Wednesday 17 November 2021

Lest we forget

November 11 is Remembrance Day in the UK and Commonwealth countries, Veterans Day in the US, and a public holiday in France and Belgium as well. On this day, my dice fall silent. It is not a day for wargaming but one for sombre reflection on the grim reality of war and for honouring those who died.

Last week we paid our respects at the new British Normandy Memorial. Construction of the memorial began in 2019 and it was completed and officially opened in June this year. It has a fine hilltop site by Ver-sur-Mer, overlooking Gold Beach, with the Mulberry harbour at Arromanches visible away to the west. A few photos below.


The memorial is done in appropriate style.
The names of the fallen are inscribed on the pillars of the colonnades.

Newly laid poppy wreaths.

Proper statuary.


Not a D-Day veteran, nor one of the fallen. However, this seems a suitable place to remember my grandfather, Frank Pringle, pictured here before going overseas in 1943 as a member of 2 NZ Division. Frank fought all the way up through Italy, including at Monte Cassino and the Sangro, before returning home safe and sound to live a long and happy life back in New Zealand.

Wednesday 3 November 2021

Battle of Delhi (1803)

It would be difficult to exaggerate my ignorance about the British conquest of India. I knew there were Maratha Wars, but I could not have told you there were three of them, and I would have struggled to pin any of them to the right decade. Apparently the First Anglo-Maratha War was 1775-1782 (when Britain was also busy with some other minor colonial scuffle elsewhere), the second in 1803-1805 - in which the future Duke of Wellington won some famous victories - and the third in 1817-1819.

Our game this week was the Battle of Delhi during the Second Anglo-Maratha War. This pitted some 4,500 East India Company troops against over three times their number of Marathas in an asymmetrical contest of quality vs quantity - often a promising start for a wargame scenario. The Maratha army was lined up just outside Delhi, southeast of the city. The British vanguard was encamped about five miles away. The Marathas surprised General Lake by advancing, obliging his cavalry brigade to conduct a fighting withdrawal while he brought up his infantry. Once his force was formed up, Lake attacked and routed the opposition. Delhi fell three days later.


In our game, I took the part of the EIC and Mark J the Marathas. Our scenario designer, Mark S, hosted and umpired from his war room while we played remotely.

Mark chose to deviate from the history and hold in place, rather than attempt a coherent advance with his unwieldy army. The Maratha C-in-C and a number of regimental officers had recently defected. Consequently half their force was rated Passive and Mark had no Generals on table, making manoeuvre difficult for him. He formed a solid line punctuated by two batteries entrenched in front of two of the hilltop village objectives.

I was heavily outnumbered but needed to attack to win. The Marathas' numbers and artillery would give them an edge in a protracted firefight, but my troops' qualitative edge meant they should win most assaults. To get stuck in without risking being outflanked and swarmed, I opted for a pincer attack. My cavalry that started on table would move north around the Marathas' more distant left flank, staying at a safeish distance from Mark's guns, and threaten the ford behind them (an objective). Then as my infantry marched on, they would head for the Marathas right, with my best unit leading (His Majesty's 76th regiment of foot) and the Bengal Native Infantry (BNI) battalions following in echelon. Another point in favour of this plan was that the right wing of the Maratha army was its worst formation, the 2nd Compoo under Geslin, which was rated Passive as well as Fragile and would therefore find it difficult to react.


A taster snippet of the scenario

A cautious cavalry dance developed on my right. Colonel St Leger's dragoons and BNC probed for a worthwhile opportunity to charge, but I was wary of spending this potent force too early. The opposing Hindustani cavalry and Sikh gorchurra mercenaries were similarly leery of actual fighting and preferred to face us off and cover their infantry's flank.

Mark responded to the gap in my centre by sending successive units to probe towards my vulnerable encampment and baggage train. First a contingent of his cavalry advanced, only to scamper back when my most echeloned BNI moved to counter them. Next a brigade of 3rd Compoo pushed forward, engaging that BNI unit and my baggage guard in a tough fight. The BNI eventually won but at heavy cost. While that was going on, some gorchurras chanced their arm, but were blown away by a lucky long-range salvo from my cavalry's galloper guns.

My oblique order attack à la Frederick the Great against the Maratha right went almost perfectly. The 76th smashed the end enemy unit and wheeled right. With the supporting BNI also pushing back the next Maratha unit, my men were now enveloping the first of the fortified villages. This was the time to commit my cavalry, who charged the Maratha cavalry north of the second fortified village while more echeloned BNI attacked it frontally, taking advantage of the enemy guns having turned to face the cavalry and expended their ammo. The second village was carried!

The crisis of the battle had arrived (as Clausewitz likes to say). Mark threw everything into desperate counterattacks. In the centre, a Maratha brigade scorned the fire of the galloper guns and brushed aside my baggage guard to threaten my camp once more. Another brigade broke ranks to advance towards another objective village behind my lines. Every other unit he could muster charged my cavalry (disordered after their earlier charge) and my BNI in the captured hilltop village.

By rights, my cavalry should have been driven back or even destroyed. Instead, in the kind of moment beloved of our tournament-gamer comrades at OWS, I rolled a 6 and Mark a 1, so his counterattackers were put to flight. My cavalry were left free to seize another objective, which they did. My movement dice were kind. A reserve unit of BNI thwarted one of the Maratha thrusts in the centre. The 76th and the BNI stormed the remaining fortified village.

With that, the Maratha army was broken and the East India Company had carried the day. Delhi would certainly fall. Victory was mine.

However, it was by no means one-sided and indeed, a turn earlier a Maratha victory had looked entirely possible. A few dice falling differently would have left me with just one or two objectives rather than the four I needed to win or three for a draw.

Reflections:

- This was a thoroughly absorbing game (hence I forgot to take any pictures, sorry!). I found it very challenging and had lots of important decisions to make. On the other side of the hill, Mark didn't find it any easier than I did. When both commanders think they have a hard job, that's the sign of a good scenario.

- I've said it before, I'll say it again: asymmetry makes for a good game. Quality vs quantity is a great match-up.

- I sometimes find it really hard to know what to do with cavalry! Their manoeuvrability gives them so many options, the choice set becomes too large. On the other hand, they can be a one-shot weapon: even if they charge successfully, that leaves them disrupted and unable to evade, so if the enemy they defeated has some friends around, they're dead. An eternal conundrum.

- It's good to have a plan. This time I read the scenario thoroughly in advance, paid proper attention to the victory conditions, came up with a decent plan and executed it successfully. Nice when it works.

- 'Learning by doing' - I will remember this game for a long time. I probably increased my knowledge of the Maratha Wars in a much more enduring way than if I'd just spent three hours reading a book.

- The remote format generated the usual degree of fog of war, misunderstandings over distances and angles etc. Mark probably had the worst of this.

- Fortunes of war: as noted above, just two or three different dice would have produced a Maratha victory. The game was in the balance right to the end. Well played to Mark J who was a little unlucky to lose and made me work hard for the win. Super scenario.

- I think Mark S has just two or three more scenarios to finalise and then his "Wars in India" collection will be complete. The resulting set, covering the Maratha Wars, Sikh Wars, Gwalior Campaign and India Mutiny (and maybe more I've missed) should be published some time next year as a BBB campaign book.

Thursday 21 October 2021

Reflections on wargaming

The BBBBlog is now over 200 posts old. Most of these are routine reports of tabletop battles. While I try to make them entertaining and informative, I don't go in for much eye-candy, so they don't have particularly wide appeal beyond readers interested in the conflict in question. However, occasionally I have mused on more general wargaming topics. Some of these general posts have attracted very high readership and generated lots of fascinating discussion among fellow wargamers. Until now, though, whereas a battle report would be easy to find by means of the blog labels (either the name of the war or the year of the battle), the general interest posts would not.

I have now rectified this by adding a label, 'Reflections on wargaming'. Here are the topics I've addressed to date under that label. I hope you'll find something among them to interest you:

Reasons NOT to refight historical battles. Arguing against my own preferred format produced tons of really good comments on multiple forums. The updated blog post links to these.

On the virtues of IGO-UGO. Prompted by having spent too much time sitting around doing nothing in big multi-player games where only one player acts at a time.

Wargaming one-sided wars. An attempt to counter prejudice against gaming conflicts perceived as one-sided walkovers.

Changing situations mid-game. Remarking on how scenario designs that include some significant change in battle situation tend to present more interesting decisions than more straightforward line-out punch-ups. (This was illustrated yet again recently with our Hegyes and Gitschin refights.)

Studying classic battles. Some thoughts on different ways of approaching history to obtain insights and understanding of the events.

V-E Day games ... and granularity. On the need to represent time, troops and terrain in due proportion.

Get out there and wargame! I am regularly saddened by wargames forum members who state that they wargame solo (or rarely, or never) because they have been put off going to clubs.

Airing some prejudices: on one-dimensional vs 2-dimensional games. Oh, this was a good one, really set cats among pigeons. Basically explaining my prejudice against any pre-Napoleonic games.

Wargames: how much "war", how much "game"? A nice thoughtful post that hasn't had as much attention as I think it deserved. Discussing how people's choice of game is influenced by the different things we want from our games.

Victory conditions in wargames. I think this might be the all-time most popular BBBBlog post.

The appeal of miniature models. A snippet about why models rather than just cardboard counters.

The Quest for the "High Quality Gaming Experience". Or, "life's too short to waste playing lame games with jerks".

It's not about winning - it's just losing I can't stand. One year I kept track of how many games I won or lost, but really that's not what it's about. (See "Wargames: how much war, how much game" above.)

Further reflections - added since this post was first written:

In praise of looong games. Musing on the virtues of large, protracted, all-day or even all-weekend games, versus my usual diet of compressed 3- or 4-hour evening bashes.

"At that point we called it" - who cares if we don't finish the game?  One of the most popular RoW posts to date, debating whether and why it matters if a game isn't fought to a conclusion.

Replaying scenarios: pros and cons? On why it's worth fighting the same battle again and again.

On rules for committing reserves. What are the best ways for wargame rules to represent why and how real-life generals maintain and commit reserves?

The value of playing 'What-Ifs'. Based on a game that explored an alternative strategic mission from the historical one, some brief musings on what we get out of such 'what-if' games.

Stolberg's Death Ride: pivotal moments in wargames. Prompted by a crucial (failed) cavalry charge, I ponder three different shapes wargames can take, of which the 'pivotal moment' is one.


Tuesday 12 October 2021

Reasons NOT to refight historical battles

I am an avowed historical wargamer, dedicated to recreating historical battle situations on the tabletop and then seeing how players' decisions and fickle dice make them turn out. I find this immensely satisfying in several ways and it is definitely my preferred wargame format. However, my impression is that among my fellow wargamers this is very much a minority sport. People may make a special effort to depict a particular battle for a convention game, but on a routine club night or home-hosted game most seem happy with something non-historical: perhaps a points-based competition game; perhaps a cunningly devised tactical puzzle that may or may not have some historical inspiration; perhaps something entirely unscripted beyond fielding whatever armies take the players' fancy on a given evening. And that's without even counting all the fantasy and science fiction armies alongside the 'real' ones.

I've been involved in some rather good non-historical games myself in recent weeks. Therefore, rather than harp on tiresomely about why everybody should change their ways and do what I usually do, in this week's meta-musing I thought I'd ponder on the many good reasons for NOT refighting historical battles but doing a non-historical game instead. Here are some I could think of, in no particular order.

Preparation time

Researching a battle and turning it into a playable scenario takes a lot of time and effort. Not everyone has that time to spare, not everyone enjoys it, and not everyone will find the results worth it.

Terrain challenges

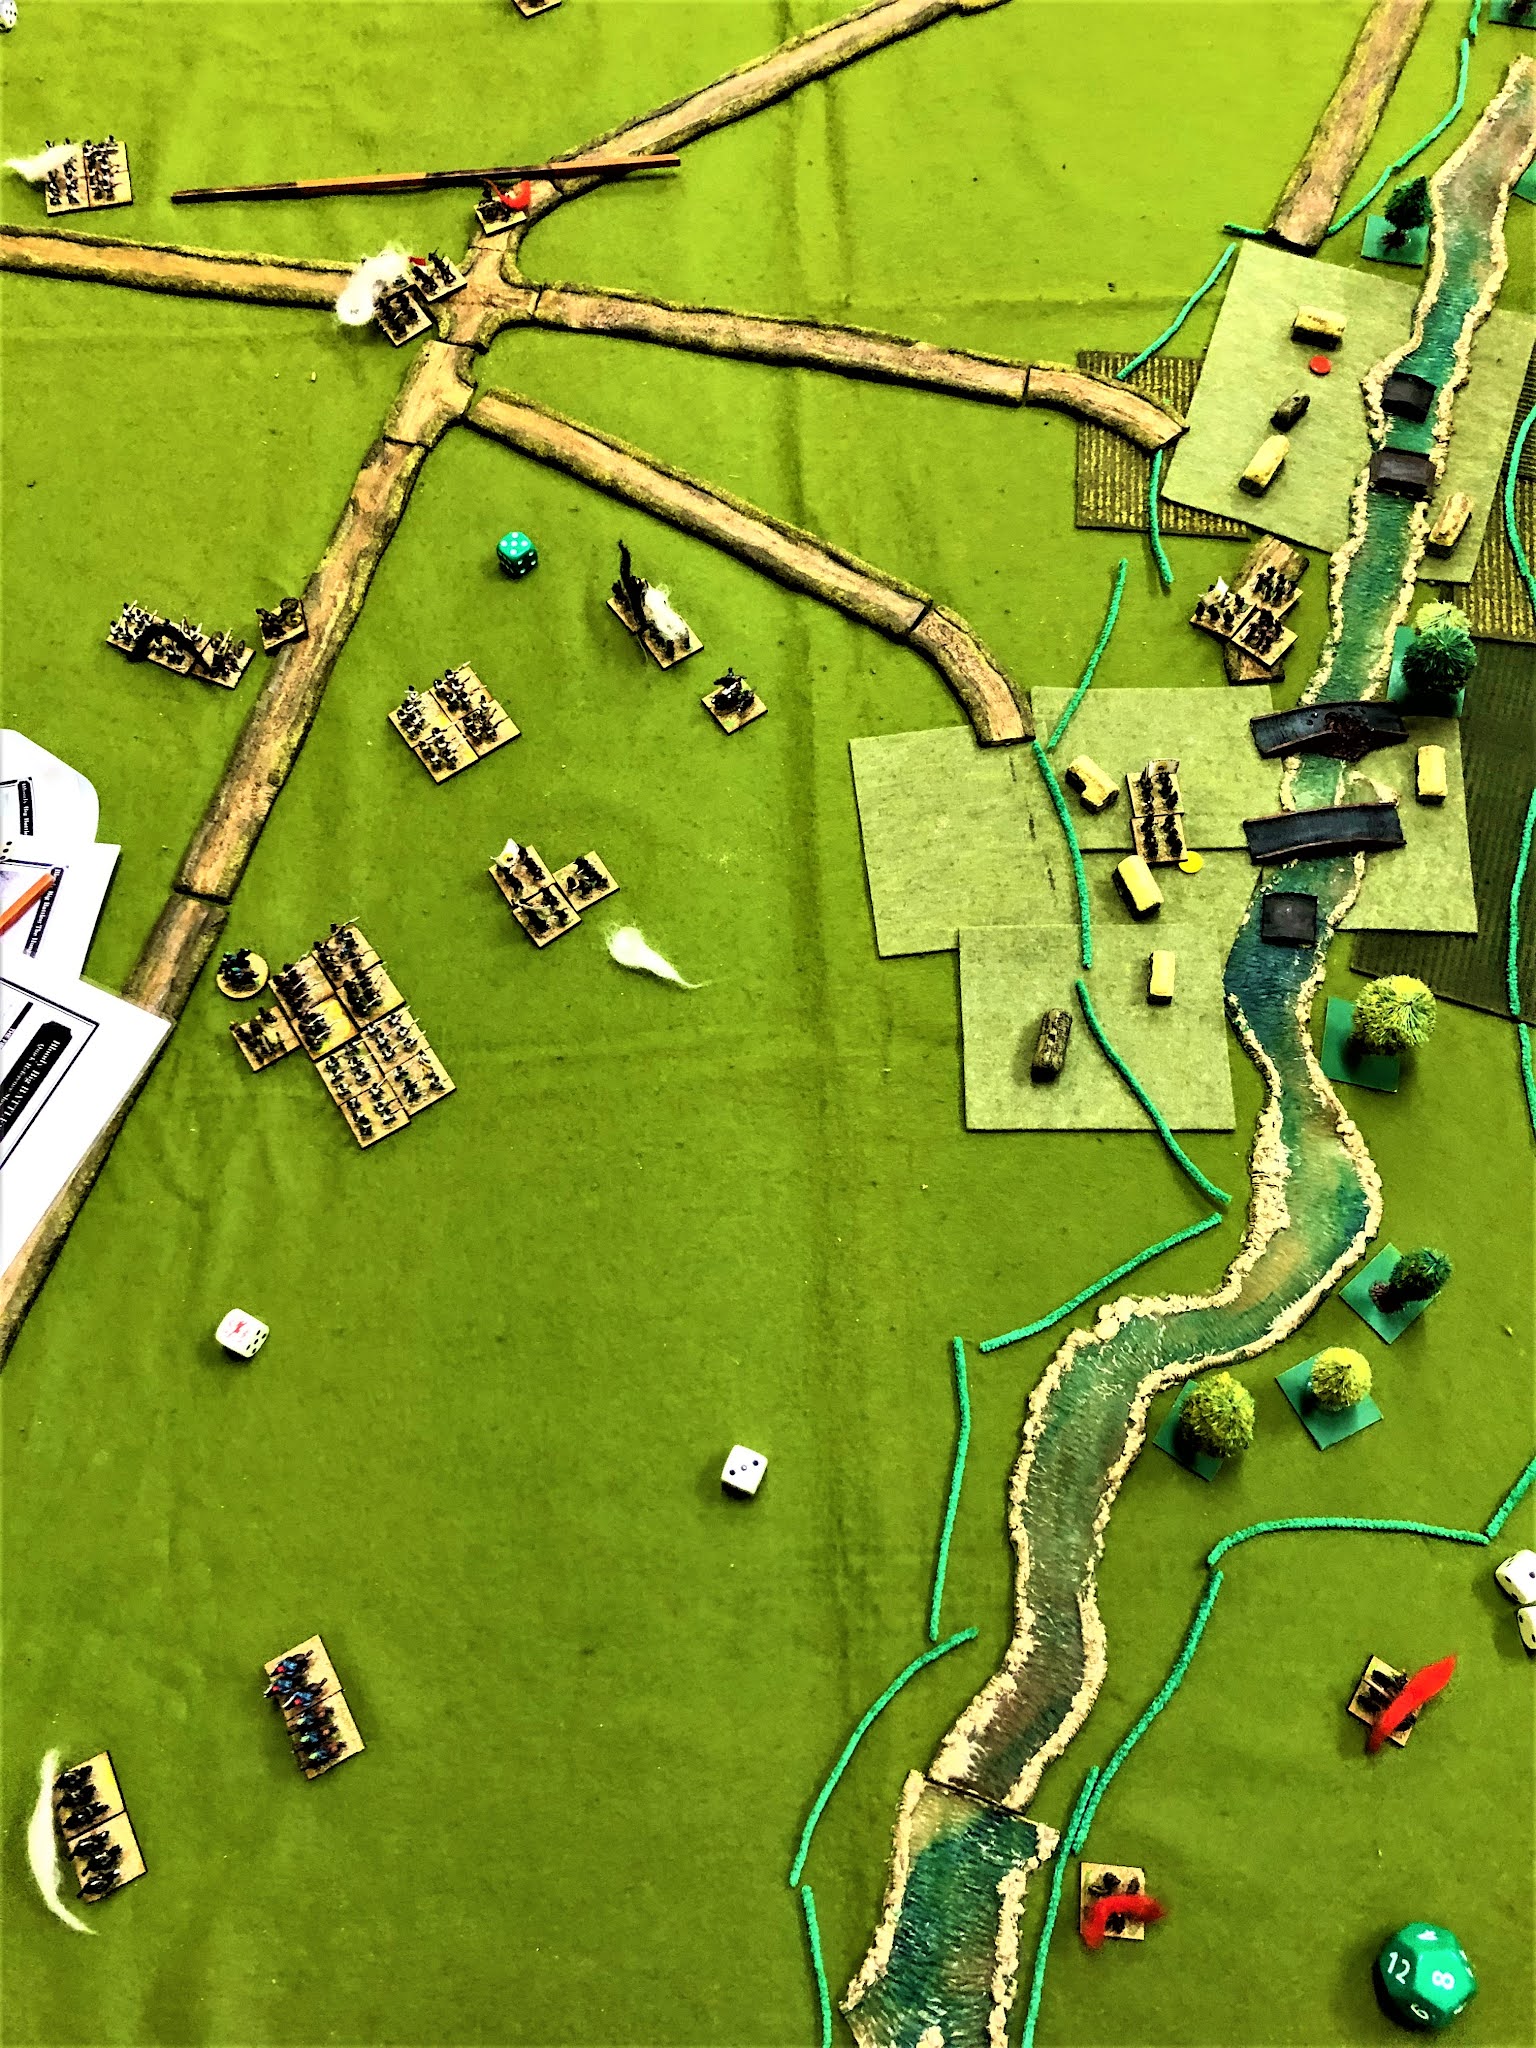
Historical battlefields are generally more complicated than the average wargames table, particularly in terms of hills and valleys, which can be difficult to portray. Even an extensive terrain collection can find itself stretched and run out of roads, or streams, or mountains, or villages. Then there is the set-up time required for faithfully representing a historical battlefield in detail. Especially for a club night when time is limited, that can be a serious limiting factor.

I don't have the troops!

I was going to make this a reason, but on reflection, no wargamer worth his salt would accept that. Not having the troops isn't a reason for not fighting a battle, it's a reason to buy more troops! (And until then - use proxies.)

We're doomed, so what's the point?

A significant proportion of historical battles were one-sided affairs which are bound to end in a more or less crushing defeat for the historical loser. I've seen that offered on several occasions as a reason not to touch the Franco-Prussian War at all, for instance, because people have a prejudiced view of it as a walkover for the Germans. Understandably, while a "damned near-run thing" like Waterloo (to paraphrase Wellington) is enduringly attractive, the destruction of Napoleon III's army at Sedan is less popular with gamers, even if clever victory point schemes can make it possible for the loser to "win".

But the [insert favourite regiment, tank, etc] was just so awesome!

We all want to field the cool kit or the funky fun units, even if they never actually made it onto the battlefield. I have seen six 60cm Karl mortars on the table, which was perhaps overdoing it, but I can see the appeal. And among the competition gamers, I have seen niche stuff like T34/57s or double-mounted archer camelry go through phases of tremendous popularity because their tabletop effectiveness far outweighed their historical footnote status.

Never mind the historical battles, I want to fight a campaign

And as soon as you start making campaign decisions, you will inevitably change the shape of the resulting battles. I have quite a lot of troops in 1891 uniforms they never fought in, including an entire (small) Portuguese 1891 army, all painted purely for campaign purposes and necessarily only ever used in non-historical games.

What if ...

... the Aztecs fought the Samurai? (Or whoever.) Or if the D-Day invasion had been aimed at the Pas de Calais rather than Normandy? It is quite natural to think about armies that never met and wonder which would have won, or for armies that did meet, to consider battles they might have fought if they'd made different strategic decisions. Non-historical what-if games let you explore those questions.

All that button-counting is just annoying and trivial

Among us historical types there is certainly a tendency to obsess over details that, while fascinating to us, can seem irrelevant to others. The player who just wants to have a game doesn't really enjoy being told their tanks are in the wrong camouflage scheme, or any other such unhelpful "advice" aka smug derision of their harmless amusement. In that respect, historical devotees sometimes do our own cause more harm than good.

All that historical detail actually gets in the way of the game

We historical scenario designers can get too carried away with our Great Work, too in love with all the esoteric detail we have discovered, too eager to incorporate every last precious nugget of our arcane knowledge into a 3-hour bash. The game may drown in a plethora of scenario special rules and infinite variety of confusingly nuanced unit differences. (Guilty as charged, m'lud - I know I've done this at times.) A game "inspired by" a historical situation but with all the clutter stripped away may be a much better game than an excessively faithful recreation.

I just want to put some nice armies on the table and have some fun

There is a lot of aesthetic pleasure to be had from beautifully painted figures on a finely crafted layout. Who cares if this lot in their 1809 uniform are next to some others in anachronistic 1815 garb, and are fighting an army that was actually their ally, so long as it looks good and the game is exciting?

Why limit your imagination?

With a historical battle, there are so many limits on what the game can include and what can happen. Throw off those shackles! Play Fantasy, Science Fiction, Pulp, Alternate History! Mix periods, mix genres, create crazy cocktails to delight your gaming palate!


Well, that's it. I've pretty much persuaded myself. Time to throw out those nerdily researched historical armies and splash out on more orcs, space marines and steampunk machines. Goodbye accurate orders of battle, hello cunning calculations of 400-point armies. Roll those dice for random terrain, missions and deployment, and have at thee!

===***===

Update added 17/10/2021

I was pleasantly surprised by the amount of comment this generated – well over 100 responses on various threads on various forums. Rather than respond to them all there, let me provide one collective response here, with a big thank you to all who took the trouble to comment. The forums where these many thoughtful and fascinating comments are to be found are these:

[TMP] "ReasonsNOT to refight historical battles" Topic (theminiaturespage.com)

Reasons NOTto refight historical battles (pendrakenforum.co.uk)

»Topic: Reasons NOT to refight historical battles (thewargameswebsite.com)

Reasons NOT to refight historical battles (leadadventureforum.com)

The first thing I need to address is the old chestnut, “it’s all fantasy anyway” (aka the “Claudia Schiffer gambit”). I disagree with that, except in a trivial semantic sense. There is obviously a major category distinction between games whose divergence from actual history rests only on human decisions (and are in that sense “possible” alternative history) and those that involve things that never existed and cannot exist – magic, monsters, etc – and are thus “impossible”. (If you’d just made different life choices, Mike, you could have impressed Claudia …) Rather than use words like “fantasy” or “fiction”, how about if we talk about “explorations of history”? Thus:

-          - Refighting an actual battle is an exploration of the history of that battle;

-          - fighting fictional battles generated by starting from an actual campaign situation explores the history of that campaign;

-          - fighting fictional battles between historical armies (whether or not those armies ever met) could be regarded as explorations of historical weapons and tactics.

Having dealt with that, let me endeavour to group the respondents’ reasons into a few major headings.

“We know what happened!”

This includes the problem of surprise (or lack of it). Often the reason a battle took the shape it did is because a commander was deceived or ignorant of some major factor, be it terrain, enemy strength and dispositions, etc. It is hard to recreate that when players know what happened. Artificial constraints on what players are allowed to do are not entirely satisfactory – it is important not to make things too ‘scripted’, otherwise why bother having players? That said, it can be done, witness our recent games of Hegyes or Gitschin where one side’s strategic objective changes mid-battle. Player knowledge didn’t seem to prevent these being good games and decent depictions of the battles in question.

Another aspect of the “we know what happened” problem is that players can be unhappy of the refight turns out differently from the historical event. But if we allow (as I think we should) that people could have made different decisions – whether generals giving different orders, or private soldier choosing when to fire or whether to stand or run – then we should be OK with getting different results. In fact, seeing whether different plans (or even the same ones) could have succeeded or failed is part of the attraction.

And another: translating the history we know onto the tabletop is difficult, and “we all love a good scenario – but have probably suffered too many half-baked ones that didn’t quite work – which is why the basic two sides line up and charge format is so often favoured”. Well, I recognise the problem, but the fact that something is difficult to do doesn’t necessarily mean it isn’t worth doing. When it’s done right it is so much better.

Tabletop representation

I already addressed the challenge of terrain. Others raised “depth of the battlefield and how many forces are packed into small spaces … it’s quite a shock to see the set ups for Dresden, Borodino, etc, where troops are piled on top of troops”. Or similarly, “Most sets of rules focus their command/unit representation too low to do a whole historic battle.” I suppose my answer to that would be that’s simply a problem of choice of ruleset – have you tried BBB? 😉

Arguments

People have different notions about what historically happened or could have happened, so historical refights can create disputes. Well, if these are constructive discussion, that’s interesting, isn’t it? And if they’re blazing rows, the problem is probably that you’re gaming with the wrong people, not a problem of the game per se. (Though as one respondent said, “it’s hard finding like-minded people”. In that respect I’ve been very lucky.)

There are not enough historical battles!

That’s a fair point: if you’ve gone to the trouble of painting your Bolivian army for 1880, you might want to use it for more than just endless refights of the battle of Tacna. That said, my own focus on the whole of the 19th century has kept our group entertained for the past decade and more, without having to learn new rules (we fight them all with BBB), and with no prospect of running out of battles any time soon.

Fighting smaller actions that never reached the history books

This was a good one. Particularly for skirmish-level games, a more generic ahistorical approach can be just fine, eg for pre-modern wars where records don’t exist, or for modern wars on such a scale that almost any skirmish scenario ‘could have’ happened (and again, not everything at that level was recorded).

It’s disrespectful

Some feel it’s disrespectful to those who gave their lives if we trivialise their sacrifice in a game, hence eg the appeal of gaming with ‘Imagi-nations’. I disagree – I have enough combat veteran gaming friends to think if it’s OK for them, it’s OK for me – but I entirely accept this as a reason for those who do feel that way.

“Modern sensibilities” were also mentioned, as in it being considered distasteful and insulting to suggest one nationality was inherently better than another. I suppose that could put people off recreating certain conflicts.

I’m just not that into history

People get different things from our hobby. Some are more into the craft element (the painting and modelling), or the social occasion, or the competitive aspect. Not everyone cares about the history.

What’s the point? You won’t really learn anything

Some dismiss the idea that you can gain any deeper insights or understanding of a battle or period by doing refights. Hmm: perhaps whether anything can be learned from a refight depends on both the learner and the lesson? We all learn in different ways. A refight can be “learning by doing” – I know that refighting historical battles has imprinted them on my memory better than all my reading about them – and the better crafted a scenario is, the more we will learn from it.


===


I hope that’s a fair summary of the many points raised. Apologies to any to whose comments I haven’t done full justice – hard to reply to >100 in sufficient detail! Thanks again to everyone who engaged with my blog post and created such an interesting discussion.

Incidentally, I have now added a new label on the blog, “Reflections on wargaming”, which links to a few similarly broad-themed blog posts that have generated similarly rich discussions. Please do have a browse.  

Thursday 7 October 2021

Sherlock Holmes and the Wicker Man

And now for something completely different ... as if our recent post-apocalyptic diversion into the Gaslands were not fantastical enough, this week Bruce's talented pen brought us some alternative Victorian SF/Fantasy in the form of his scenario for 'Sherlock Holmes and the Wicker Man'. I trust I don't really need to introduce the eminent detective, Holmes, but some readers may not be familiar with the classic horror movie, The Wicker Man. The film is about a Scottish isle whose inhabitants still cleave to old pagan ways, including the occasional human sacrifice to ensure rich harvests. In Bruce's spin on the plot, Sherlock Holmes is on the island in disguise, investigating the islanders' misdeeds, and summons his sidekick Dr Watson urgently, who arrives with five policemen. These valiant few have to sneak/fight their way past/through Lord Summerisle and assorted henchmen and villagers to rescue a captive from being burned in the giant wicker man.

Bruce's time in lockdown was not entirely wasted. His brush is as talented as his pen and he unfurled a splendid layout for our eyes to feast on. The ruleset was Osprey's "A Fistful of Kung Fu", which apparently uses the engine from the "Song of Blades and Heroes". SBH I was faintly aware of, AFKF I had never heard of, the rules engine I had never encountered but a jolly clever one it is. The basic mechanisms were easy to grasp; we learned their tactical subtleties as we went along.

Mark J and I found ourselves on the side of the old gods and their Hebridean worshippers. Dave T and Nigel were the forces of law and order and civilisation. I'll let the photos tell the story.

The magnificent Wicker Man complete with hapless 28mm maiden trapped inside him and bonfire piled up around him, cultist poised to light it. The Wicker Man is well over a foot tall.

The table seen from the point of view of Watson and the approaching bobbies. They had to get through the wood or orchard, past a couple of dozy cultist sentries. All the other enemies were busy with their pagan ceremony until the alarm was raised.

Some of the islanders. Could that master of disguise, Sherlock Holmes, be one of these? That one on the left looks dubious. Fine paintwork by Bruce.

Lord Summerisle conducts his pagan ritual, backed up by a cultist, his alluring sidekick Willow, and one of his three gamekeepers, oblivious to the policemen sneaking through the trees behind them ...

A big punch-up ensued around the central wagon. Watson perished there, as did a couple of coppers. Willow was wounded but got away, luring a policeman after her.

Holmes is revealed! He could easily despatch those two villagers, but he has more urgent business to attend to. He dashes towards the Wicker Man! He strikes Lord Summerisle to the ground! He scales the ladder and unties the damsel in distress! But ...


... a welcome committee gathers at the foot of the ladder as flames begin licking up the Wicker Man's timber shins. All the police have fallen or scattered. Only the dastardly Summerisle and his cohorts remain. Holmes's chances of survival look remote ...

Thus the game ended in a triumph for the forces of evil, and Conan Doyle will have to either start writing about a new character or resort to penning prequels. There will be a bumper harvest on Summerisle this year.

This was splendid good fun. From my (evil) side of the table it did seem like too hard a job for the goodies, so maybe Bruce will tweak it a bit before its next outing. (For another outing there must surely be - too much work has gone into the Wicker Man not to use him again!) But the game was at least as much about the journey as the destination, and a thoroughly entertaining ride it was. Bravo, Bruce!

Friday 1 October 2021

Austro-Prussian War: Gitschin (1866)

Time is a bit short this week, but it would be remiss of me not to give suitably honourable mention to the fine game Crispin ran for us at OWS on Monday. This was an Austro-Prussian War action, Gitschin.

It's an interesting battle because, not unlike last week's Hegyes outing, one side's mission changes radically halfway through. Once again it is the Austrians who have this awkward problem to deal with. They start the battle determined to hold a defensive line and halt the Prussian advance. Then, when they are already inconveniently heavily engaged, a courier arrives with the order to withdraw.

Crispin addressed this in scenario terms by requiring the Austrians to hold three out of four objectives on the defensive line until either Turn 5 or Turn 6 (determined by a die roll on Turn 6 to prevent unduly gamey actions by the Austrian players). If they fail, they lose instantly. After that, victory is decided by how many Austrian units manage to escape off their home road exits.


View from the southern corner of the battlefield behind the Austrian lines. Austrian columns can be seen marching forward to occupy the line against the Prussians who will march on at top of picture. More are off-camera in the distance to the right. Saxons will arrive left foreground on Turn 2. In the foreground is the town of Gitschin. The two roads leading off the bottom edge are the Austrians' escape routes. Buildings hand-crafted by Crispin.


John and I took on this difficult job, John holding the Austrian right while I commanded the left, including our Saxon reinforcements. The radical asymmetry in weapons and tactics soon became apparent. Initially our longer-ranged rifles and deployed artillery disrupted and delayed the Prussians' approach. However, as soon as they got close, skirmishers with needleguns demonstrated their superiority to Stosstaktik and devastated our ranks.

Nevertheless, we were still solidly in control of the defensive line by Turn 6, when we were fortunate enough to be allowed to withdraw immediately rather than hold on for an extra turn. Less fortunately, though, we had paid insufficient attention to the inevitable need to retreat eventually, so too many of our troops had ventured too far from home.

To make things worse, Dave W on the Prussian right unleashed a deadly volley of 11s and 12s. The critical one was against the Saxon Kronprinz brigade on our southern flank. This happened as I was trying to move it into Podhrad to enfilade the Prussian 6th Brigade. Had this succeeded, it was have seriously hindered the Prussian attempt to cut us off at Gitschin. Instead, the Saxons were cut down in droves, prevented from reaching the cover of the village, pinned in the open, immediately rendered Spent and therefore easy meat for the Prussian charge that inevitably ensued.

From that point it became a desperate scramble to escape. One of my Austrian brigades was too far forward to get back. The other had a chance but ended up driven into a marsh being gunned down from behind and unable to extricate itself. I did salvage the Saxon cavalry and Leib brigade, though, so we just needed one unit of John's command to escape for a draw or two for a win. His one possible infantry unit failed a movement roll on Turn 7, so on the final Turn 8 it all came down to his remaining cavalry unit. Could they manage a half-move and also avoid being mown down by the Prussian infantry nearby? Of course the dice blew it and they didn't move at all - Prussian victory!

Ignominious defeat! Crown Prince Albert of Saxony (that's me) about to be captured in Gitschin along with his artillery and Poschacher's battered Austrian brigade stuck in a marsh. Right of picture is the Austrian cavalry column, deciding - perhaps wisely - not to risk riding across the front of those nasty Prussian needleguns in the foreground.
 

Reflections:

Crispin's ready-to-(un)roll battlemat looked good and saved us valuable set-up time.

The scenario was ideal for a Monday night - not too many units, not too many turns, plenty of movement. It took under two hours to play.

Once again, having the mission and situation change mid-game made for a really entertaining challenge.

Likewise, asymmetrical armies generated interest as they force players to choose the right tactics to exploit their strengths and the enemy's weaknesses.

First principle of war is maintain the aim. John and I lost because we failed to do that: we focused too much on fighting the enemy in front of us and too little on making sure we had enough units close enough to the escape routes behind us.

Usually the dice even out, and I wouldn't say they were especially unkind to us this time either. However, sometimes one or two critical rolls really matter. The volley that stymied my Saxons' flanking manoeuvre was crucial.

I want some Austrian grenadiers!


The scenario is freely available in the BBB group files here. There may be more Austro-Prussian BBB action at OWS soon as I wrote scenarios last year for Trautenau and Soor which have yet to be played. These are in the files too.

Wednesday 22 September 2021

Hungary 1848 #11: Hegyes

Our Hungary 1848 campaign continues. The 11th of our planned 15 games took us to the southern front for the first time for the battle of Hegyes. This was the largest battle on that front, inflicted some of the heaviest losses suffered by the imperial side, and was Hungary's last major victory of the war.

The situation was an unusual one. Under pressure from invading Austrian and Russian armies in the north and west of the country, Hungary's government had decided to mass its forces in the south, knock the imperial Army of the South out of the war, and then base itself on the fortresses of Arad and Temesvár. The imperial C-in-C in the south was Jellachich, Bán of Croatia, commanding an army mainly composed of 3rd- or 4th-line Grenzers. He was holding the line of the Franzenskanal between the Danube and the Tisza in what is now northern Serbia. The Hungarian forces converging on him took one end of the canal, forcing him to choose: should he fall back behind the Danube immediately, or thrust forward to give the Hungarians a bloody nose in an attempt to deter and delay them?

Opting for the latter course, he took some 12,000 men on an overnight march to seize the village of Kis-Hegyes and its bridges over a minor river, the Barra, which he knew were Hungarian-held. Unfortunately for him, a similar-sized force of Hungarians under the English general Richard Guyon, well aware of Jellachich's approach, was hunkered down in Kis-Hegyes and the neighbouring villages of Szeghegy and Feketehegy. At 3:00 a.m., Jellachich walked into a division-scale ambush. His initial assaults on the villages were repulsed and Hungarian hussars lapped around his flanks. Hearing gunfire in his rear as well, he realised he was in danger of being cut off and captured. His assault turned into a fighting withdrawal which he executed rather well, but he lost over 1,000 men.

Unusual terrain: the Barra has carved itself a gully through the flat plain of the Bácska. The steep banks of the gully are denoted by the green lines of pipecleaners. Three sprawling villages straddle the tree-lined river, with vineyards on the slopes behind them. Jellachich's force has arrived from bottom left, then executed a wheel to the right to deploy for battle. The Hungarians lurk unseen in ambush.
 

This is tricky to capture in a wargame scenario because of the problem of hindsight. Unlike Jellachich, we players know that his assault is probably doomed to fail, and we know that an outflanking force will threaten to cut his line of communications. Rather than the usual simple formula of judging victory by who holds which objective locations at the end, I defined three strategic objectives for the Austrian side:

1. To seize one of the three villages, even if only temporarily;

2. To have at least one of the two Austrian cavalry units survive to cover the retreat and to have lost no more units Spent or destroyed than the Hungarians;

3. To have no Hungarian unit closer to the two line of communications road exits than all Austrian units.

The Austrians needed to achieve all three of these for a win or two for a draw (and had to have assaulted a village with at least two units).

The point of this mix of objectives is that the Austrian mission changed halfway through the battle from "seize a village" to "run away!". Thus the Austrians have to make a good-faith effort to attack the villages initially, but they are not required to hold any at game end.

The Austrian problems are compounded by a scenario rule to reflect the nervousness that gripped Jellachich's force when they heard cannon fire from the rear. Starting on Turn 4, the Austrian side must dice each turn to see if the whole Austrian force becomes Fragile. If it does not do so by Turn 6, it is ruled Complacent instead, and a Hungarian unit shows up in the Austrian flank or rear, followed by the Austrian reserve that historically got sent back to protect the retreat.

Last but not least, because this was an ambush, none of the Hungarian units are deployed on table initially or even plotted on a map. Instead, the Hungarian players can simply deploy them in a village as soon as the Austrians move within 3" of it, or in any village in their own turn.

I was a bit anxious about these unusual scenario special rules pre-game because 'funky' rules do not always work out as intended. I needn't have worried: they provided us with a distinctively different battle that still gave a close and exciting game and a decent representation of the historical battle.

As was always going to happen, the first Austrian unit to move up against Feketehegy (the Erzherzog Wilhelm and Piret infantry) was ambushed by a Hungarian firing line anchored by a battery at each end. The hapless Wilhelms/Pirets were immediately reduced to half strength, Spent, and played no further significant part in the battle.

However, the Hungarians could not be everywhere. They did declare troops in Szeghegy as well, but not enough to prevent Budisavlievich's Grenzers from pressing into the village. Intense fighting in and around both villages ensued.

At the northern end of the line, the Hungarian right wing (commanded by our new comrade and BBB novice, Simon) debouched from Kis-Hegyes. All that was in their way was Castiglione's cuirassiers. These carelessly loitered long enough to be blown away by Hungarian artillery, meaning the Austrians could not afford to lose their remaining cavalry on the other flank if they were to have a chance of winning.

At the start of Turn 4, the dice decreed that 'Austrian Anxiety' came into play, word spread through the Austrian ranks about the enemy advancing in their rear, and all Austrian units became Fragile. The Austrian players' morale was creaking at that point too, but I pointed out that they still had a chance of victory if they could clear one village. One Austrian unit in Szeghegy duly turned to the right and attacked the flank of the Hungarian defenders of Feketehegy, clearing them out and planting a yellow Habsburg victory counter in it.

 Circa Turn 5: the Austrians have cleared the large village of Feketehegy (upper right). Hungarians from the north approach the Austrian left anchored on the crossroads (upper left). Both sides' cavalry are disrupted after a clash on the southern flank (bottom right).
 

As the Hungarians from the north closed in, the Fragile Austrians were compressed back towards their precious line of communications exits. On their southern flank, there was a tense series of cavalry actions between hussars and cuirassiers, the latter being superior in combat but having to be cautious.

On the last turn, all three results were possible. The Austrians had suffered one more unit than the Hungarians Spent/destroyed; if they could kill the hussars in the south, they would rectify that and win. Conversely, if the Hungarians could get either hussar unit closer to either road exit, that would produce a Hungarian victory. In the event, neither transpired, and it was yet another classic honours-even draw to conclude an exciting and different game.

Game end: the Austrians have been driven back but managed to cover their line of communications. Red markers bottom right are on the Hungarian batteries that delivered the initial ambush but were then driven off with loss.

Reflections:

BBB proved again how easy it is for new players to pick up: Simon said he was daunted at first but comfortable by the end.

The simple special rule for the ambush deployment produced the right effect.

The mix of objectives to reflect the Austrian change of mission mid-battle likewise worked. (Phew!)

Perfect scenario for a Monday night at the club: simple terrain to set up, ~10 units a side, enough variety of troops to be interesting, both sides have to manoeuvre. Eight turns long so we were done in two hours' play, despite going in slow time initially to introduce Simon to the rules.

Our regular multi-player format is good for flexibility! When Simon was looking for a game, it was easy for us to fit him in as a third player on the Hungarian side. Conversely, we were expecting three Austrian players - one couldn't make it, but the game went on without him, whereas in a one-to-one game, if one player drops out, the other player's evening is written off as well.

And finally, John and I relished one thing remote gaming can't really provide: the post-battle pint together in the pub.

Sunday 19 September 2021

A healthy varied gaming diet

This year's ongoing project is to playtest all the scenarios for my planned Hungary 1848 BBB campaign book (10 out of 15 now done). These battles have kept me and the gang very much engaged. Even so, a change of diet now and then is healthy. Happily, over the last couple of weeks I've played three quite different games.

Gaslands

Two new members, Simon and Martin, joined OWS and laid on Gaslands for us. This is a kind of car wars game in a Mad Max type post-apocalyptic setting. The scenario was a race, but one in which we could shoot or ram our fellow competitors. We each had a team of two cars. I chose two that closely resembled cars I used to own (apart from the rockets). Our referees had a lovely layout which we duly charged around, cheerfully machine-gunning and ramming each other. With four newbie players, we didn't quite complete the circuit, but Bruce's sturdy van was comfortably in the lead when we wrapped up and my poor little sports car was scrap metal ...

Six teams surge from the start line, Bruce's van in pole position.

Excellent lighthearted fun, a nice change from historical gaming, and great to meet two new members who will enliven OWS. Incidentally, Simon is the proprietor of Syborg 3D Printing, producing a terrific range of 15mm vehicles, aircraft and terrain for WWI, WWII, post-war and more.

Fetching Gaslands scenery and oil slicks. Terrain matters!

Lützen 1813

Back to BBB but not to Hungary. Mark has been working his way through all of Napoleon's biggest battles. This time it was the turn of Lützen, a battle about which I knew effectively nothing until now. This was Napoleon's first victory of the spring campaign of 1813, an attempt to knock the Prussians out of the war and dissuade the Austrians from joining in. It makes a good game because initially the Russian and Prussian are on the attack, trying to beat up Ney's isolated corps; then as French reinforcements arrive, the allies have to fend off Napoleon's double envelopment. Thus everyone gets to do lots of maneuvering and make important decisions. Mark's scenario was particularly good because he drew the frame wider than most maps of the battlefield tend to do, so he made all that outflanking space available for people to make mistakes in.

View from the French side. The Imperial Guard (and friends) have counterattacked up the road from Luetzen (offtable bottom right) and retaken three of the four central villages, as well as both flanks, but failed to cut the allied line of communications (road exit at top) - a draw.

We fought this in two sessions: the first remotely, the second in person in Mark's Kriegspielium. That made a big difference. In the remote session, seeing just a segment of the battlefield at a time made it hard to appreciate how the sectors connected and interacted - so for instance I didn't realise some of my artillery in the centre was vulnerable to enemy cavalry on my right until they pounced. Having the overall view of the whole battlefield made it much easier to understand what was going on. Not a complaint - the limited 'fog of war' view is probably more realistic than the 'helicopter' view! - and either approach can work, it was just unusual to have the chance to get both views in the same game.

Close-up of Napoleon himself among his grognards in recaptured Kaja, Rahna and Gross Goerschen.

As for the course of the game itself: broadly historical, I think. A big slugfest in the centre over the four strongpoint villages; then pressure on both allied flanks from French reinforcements; and finally the Imperial Guard smashing into the middle. Honours even, objective-wise, meant everyone went home happy with a draw. A terrific scenario that doesn't need any further revision.

Agincourt

I was entrusted with a 10-year-old boy to entertain for a Saturday. Fortunately he has been indoctrinated, is already army-barmy, and was eager to roll some dice. I was recently given two boxes full of 15mm Hundred Years War figures, painted and based, but somewhat the worse for wear after decades in a barn. My apprentice and I spent a happy hour or two just sorting them out and getting rid of the goose poo, cobwebs and dead beetles. Next step was a 3-minute video, "Battle Stack: The Battle of Agincourt tactics", pitched at just the right length and level for an excited youth who just wanted to get the toys on the table. Once he knew what the historical battle was, he had a jolly time setting up a sort of Agincourt terrain. I say "sort of" because my French had it even harder, having to cross a river into the teeth of entrenched bombards and organ guns.

A rare sight in my war room - something pre-Napoleonic! Linear, yes; limited, yes; dull, no.

I didn't have a suitable rulebook to hand so we played DBM - that is, De Bellis Made-it-up-as-we-went-along ... let's say inspired by DBA/DBM (command pips and opposed die rolls) but simplified for speed and with movement 'kriegspieled' rather than measuring. This exceeded my expectations: after 90 minutes or so I kept trying to surrender, but His Majesty the King of England was having such a good time he would urge me to charge again and again. I did overrun the bombards and the cocktail-stick chevaux de frise, and I did get rid of a lot of English longbowmen and men-at-arms, but eventually ground to a halt and was permitted to concede defeat.

This was surprisingly good fun for all concerned. It was also educational for my young pupil: he now understands the importance of maneuvering your medieval troops in "battles" rather than modern skirmish lines; and how lethal the longbow was; and has had a first taste of command pips as one way of representing a commander's limited time and attention and influence.


Back to the staple diet of BBB Hungary 1848 tomorrow, but refreshed and invigorated by having enjoyed some different games in between!


Thursday 26 August 2021

"The entire work is a treat for military specialists and lay readers alike" - Clausewitz 1796 reviewed on H-War

Delighted to see our translation of Clausewitz's history of Napoleon's 1796 Italian Campaign receive this excellent review by Doina Georgeta Harsanyi (Central Michigan University) for H-War. Some quotes from her assessment of the work:


"Military historians and army officers will find much to enjoy in this theoretician’s take on a well-known sequence of events."

"The narrative is rich in perceptive insights"

"excellent critical apparatus"

"Richly researched footnotes"

"The entire work is a treat for military specialists and lay readers alike"


I am very grateful to Dr Harsanyi for her thorough review and generous comments.

Wednesday 25 August 2021

The Road to Vicksburg: Champion Hill (1863)

Having enjoyed Vincent Tsao's Marengo scenario at our last club outing, we gave another of his scenarios a run at the club this week, this time from the American Civil War: Champion Hill (16 May 1863).

This gave Dave W a chance to get his 10mm Pendraken ACW troops onto the table. We chose sides by the expedient of who was wearing what - Dave and Bruce were both in blue, which made them the Union, leaving me and Colin as Confederates (though it would be a stretch to describe my red T-shirt and Colin's camo pants as 'butternut').

Champion Hill was a small but important action. It was Grant's seventh attempt to reach Vicksburg so as to cut the Mississippi. Hitherto he had been thwarted by Confederate fortifications and raids on his supply lines. On this occasion he broke through, inflicting heavy casualties and fragmenting the Confederate army, enabling him to establish the siege of Vicksburg.

The game starts with the Rebs in a tricky position. Basically Grant has managed to get round the northern end of their line and mass against their left, which is anchored on Champion Hill. All that holds the hill is a poor quality force under Cumming & Reynolds (Raw and Fragile, in BBB terms), which is supported by an artillery battery but begins the battle already Disrupted by having been rushed up there.

View of the whole battlefield. Union line top left facing Confederate line on Champion Hill. More Union will approach from top centre and top right corner. Bowen's and Loring's divisions in column on road bottom right.

Fortunately for the Confederates, historically McClernand (facing their front with his XIII Corps) was very slow to get off the mark. The scenario limits how close to the enemy XIII Cps units can move initially. This gives the Rebs a brief window in which to fend off the flank threat and even turn the tables by pouncing on the Union supply column at Champion House. Whether or not they manage to do that, the second half of the battle will see Union weight of numbers turn it into a fighting withdrawal towards the road exits to Vicksburg and an effort to prevent the Union getting troops down those roads.

Rebel's eye view of the impending threat from behind the Champion Hill line. White puff shows the defenders' initial disarray. Union wagon train visible lurking behind Champion House top right. 

We weren't able to fend off the flank threat. That's not entirely true: it did take the Union three turns to kick us off Champion Hill. But we lost a lot of troops trying to hang onto it, and the dice were cruel to us. Dave's long range artillery threw consecutive 11s to smash Buford's brigade as it hastened north towards the Hill, rendering it Spent and of negligible combat value. On the Hill itself, despite getting a second battery up there and moving S.D. Lee and Barton's brigade to enfilade the decisive Union assault, we couldn't repulse it: with two shots at firepower of 16 and 20 (pretty lethal in BBB terms), I rolled 4 and 3 - enough to Disrupt the bluebellies but not stop them.

And now a view from the Union side a turn or two later. The Union troops have got onto the hill and driven back the Confederate infantry who are Spent and Disrupted. They are flanked by two batteries now, whose canister should have kept the Union at bay a little longer, but it was not to be. 

Our most potent unit, Bowen's division, did attempt to get back on the Hill but failed. Lee and Barton had two chances to overrun Stevenson's weak brigade on the Union extreme right and open the way to the Union wagon train, but here too the dice let us down. Stevenson survived long enough for reinforcements to join him and the window slammed shut.

The scene immediately after the Union took the Hill. Lee and Barton lower left about to try (and fail) a desperate left hook towards the Union wagons. Bowen, upper right, about to try (and fail) to storm back onto the Hill. Routed rebs lower right will take no further useful part in proceedings.

That was around Turn 5. The battle was pretty much over in the north at that point: the Union had Champion Hill secure and its wagons untouchable, but Bruce saw no realistic chance of taking the bridge across Baker Creek, only the risk of excessive casualties from trying.


Game end on the northern part of the field. Battered Confederates falling back to hold Baker Creek bridge; Union not bothering to pursue them seriously.

In the southern sector it was a different story. All that was between McClernand and the Vicksburg road exit was Tilghman & Featherstone and a few guns. Three Union divisions converged on them, driving them back. At the start of Turn 7 we calculated that two successful assaults could see the Union achieve the road exit objective. Turn 7: two Union divisions assaulted; one was repelled by fire, but the other smashed the Confederates back 9" with loss and exploited 6" after them. Turn 8: the pursuing division needed to repeat its performance. It succeeded in charging; it shrugged off the feeble defensive volley; it won the resulting assault, forcing the rebels back another 3" - but not quite off the table. One more pip on the dice would have done it! A real knife-edge finish and a great way to end the game.

While the action petered out in the north, it hotted up in the south. Initial stand-off gave way to long range firefight and then to close assaults. Here the rebels have been driven out of their protective woods and cling on to the last inch of table to deny the Union another objective. 

Objectives-wise, both sides held one (Champion Hill vs the Baker Creek Bridge). The Union hadn't quite got off the road exits, but the rebels hadn't hurt the Union supply column. The decisive factor was casualties: the Union had inflicted more than double its own losses. Consequently the game was a Union victory.

Reflections:

The virtuous simplicity of BBB: Bruce had not played since February 2019, yet he picked the rules up again immediately, no brain pain or fumbling and stumbling.

Vincent's Victory Point scheme was a little complicated for us (4 VP for this, 5 VP for that, a VP per base for the other); could probably be reduced to a more standard simple BBB format of 1 per objective achieved. But it worked as is.

Victory can rest on small margins. Whether or not an individual unit reaches a crucial location in time; whether a particular assault succeeds or fails; how effective a single volley happens to be ... the result of the whole battle can turn on any one of these. Although we Rebs lost (and felt very battered), it was easy to see how the boot could have been on the other foot.

10mm is a great scale for achieving that 'mass battle' visual effect with figures that are still large enough to be easily identifiable.

The imperfect symmetry of ACW: although the blue and the gray use the same limited array of weapons and tactics, and although the uniform variations are relatively few compared with contemporary European armies, the opposing armies were not bland. Our small forces had enough nuance and difference (some Aggressive units, some Fragile, some Passive, the whole range of Raw/Trained/Veteran) for there to be significant tactical choices arising and flavour resulting.

A big thank you to Vincent for another fine evening's entertainment!

The scenario is freely available in the BBB group files.

Wednesday 18 August 2021

Hungary 1848 #10: Breakout! Third Battle of Komárom

The '48 campaign furnished us with another epic game, fought remotely over two successive Monday evenings. We were joined by a new comrade, Mike E, a retired US army officer who cut his teeth on SPI hex boardgames but had never really tried miniatures gaming.

Histoically, after the inconclusive Second Battle of Komárom (our previous game) there was a lull of a week or so. The Hungarian C-in-C, Görgei, was suffering from a head wound. He was briefly dismissed while unconscious by an unhappy Regent-President Kossuth but reinstated after protests from his outraged army. He decided on a last desperate attempt to break out southwards from Komárom but, still not fit to take the field, he had to let Klapka command. The result was a poor plan, poorly executed, and the Hungarian army's sortie was repulsed.

The scenario portrays the command confusion on the Hungarian side by omitting Klapka, representing only the two best Hungarian corps commanders (Leiningen and Pöltenberg), and making Nagysándor's under-performing 1st Corps and Pikéty's cavalry division Passive. There are objectives spread around the table, variously representing the main Austrian defensive line, the Austrian line of communications beyond, the route east to Budapest, and the Hungarians' own fortifications. As Görgei recognised at the time, the balance of forces makes a genuine breakout virtually impossible, so victory is measured by what 'high water mark' the Hungarians achieve in terms of objectives taken temporarily as well as those held at the end.

I can only describe the first session as 'vivid'. Running these games is always quite demanding both physically and mentally but I was almost light-headed by the end of this one. The action was fast-moving, unpredictable and exciting.

The Hungarian initial deployment: 1st, 3rd, 7th and 8th Corps in a semi-circle outside their fortifications, about to emerge from the fog and surprise the Austrians (mostly off-camera, spread out in an even wider semi-circle, with their allied Russian division off-table for the first half of the game). River Danube in the foreground. Light green areas are vineyards. Yellow fields are there to remind players that the tall maize limits firing ranges to 6" everywhere.
 

The tone was set on Turn 1 when Schneider's brigade defending the Ács wood on the Austrian left rolled snake eyes and abandoned its abattis. This forced a swift change in the Austrian players' plan. They had intended Schlik to lend some support to Wohlgemuth in the centre, but instead had to commit his whole corps - and all the reserve artillery - to hang onto the wood.

Hungarians establish themselves in the southeastern part of the Ács wood. Upper right of picture, Sartori's brigade is disrupted but manages to retain a crucial toehold to prevent the Hungarians claiming the objective - the Habsburg yellow counter stays!
 

In the centre, Wohlgemuth held Herkály puszta as a bastion. The Hungarians chose not to storm his gun emplacements for the time being but flowed around it and took Csém puszta in the south.

Hungarians mass in front of Herkály puszta, waiting for the right moment to assault. Top left of photo red counter shows that the vacant Csém puszta has fallen to the hussars.

Close-up of Csém puszta. The Polish Legion and their supporting hussars, somewhat disordered after seeing off Ludwig's cavalry brigade, await the arrival of Panutine's Russian division. (Figures are Austrians - green counters denote that they are supposed to be Russians - my Russians are in a box somewhere.)
 

In the east (the Austrian right), Bechtold and Wolf faced off against most of Nagysándor's corps, much as they did historically.

Stalemate in the east: infantry trading shots across the Szilla stream, cavalry eyeing each other warily.
 

Turn 4, the last move of our first evening's play, was a critical one. There was a moment when a reasonable movement roll would have enabled Rakowsky's hardcore veteran brigade to assault the last discomfited Austrian defenders of the Ács wood, with a high chance of ejecting them and claiming the wood for the 'high water mark'. Instead, Rakowsky remained disrupted and vulnerable to the ensuing Austrian counterattack, and an Austrian brigade began sneaking along the bank of the Danube towards the Hungarian fortifications.

Sneaky Landwehr dodging roundshot from an understrength Hungarian battery as they sidle past the Danube vineyards. 
 

Battle resumed a week later. Two of the three Hungarian players were now on holiday, leaving Graham to hold off the Austrians alone. His situation looked grim but he put up a spirited fight. The stand-off on his left continued. On his right, he was gradually driven out of the woods, and Reischach's Landwehr managed to steal into his redoubts. Fighting raged in the centre. The Hungarians threw Jablonowsky out of Herkály puszta. The Austrians rallied, brought up their gun line, and counterattacked. The Poles held up three times their number of Russians for three hours before giving way. The 'red kepis' stormed the Austrian artillery and scared off half of the guns. Hungarian musketry held off one counterattacking brigade, but could not stop the other. It piled into the disrupted, depleted defenders who, low on ammo, were forced to concede the objective. 

Endex: Herkály puszta falls to the Austrians. Remnants of Hungarian 1st and 7th corps in the foreground. Hungarian guns left of picture deter oncoming Russians, but red kepis top centre are unable to stop the final assault.
 

The end result: the Hungarians had held the necessary five objectives at one time or other, but only retained two at game end, one short of their target, thus it was an allied victory. Still, it was a much tougher job for the allies than had seemed likely at half-time, and it took Reischach's improbable infiltration of the Hungarian redoubts to swing it. It certainly produced an exciting finish.

Reflections:

The simple yet subtle BBB approach to command & control proved its worth. Making some of the Hungarian army Passive and just giving it two corps Generals and no C-in-C worked well to recreate its poorly coordinated performance on the day.

A wargame can change your view of the history. Nagysándor and Bechtold get criticised by historians for pinning each other and not intervening more actively in the decisive sector. Yet when it comes to moving their troops on the table, you can see why they acted that way and how it could have gone badly if they had done as their critics advocate, and perhaps have more sympathy for them accordingly. This is not the first time a BBB game has given such an insight.

Objectives: setting these can make or break a scenario. In this case, the number of them and their distribution around the table resulted in the game reproducing the shape of the historical battle reasonably well, while providing interesting choices and challenges for the players. Deciding what number of objectives constitutes victory was tricky but history provides a 'par score', and I'm happy with the targets this scenario sets now.

How much should casualties matter? As Graham said, at half-time it was obvious that he wasn't going to break through, so realistically he would have preserved his army and pulled back behind his entrenchments. But then you'd think you could say the same for Klapka, yet the historical battle went on for eight hours, I suppose partly because it was fought across such a wide area and it was hard to get the full picture or to react quickly to change it. There's certainly a case for including casualty totals or ratios in the win/lose equation, but as a general policy I prefer not to, as discussed on this blog before.

Never give up! Even though things looked dire for the Hungarians at half-time, they came within a couple of dice of salvaging a draw or even snatching victory. Time-limited scenarios and the vagaries of the movement and combat tables mean there is usually a chance, albeit a small one, of extreme rolls changing fortunes.

A new player is refreshing. Mike fitted right in. He'd done his homework and read the rules beforehand. Happily, BBB seemed to hit his 'sweet spot' with its balance of big battle manoeuvre and tactical flavour. And of course, it's always good for a new player's morale to end up on the winning side.

***

Next up will be a change of scene as we finally leave Komárom and move to the southern front for a corps-sized ambush: the battle of Hegyes.