Our Hungary 1848 campaign continues. The 11th of our planned 15 games took us to the southern front for the first time for the battle of Hegyes. This was the largest battle on that front, inflicted some of the heaviest losses suffered by the imperial side, and was Hungary's last major victory of the war.
The situation was an unusual one. Under pressure from invading Austrian and Russian armies in the north and west of the country, Hungary's government had decided to mass its forces in the south, knock the imperial Army of the South out of the war, and then base itself on the fortresses of Arad and Temesvár. The imperial C-in-C in the south was Jellachich, Bán of Croatia, commanding an army mainly composed of 3rd- or 4th-line Grenzers. He was holding the line of the Franzenskanal between the Danube and the Tisza in what is now northern Serbia. The Hungarian forces converging on him took one end of the canal, forcing him to choose: should he fall back behind the Danube immediately, or thrust forward to give the Hungarians a bloody nose in an attempt to deter and delay them?
Opting for the latter course, he took some 12,000 men on an overnight march to seize the village of Kis-Hegyes and its bridges over a minor river, the Barra, which he knew were Hungarian-held. Unfortunately for him, a similar-sized force of Hungarians under the English general Richard Guyon, well aware of Jellachich's approach, was hunkered down in Kis-Hegyes and the neighbouring villages of Szeghegy and Feketehegy. At 3:00 a.m., Jellachich walked into a division-scale ambush. His initial assaults on the villages were repulsed and Hungarian hussars lapped around his flanks. Hearing gunfire in his rear as well, he realised he was in danger of being cut off and captured. His assault turned into a fighting withdrawal which he executed rather well, but he lost over 1,000 men.

This is tricky to capture in a wargame scenario because of the problem of hindsight. Unlike Jellachich, we players know that his assault is probably doomed to fail, and we know that an outflanking force will threaten to cut his line of communications. Rather than the usual simple formula of judging victory by who holds which objective locations at the end, I defined three strategic objectives for the Austrian side:
1. To seize one of the three villages, even if only temporarily;
2. To have at least one of the two Austrian cavalry units survive to cover the retreat and to have lost no more units Spent or destroyed than the Hungarians;
3. To have no Hungarian unit closer to the two line of communications road exits than all Austrian units.
The Austrians needed to achieve all three of these for a win or two for a draw (and had to have assaulted a village with at least two units).
The point of this mix of objectives is that the Austrian mission changed halfway through the battle from "seize a village" to "run away!". Thus the Austrians have to make a good-faith effort to attack the villages initially, but they are not required to hold any at game end.
The Austrian problems are compounded by a scenario rule to reflect the nervousness that gripped Jellachich's force when they heard cannon fire from the rear. Starting on Turn 4, the Austrian side must dice each turn to see if the whole Austrian force becomes Fragile. If it does not do so by Turn 6, it is ruled Complacent instead, and a Hungarian unit shows up in the Austrian flank or rear, followed by the Austrian reserve that historically got sent back to protect the retreat.
Last but not least, because this was an ambush, none of the Hungarian units are deployed on table initially or even plotted on a map. Instead, the Hungarian players can simply deploy them in a village as soon as the Austrians move within 3" of it, or in any village in their own turn.
I was a bit anxious about these unusual scenario special rules pre-game because 'funky' rules do not always work out as intended. I needn't have worried: they provided us with a distinctively different battle that still gave a close and exciting game and a decent representation of the historical battle.
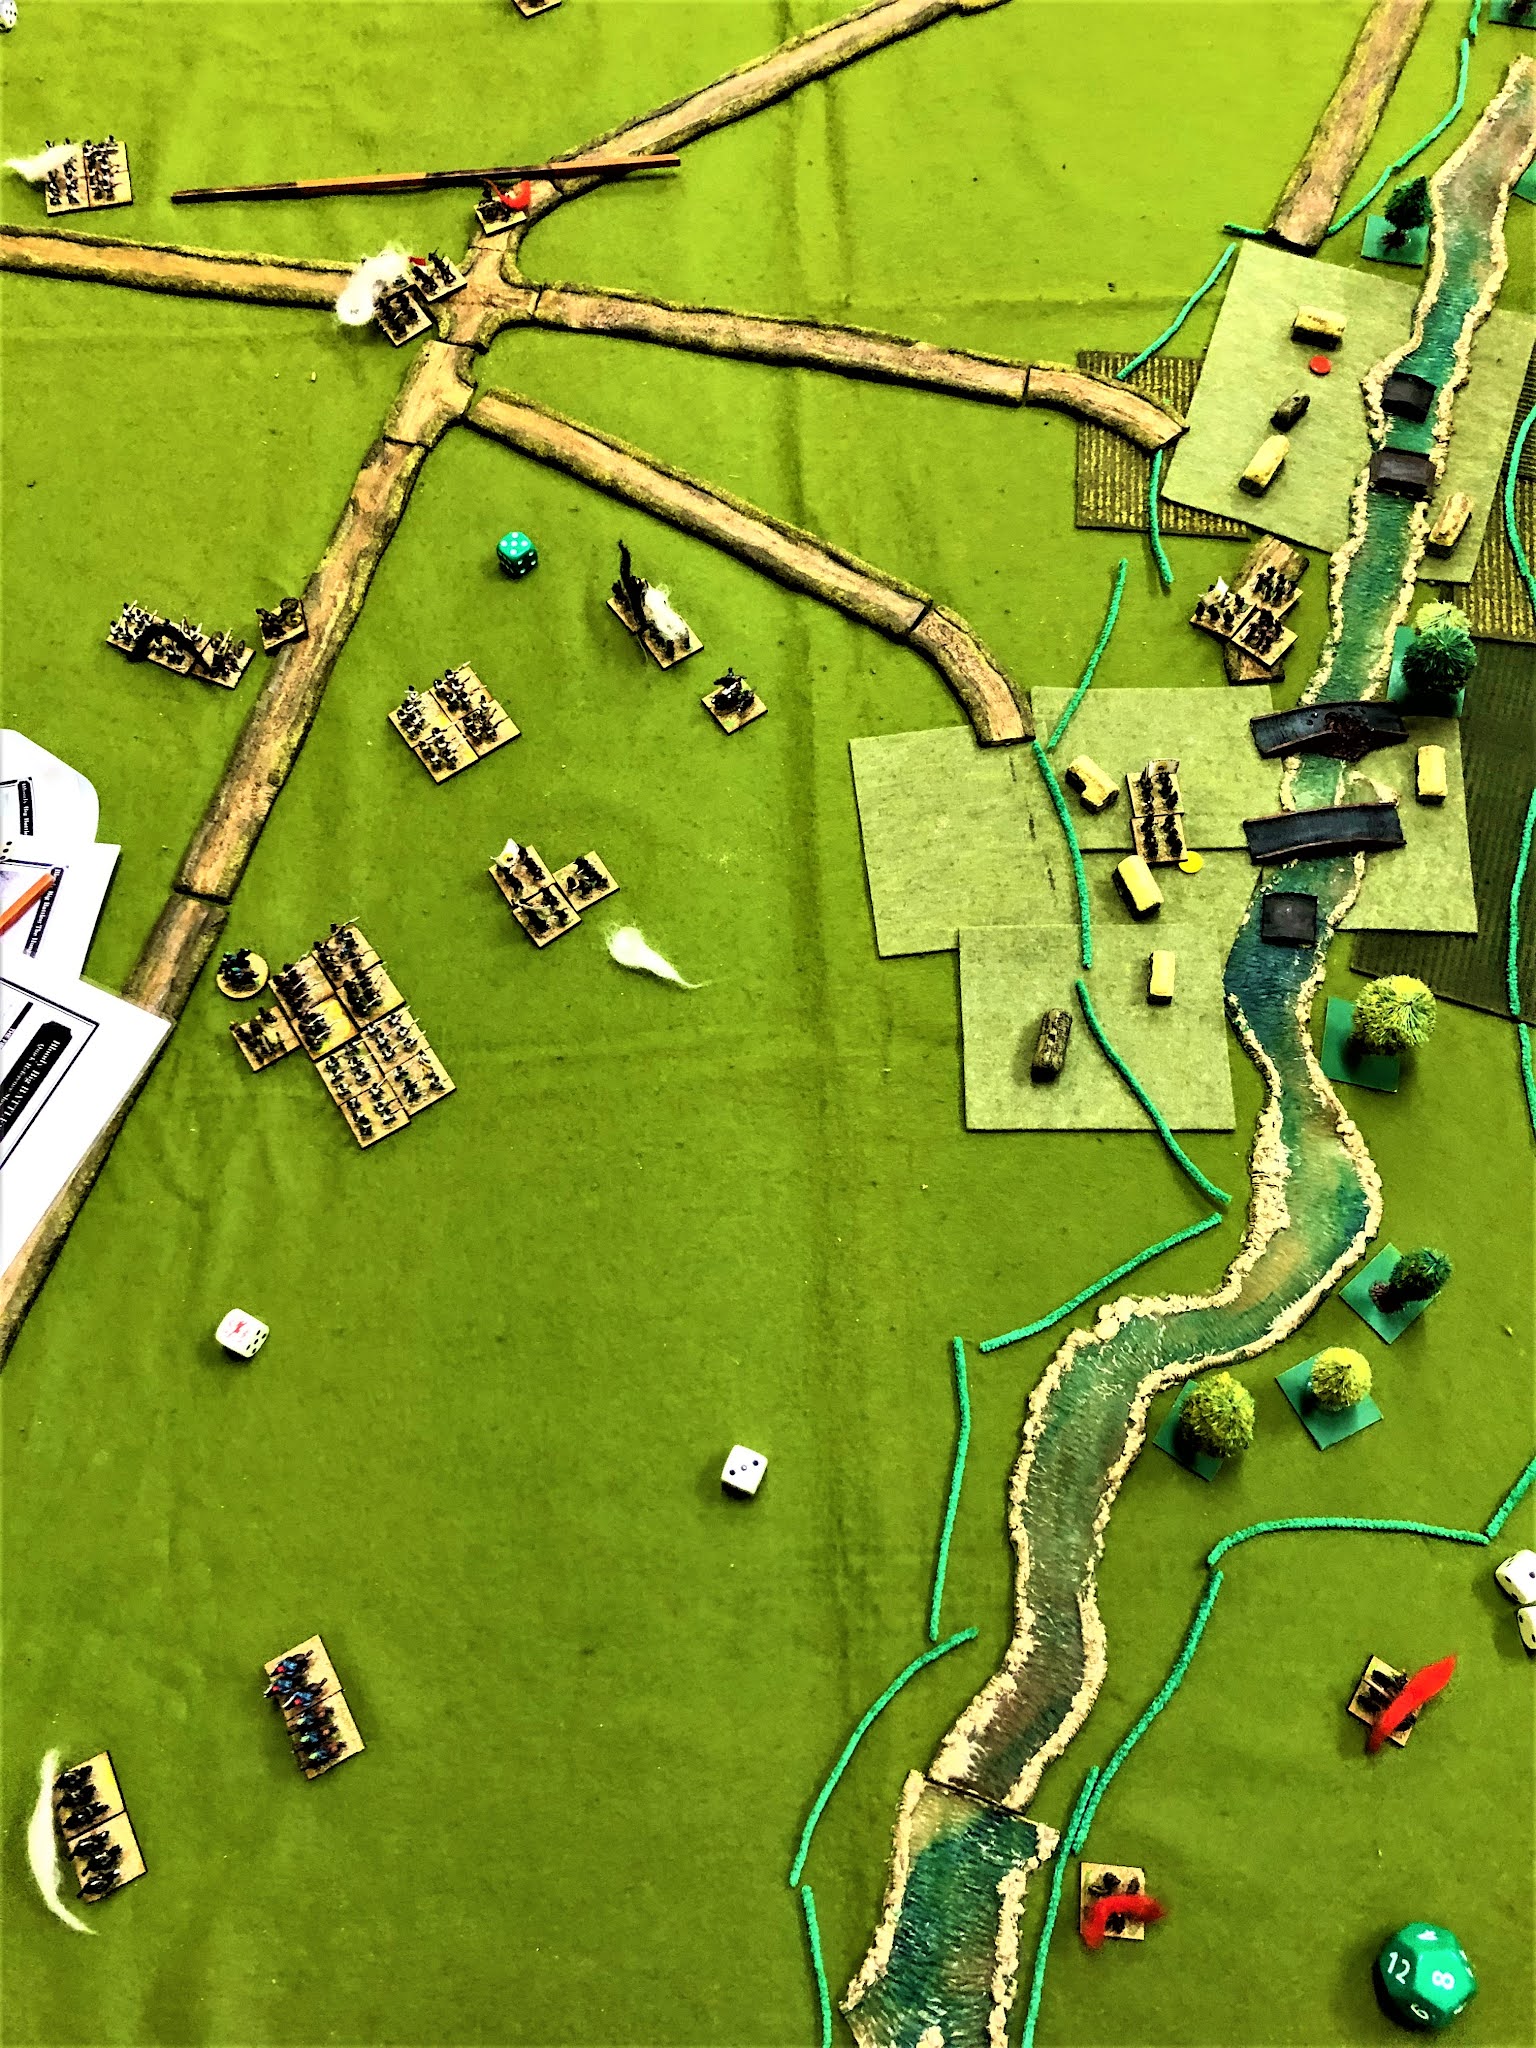
As was always going to happen, the first Austrian unit to move up against Feketehegy (the Erzherzog Wilhelm and Piret infantry) was ambushed by a Hungarian firing line anchored by a battery at each end. The hapless Wilhelms/Pirets were immediately reduced to half strength, Spent, and played no further significant part in the battle.
However, the Hungarians could not be everywhere. They did declare troops in Szeghegy as well, but not enough to prevent Budisavlievich's Grenzers from pressing into the village. Intense fighting in and around both villages ensued.
At the northern end of the line, the Hungarian right wing (commanded by our new comrade and BBB novice, Simon) debouched from Kis-Hegyes. All that was in their way was Castiglione's cuirassiers. These carelessly loitered long enough to be blown away by Hungarian artillery, meaning the Austrians could not afford to lose their remaining cavalry on the other flank if they were to have a chance of winning.
At the start of Turn 4, the dice decreed that 'Austrian Anxiety' came into play, word spread through the Austrian ranks about the enemy advancing in their rear, and all Austrian units became Fragile. The Austrian players' morale was creaking at that point too, but I pointed out that they still had a chance of victory if they could clear one village. One Austrian unit in Szeghegy duly turned to the right and attacked the flank of the Hungarian defenders of Feketehegy, clearing them out and planting a yellow Habsburg victory counter in it.

As the Hungarians from the north closed in, the Fragile Austrians were compressed back towards their precious line of communications exits. On their southern flank, there was a tense series of cavalry actions between hussars and cuirassiers, the latter being superior in combat but having to be cautious.
On the last turn, all three results were possible. The Austrians had suffered one more unit than the Hungarians Spent/destroyed; if they could kill the hussars in the south, they would rectify that and win. Conversely, if the Hungarians could get either hussar unit closer to either road exit, that would produce a Hungarian victory. In the event, neither transpired, and it was yet another classic honours-even draw to conclude an exciting and different game.
Reflections:
BBB proved again how easy it is for new players to pick up: Simon said he was daunted at first but comfortable by the end.
The simple special rule for the ambush deployment produced the right effect.
The mix of objectives to reflect the Austrian change of mission mid-battle likewise worked. (Phew!)
Perfect scenario for a Monday night at the club: simple terrain to set up, ~10 units a side, enough variety of troops to be interesting, both sides have to manoeuvre. Eight turns long so we were done in two hours' play, despite going in slow time initially to introduce Simon to the rules.
Our regular multi-player format is good for flexibility! When Simon was looking for a game, it was easy for us to fit him in as a third player on the Hungarian side. Conversely, we were expecting three Austrian players - one couldn't make it, but the game went on without him, whereas in a one-to-one game, if one player drops out, the other player's evening is written off as well.
And finally, John and I relished one thing remote gaming can't really provide: the post-battle pint together in the pub.
Another excellent scenario Chris and once again well done on bringing this conflict to the wargames table.
ReplyDeleteExcellent scenario idea
ReplyDeleteSounds a lot of fun!
Thanks, fellers. Yes, I was really happy with how this one turned out. Especially good to have it produce such a good game when we had a new player in the ranks.
ReplyDelete