Showing posts with label Balkan Wars. Show all posts

Tuesday, 4 June 2024

Defence is not king! Lule Burgas (1912)

A friend of mine writes school textbooks. A few years ago he did one in war and society for the UK history curriculum. I reviewed the chapter on 1750-1914 for him. I thought I was doing him a favour but in fact I caused him a problem. I found two bones of contention in it.

One was the claim that war did not change significantly between 1750 and 1850. Napoleon and Clausewitz might disagree with that.

The other debatable claim was this (I paraphrase): 'the foolish WW1 generals had not learned the lesson of the previous 50 years that, because modern weapons had become so lethal, the defence was king'. I pointed out that (a) the attacker gets to shoot too and (b) the lesson from virtually every war of the previous 50 years was that the attacker wins. The Crimea; Italy in 1859; Denmark in 1864; the ACW; the Austro-Prussian War; the Franco-Prussian War; the Russo-Japanese War and the Balkan Wars, with the latter two being proto-WW1 warfare with WW1 weapons: the attacker wins, the attacker wins, the attacker wins. The difficulty for Paul was that the debatable claim was not his, but he was required to make it because it was actually in the curriculum ...

Which brings us to this week's wargame: Lule Burgas (1912), the fourth in our ongoing campaign from the "Bloody Big Balkan Battles!" scenario book. This was the largest European battle between 1870 and 1914. The attacker won.

The historical situation was that, just four days earlier, the Bulgarians had defeated the Ottomans at Kirkkilise. The battered Ottoman army established a new defensive line at Lule Burgas, but its right flank was open. Ottoman reserves were rushed up to fill the gap and clashed with the Bulgarian 3rd Army, while the Bulgarian 1st Army took Lule Burgas. After a three-day battle, the Ottoman defense caved in and retreated to the fortified lines at Chataldja.

The scenario revolves around four objectives: Lule Burgas itself on the Turkish left; Karagac in the centre; Bunarhisar on the right; and Congara in the rear. Both sides need to hold two of these to draw or three to win. The five annotated photos that follow reveal how the game went.

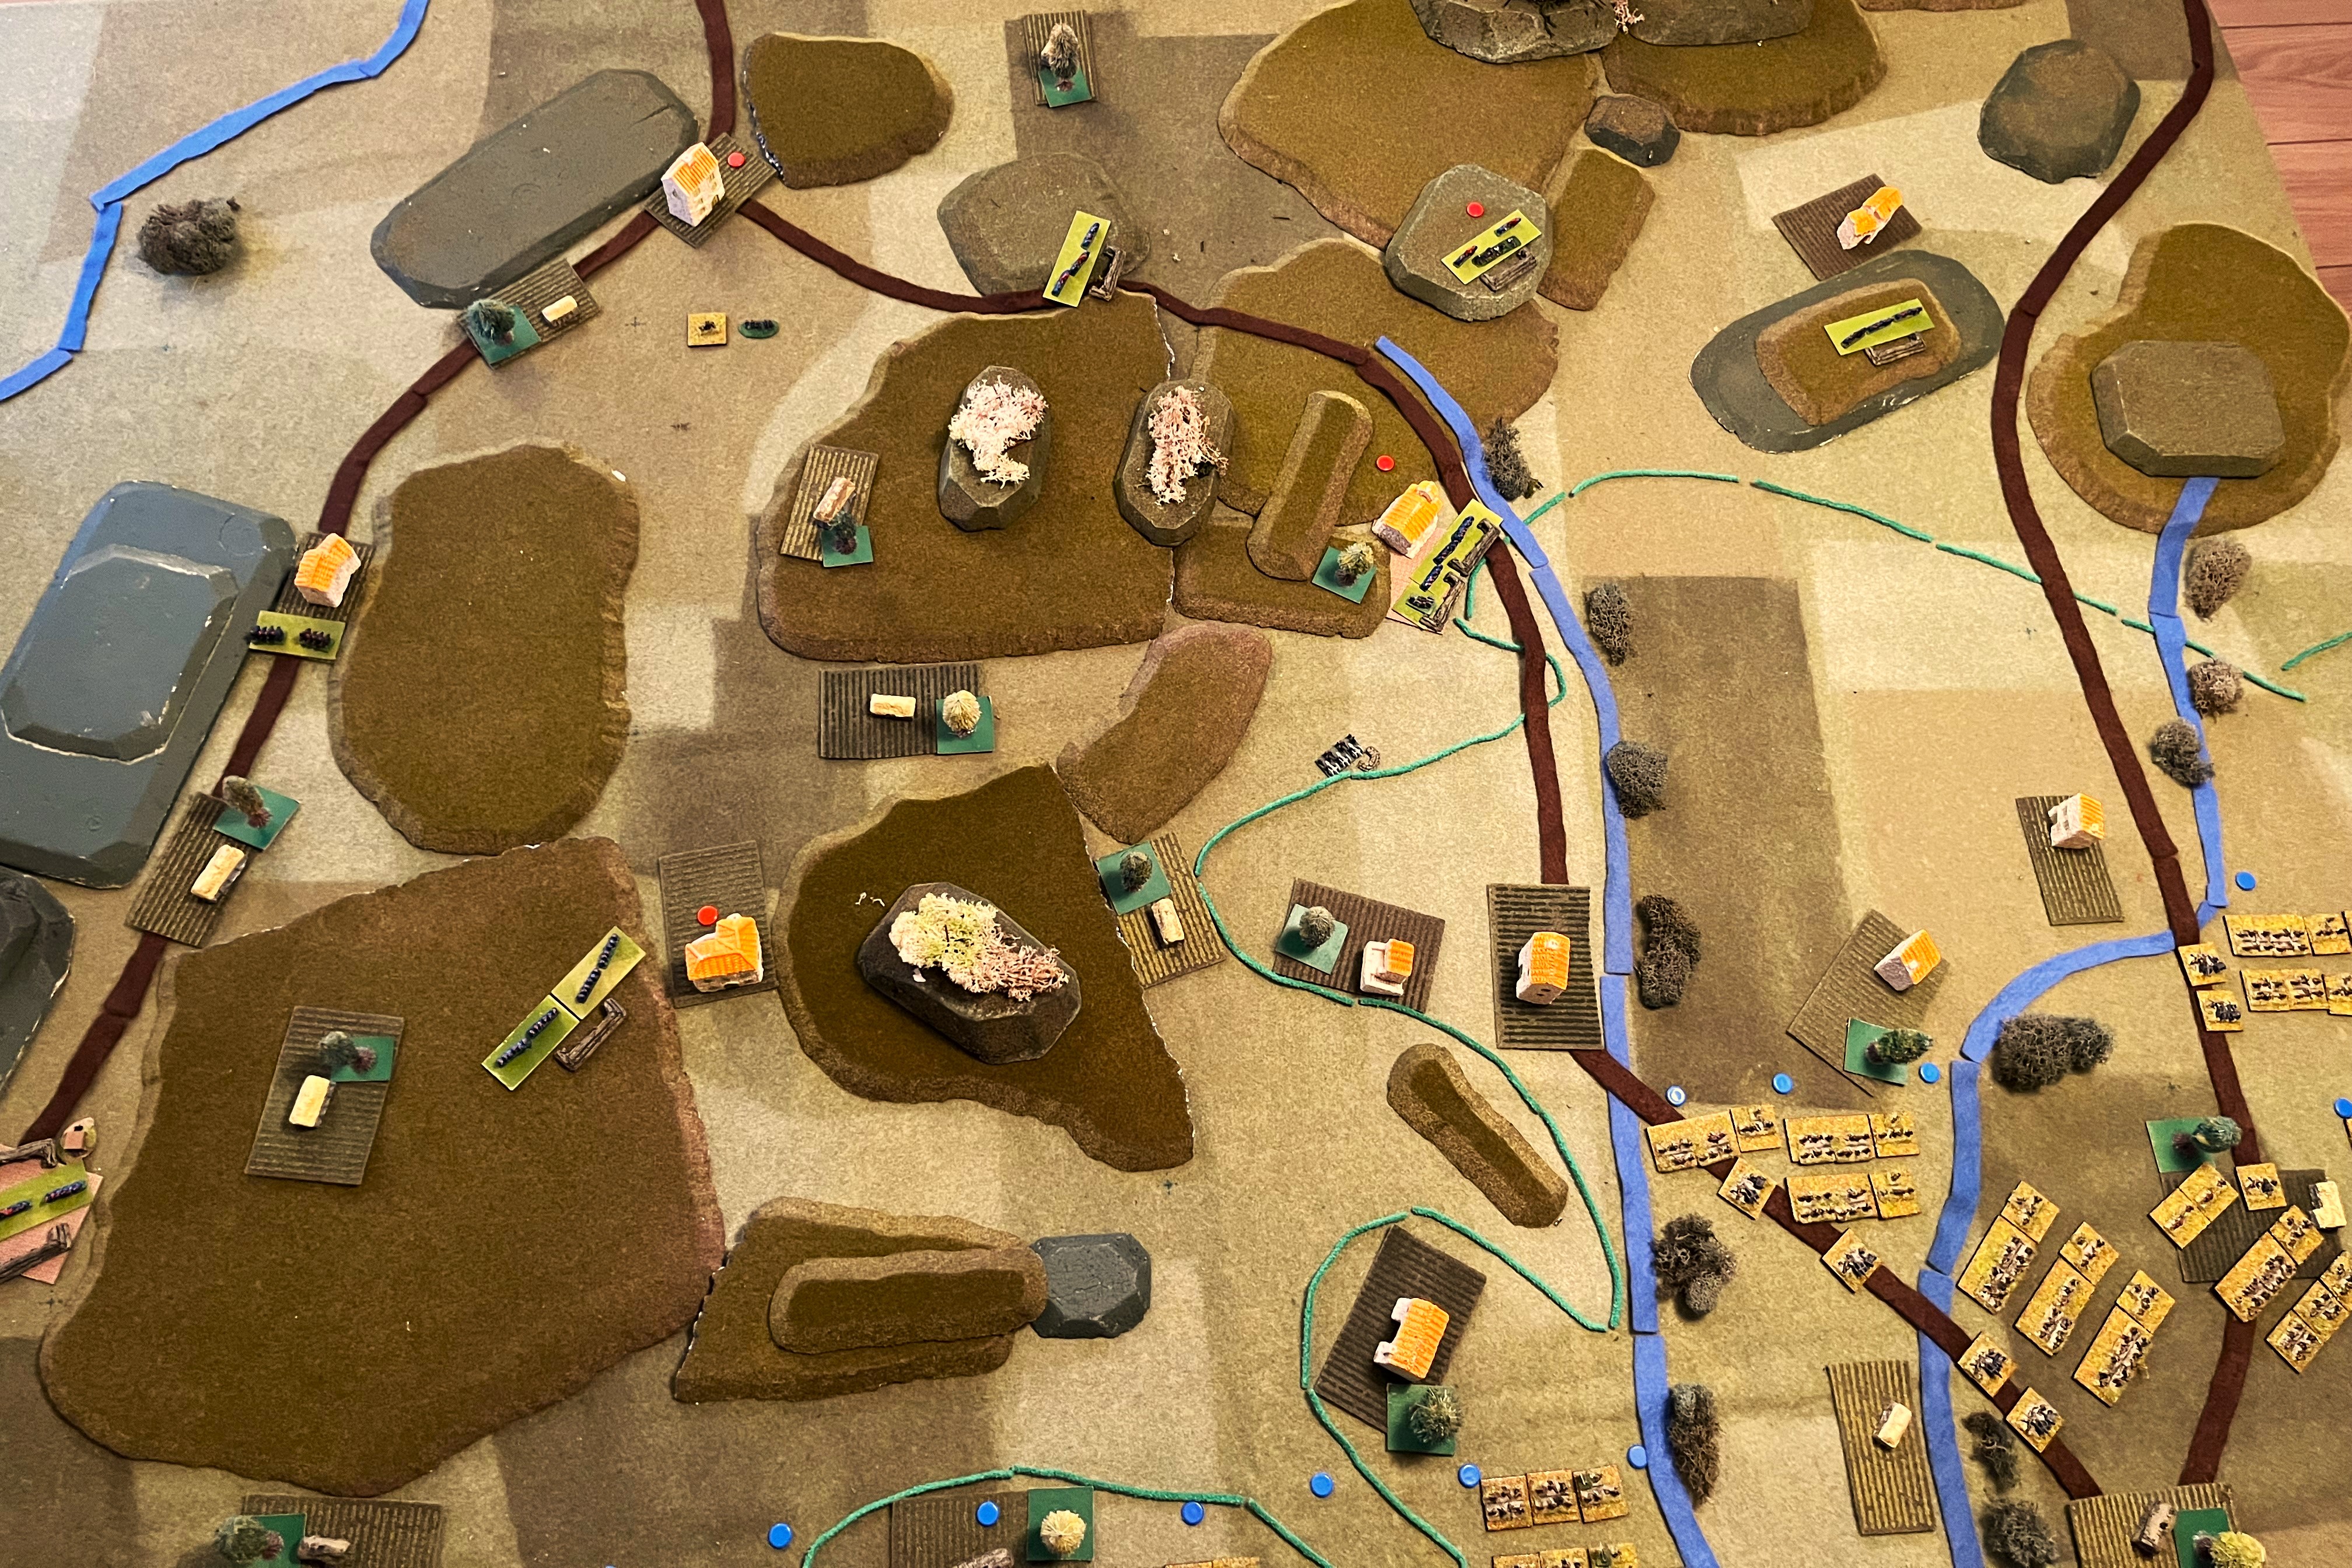
Looking north up the Turkish lines. Lots of lovely muddy brown rivers, custom-made for me by Rob Owens of Rob's ScenicsA cavalry brigade foot of pic covers the Turkish left. IV Corps is entrenched behind Lule Burgas (the town with the marsh in front of it); I Cps holds the centre; II Cps in the woods. III Cps and XVII & XVIII Provisional Cps are poised to enter top right. Red and white counters mark the four objectives. (Turkish figures are a mix of Irregular Miniatures and Heroics & Ros 6mm.)

View of the same Turkish deployment from the Bulgarian side of the table. The scenario uses a large scale - this 6'x4' table represents a 60km front; it lasts 9 turns with two night intervals, each turn being 6 hours; the armies are both over 100,000 men, so each individual base is 2,000-2,500 men and units are brigades of 6,000-10,000 men. Because of the large scale, there is a simple scenario special rule that fire cannot cross more than one river. This worked rather well.

Halfway through the battle, the Turkish left has been turned. Will, commanding Bulgarian 1st Army, chose to send the Sborna Division south of the River Ergene to outflank the Turkish trenches, while the Sofiyska Div threatened the front. Day 1 was spent moving into position and exchanging inconclusive fire with the defenders in Lule Burgas. This photo on Day 2 shows empty trenches as the Turkish units in them and the town have been routed, leaving Abdullah Pasha alone, embarrassed, and hoping John's finger can bring reserves from the centre in time. (Proxies of proxies: the 'Bulgarians' are actually my Greek army for this conflict, which uses British WW1 figures from Irregular. I'll need a different solution for the 2nd Balkan War battles between Bulgarians and Greeks! Entrenchments and railway also by Irregular.)

Meanwhile, the thin line of Nick's Bulgarian 3rd Army clashes with Dave's Turkish reinforcements in the woods. Bulgarian cavalry hold the Bunahisar objective (foreground); Turks hold Congara (top centre) and Karagac (top right). On Day 1, the wide open space in front of Karagac was a scene of carnage as the Bulgarians advanced into a deadly storm of fire, the survivors falling back at dusk and then shifting their effort further left. At that point, Nick was struggling to see how he could possibly avoid defeat.

The game produced a wonderful climax on the last turn. Both sides held two objectives, which would have meant it was a draw. However, in attempting to capture Bunahisar on their right and to hold and then retake Lule Burgas on their left, the Turks had drawn forces away from their centre, exposing Karagac. Two brigades of the Balkanska and Sofiyska divisions were close enough to assault Karagac, which was held by two Turkish brigades. Bulgarian fire had scrubbed away would-be supporting units and Bulgarian QF artillery wiped out one defending brigade. Both attacking units got the full moves they needed to reach, albeit one of them still in march column. Defensive fire held off the Sofiyska, but the Balkanska assaulted from the march - and emerged victorious! It was a splendid end to a game that at one stage had looked nigh impossible for the Bulgarians.

Reflections:

Blenheim in the Balkans. The battle had a nice shape to it: initial fencing along the front, a turning movement on the Turkish left, then essentially a big fight on each flank that made the Turks thin out their centre and make it vulnerable to the victory blow. Kudos to Will for having the vision four turns earlier to get his Balkanska brigade into march column and race it across the battlefield to where it was needed.

Other plans are possible. As is usually the way, I can see other options for both sides. The Turks could deploy differently with more attention to their left flank and to fields of fire. The Bulgarians could try what seemed an obvious approach at first glance: weight their attack heavily to the left, avoiding most of the dug-in Turks and going for the three village objectives rather than the tougher town. Certainly worth replaying to see how it goes with different plans and different players.

Limiting LOS. I noted in the Kirkkilise report how that similarly large-scale scenario might benefit from some line of sight limit. The scenario special rule here did the job.

Quality tells! All the Bulgarians were rated Aggressive. Most of the Turks were Fragile. On Day 1, while they were mowing down advancing Bulgars, the Turks had the best of it. Once the Bulgarians developed their own firing lines and set up their artillery and started dishing some out, Turkish units evaporated rapidly. And, of course, the quality difference swung it in the final assault.

Nice terrain. Rob Owens's rivers had their second serious outing (their first having been at Kirkkilise). Definitely an improvement on the usual blue felt. Now to attend to the roads, and then the woods ...

What a good game! I embarked on this one with some trepidation. Assaulting against an entrenched enemy with equal numbers of troops and modern weapons? It didn't look too promising. But the space for manoeuvre on both flanks actually enabled a mobile game, and it was a bold dash in the centre that decided it at the end. The shift in fortunes and the epic climax meant the game really told a story.


Thank you to Nick, Will, Dave and John for being engaged and enthusiastic and tackling the challenge in good spirits, and to Konstantinos for a fine scenario.


Tuesday, 16 April 2024

Kumanovo (1912) - the calm, then the storm

We progressed to scenario #3 of "Bloody Big Balkan Battles!": Kumanovo. Scenarios 1 & 2 saw the Greeks attack northwards towards Thessaloniki and the Bulgarians attack southwards at Kirkkilise. For #3, the Serbs get in on the act, driving south into Macedonia.

Historically, the Serbian enveloping attack with three corps was pre-empted by an Ottoman attack with a smaller force trying to envelop the Serbian centre before it could join up. It didn't work: the Serbs held, then concentrated and counterattacked next day, and the outnumbered Ottomans were defeated.

The scenario tries to capture this in a 12-turn game divided into two halves by a Night Interval. Both sides start with most of their forces lightly dug-in. The victor has to hold the town of Kumanovo itself plus 3 of the 5 other objective villages. The Turks start in possession of K+3, i.e., enough to win. Thus, they have no real need to advance against dug-in MGs and repeating rifles and superior Serbian artillery, especially when the players had recently experienced how deadly modern weapons are in the first two scenarios. Consequently, in our game, both sides sat tight for the first 6 turns (bar some minor Turkish probes against the Serb right flank), exchanging artillery fire from their earthworks. This didn't bode well for it to be an exciting game.

Then on Turn 7 it all kicked off big-time.

The Serbs had to attack or lose, so once their reinforcements were on the table, they emerged from their trenches. Here we see three big 9,000-man Serb brigades advancing across the plain against Kumanovo (foreground), whose be-fezzed garrison is being pounded by a row of Serb batteries on the opposite hillside (top centre). To the right of the guns, a blue counter marks the Serb-held objective village of Cetirci, of which more later, facing the entrenched Turkish centre (top right of pic). Out of shot top right, three Serb divisions advance to try and take two objective villages on the Turkish right wing.

How did it go? On the Turkish left, dire Serbian dice nullified their massed batteries' attempts to pummel Kumanovo. The Turkish defenders had no such problems and their own batteries and supporting infantry inflicted heavy losses on repeated Serb assault that were ultimately unsuccessful.

On the Turkish right, things went better for the Serbs, who eventually scrubbed away virtually all the Turks in front of them. However, they ran out of time and could not quite reach the now undefended objectives.

In the centre, the Turks actually attacked, trying to take Cetirci. The pic below shows their first assault. The defending Serb brigade was already spent, disrupted and low on ammo from the preliminary exchange of fire. Despite this, they held on, repelling the Turkish assault with heavy losses!

Figures are Irregular Miniatures 6mm (and some Heroics & Ros in the background). Serbs painted by Irregular Miniatures (a service they no longer offer, unfortunately). Turks in the foreground by Dave W; those at the back by me.

But it couldn't last. A fresh Turkish unit followed up and swept the Serbs out of Cetirci. The Turks were then able to press on and roll up the Serb gun line above Kumanovo.

The end result of this most sanguinary struggle was a clear win for the Turks, holding one objective more than they needed for victory.


Reflections:

Don't tamper with the scenario (i). As written, the Serbs deploy first and can be anywhere up to the mid-point of the table (24" in); the Turks can then deploy anywhere in the other half, at least 6" from any Serbs; Turks get to fire first on Turn 1. I felt this could result in the Serbs being "set up" and too easily ambushed by cunning Turkish deployment, so I made the Serbs deploy only up to 12" in instead.

In doing so, maybe I caused the 6-turn calm before the storm. Of course, the Serb players could have taken a cautious option and deployed at a safe distance from potential Turkish ambush. But the incentive to deploy further forward is that it would put them closer to the objectives they need to take. (Then again, it might have made it to easy for them to scour Kumanovo with fire without leaving their rifle pits.) Still, we should probably play it again as written and see if the first few turns are a bit livelier as a result.

Don't tamper with the scenario (ii). The scenario provides a Scenario Option under which an additional Turkish division arrives overnight (one that conceivably could have made it historically but didn't). Looking at the scenario beforehand, I felt the Turks would need that help (plus we had seven players, so more troops was better in terms of people having enough to do), so I decreed that we'd use the Option. Those reinforcements enabled the Turks to counterattack in the centre and may have contributed to holding Kumanovo as well.

Luck plays a part. Ben's dice were comically bad, several sets of snake-eyes at critical junctures, including (I think) once after saying "I can't roll snake-eyes again". This despite swapping dice with other players a couple of times, and they are all the same type from the same bucket anyway. Credit to Ben for keeping his morale high and soldiering on to the end regardless. A couple of different dice rolls could easily have changed the course of the game and produced a different result.

Welcome, Jeremy. We had a visitor from Hong Kong, Jeremy, who we gave command of the Serbian left. We also attached Mark S to his staff as technical advisor, as Jeremy hadn't played BBB much before. We hope to welcome him back as and when his travels bring him back to Oxford.


Monday, 12 February 2024

The Race for Thrace: Kirkkilise (1912)

Battle #2 in our Balkan Wars campaign is Kirkkilise. In #1, Sarantaporo, we saw the Greeks attack the Ottomans on the southern front in an attempt to reach Thessaloniki ahead of the Bulgarian army coming from the north. Now we visit the eastern front, where the Bulgarians were attacking into eastern Thracia (that corner of Europe that is still part of modern Turkey).

No fewer than nine of us convened in my war room - fortunately the rest of the guys couldn't make it! Luckily, the scenario lends itself reasonably well to four a side, since it starts with nearly all the forces on both sides deployed on-table on a broad front. A very broad front, in fact: the battlefield is 60km across (one 12" grid square = 10x10km), with ~150,000-200,000 men a side engaged.

Plan A

This shows the entire battlefield. The Ottoman army is in the southern half of the table (top half of pic). Its left flank rests on the extensive and well-armed Entrenchments around Adrianople, the right on the somewhat weaker fortifications around Kirkkilise. The Bulgarians have a significant quality advantage (about half the Ottomans being raw, fragile Redif reserve units), but they have to attack against well dug-in defenders. I have called this pic 'Plan A' because we managed two goes at the game. Red and white counters are objective markers. In the first attempt, Dave T, Bob, Mike and John tried to focus on taking Kirkkilise, with a secondary attack to secure the two villages on their right, hoping then to wheel right from Kirkkilise and roll up the Ottoman centre.

In executing this plan, they discovered just how hideous 1912 firepower was against 19th-century formations and tactics. From the comfort of their fortifications, solid lines of Ottoman riflemen and guns were able to concentrate their fire and blow away the Bulgarians as they came forward in a rather piecemeal fashion. The Bulgarian guards arrived as reinforcements from the bottom right corner and fought their way forward far enough to attempt a bayonet charge against the defenders of Adrianople, but this stalled under withering fire. Credit to the plucky Bulgarian players, they persevered for another turn, but it was clear that they were bound to lose.

We therefore reset the table and the teams swapped sides. With the advantage of having seen Plan A fail, Anton, Crispin, Phil and Bruce changed headgear and took up the challenge of commanding the Bulgarians.

Plan B

This time, the Bulgarians tried to avoid the fortress artillery, aiming instead for the soft centre: not so many Ottoman guns, little cover for the defenders, and plenty of rubbish redifs to bully. Far from being overawed, the Ottomans responded by pushing forward I & IV Corps to confront the Bulgarian advance. As the battle progressed, III Corps and Shukru Pasha's force also sallied from their entrenchments to capture the objective villages on each flank (representing threats to the Bulgarian line of communications). This was much less one-sided than the first game, as the Bulgarians made the Ottomans pay a much heavier price in terms of casualties. Nevertheless, it still ended in Bulgarian defeat as the Bulgars ran out of steam and troops.

Bulgarian high water mark as the guards assault the entrenchments outside Adrianople. (Bulgarian figures are proxied by my Russo-Turkish War Russians - actually Prussian Napoleonic Landwehr. The Ottomans are Anton's WWI Turkish army, hence the particularly arid bases. He got these painted in 2020, then didn't have a chance to use them for years because of COVID - this was not only the first time they saw action, they'd never even come out of the box they arrived in before.)

Reflections:

Modern weapons change the rules! Most of our BBB games are nineteenth-century battles with muskets or single-shot rifles. The arrival of magazine rifles and plentiful machine-guns makes fire more deadly and manoeuvre consequently more difficult and dangerous. Whole units were swept away much more quickly than we are used to. You can see why by 1915 everyone was soon deeply dug in and bringing up ever more artillery. Illuminating.

Overstretched elastic? This scenario stretches BBB's elastic scale to its limits. That's OK, but I should really have limited ranges to maybe 12" for artillery and 9" for infantry: the guns being able to reach 20km were too much like airpower and it was too easy for defenders to concentrate firepower and kill manoeuvre.

Virtue of replaying scenarios I wrote a whole 'Reflections' essay on the pros and cons of replaying scenarios. As I said there, "if the scenario itself is unbalanced, playing it from both ends evens that out in a way". That was certainly true on this occasion. If we'd just played it once, I think we'd have left feeling a bit flat. Swapping sides meant both teams got to dish it out as well as take it and marvel at how bloody it all was but without feeling unfairly battered.

Importance of the reorg phase The luxury of a Sunday game meant we could then all adjourn to our favourite local curry house for a post-battle social. Good friends, good gaming, good times!


Monday, 1 January 2024

Balkan Wars campaign begins at Sarantaporo

The "Bloody Big Balkan Battles!" scenario book for the Balkan Wars of 1912-1913 was published back in 2019. A lot of these battles were fought over very mountainous terrain that takes time to set up, so is not ideal for a club night and better done at home. My war room at home has been out of commission for a while but is back in action now. To inaugurate the refurbished war room, I decided to host the first game in the BBBB book: Sarantaporo (which I playtested in 2017). I took advantage of the Christmas holiday to run it twice for different groups of friends.

The scenario sees a thin Turkish cordon defence in the mountains facing a much larger Greek attacking force. The strategic situation is that the Greeks are racing to reach Thessaloniki (some distance offtable) from the southwest before the Bulgarians can get there from the north. Victory therefore depends on how long the Turks can delay the Greeks before being inevitably overwhelmed.

Fourteen annotated photos tell the tale, followed by some reflections at the end.

Plan view looking north from the Greek side of the table. The wavy green line marking off the SE quarter is a steep slope between the flat and open river valley (Level 0, good going) and the rest of the table that is all difficult terrain and Level 1 or higher. The 'polystyrene jigsaw' hills are Levels 2 and 3. Those crested with pale lichen are impassable peaks. (For an essay on various ways to represent complex hilly terrain, see here.) At lower left edge is the fort at Lazarat, guarding a pass. The town of Sarantaporo is the church next to the road, upper centre. Red counters mark the five objectives (you can't see the one at Mikrovalto, halfway up the westernmost road, because the Turkish cavalry are sitting on it). Greeks have to take three of these to draw and four to win. Most of the Greek army starts massed in the SE corner but a couple of divisions, cavalry and evzones are along the western half of the southern edge.

View from the Greek SE corner towards Sarantaporo and the Skopia-Vigli hilltop objective. You can see roughly four of the Greeks' six divisions here (three 3-base regiments to a division; some little 2-base Evzone units). Blue counters are temporary to indicate Greek deployment areas. Ben and Luke modified this deployment before the game started and established a grand battery of 80+ guns along the stream and to the left of it.

The defenders of Sarantaporo. (6mm figures by Irregular Miniatures, painted and donated by Dave W.) Most of the Turkish force is raw, fragile Redifs (hastily conscripted reserves), as indicated by the absence of flags. All my Turks are in anachronistic 1877 uniforms rather than 1912 khaki. Never mind, red fezzes look pretty.

The Greeks retaliate with some red hats of their own: two bases of elite Evzone mountain troops (right of pic) prepare to advance alongside a couple of regiments of line infantry. (Evzone figures are actually French chasseurs alpins; line inf are British WWI.)

The Turkish strongpoint on Skopia-Vigli. These two regiments are veteran Nizam regulars (hence get flags). The one in the foreground has been given VIII Corps's entire company of nine machine-guns, giving it the Devastating Volleys attribute. The hilltop regiment has the advantage of a Skirmisher base. Entrenchments and sandbag emplacement are from Irregular Miniatures. The hilltop itself is carved from ammunition packing for added authenticity.

Luke, Ben and John M opted for a three-pronged attack. On the left, John pressed up the Lazarat pass and over the high ground either side of it. Luke and Ben avoided the Turkish 'killsack' in front of Sarantaporo and Skopia Vigli, Luke marching wide around the right. This pic shows Ben's central force working its way towards Sarantaporo from the south and pushing through the mountains west of it. Meanwhile, the Greek grand battery takes fearsome toll of the Turkish redifs who are soon spent and disrupted (black and white smoke markers).

Endgame on the right. The Greeks have taken Mikrovalto, Livadero and Sarantaporo, securing a draw. Can they take either Polirabo or Skopia-Vigli for the win? Luke's right hook approaches Skopia-Vigli - but the mountainous terrain has delayed him too much and he runs out of time. Dave T's defenders stand firm in the Turkish centre!

Ben's regiments storm forward through Sarantaporo, but they can't reach Skopia-Vigli in time either. And on the left ...

Mark S's Turkish reserves arrived in time to garrison the vital road junction at Polirabo. John's infantry can't quite get there. Only Soutsos's cavalry brigade can reach it. Sabres drawn, they charge into the teeth of Turkish Mauser fire - which fails to stop them! They rout the first redif regiment, exploit onward and drive out the second regiment as well. Victory to Greece! The Bulgarians shall not have Thessaloniki!

Game 2 saw me and Bob command the Greeks against Crispin's Turks. This shot shows most of my force on the Greek left and centre (cavalry and some more inf out of shot to the left), ready to advance on Livadero (red objective marker).

I didn't tell Bob how the previous game went, but he too opted for a grand battery in the centre and a right hook to avoid the 'killsack' of combined Turkish artillery, skirmisher and MG fire.

However, he soon realised that the difficult terrain would make it hard for a wide right hook to arrive in time, so he changed his plan and converged into the killsack after all. The grand battery had done much execution by now, as had the Greek infantry's rifle fire (seen here wreathed in brown smoke showing they are Low on Ammo after a high firing roll), so the weakened defensive fire was not able to stop the Greek advance.

Still, the combination of defensive fire and difficult terrain meant that only two Greek regiments were able to assault Skopia-Vigli on the last turn. Turkish fire repelled this desperate assault. As in the previous game, it all came down to what happened at Polirabo ...

... again the Greek cavalry charged, this time in support of an infantry assault with the bayonet. However, I had not been able to suppress the defenders beforehand, so their fire was effective - our charge was repelled and the Turks hung on to Polirabo. Match drawn!


Reflections:

Too tough for the Turks? While a draw is very achievable, we found it hard to see how the Turks could win. Perhaps if the Greeks neglect to set up a grand battery initially and try to rumble their guns forward? But bar some such major error, it would be nigh impossible for the Turks to hold three objectives. Maybe they should be rewarded if, say, 4 of their 9 inf and cav units survive on-table at game end (as Crispin managed against me and Bob, a game that felt like a defeat to us even though technically it was a draw).

Variable objectives? Crispin suggested variable objectives are a good thing, not necessarily just here but in general. In particular, my scenarios for Gettysburg and Königgrätz both have variable objectives that are not determined until after deployment (and in the Gettysburg case, after the first day of battle). This is good for replay value and also for producing some fog of war, obliging players to plan for uncertainty. Maybe I'll try to do more of that in future.

The battlefield shapes the battle. Everyone remarked on the huge influence of the difficult mountainous terrain, not just in slowing movement, but also in breaking lines of sight and creating shadows below steep slopes. Thus it both hindered and helped maneuver. Crispin said that one of his biggest pleasures from our BBB games is the terrain: the complexities and idiosyncrasies of realistic battlefields generate rich tactical decisions and make each game a different and unique tactical challenge.

Free deployment vs strict historical. Following on from the point about terrain generating decisions, we talked about deployment decisions. Sometimes scenario writers allow very free deployment - any troops anywhere within a broad deployment area. Others are very prescriptive and stipulate that every unit must start exactly where it did on the day of the battle. Perhaps the ideal is somewhere in between: some historical restrictions about which corps can be in which sector, but a fair amount of latitude about how the forces in each sector can deploy. That gives players some interesting choices at the start of the game and also increases the replay value by allowing more variety of plans.

Game-themed refreshments! As it was Greeks vs Turks, what else could I do but offer my guests a large tray of tasty baklava (as if any of us needed that sugar rush on top of the stimulation of an exciting BBB battle!).


Bloody Big Balkan Battles! is available in both print and PDF from Brigade Games.

Wednesday, 4 September 2019

Beautifying bases makes a difference


I rarely paint a figure these days - I regard that as precious time that is better spent researching or translating or actually gaming - but when I used to paint my own armies, I always particularly enjoyed two stages in particular: adding faces, and painting bases. Those were what seemed to bring the troops to life for me.

A couple of years ago I ordered two ready-painted 6mm armies (complete with faces) supplied by Irregular Miniatures, which I swiftly stuck on Warbases and then fielded without further effort on their naked mdf. The armies in question were my Greeks and Serbs for the Balkan Wars of 1912-1913, which I used to help Konstantinos Travlos by playtesting some of the scenarios for his "Bloody Big Balkan Battles!" campaign book.

While this was functional enough, it didn't make for a great aesthetic effect. Last month I finally spent a happy four hours or so applying wood glue and static grass; nothing especially fancy or clever, but effective enough. Thus in a couple of short evenings I significantly improved two armies, to the point where I am keen to get them back on the table and into action again. The comparison shot below shows what a difference this small investment of time made:


Before and after:
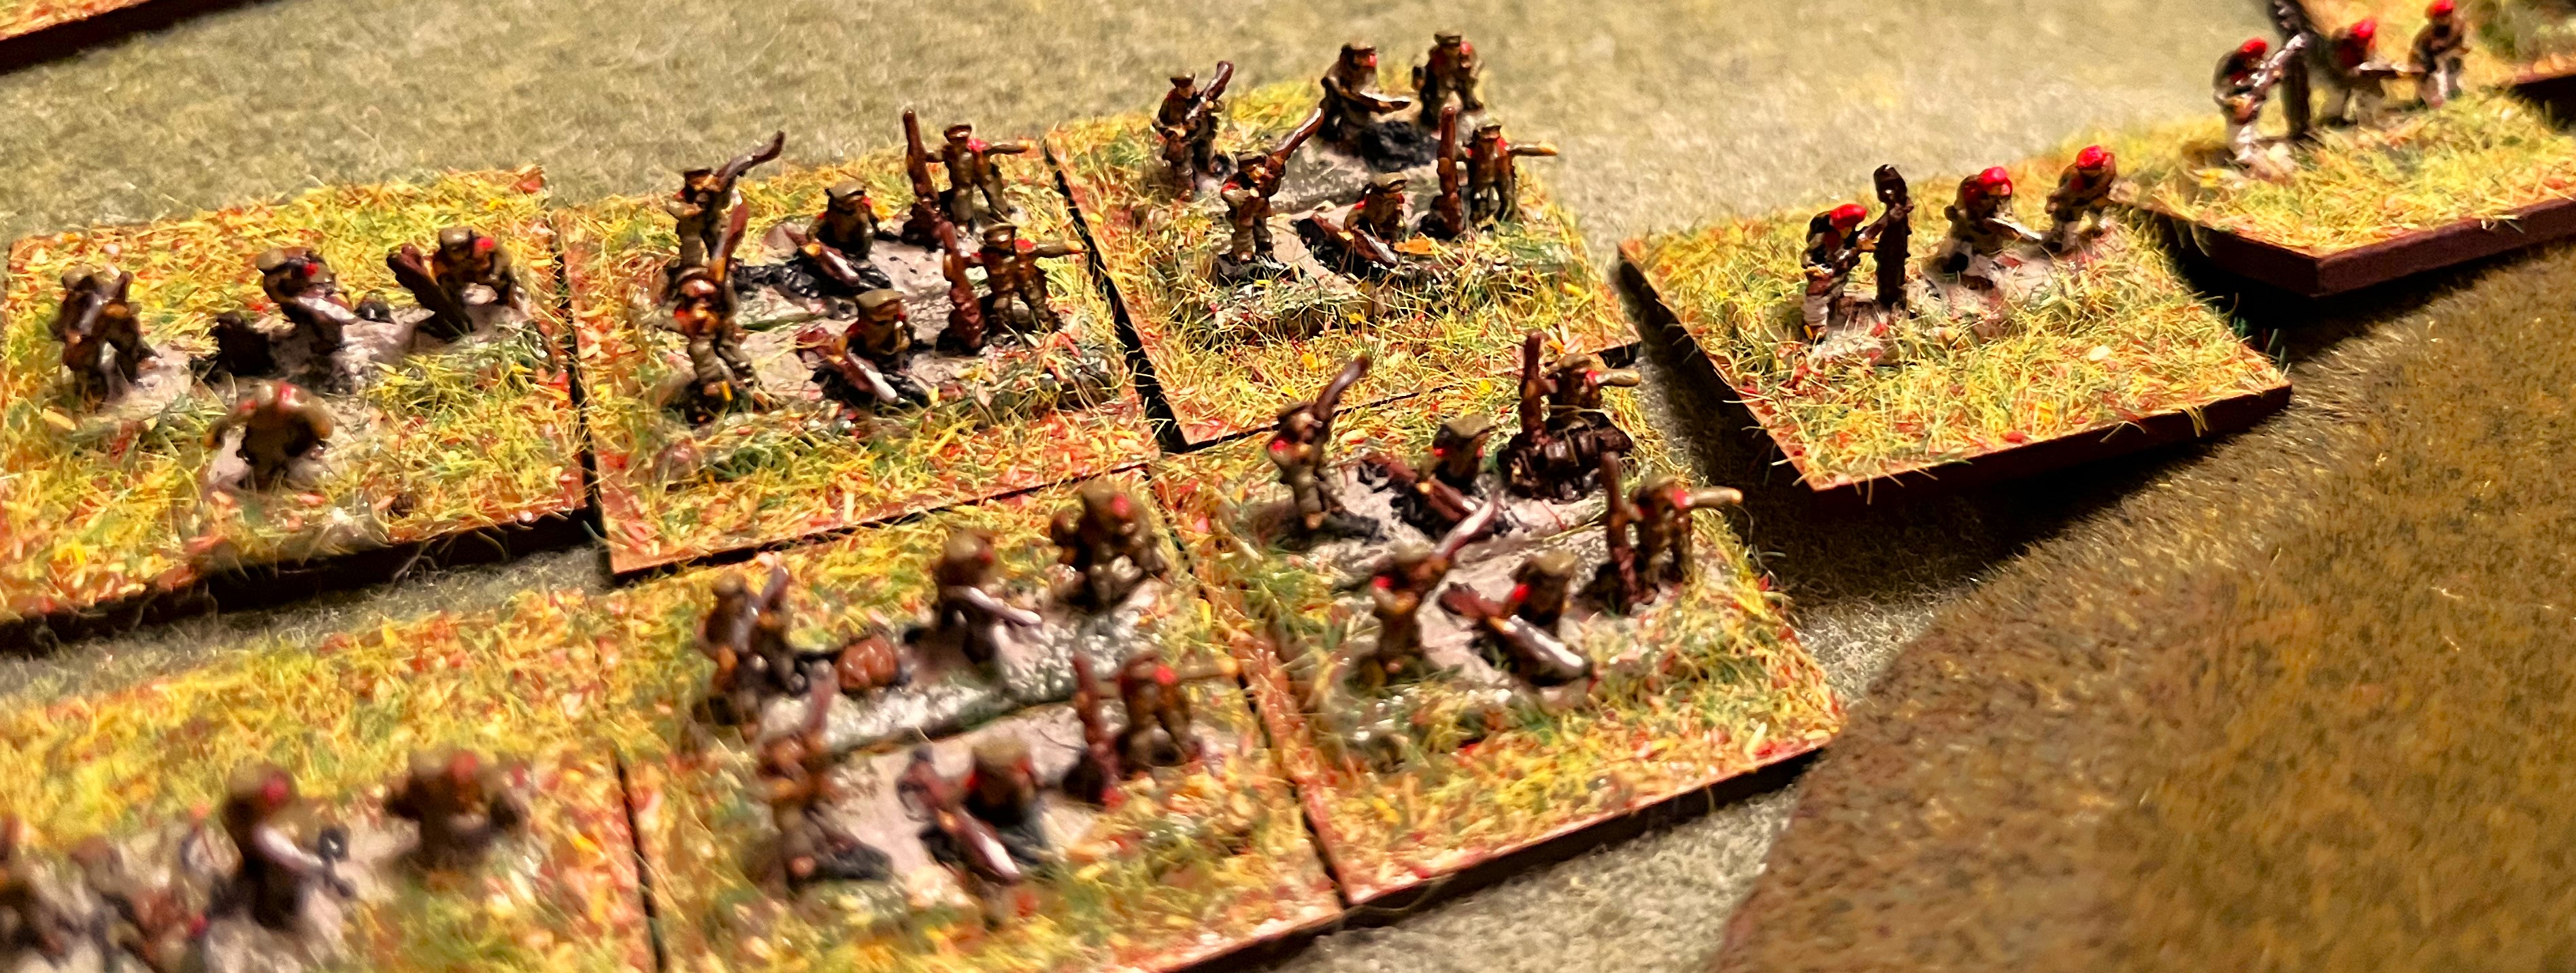
Unflocked Serbs (and Montenegrins) in action, and freshly flocked on parade.
Pics of the finished Greek and Serbian armies are on Flickr.

I'm by no means the first to make this observation but it merits repetition: especially with small scale figures like these 6mm, unsightly bases can really spoil the look, and conversely, just a little effort on beautifying bases really pays off in making armies look good - an important part of the HQGE.