Showing posts with label 1849. Show all posts

Friday, 20 February 2026

Alexander the not-so-Great at Debrecen

I think I've only written three scenarios in the last three years. They were all ACW and quite challenging to write, being complex higher-level operational games. I've been trying to get my scenario-writing mojo back and finally managed it (I hope). It turned out that nobody else had a game ready for this week and I had three days to come up with something, so I did.

The battle I chose is one that has been on my to-do list and knocking around in the back of my head for a while: Debrecen. It's from the Hungarian War of Independence, which was a big focus for me while we were preparing the scenario book we published in 2022, but which I haven't played a lot since then.

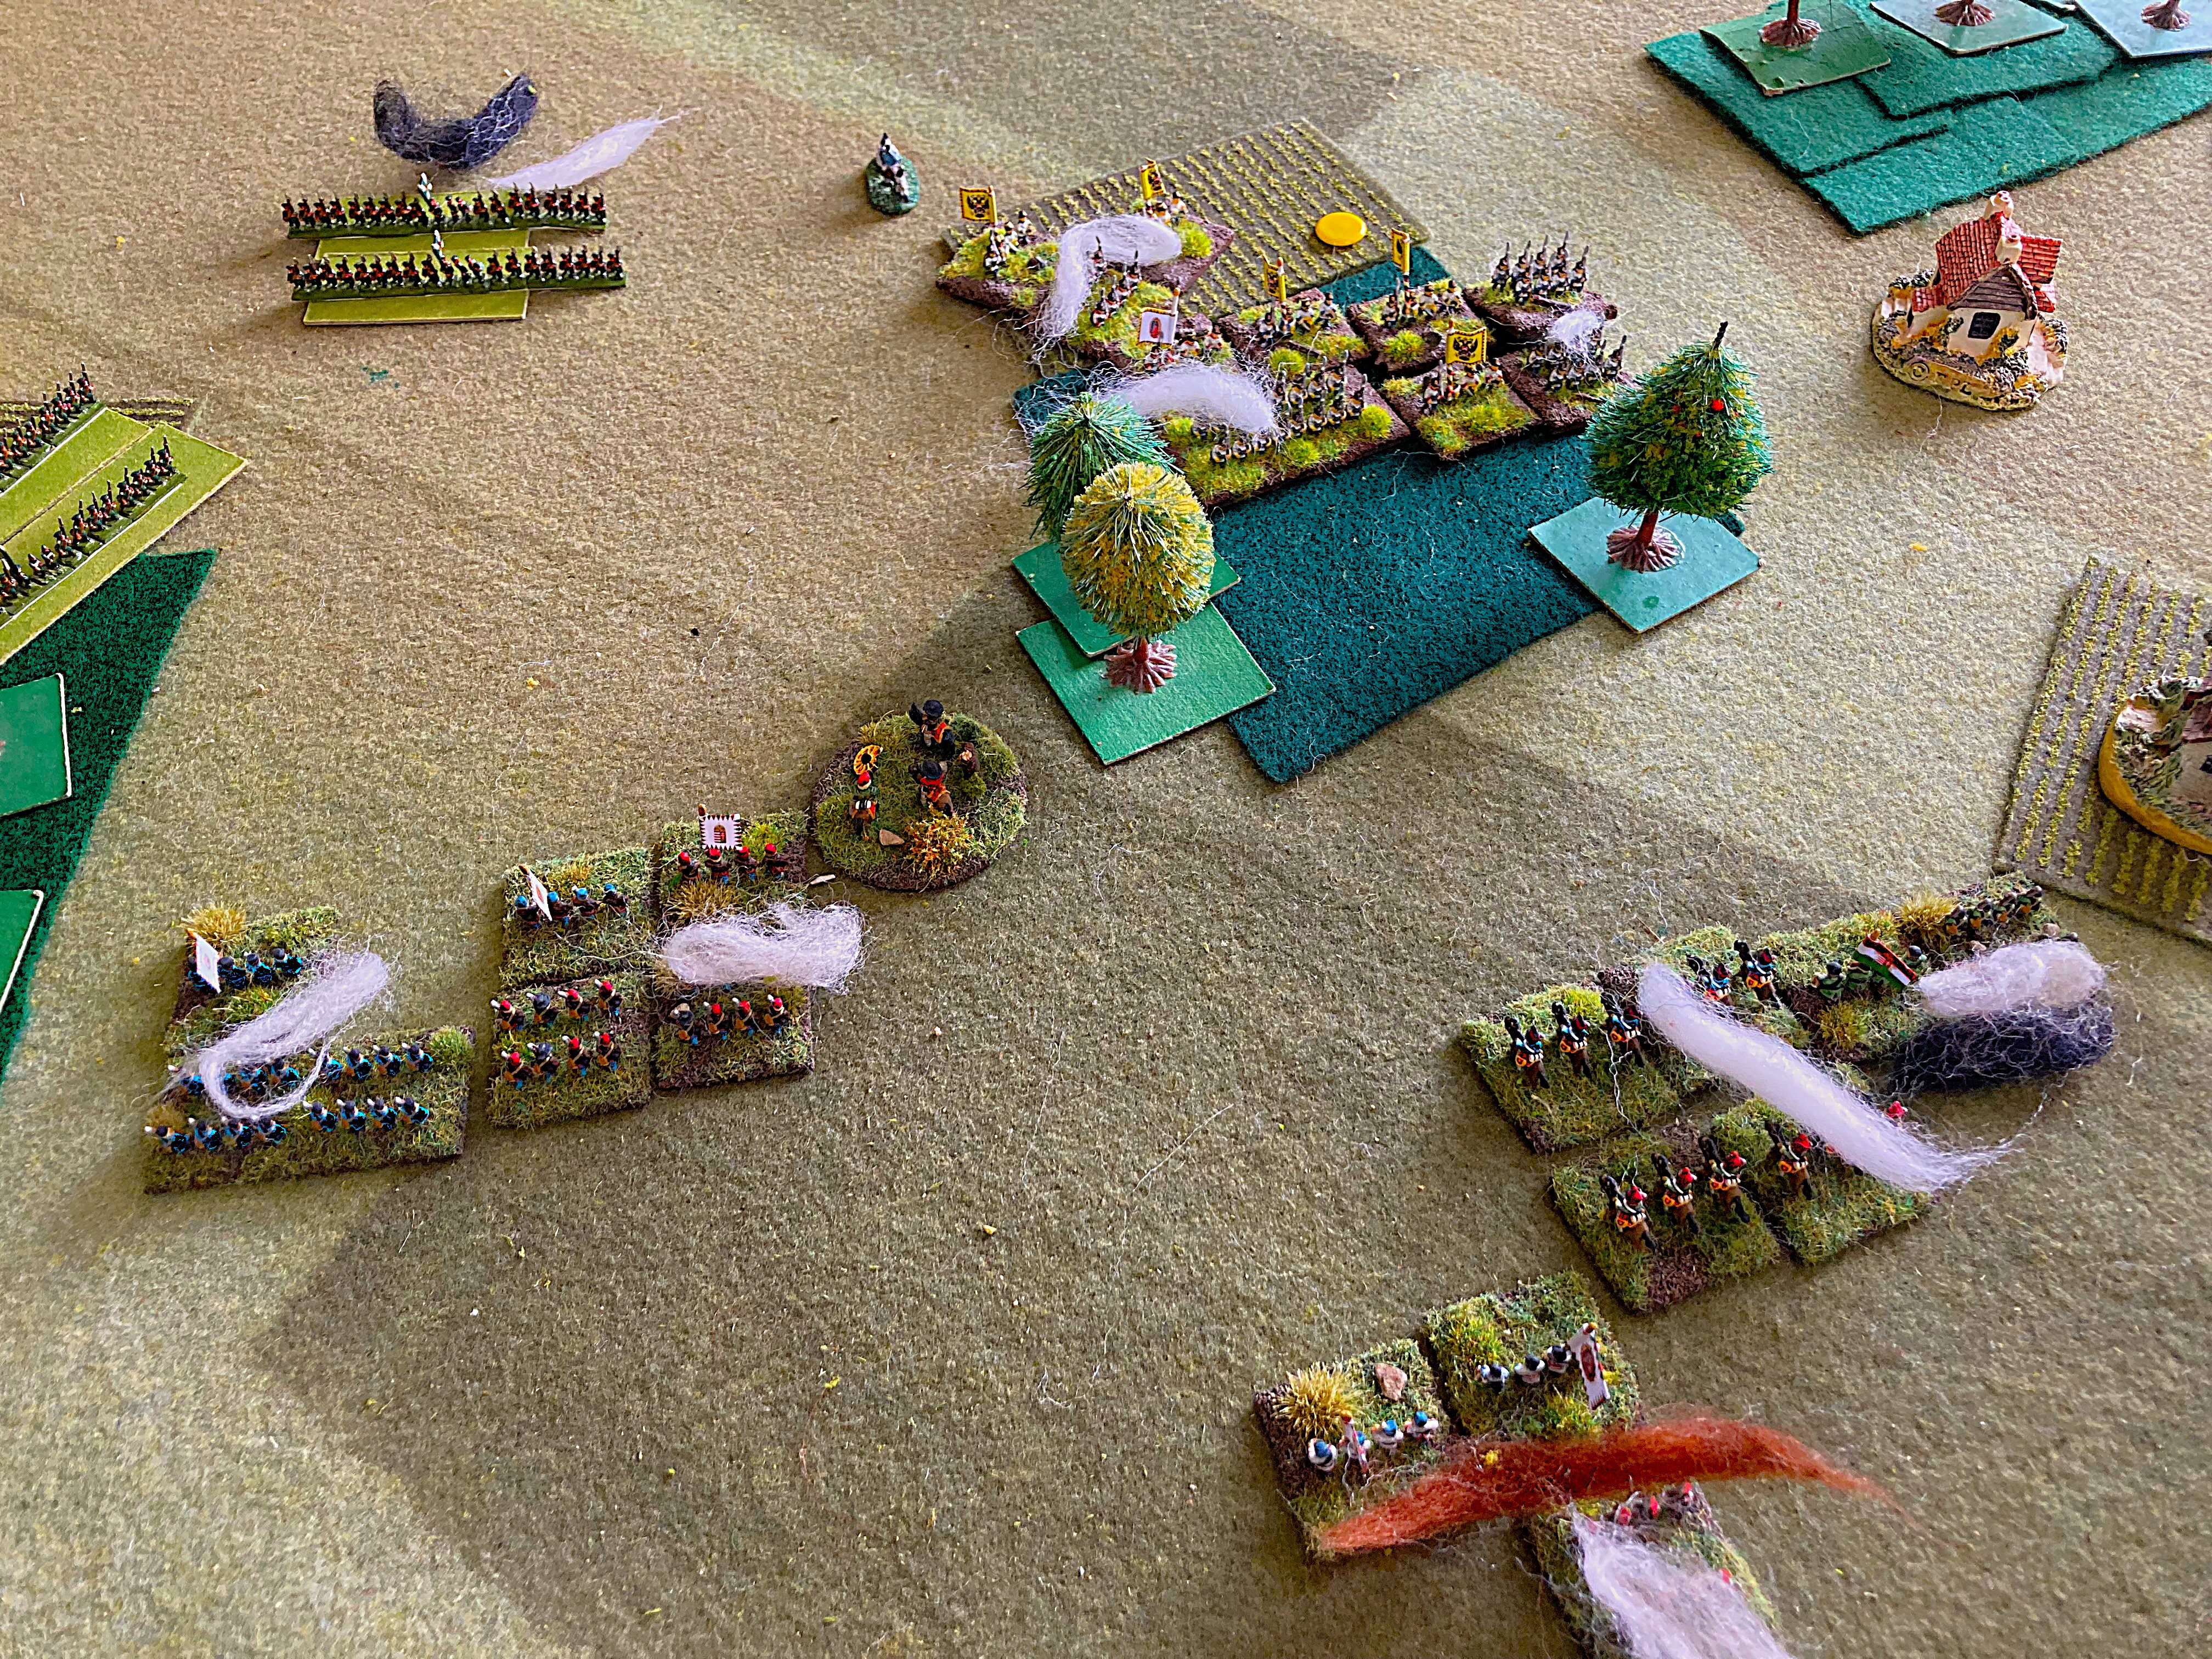
Fighting through the tall maize outside Debrecen.

The reason this battle didn't make it into the scenario book is that it was very one-sided. General József Nagysándor (whose surname literally means "Alexander the Great"), commanding the Hungarian 1st Corps, was tasked with delaying the Russian advance while the rest of General Görgei's Hungarian army was escaping southwards. The approaching Russian army under Marshal Paskevich outnumbered 1st Corps by about five to one. Nagysándor unwisely stood to fight rather longer than was prudent, so his force was overwhelmed and routed.

Nevertheless, fighting withdrawals are fundamentally interesting situations and I was intrigued to explore whether it could have gone better for the Hungarians. I put together a scenario and Dave T and I fought it out. Here's how it went in 11 photos, with some reflections at the end.

The battlefield is a compact one - only 36"x36". We're looking east towards the city of Debrecen, which is just off the top edge. The Russians march on from the bottom edge. They have to cross a big stretch of maize fields. The maize at this time of year was taller than a mounted cavalryman, a serious obstacle, so it is treated as woods. The Hungarian defensive line is behind a stream, along some low hills and vineyards on the outskirts of the city.

It's an 8-turn game. The four red counters are Objective locations. The Hungarians earn 1 VP at the end of Turn 6, and Turn 7, and Turn 8, if they hold at least 2 of those Objectives. They also earn 1 VP if at least two Russian inf or cav units are Spent or destroyed; 1 VP for getting half their artillery away; and 1 VP for getting half their inf/cav units away. They need 4 VP to draw or 5+ to win.

First big decision for the Hungarians is whether to post some troops forward in the maize to delay the Russians. Dave opted to deploy one of his infantry brigades and a battery there, as well as his cavalry.


Here come the Russians! This is Turn 2. On Turn 1, a cavalry division moved on, which has scouted the far edge of the maize (top right), obliging Dave to reveal all his troops behind the stream (they start the game hidden). Now two infantry regiments move towards the Hungarian advance guard while another two race up the road in march column.

Dave responds by attacking my lead regiment's march column in front and flank! No serious harm done - I was lucky - but the column was pushed back in disorder and delayed.

Figures are Baccus 6mm. The Hungarians are mostly proxied from the ACW range. The "Russians" today are actually my 1870 Prussians. At least they have spiked helmets and iron cross flags, so they look near enough like Russians.

Turn 3. All my four infantry regiments have shaken out into assault formations. They've driven the Hungarian speed bump back but are still struggling to get through the maize. Meanwhile, 96 guns are rumbling up the road, hoping to deploy a gun line to blast our way to Debrecen.

Unfortunately, deploying that gun line isn't straightforward. Dave's own guns blew some of mine away, then two of his brigades boldly charged. My cannister didn't deter the Hungarians and most of my guns were taken or forced to fall back.

So I brought another four regiments on! The Hungarians were now outnumbered 3:1. This is the view from the Hungarian side as their right is about to be enveloped and overwhelmed by the torrent of Russians. Nagysándor is in the foreground regretting his decision to stand and fight.

All quiet on the Hungarian left, though. Dave has chosen to hide his raw scythe-armed national guards here, which is enough to deter my cavalry (top left).

Russians are flooding across the stream and over the Hungarian right and centre now. We've just taken the hill objective, but Dave still earns the VP for holding 2+ at end of Turn 6.

Turn 7, looking across from the Russian left now. Russian cavalry have taken one road exit; Russian infantry try to capture the Hatvan Street vineyard but can't do it on Turn 7 - another VP for Dave.

Turn 8, the vineyard falls, so no Turn 8 VP. However, the Hungarians do manage to get half their troops and artillery away for 2 more VP, as a sole horse artillery battery covers their retreat.
Sum total: 4 VP, making it an honourable draw.


Reflections

The fun of one-to-one. Dave T has been a bit occasional in recent years because of his work, but happily is now a regular attender again. He's a good bloke and we've missed him, so it was good to have a game with just the two of us. Also it was just a nice change from our usual more hectic multi-player games.

The fun of Hungary 1848. This is such a characterful war, full of incident and interest. That maize field alone made this a distinctive action to fight on the tabletop. And how many 19th-century battles feature scythemen? 

More research needed. Because of time pressure, I created the scenario from just two resources (Ramming and Rüstow). I know there is more detail to be had from two others (Bánlaky and Hermann). What I produced was great as a game but I'm sure it is imperfect as a historical recreation, so I'll go over it again at more leisure.

Got my mojo back! It was great to have a tight deadline and motivation to produce a scenario quickly, and I was very pleased with the result. I need to knuckle down and create a couple more particular ACW scenarios that I've been postponing for ages. Having bashed out this one should help me get on with those as well.


This draft scenario (with all its historical imperfections) is available from the BBB io group files here.

The "Bloody Big Hungary '48 Battles!" scenario book is now available in pdf format from SkirmishCampaigns here.

Wednesday, 2 July 2025

Decisions, decisions! Players' gambles pay off at Pered.

A visit from my fellow Helion author and Hungary 1848 enthusiast, Nigel Smith (of The Honvéd War fame), provided the occasion to muster half a dozen of us for a game. Since we had the leisure of a long Sunday afternoon and a couple of the guys were going to miss the kick-off, I chose a largeish scenario that features substantial reinforcements mid-battle: Pered (whose anniversary fell the week before).

We last fought this a few times back in 2021 when we were still playtesting it for the Bloody Big Hungary '48 Battles! scenario book (see report here). It proved an ideal choice for our game.

Initially there were just four of us. Luke and Ben slotted comfortably into the role of the Hungarian revolutionaries, while Nigel opted to wield the forces of Imperial reaction. As he was relatively new to BBB, I acted as his technical advisor until Anton joined him for Day 2.

Pered is a battle fought on three days (with a few days' interlude after Day 1). As multi-day BBB battles generally do, this provided the players with important strategic decisions at different stages of the game, and produced very different phases of play.

Let me therefore offer a brief summary, followed by a more detailed photo-AAR for those who like these, then some reflections at the end.

In summary:

- Day 1 is when the Hungarian II Corps needs to drive back Herzinger's isolated and dispersed Austrian division far enough to encourage Hungarian III Corps to cross as well. Both sides conducted bloody and desperate charges and countercharges with heavy casualties. Net result was that the Hungarians didn't achieve their Day 1 goal, only taking one of the three objectives they needed.

- Day 2, both sides have important options. The Hungarians chose to convert III Corps's demonstration upriver behind the Austrian left flank into a serious crossing attempt at Sellye. The Austrians chose to gamble on bringing Perin's brigade (covering their rear off-table) south and on-table a day early, hoping that the off-table Hungarian I Corps would be too slow to exploit their absence and raid the Austrian rear. Both gambles paid off: III Cps crossed at Sellye, threatening the Austrian LOC and making space for the rest of the corps to deploy forward for Day 3; but I Cps failed to show, while Perin's grenadiers freed up all of Herzinger's division to contest the main Hungarian advance. The actual fighting on Day 2 consisted of II Cps slogging forward to take a second objective but at cost of further casualties.

- Day 3 was grand battle. Panyutin's Russian division reinforced the Austrians, who chose to form a solid line on II Corps's front, with isolated brigades guarding flank and rear. Meanwhile, all of Hungarian III Corps arrived. Luke and Ben decided to form this on their right and aim it at the hinge of the Imperial position. This looked like a good plan as they stormed into another two objective villages. However, Imperial counterattacks ejected them on the last turn, as well as recapturing one from II Corps to claim a last-gasp victory.

Now that you're oriented, here are the photos:

Sometimes troops would be issued schnapps or pálinka to fortify them before battle.
We made do with tea and coffee pre-game and saved the good stuff for after.

Initial set-up on a flat, marshy plain, north of the Danube. Ásboth's II Corps in the foreground prepares to assault the objective villages (yellow counters = Austrian-held) of Királyrév (left), Zsigárd (centre) and Pered (behind the wood, upper centre). 

How it looks from the Austrian side, with the two units of Pott's brigade holding Zsigárd and Királyrév. 

General Herzinger with the rest of his division: part of Theissing's grenadier brigade and Lederer's fearsome cuirassiers. I wish I'd planned my Austrian army better when I commissioned it. The grenadiers should have bearskins; the gunners should have broad-brimmed hats; I didn't get any grenzers or uhlans or chevaulegers ... oh well, you can get away with a lot in 6mm. Figures are proxied from various Baccus 6mm ranges.


Imperial reinforcements, from the left: C-inC General Wohlgemuth with more of Theissing's grenadiers; light cavalry; the two units of Perin's grenadier brigade, plus artillery and some rockets (the red trail); and the four mighty regiments of Panyutin's Russian 9th Division, plus guns. The 'Russians' are Prussian Landwehr figures by Heroics & Ros.

Hungarian C-in-C, General Görgei, reviews Knezics's III Corps. (Knezics gets sacked mid-game, so his corps actually gets led into battle by Leiningen.) Units with two flags and red hats are aggressive veterans: the famous 'red kepis' and the Polish Legion. The blue- and green-tunicked units are in early war national guard uniforms, which would have been replaced by standard brown honvéd tunics by the time of this battle - but they look good. Pikéty's hussars cavort at the rear.

Battle was ferocious on Day 1. The unit with black smoke (Spent), lower left, is what's left of Buttler's Hungarian division after recklessly trying to assault Királyrév across the bridge left of pic. However, the Hungarians have taken Zsigárd (red counter = Hungarian-held). Heavy casualties on both sides, including the entire cuirassier brigade.

The two sides reset for Day 2. Ásboth weights the left of his line to attack Királyrév. Herzinger braces his division to receive the Hungarian assault.

Meanwhile, behind the Austrian left, one of Knezics's brigades brings up pontoon bridges to demonstrate near Sellye. Alarmed, the Austrians call in Perin's grenadiers and dedicate three brigades to guarding objective villages in their rear: Deáki (upper left), Királyfalva (centre) and Tósnyárasd (right).

Austrian's-eye-view from behind Herzinger's line. I didn't manage to take any photos of the assault that ensued - another sanguinary one that expelled the Austrians from Királyrév with loss, but left a second II Corps brigade Spent.


Each of the three days consisted of four game turns. On Turn 8 (dusk of Day 2), the Hungarians got lucky and rolled a 6 to get Knezics's men across the river into Sellye. This had significant implications for the set-up for Day 3.

At end of Day 2, the Hungarians held two objectives - enough for a draw, needing one more for victory. Dawn on Day 3 therefore saw the Imperials commit most of the newly-arrived Russians to their line, as they needed to retake at least one objective if they were to win. Both sides formed substantial gun lines in this sector (at 18 guns per base, that's over 70 guns a side).


The Hungarians got to deploy their reinforcements second. Rather than just beefing up II Corps to try and hang on for a draw, they gambled to win. The crossing at Sellye opened up deployment space for them to the right of II Corps. They chose to commit all of Knezics's corps (now Leiningen's) there, outside the main Austrian line's left flank, and launch it at the objective villages behind the Austrian left rear.

Crunch! The Austrians had a turn to react and face left against Leiningen, who nevertheless thumped into them en masse. Although the righthand Hungarian units will bounce off Deáki (behind the wood centre right), they will smash the central Russian regiment, which reels back Spent. Meanwhile, the first Austrian attempt to retake Királyrév has been repulsed (top left) ...

... but the next one goes in, wiping out a Hungarian brigade. A Russian regiment advances towards the Hungarian gun line; Hungarian hussars behind it prepare to counterattack.

The Austrians launch a counterattack of their own against Leiningen, whose troops are driven back with heavy losses. The Austrians will advance to the edge of the wood.

This exposes them to a flank attack by Leiningen's indomitable red kepis and Poles. It is the Austrians' turn to suffer heavy losses. Not only does the Hungarian infantry take Deáki, but the hussars move north and seize Királyfalva (top right). The Hungarians hold three objectives - enough for victory. This means that on the last Imperial turn the Imperials must retake at least one to avoid defeat, or two to turn the result around.

The Imperial troops respond with alacrity and ardor (i.e., they get all their movement rolls). First the Poles are wiped out; then, assaulted on two sides, the Hungarian brigade in Deáki surrenders, leaving the red kepis to stand alone.

No better fortune for the Hungarians in Királyfalva, where the hussars are unable to stand against the Austrian infantry's assault.

The final Hungarian turn and a final charge by the red kepis. They manage to expel the Austrians from Deáki - but a few Russian boots are enough to retain possession of the village for the Imperials, and therefore to deny the Hungarians a draw and claim Imperial victory!

Reflections

The Narrative. As Bob H said on the io group after he participated in our BBB Bash Day convention a couple of weeks ago, "Every time I've played BBB I've come away with a narrative and the urge to revisit the scenario map to see if there's another way it could have played out". That absolutely applied here. As my brief summary shows, the game told a story in several chapters with dramatic twists and turns. There was no shortage of options for both sides to do things differently, and no shortage of moments where different dice could have made things turn out very differently. Eminently replayable to change the narrative!

Variable Reinforcements. Dicing to see whether reinforcements arrive is hardly an innovative game mechanism but doesn't feature in most BBB scenarios. It really helps to introduces some Clausewitzian gambles into this one and make it a nail-biter.

Councils of War. As noted above, the two Night Intervals in the battle produce major resets and present the players with major strategic decisions. As I was reffing rather than playing, I was able to stand back and enjoy the two command teams each debating their options and making their plans. My main demand of a game is that it should present players with plenty of interesting choices and challenging decisions. Pered definitely delivered.

The Social. As is traditional after our weekend games, four of us went for a post-battle curry. In its way, this was just as much fun as the game. Good times with good friends are precious.

First Significant Military Use of Railways? Panyutin's Russian division was only able to save the day because it had been shipped across Galicia by train before marching to the battlefield. People like to point to the Second Italian War of Independence as the first massive military use of railways, but perhaps the Imperials can claim the first significant one? The railway in Hungary also featured in various ways during the war, ferrying troops and supplies and even, on one occasion, sending a locomotive to raise the alarm and call for reinforcements. A nice footnote in history on which to end this post.


The Pered scenario is one of sixteen in the "Bloody Big Hungary '48 Battles!" campaign book for BBB.

Tuesday, 10 October 2023

The Value of Playing "What-Ifs"

I don't usually do "what-ifs". By that I mean, my staple fare is straight recreations of historical battles, in which forces have to start deployed broadly where they did historically and both sides are trying to achieve the objectives they were aiming for historically. The purpose of these (apart from providing a few hours' entertainment, obviously) is to let players explore various plans as different possible routes to victory - cracking tactical puzzles, if you like.

Occasionally, though, in the historical scenarios I write I might provide for some not too remote alternative possibility, such as the Russians at the Alma choosing to present a flank threat rather than a direct blocking position.

This week we explored a quite radical alternative. The scenario in question is the Second Battle of Vác (1849) from the Hungarian War of Independence, as found in the "Bloody Big Hungary '48 Battles!" scenario book. The standard historical scenario is an unusual and interesting one to start with, as it is an initial advance guard action followed by a fighting withdrawal. I did the straight refight back in January 2022 (in-depth report with lots of gorgeous photos here). The scenario provides an option that assumes the Hungarian C-in-C, Görgei, chooses the bold course of attempting to break through the Russian army that has intercepted him, rather than withdrawing to find another way around it as he did historically.

The following photos show how that went, with some reflections at the end.

'Der Donau ist blau.' The Hungarians start with an advance guard and two corps on table with a third due later. Here Leiningen's III Cps conducts its forced march along the Danube ...

... preceded by Nagysándor's I Cps, seen here marching through the town of Vác. Behind it is the railway embankment for Hungary's very own HS2. (At this time, the Hungarian rail network consisted of one line from Budapest southeast to Szolnok and another from Budapest north to Vác. The leg to Pressburg aka Bratislava was under construction.) Out of shot to the right is the Hungarian advance guard. This spent the first four turns driving back the Russian advance guard and making space for I Cps to push down the road to the south.

OMG that's a lot of Russians ... after the advance guard action, the scenario provides a Night Interval, a lull for everyone to have a rest after their forced marching and deploy for the next day's withdrawal or breakthrough attempt, as applicable. The Russians can deploy anywhere >6" from the Hungarians and south of the Csörög stream. Here you see about 50,000 men poised to crush the reckless Magyars, with a formidable gun line already deployed lower right. Only two of the units in shot are Hungarian: one in the bottom left corner and the other above that in the edge of the vineyard.

Plan view gives the full picture. The Hungarians are trying to push from left to bottom right. Victory depends on how wide a gap they can maintain at game end, as measured by how many of the four white counters they hold (the two bridges and the village of Sződ at lower right, and the vineyard above that). Russians are all in the upper right quarter. Hungarian I and III Cps are facing them, lower right. Pöltenberg's VII Cps has arrived around Vác (left centre) and will try to put pressure on the Russian right flank.

Most of I and III Cps immediately falls back to try to defend the line of the railway embankment, apart from one brigade that advances to occupy Sződ. VII Cps pushes forward on the Hungarian left. 

A view from behind the railway embankment before the Russian hordes arrive there.

Turn 7 of 12. The solitary forward Hungarian brigade in Sződ has been demolished. Initial Russian assault on the Hungarian extreme right has been rebuffed, but worse is about to come.

Russian highwater mark - eight regiments assault the embankment.

Plan view, end of Turn 7 or 8. Russians continue to press forward bottom right but have been repulsed in the centre. Centre of pic, two Hungarian brigades and some hussars have crossed the embankment to attack the right flank of the massed Russian assault. Upper left, VII Cps and the Russians facing it find themselves in a stand-off.

Close-up of the Hungarian counterattack against the repulsed Russians. Their blurred images betray just how shaken those Russians are.

Unusually, we ended the game a couple of turns early because several of the guys had to leave a bit early. The rest of us could have finished it but we were happy to call it a draw. The Russian hordes had suffered enough infantry losses that they would have struggled to press another assault home, but they probably had enough guns to prevent the Hungarian counter-attack from carrying too far either.


The Hungarian army's historical withdrawal was seriously impeded by a column of thousands of refugees following it. Here we see the refugee column milling around and blocking movement through Vác. Even if the Hungarian army itself does break through the Russians, this tail of unfortunates is likely to be left at the mercy of Russian Cossacks and Caucasus Muslim cavalry.

Reflections:

An Illuminating 'What-If'. Görgei is widely regarded as Hungary's best general of the war. I think it fair to say that this what-if game confirmed the wisdom of his actual decision in this case. His historical withdrawal took his army into hilly country that aided rearguard actions to delay pursuit and made it difficult for the Russians to bring their superior numbers to bear; he was able to send his baggage and ammunition trains away first and give them a head start; the Russians were unsure about exactly where he was heading; his army escaped virtually intact (and then dodged behind and through the Russians, leading them on a merry dance for weeks). By contrast, our attempt to break through showed that it would have been pretty disastrous. Even if victorious, his army would have been mauled; it would then have had to march across open country, harassed by Russian light cavalry and Cossacks; it would probably have lost much of its supply train. No doubt I could have worked that out as the likely result beforehand, just as Görgei evidently did, but it was still highly instructive to see it play out on the table.

Shock and Awe: it's one thing to read (or indeed write) a scenario, and another to see the troops deployed. Once the Russian army appeared in full force after the Night Interval, we were all a bit gobsmacked - especially those of us on the Hungarian side tasked with fending it off. It goes to show that small figures can still make a big impression. 6mm is good for mass effect.

Quality vs Quantity: Görgei's army was a pretty well oiled machine at this stage, whereas the Russian one was a mighty but unsubtle steamroller. The Russians had also been ravaged by cholera, which killed more Russians than the Hungarians did in this war. The scenario therefore gives the Hungarians a quality advantage overall. By the time we stopped, this seemed to be on the way to compensating for Russian numerical superiority.

What is a 'What-If'? It's a bit of a stretch to claim this post as a genuine 'Reflection on Wargaming'. Really it's one battle report that prompted one particular thought that I've tried to expand on. I suppose I can expand on it a bit more by saying every game is a what-if to some degree (unless it is not a game at all but simply an exercise in pushing figures along courses utterly pre-determined by history, without any player choices or chance to deviate from that history). My typical historical recreations start the 'what-if' around the point at which historical opposing armies deployed for a historical battle, with their historical objectives and orders of battle, and explore how different plans might have worked out. The alternative version of Vác that I've reported here just changes the Hungarian C-in-C's aim - the mission, if you like - and explores a more radical strategic plan rather than grand tactical ones. A next step away from the historical event would be to have those same armies meet on a different battlefield, perhaps imagining a breakthrough attempt at a slightly different location; the step after that, to put historical opponents on some imaginary battlefield, tournament-style; beyond that, we get into competition-style games pitting ahistorical opponents against each other in battles that never happened, on terrain that didn't exist, in wars that were never fought. Which step of that progression we prefer depends on which 'what-if' question we want answered.

And finally: Thanks to Crispin for creating the custom battlemat, painting the armies and laying on the game.

For the full list of my (mostly rather more extensive and considered) 'Reflections on Wargaming' essays, see here.

Friday, 14 April 2023

"Hungary 1849" reviewed: "a cracking read"!

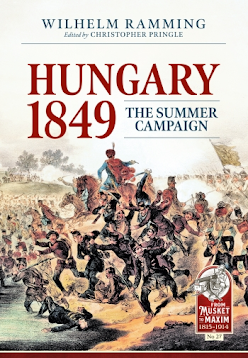
I was delighted today to see the first review of my recently published book, "Hungary 1849: The Summer Campaign". I am obliged to Colin Ashton for reviewing it on his "Carryings On Up The Dale" blog, here.

Colin gave a very generous review to the previous volume, "Hungary 1848: The Winter Campaign". This time he is equally kind. Phrases like "Chris Pringle has again done a superb job" and "a sympathetic translation, forensically researched and presented, and a cracking read to boot!" are calculated to warm any author's heart. (As is giving it five stars on Amazon - thanks, Colin.)

I hope I might have a chance at some wargame show or other such event to express my appreciation to Colin in person, but for now let me publicly thank him here.

Saturday, 21 January 2023

Newly published: "Hungary 1849: The Summer Campaign"

I am delighted to report that my latest book was published this week. "Hungary 1849: The Summer Campaign" is the sequel to "Hungary 1848: The Winter Campaign". Together, these two volumes provide a complete and very detailed military history of this epic year-long struggle.


The previous volume has had some very kind reviews, e.g.:

- by "Balkan Dave" Watson

- by Colin "Carryings on up the dale" Ashton

- by Mike Huston on "Hamsterwrangler"

and others. I hope "Hungary 1849" will be equally well received.

As this blog is mainly aimed at wargamers, let me remind you that, if you want to wargame the battles described in these books, scenarios for 16 of the most important ones are to be found in my BBB campaign supplement for this war, "Bloody Big Hungary '48 Battles!".


Friday, 23 September 2022

"Bloody Big HUNGARY '48 Battles!" - scenario book published!

If you pay any attention to this blog at all, you'll already know that my major obsession for the past several years has been the Hungarian War of Independence of 1848-1849. Search by the labels "Hungary", "1848" or "1849" and you will find dozens of battle reports, etc, relating to it.


 Now I'm adding one more such post to mark the publication of the resulting campaign scenario book, "Bloody Big HUNGARY '48 Battles!". To quote the back cover blurb:

"The Hungarian War of Independence was the largest and longest of the conflicts arising from Europe’s Year of Revolution in 1848. It lasted a year, saw half a million troops engaged, and generated dozens of significant engagements on three major fronts. Dedicated research now makes this neglected conflict accessible to wargamers. BBHB lets you refight sixteen of the most important battles of the war! Each scenario gives you:
• A clear and accurate historical situation
• New decisions for both sides every turn
• Simple but ingenious victory conditions
• A battle you can fight to the finish in an evening
• A great game that will ebb and flow to the end!
Most also offer scenario options to explore ‘what-ifs’ and increase replay value. Campaign options allow players to link battles so that each has consequences for the next. BBHB is a scenario book for use with the “Bloody Big Battles” wargames rules (BBB)."

I should also note that, like the previous BBB scenario book ("Bloody Big Battles in INDIA!"), the maps are in full colour throughout (as are the flags, illustrations, etc.).

The battles in the book are:

  • Pákozd
  • Schwechat
  • Hermannstadt
  • Kápolna
  • Tápió-Bicske
  • Isaszeg
  • Nagy-Salló
  • First Battle of Komárom
  • Pered
  • Second Battle of Komárom
  • Third Battle of Komárom
  • Hegyes
  • Second Battle of Vác
  • Sepsi-Szt.-György
  • Szőreg
  • Temesvár

The book is available from the usual retailers who carry BBB. I believe the main ones are listed on the SkirmishCampaigns website here. (Before you ask - sorry, no pdf edition at this time, just the lavish full-colour print.)

If you're interested not only in wargaming the battles but also in learning more about this large, protracted and fascinating conflict, I commend to you my translations of the two Austrian semi-official histories covering the two halves of the war:

"Hungary 1848: The Winter Campaign" (published 2021)

"Hungary 1849: The Summer Campaign" (forthcoming 2022)

Update 19 November 2022: Nice review of BBHB in Vae Victis, "really well done".


Tuesday, 5 April 2022

Hungary 1848 #15: Temesvár - an army disintegrates

 And lo, 'tis done: the final battle in our 15-month, 15-game Hungary 1848 campaign has been fought.

The climactic battle of Temesvár (nowadays Timisoara in western Romania) is notable in a couple of ways. It is the decisive final battle of the war and also the largest, pitting about 30,000 Austrian and Russian attackers against 60,000 Hungarians. It is remarkable in that it was decided entirely by the artillery and cavalry, with the infantry scarcely firing a shot and certainly not crossing bayonets. This is because many of the Hungarian infantry were unarmed raw recruits, and all of them were exhausted and demoralised by constant retreating. The action opened with the usual artillery duel along the whole front; there was considerable manoeuvre by both sides, including several Hungarian spoiling attacks, one even by infantry; but ultimately the Hungarian artillery ammunition ran out, some raw troops on the right broke under fire, and this turned into an infectious rout covered by the hussars. Allied casualties were light, Hungarian losses devastating (mostly prisoners or just 'missing'), and most of the Hungarian formations were left worthless for combat.

Translating such a battle to the wargames table is a challenge. Do you script in the infectious rout? Do you make the Hungarian infantry unfit for combat from the start? Or do you give them a real chance of inflicting a bloody nose and pause for thought on the allies as their commander, General Bem, intended?

I opted to downgrade the Hungarian infantry's combat abilities significantly but not cripplingly. Any 'Aggressive' ratings were stripped away (even from the fabled Polish Legion). Even the best units were made Fragile, penalising them in both assault and movement. Most were rated XF - 'Extra Fragile' - making them much more likely to run away once disrupted. Many were rated as Ragged Volleys to reflect their armament with scythes rather than muskets.

The result was an excellent game, but one that only partly matched the history. Much of the Hungarian force was routed but, as the Austrian commander, I made some poor decisions that earned me a very bloody nose indeed. If you're interested in the detailed action, read the photo-AAR below. If not, you might want to skip to the end to see my reflections on the game. 

The battlefield is bisected by the marshy Nyárad stream, the line the Hungarian C-in-C Bem tried to defend. Off-table to the SE (top edge) is the Austrian-held fortress of Temesvár, whose epic siege is about to end. The yellow patches indicate that much of the battlefield was covered by tall maize, limiting visibility. White counters are the objectives: at top, the bridges leading to Temesvár; below them, an inn on each road, roughly representing the Hungarians holding a line; bottom right, two villages on the allied line of communications; and on the left, the stone bridge on the highway leading to Arad and the possibility of Bem linking up there with Hungary's other remaining field army under Görgei. All the Hungarians are on top half of the field already. Allied advance guard is lower right of picture. Main body arrives bottom right Turn 1; others bottom left T1 or 2 and (out of view) left edge T 2 or 3.

Ramberg's III Cps on the start line on the Austrian right.

The "10,000 scythe-armed national guards" around the Szt András inn on the Hungarian right wing
(in reality probably the several battalions of unarmed recruits belonging to X Corps). These are the troops who historically sparked the Hungarian rout. 

 Lázár's IX Corps in the Hungarian centre (including the Polish Legion) links up with Kmety's division which is about to cross the Nyárad on their left.

End of Turn 2. All of the Austrian left wing, Liechtenstein's IV Corps, has arrived. His grenadiers march onto the heights above Szt András (bottom right) while Brigade Siegenthal pushes forward on the left (bottom left). The Hungarians brace themselves to receive the attack. Note the wagon and white counter next to the line of poplars: this represents the Hungarian baggage train trying to escape to Arad. In the unlikely event that the wagon manages to cross the Nyárad and survive, the Austrians will lose a victory point. Meanwhile, top right, Panyutin's Russians are visible advancing to the Nyárad.

End of Turn 2 on the allied right: a formidable Hungarian force under Lázár and Kmety is debouching across the Nyárad (top right) to threaten the allied line of communications. The Italian Legion has been left to hold the Besenyő inn (top left). Wallmoden's cavalry (bottom right) have given ground while the infantry march up and the guns deploy along the road. Top centre, I pushed Brigade Dossen forward to delay the Hungarian advance. This was careless - what I thought was a unit of hapless raw recruits was actually the honvéds of Division Jászvitz with their dangerous jaegers. I would soon rue this move.

End of Turn 3 and things are looking good on my (allied) left. Siegenthal has stormed across the Nyárad (left of photo), rendering a raw Hungarian unit Spent (blue counter) and disrupting the honvéd line behind it (yellow counters = disruption). Herzinger's grenadiers press forward to the Nyárad (bottom centre). That unit in line in the maize field, upper right, is a bold Russian jaeger regiment.

 Also T3:  more Russians push forward in my centre to threaten the Besenyő inn (left of picture). The corps heavy artillery has deployed to soften up the Italian Legion defending the inn. (Green counters = Devastating 12-pdrs.) However, the Hungarians have rumbled up two artillery units - 48 guns - to canister Dossen and drive home just how serious an error I had made.

End of Turn 4 and on my left, it just gets better and better. Siegenthal has inflicted another blue Spent counter on a second raw Hungarian unit. Herzinger's grenadiers are across the stream and ready to join in the fun. The Russians in the centre are fending off weak Hungarian counterattacks and preparing for their own assault on the Besenyő inn (top right).

But on my right, the tragic waste of Brigade Dossen is complete and they are back in the box. On the positive side, the Hungarian flanking move has barely moved at all, as my horse artillery is compounding their poor movement rolls to delay them.

Not satisfied with squandering Brigade Dossen, on Turn 5 I committed an even worse sin on my left. Siegenthal's success caused a rush of blood to my head. I launched both my potent grenadier brigades against a honvéd line that looked thin but was armed with jaegers and two artillery units. The jaegers repelled one brigade with loss and the combined canister fire wiped out the other entirely - note the embarrassing gap in my ranks in front of my general by the road. Stupid, stupid, stupid.

Turn 5 was quite exciting on the right too, but better for me. My 12-pdrs began tearing holes in the Italian Legion (top left). The Hungarian left-flanking force tried to assault Wallmoden's cavalry division. The cavalry prudently evaded to safety; their guns smashed back the infantry attacking them frontally, then managed to survive the hussars' charge as well. My gallant horse artillery can be seen heading for the line of poplars, leaving a cluster of yellow-countered Disrupted Hungarians behind them. One of the yellow counters belongs to my Brigade Wolf (white coats, top centre, near their general). Undeterred by the loss of their sister Brigade Dossen, I sent these on another spoiling attack, this time with greater success.
 

Turn 6: the good news on my left is that the Hungarian jaegers are low on ammo (black counter). The bad news is that they've used it all to wipe out the rest of my grenadiers (big gap lower centre). Brigade Siegenthal by the Arad bridge looks very lonely. With hussars creeping towards my left flank (top left and top centre-left), barring the way to Arad just got much harder. 

Progress on my right, though. With only two turns remaining and quite a lot of my troops in the way, the Hungarians at top right are probably still too far away to threaten my line of communications seriously. Two Russian regiments have ejected the Italian Legion from the Besenyő inn (top left) and captured their guns. Thus, the three objectives in this picture are looking secure; I need one more for a draw and two to win. Also, notice the single-base cavalry unit on the bridge at centre left, Brigade Veigl. This will shortly have an important part to play.

End of Turn 7. The disaster on my left gets worse. Now Siegenthal's brigade has gone as well - those whitecoats you see on the bridge to Arad are the victorious honvéds, closely followed by their baggage train. All is not lost, though: the Russian jaegers have driven back their foes in the centre, then wheeled left to storm the Szt András inn - my fourth objective - while Haynau himself canters forward with Veigl's cavalry (centre-right), seeking to dash across a bridge for that fifth objective to claim a win.

Turn 7 on the right: the Hungarians have the consolation of overrunning my horse artillery but are forced to accept that my line of communications is out of reach and secure.

End of Turn 8, the final turn of the game. The Hungarian baggage crosses the Arad bridge, costing me an objective! Drama around the Szt András inn as well, which desperate scythemen briefly recaptured, only to be definitively expelled again by the Russian jaegers. I have four minus one = three objectives, one short of a draw ...

... and it is the commander-in-chief who achieves it, just as Haynau did historically when, as dusk fell, he led a mad dash through the debris of the Hungarian army to the gates of the fortress to relieve the siege!

Reflections


As a game, it was great: plenty of options and decisions and movement for both sides, see-saw action, and a rollicking finish with objectives changing hands repeatedly and the result in the balance right to the end. Don't change the scenario!

Yet, as history, it felt strangely unsatisfactory. It reproduced the Hungarian thrust around the allied left, and recreating Haynau's mad dash at the end was wonderful. But the intense infantry fights we had just didn't happen in the real thing, and it's hard to know how (or whether) to prevent that. I think the answer is to offer a scenario option that ups the Austrian victory target while (probably) handicapping the Hungarian infantry further, making them either more shaky under fire, or even worse in close combat, or even more reluctant to move, or a combination of the above - all depending on a random die roll. This could be a good way to represent the imponderables of army morale and come closer to the historical event for players who want that and who don't mind if the game is a bit more one-sided as a battle.

Good to field Crispin's new Hungarian army for the first time. That now makes three of us at OWS with full armies for both sides for the '48. I doubt any clubs outside Hungary could match that.

Exotic troop types enhance a game. Those extra-fragile scythemen may not have had much combat value, but they provided plenty of entertainment value. The baggage train was a nice addition too.

You can't legislate for stupidity. I am still shaking my head at my own recklessness in squandering not one but three brigades with such rash advances. I bet my opponents Mark and Crispin couldn't believe their luck. I don't know how I got away with a draw despite that. Maybe my judicious use of Haynau and Veigl's cavalry made up for it.

We completed a campaign! Inevitably, travels and lockdowns and other real-life inconveniences meant it took a little longer than planned and some of the core group missed out on some of the games. Because of these interruptions, we also lost some of the feeling of campaign continuity, though we managed to retain the overall 'story arc'. Even so, one campaign battle a month (and some of them being fought more than once) for fifteen months is a respectable achievement. Generals and formations acquired personality and character in our eyes over time and became old friends. After spending so long immersed in the drama of the '48, we have absorbed its history. No doubt we will visit it again, but for now: Mission Accomplished!

 
Next mission: compile all the campaign scenarios together, write an introduction, design a cover and publish "Bloody Big Hungary 1848 Battles!". Actually, that work is almost all done already in anticipation of this last game. I should therefore be able to get BBHB published very soon. Start saving your forint/Schilling!


PS - if these reports have got you interested in the Hungarian War of Independence, you might want to take a look at my books on it from Helion: