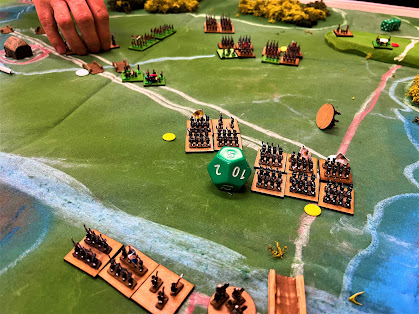
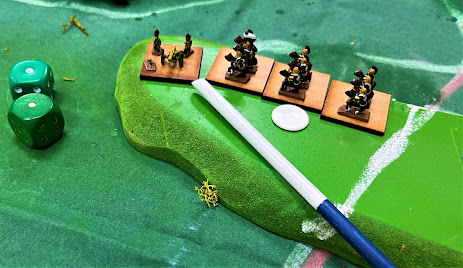
Tuesday 21 February 2023

Zulus! - Nyezane

Our Bruce at OWS is a multi-talented chap: a fine painter, diligent researcher, judicious game designer. He brought all these skills together to entertain us with a scenario for one of the less well known (to me, at least, though I realise it is familiar to others) actions of the Zulu War: Nyezane.

The game used Bruce's beautiful 28mm figures with the "Bloody Big Battles!" rules. Each figure was one base in BBB terms. The unusual combo of 28mm and BBB worked perfectly well both gamewise and visually. I was on the British side and our thin red line looked suitably thin!

I took 13 photos which I've annotated below. If you want to skip the photos there are some reflections at the foot of the post as usual. First, here's a synopsis of the game.

This was a rare BBB game in that it used hidden movement for the Zulus. Speaking for the British, this definitely helped create an atmosphere and caused us some nerves. To win, we couldn't just sit back and blast away - we had to advance and capture a kraal and/or the Wombane hilltop. The trouble with advancing was that, while our small units' firepower was potent enough to have a reasonable chance of repelling a frontal assault, there was a high chance of a failed movement roll causing some dislocation of our formation and presenting an exposed flank to the hidden Zulu 'horns' we knew would be probing around each side.

I did try to push up on the right towards Wombane, while Crispin commanded our left protecting our wagons. However, by the time I got close to the peak, the Zulu right was closing on our wagon guard, our artillery in the centre was looking vulnerable, and I was worried that advancing any further would just see me swarmed and massacred.

I therefore fell back towards the left to close up our line. Zulus did duly swarm towards us on all fronts. Our firepower took its traditional toll on their ranks, but they overran our gun troop in the centre and our colonial volunteer unit on the left. It was touch and go for a while. Amazingly, it was the raw and fragile Natal Native Contingent, holding out heroically in the bush on our left, whose stand held up a lot of Mark's Zulus for a long time and probably saved the wagons. On our right, John had the consolation of overrunning my Naval Brigade, but too late to matter. Meanwhile, we had caused such carnage to the Zulu army that we had earned the casualty victory point we needed to turn defeat into a draw.


 The tiny 2-figure British units of Colonel Pearson's column queue up along the trail. The wagons are static and the porters are just for decoration.

The valiant Natal Native Contingent who belied their poor write-up in the history books and their "Passive, Raw, Fragile" rating to perform gallantly.

 Another shot of Pearson's column gives a better view of the guns, the rocket troop, and the Gatling bringing up the rear.

What lies ahead of Pearson's column: the trail leads up over a knoll (white objective marker) and onto the higher ground beyond, passing between the kraal and the green peak of Wombane at top of pic. Green scatter marks two bush-filled ravines that could conceal a Zulu ambush. A large patch of light bush is on the British left.

 Captain Hart's little scouting party discovers the Zulu ambush. This brief and bloody encounter will be Hart's first and last contribution to the action.

The British advance takes shape. The Zulu ambush party has retreated behind Wombane. No others have been spotted yet. NNC and Colonial Volunteers cover our left, artillery takes position in the centre, while our most potent infantry push up on the right with the idea of taking Wombane.

Masses of Zulus lurk off-table. In the foreground here are the two 3-base "Sharpshooter" units. Their fire managed the sum total of one Disruption result all game (though one of these units did participate in taking the British guns).

 Five of the 10 Zulu 7-base impis. As John said, "Zulus, sir - sevens of 'em!"

View of the British advance from the Zulu side of the table before the Zulu onrush begins.

Now nine of the 10 Zulu impis are revealed. Left of pic, one clashes with the NNC. Another has overrun the Colonial Volunteers. The British artillery pins down the Zulu centre ...

... while the Zulu left charges, only to be repelled by intense British rifle fire.

Action followed thick and fast so there were a few turns with no photos. This shows the situation almost at the end of the game. On the left, the British line has creaked but managed to keep the Zulus at bay and saved the wagons. The Gatling has been removed as it jammed permanently after its first (very effective) shot. The guns in the centre were overrun and the knoll lost. Bottom right, the Naval Brigade had moved to fire at the knoll, trusting that the spent Zulu impi to their right would not be able to rally and charge their flank - but it did.

Zulu view of the last turn, showing how the massed impis have straggled and been broken up by difficult terrain and British fire.

Reflections

28mm figures! Not a scale I touch much, and not a scale that gets used much for BBB. But it worked seamlessly with the rules, even with round bases. Furthermore, it was a visual treat. Perhaps for more conventional battles it would look a little odd to have units of 28s wandering around almost at bayonet point and would not give the massed battle effect you really want for ACW, FPW etc. But for this Zulu War game it looked just fine.

Hidden movement and fog of war. There are pros and cons to hidden movement. The map movement does entail a certain amount of faff. We Brit players had to wander off around the hall or talk amongst ourselves while secret movement was being plotted and resolved. But on the plus side, (a) it is obviously more realistic and (b) it did add to the feel of the game to wonder where the masses of Zulus could be hiding and when we might be pounced on from any direction. Though since Bruce has gone to the trouble of painting up all these beautiful figures, it would have been nice to see more of them on the table.

Victory conditions: Bruce said he'd played it solo and managed a British win, but he didn't have to contend with hidden movement. For us Brit players it felt as though you would have to take a big gamble and get pretty lucky to take the necessary objectives and fend off the Zulu hordes without being flanked and swarmed. But it's tricky to write victory conditions that will encourage both sides to attack (as they did). We've offered Bruce some suggestions.

Generals are useful and the Zulus didn't have any. As Mark remarked, this made it difficult for them to coordinate attacks and take advantage of their numbers. One Zulu impi marched into a bush-filled ravine and never made it out the other side before the game ended. But that's OK. As Bruce said, the Zulu command structure wasn't on top form in this action.

Bags of flavour. The asymmetry of forces made for a good game, as it always does. It was fun to have such colourful units on the table: Gatlings, rockets, Naval Brigade, Colonial Volunteers ... and the Zulus weren't just a homogeneous mob either, as they had their Sharpshooters and units of different quality.

Corners of history. Nyezane isn't particularly obscure but it was obscure enough for me. And Bruce is talking about following it up with another Zulu game, but this time set in the Second Zulu Civil War in 1856 - the battle of Ndondakusuka. I wasn't aware they'd had one civil war, never mind two!

Thursday 16 February 2023

Board Game Geek rates BBB 8.7 out of 10

Board Game Geek is an online resource with more than 2,000,000 registered users that reviews and rates games of all kinds, including wargames. This is a serious site, so I am gratified to report that "Bloody Big Battles!" is listed on BGG with a current rating of 8.7. (The four scenario books are listed as well under Expansions but people don't seem to have discovered them to rate.) Just for context, this is what BGG's rating guidelines suggest 8 or 9 should mean:

  • 9 - Excellent game. Always want to play it.
  • 8 - Very good game. I like to play. Probably I'll suggest it and will never turn down a game.


Slight disclaimer: it's not a huge number of responses (25 at time of posting), and eight of these followed me mentioning BGG on the BBB group, so there's a degree of self-selection from among BBB's fan base. But it was 8.3 even before that, and any game has its fans. The fact that people are willing to make the effort to register on BGG and share their opinions tells us something.

The respondents' comments are illuminating as to why they rate BBB so highly. It's not everyone's cup of tea - some players prefer a lower-level game with more tactical detail, some don't share BBB's focus on historical refights, etc - but those who like it seem to love it. I'm happy that it is giving so many people the kind of game they want.

Tuesday 14 February 2023

Peninsular punch-up: Tudela (1808)

I know very little about Napoleon's invasion of Spain in 1808 and don't remember ever hearing of Tudela before. (A search of TMP to see how often others have gamed it found just one report of it being fought on a 12'x7.5' table over a weekend of  'two solid days of gaming', a commitment of time and space that is both metaphorically and physically beyond the reach of most of us!) This was a decent-sized clash of 35,000 French on their way to Madrid attacking 45,000 Spanish trying to defend a river line. The Spanish forces are divided, in or arriving at two towns, Tudela and Cascante, that anchor the ends of the line. They need to move towards each other and fill the gap. Meanwhile Marshal Lannes has seen the opportunity to defeat the Spanish in detail by pouncing on one Spanish force while fending off the other.

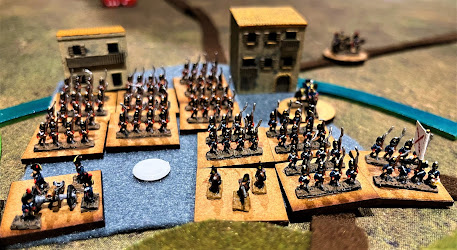
Looking south from the French table edge. Spanish-held Tudela left centre and Cascante top right corner, with the Rio Quieles running between them. White counters indicate the seven hilltop and village or town objectives. The French must take four for a draw and five to win.

The Spanish garrison of Tudela. Figures by Baccus, buildings by Leven, all from Mark's collection. (Come on, Mark - spend a day listening to Test Match Special and flocking your bases!)

Four of us fought this at Mark's house in two and a half hours. It was so intense and absorbing, I didn't take any photos during the actual game, but I can give a brief synopsis and some reflections.

The French right (Mark) and Spanish left (Dave) start further apart, arrive gradually and, in the Spanish case, are not allowed to move initially. The action therefore kicked off on the French left, commanded by me, facing Crispin's Spanish. He pushed north onto the heights to delay me as well as marching troops west to fill the gap in the Spanish centre. I soon kicked him off the Cerro de Barbara above Tudela, then shifted my weight right to push across the Rio Quieles.

Over the next few turns, the quality of the French army told. Mark advanced rapidly, seized two objective villages, and got a dragoon brigade across the river in the centre. Meanwhile I drove the Spanish off the nearest height west of Tudela, isolating a Spanish division on the further one.

So many of the poor Spanish units were now spent or destroyed that Crispin was reeling. We were confident of smashing the isolated ones in the centre to take that objective, and perhaps even storm Tudela, for a more than sufficient victory. A counter-attack by Dave retook one of the villages, though, making things a little more difficult. In classic BBB fashion, then, several objectives were in play on the final turn, with all three results very much possible.

Dave sent a cavalry raid to seize another village, but this was repulsed by French artillery. Mark stormed Urzante, which changed hands yet again. My assault on Tudela was repelled by the Spanish guns. Could I take the central height? The cavalry let us down (my cuirassiers still rallying from a previous charge, the dragoons failing to move at all), so my infantry went in unsupported, pushing the Spanish back but not enough to claim the hill.

The result? An honorable and very satisfying draw. A big thank you to Mark for designing a great scenario and laying on such an exciting game.


Reflections

It felt Napoleonic. As with our Borodino game over Christmas, I enjoyed the feeling of making grand tactical decisions, shifting whole divisions to move the point of attack.

Ideal as a four-hander! The battle divides naturally into two halves so we players could pair off.

History in action. I knew nothing about Tudela. Now I am quite well acquainted with it. A week later, Napoleon was in Madrid.

Player morale: for the last few turns, as one Spanish milita unit after another disintegrated and fled to hide among the olive groves, Crispin was obviously feeling more and more beleaguered. He took it in good spirit, but it was quite amusing to watch. Anyway, his tenacious defence was justly rewarded in the end.

Movement makes the game. Both sides had to manoeuvre, there was plenty of space to do so, the terrain was just complex enough to make decisions interesting. Arrival of reinforcements contributed to the changing situation and the need to manoeuvre.

Super good fun! A fast-moving battle, plenty of ebb and flow (Urzante changing hands three times), nice mix of troops, well-designed victory conditions that produced an exciting finish.


Thursday 9 February 2023

In memoriam Geoff Coe: Ostroleka (1831)

Back in 2015, not long after BBB was first published, I somehow came into email contact with a chap called Geoff Coe. I never met or spoke with Geoff, so I only knew him through our email exchanges and his prolific postings on certain wargames sites, especially the Lead Adventure Forum. His nom de guerre on LAF was 'Shipka', a reference to the battles for the Shipka Pass in Bulgaria during the Russo-Turkish War of 1877-1878. This was a sign of the passion Geoff shared with me for the more obscure corners of C19 military history. Geoff carried his enthusiasm to the extent of actually commissioning figure ranges to fill these historical gaps. As Helen ('The Grey Heron') said in her tribute to Geoff on LAF, he particularly patronised Steve Barber Models, creating ranges for the Greek Wars of Independence, SE Asia, Hungarian Revolution, Italian Wars of Independence, etc.

The specific corner that Geoff and I found ourselves together in was the Polish 'November Uprising' of 1830-1831. As my post from 2015 records, he got in touch to urge me to create a scenario for one of the major battles of that conflict, Ostroleka. Encouraged by his infectious enthusiasm, I did so, but never got round to playing it (and I don't think Geoff did either), and it has sat in the BBB group files ever since.

This month, our man Crispin decided to roll this scenario out for a club night at OWS. On the face of it, it's not an entirely promising situation for an interesting game, as all the action is channelled through a single bridge, which obviously limits the number of different possible plans. The battle starts with the Poles holding a bridgehead across the River Narew at Ostroleka. The Russians have to force their way across, then capture some objectives beyond it, while Polish reinforcements turn up from various directions to contest these.

The bridgehead fight was surprisingly protracted, to-and-fro, intricate, tense and absorbing. The Polish 3rd Division put up gallant resistance and repulsed several Russian assaults. Not until Turn 5 - halfway through the game - could we Russians get two divisions across, drive back the defenders, and claim the first objective. This was concerning because the scenario specified that only one unit per turn could cross the half-demolished bridge, so we were anxious that we might not get enough troops into action soon enough to reach the other objectives.

Meanwhile, Polish reinforcements had arrived and they launched a massed counter-attack. This bounced off, though the raw scythe-armed militia reaped a goodly number of Russian guardsmen before they were spent. Not bad for a 'no-shot weapon'.

The third act of the game was swift, dramatic and glorious. On Turn 7, we committed General Nostitz's 1st Guard Light Cavalry Brigade as our one unit to cross the bridge that turn. In a smart parade column, with their 36" road move, the cavalry dashed across the bridge and up the road to where a Polish battery guarded the hill objective a mile from Ostroleka, wheeled off the road and attacked the Polish guns, still in march column. This move could be either audacious or suicidal, depending on the Polish cannister fire. Phil's dice had given him a lot of 6's so far, but chose that moment to roll double 1 - a total miss - and another 1 in the ensuing assault. The guns evaporated (we interpreted that to mean they never actually stuck around to fight but just limbered up and legged it), the objective was taken, and at that point the Polish players not unreasonably threw in the towel.

A few captioned photos show the action in a little more detail. Scroll past these if you want to get straight to my reflections below.

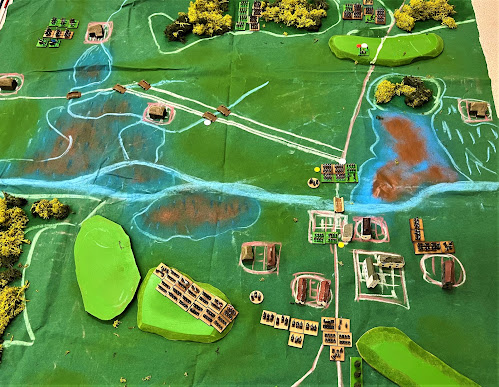
 The battlefield. Russians attack from bottom right against the Ostroleka bridgehead across the marshy Narew. The causeway road (double line) runs diagonally across centre of pic. Polish reinforcements lurk in the forests top of pic. Another Crispin battlemat.

 Pretty in pink: Crispin's Polish Legion, actually painted up for the Hungarian War of Independence of 1848-1849, but no doubt a few of those committed revolutionaries were also at Ostroleka 18 years earlier. Apologies for the blurry photo. Hmm - is that flag upside-down??

 The first Russian assault goes in on Turn 1. The green bases are the only Poles in shot, the rest are Russians. There were a lot of Russians - half of them never managed to get across the bridge and into action.

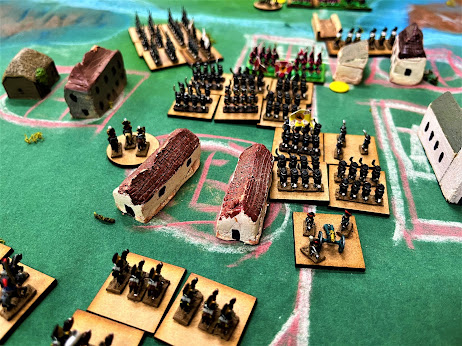
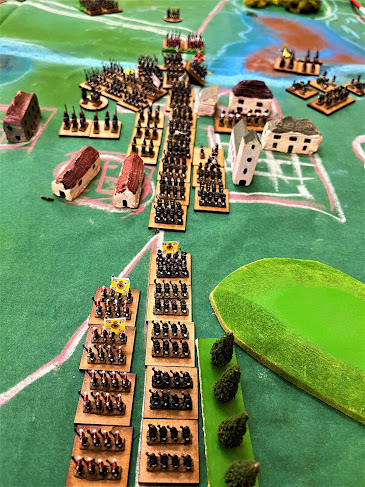
Anyone know the Russian for 'traffic jam'? Capturing Ostroleka itself was the easy bit. Establishing a foothold across the bridge when it was guarded by a large unit of hardcore Polish veterans was harder.

 Turn 5 and we finally capture the road junction objective. The overturned base is the Polish C-in-C, General Skrzynecki, 'bumped' when our assault drove his troops back. Top of pic, Polish reinforcements form up for counterattack behind their freshly deployed guns.

 'Game over, man!' Guard cavalry on parade scorns ineffectual Polish cannister, forces Polish battery to skedaddle, and seizes the second objective required for Russian victory.

Reflections

'Take the bridge': in general I'm not a fan of such apparently one-dimensional scenarios. As it turned out, though, while there wasn't much choice about 'where', both sides have a few different options about 'how' to tackle the bridgehead fight. Especially with the modified objectives (see below), the Polish defenders have some decisions to make about how far forward to defend and for how long, etc. It could have more replay value than we thought at first.

Different terrain, different geometry, different decisions. As well as the semi-demolished bridge providing focus for the fight and forcing the Russians to think about which order to send troops across it, the scenario had another unusual terrain feature: an embanked road providing combat advantage and blocking line of sight. This gave players some interesting decisions about how best to exploit/negate the resulting geometry of the battlefield.

Phased objectives: the victory conditions in the scenario weren't quite right. Having played it, it now looks inevitable that the Russians will eventually take at least the one objective they need for a draw, hence the Poles can't win. To correct this, we'll make that first one time-limited, so the Poles get rewarded if they can fend off the Russians long enough. We'll add another time-limited objective in Ostroleka itself.

Characterful units: it seems as though every wargamer loves gallant Poles! And Crispin's specially painted troops in their pink czapkas looked very smart. Also, everyone on both sides cheered when the scythe-armed militia gave such good account of themselves. Such units add important richness to a game.

Rest in peace, Geoff Coe. For all his passion for the period and efforts to create figures and terrain for neglected wars, Geoff's posts never seemed to mention games, so I do not know whether he actually wargamed much or even at all. If he did, his playing days are over, as I believe he passed away in July 2021. His contributions to the hobby - both physical (the figures) and in morale terms (his enthusiasm) - were significant and our community was the richer for his efforts. I hope our game of one of Geoff's favourite battles can serve as a small tribute to him. 


Saturday 4 February 2023

BBB Bash Day IV - Leeds, 1 July 2023

BBB BASH DAY IS BACK! 

The fourth Bloody Big Battles* BASH DAY will be held in Leeds on Saturday, 1 July. This is deliberately planned to be in conjunction with the Joy of Six** show run by Baccus in Sheffield on Sunday, 2 July. (Our thanks to Peter at Baccus for his kind blessing for this plan, and to Leeds Wargames Club*** for making their fine premises available.)

The format is entirely participation games based on historical battles and using the Bloody Big Battles (BBB) rules. For the best chance of playing the game that interests you most, please sign up in advance. However, we will do our best to accommodate walk-in participants on the day. For an idea of what to expect, see reports of Bash Day I, Bash Day II and Bash Day III.

Games offered will include Napoleonic, American Civil War, Franco-Prussian War, Sikh Wars, and other C18 or C19 conflicts. The intention is that players should be able to play an entire game in the morning and/or another entire game in the afternoon. A post-battle team curry is also on the agenda. I will try to keep the list here up to date. Planned games [updated per 15 May 2023] include:

- Napoleonic (Aspern-Essling and another 1813/1814 battle TBC)

- Second Sikh War (Gujrat)

- American Civil War (2nd Manassas and Chancellorsville)

- Austro-Prussian War (Kissingen - Bavarians vs Prussians)

- Franco-Prussian War (Sedan)

- Zulu War (Nyezane or Isandhlwana)

- and maybe a BBB Q&A/discussion session over lunch.

Invitations have been sent to our existing list of potential gamemasters, but we welcome proposals from others interested in running games at Bash Day IV.

Go on, treat yourself to a wargaming weekend in Yorkshire - come to BBB Bash Day IV and Joy of Six on 1-2 July!

Colin & Chris

Bleeding Big Bash Day Team

Contact us Colin on:

bbb.bashday@gmail.com

or by PM on Facebook, write a message on the bloody big battles io group (see below) or put a comment on this BBB or Colin the wargamer blog.


Eye Candy

Here are some pictures taken at previous bash days and of other BBB games. Thanks to Matt Bradley, Crispin Matson, Alan Millicheap, Chris Pringle and Colin Wilcock for their kind permission to use these.


Links:


*Bloody Big Battles

http://bloodybigbattles.blogspot.com/

https://groups.io/g/bloodybigbattles


**Joy of Six announcement

https://www.baccus6mm.com/news/09-01-2023/TheJoyofSix2023/


***Leeds Wargames Club

https://leedswargamesclub.com/

https://www.facebook.com/LeedsWargamesClub/


OWS website

https://www.oxfordwargamessociety.org.uk/


Practical information:

Venue address

Leeds Wargames Club - Hicks Hall, 60 Bankfield Terrace, Burley, Leeds LS4 2JR


Timings

Date – 1st  July 2023 - 09.00 - 17.00


Parking

It’s a residential area, so free, but there’s a lot of housing, so expect to spend a few minutes finding a space and walking to the club.


Tea & coffee will be provided but please bring your own lunch.


Other details will be added in due course – watch this space!