Showing posts with label campaign. Show all posts

Tuesday, 5 April 2022

Hungary 1848 #15: Temesvár - an army disintegrates

 And lo, 'tis done: the final battle in our 15-month, 15-game Hungary 1848 campaign has been fought.

The climactic battle of Temesvár (nowadays Timisoara in western Romania) is notable in a couple of ways. It is the decisive final battle of the war and also the largest, pitting about 30,000 Austrian and Russian attackers against 60,000 Hungarians. It is remarkable in that it was decided entirely by the artillery and cavalry, with the infantry scarcely firing a shot and certainly not crossing bayonets. This is because many of the Hungarian infantry were unarmed raw recruits, and all of them were exhausted and demoralised by constant retreating. The action opened with the usual artillery duel along the whole front; there was considerable manoeuvre by both sides, including several Hungarian spoiling attacks, one even by infantry; but ultimately the Hungarian artillery ammunition ran out, some raw troops on the right broke under fire, and this turned into an infectious rout covered by the hussars. Allied casualties were light, Hungarian losses devastating (mostly prisoners or just 'missing'), and most of the Hungarian formations were left worthless for combat.

Translating such a battle to the wargames table is a challenge. Do you script in the infectious rout? Do you make the Hungarian infantry unfit for combat from the start? Or do you give them a real chance of inflicting a bloody nose and pause for thought on the allies as their commander, General Bem, intended?

I opted to downgrade the Hungarian infantry's combat abilities significantly but not cripplingly. Any 'Aggressive' ratings were stripped away (even from the fabled Polish Legion). Even the best units were made Fragile, penalising them in both assault and movement. Most were rated XF - 'Extra Fragile' - making them much more likely to run away once disrupted. Many were rated as Ragged Volleys to reflect their armament with scythes rather than muskets.

The result was an excellent game, but one that only partly matched the history. Much of the Hungarian force was routed but, as the Austrian commander, I made some poor decisions that earned me a very bloody nose indeed. If you're interested in the detailed action, read the photo-AAR below. If not, you might want to skip to the end to see my reflections on the game. 

The battlefield is bisected by the marshy Nyárad stream, the line the Hungarian C-in-C Bem tried to defend. Off-table to the SE (top edge) is the Austrian-held fortress of Temesvár, whose epic siege is about to end. The yellow patches indicate that much of the battlefield was covered by tall maize, limiting visibility. White counters are the objectives: at top, the bridges leading to Temesvár; below them, an inn on each road, roughly representing the Hungarians holding a line; bottom right, two villages on the allied line of communications; and on the left, the stone bridge on the highway leading to Arad and the possibility of Bem linking up there with Hungary's other remaining field army under Görgei. All the Hungarians are on top half of the field already. Allied advance guard is lower right of picture. Main body arrives bottom right Turn 1; others bottom left T1 or 2 and (out of view) left edge T 2 or 3.

Ramberg's III Cps on the start line on the Austrian right.

The "10,000 scythe-armed national guards" around the Szt András inn on the Hungarian right wing
(in reality probably the several battalions of unarmed recruits belonging to X Corps). These are the troops who historically sparked the Hungarian rout. 

 Lázár's IX Corps in the Hungarian centre (including the Polish Legion) links up with Kmety's division which is about to cross the Nyárad on their left.

End of Turn 2. All of the Austrian left wing, Liechtenstein's IV Corps, has arrived. His grenadiers march onto the heights above Szt András (bottom right) while Brigade Siegenthal pushes forward on the left (bottom left). The Hungarians brace themselves to receive the attack. Note the wagon and white counter next to the line of poplars: this represents the Hungarian baggage train trying to escape to Arad. In the unlikely event that the wagon manages to cross the Nyárad and survive, the Austrians will lose a victory point. Meanwhile, top right, Panyutin's Russians are visible advancing to the Nyárad.

End of Turn 2 on the allied right: a formidable Hungarian force under Lázár and Kmety is debouching across the Nyárad (top right) to threaten the allied line of communications. The Italian Legion has been left to hold the Besenyő inn (top left). Wallmoden's cavalry (bottom right) have given ground while the infantry march up and the guns deploy along the road. Top centre, I pushed Brigade Dossen forward to delay the Hungarian advance. This was careless - what I thought was a unit of hapless raw recruits was actually the honvéds of Division Jászvitz with their dangerous jaegers. I would soon rue this move.

End of Turn 3 and things are looking good on my (allied) left. Siegenthal has stormed across the Nyárad (left of photo), rendering a raw Hungarian unit Spent (blue counter) and disrupting the honvéd line behind it (yellow counters = disruption). Herzinger's grenadiers press forward to the Nyárad (bottom centre). That unit in line in the maize field, upper right, is a bold Russian jaeger regiment.

 Also T3:  more Russians push forward in my centre to threaten the Besenyő inn (left of picture). The corps heavy artillery has deployed to soften up the Italian Legion defending the inn. (Green counters = Devastating 12-pdrs.) However, the Hungarians have rumbled up two artillery units - 48 guns - to canister Dossen and drive home just how serious an error I had made.

End of Turn 4 and on my left, it just gets better and better. Siegenthal has inflicted another blue Spent counter on a second raw Hungarian unit. Herzinger's grenadiers are across the stream and ready to join in the fun. The Russians in the centre are fending off weak Hungarian counterattacks and preparing for their own assault on the Besenyő inn (top right).

But on my right, the tragic waste of Brigade Dossen is complete and they are back in the box. On the positive side, the Hungarian flanking move has barely moved at all, as my horse artillery is compounding their poor movement rolls to delay them.

Not satisfied with squandering Brigade Dossen, on Turn 5 I committed an even worse sin on my left. Siegenthal's success caused a rush of blood to my head. I launched both my potent grenadier brigades against a honvéd line that looked thin but was armed with jaegers and two artillery units. The jaegers repelled one brigade with loss and the combined canister fire wiped out the other entirely - note the embarrassing gap in my ranks in front of my general by the road. Stupid, stupid, stupid.

Turn 5 was quite exciting on the right too, but better for me. My 12-pdrs began tearing holes in the Italian Legion (top left). The Hungarian left-flanking force tried to assault Wallmoden's cavalry division. The cavalry prudently evaded to safety; their guns smashed back the infantry attacking them frontally, then managed to survive the hussars' charge as well. My gallant horse artillery can be seen heading for the line of poplars, leaving a cluster of yellow-countered Disrupted Hungarians behind them. One of the yellow counters belongs to my Brigade Wolf (white coats, top centre, near their general). Undeterred by the loss of their sister Brigade Dossen, I sent these on another spoiling attack, this time with greater success.
 

Turn 6: the good news on my left is that the Hungarian jaegers are low on ammo (black counter). The bad news is that they've used it all to wipe out the rest of my grenadiers (big gap lower centre). Brigade Siegenthal by the Arad bridge looks very lonely. With hussars creeping towards my left flank (top left and top centre-left), barring the way to Arad just got much harder. 

Progress on my right, though. With only two turns remaining and quite a lot of my troops in the way, the Hungarians at top right are probably still too far away to threaten my line of communications seriously. Two Russian regiments have ejected the Italian Legion from the Besenyő inn (top left) and captured their guns. Thus, the three objectives in this picture are looking secure; I need one more for a draw and two to win. Also, notice the single-base cavalry unit on the bridge at centre left, Brigade Veigl. This will shortly have an important part to play.

End of Turn 7. The disaster on my left gets worse. Now Siegenthal's brigade has gone as well - those whitecoats you see on the bridge to Arad are the victorious honvéds, closely followed by their baggage train. All is not lost, though: the Russian jaegers have driven back their foes in the centre, then wheeled left to storm the Szt András inn - my fourth objective - while Haynau himself canters forward with Veigl's cavalry (centre-right), seeking to dash across a bridge for that fifth objective to claim a win.

Turn 7 on the right: the Hungarians have the consolation of overrunning my horse artillery but are forced to accept that my line of communications is out of reach and secure.

End of Turn 8, the final turn of the game. The Hungarian baggage crosses the Arad bridge, costing me an objective! Drama around the Szt András inn as well, which desperate scythemen briefly recaptured, only to be definitively expelled again by the Russian jaegers. I have four minus one = three objectives, one short of a draw ...

... and it is the commander-in-chief who achieves it, just as Haynau did historically when, as dusk fell, he led a mad dash through the debris of the Hungarian army to the gates of the fortress to relieve the siege!

Reflections


As a game, it was great: plenty of options and decisions and movement for both sides, see-saw action, and a rollicking finish with objectives changing hands repeatedly and the result in the balance right to the end. Don't change the scenario!

Yet, as history, it felt strangely unsatisfactory. It reproduced the Hungarian thrust around the allied left, and recreating Haynau's mad dash at the end was wonderful. But the intense infantry fights we had just didn't happen in the real thing, and it's hard to know how (or whether) to prevent that. I think the answer is to offer a scenario option that ups the Austrian victory target while (probably) handicapping the Hungarian infantry further, making them either more shaky under fire, or even worse in close combat, or even more reluctant to move, or a combination of the above - all depending on a random die roll. This could be a good way to represent the imponderables of army morale and come closer to the historical event for players who want that and who don't mind if the game is a bit more one-sided as a battle.

Good to field Crispin's new Hungarian army for the first time. That now makes three of us at OWS with full armies for both sides for the '48. I doubt any clubs outside Hungary could match that.

Exotic troop types enhance a game. Those extra-fragile scythemen may not have had much combat value, but they provided plenty of entertainment value. The baggage train was a nice addition too.

You can't legislate for stupidity. I am still shaking my head at my own recklessness in squandering not one but three brigades with such rash advances. I bet my opponents Mark and Crispin couldn't believe their luck. I don't know how I got away with a draw despite that. Maybe my judicious use of Haynau and Veigl's cavalry made up for it.

We completed a campaign! Inevitably, travels and lockdowns and other real-life inconveniences meant it took a little longer than planned and some of the core group missed out on some of the games. Because of these interruptions, we also lost some of the feeling of campaign continuity, though we managed to retain the overall 'story arc'. Even so, one campaign battle a month (and some of them being fought more than once) for fifteen months is a respectable achievement. Generals and formations acquired personality and character in our eyes over time and became old friends. After spending so long immersed in the drama of the '48, we have absorbed its history. No doubt we will visit it again, but for now: Mission Accomplished!

 
Next mission: compile all the campaign scenarios together, write an introduction, design a cover and publish "Bloody Big Hungary 1848 Battles!". Actually, that work is almost all done already in anticipation of this last game. I should therefore be able to get BBHB published very soon. Start saving your forint/Schilling!


PS - if these reports have got you interested in the Hungarian War of Independence, you might want to take a look at my books on it from Helion:


Hungary 1848 #14: Szőreg

We arrived at the penultimate clash in our year-long Hungary 1848 campaign: Szőreg.

The historical situation was this: Hungary's southern army, commanded by 'the disastrous Dembinski', had been occupying a large entrenched camp at Szeged on the west bank of the River Tisza. As Haynau's Austro-Russian columns approached, Dembinski was fearful of being surrounded, so he abandoned the camp without a fight and fell back to the east bank of the river. He then allowed the Austrians to establish a bridgehead in front of him, again with barely a fight. When the Austrians broke out from their bridgehead, the battle of Szőreg ensued. A distinctive feature of the battle was a massive dike, built to contain the Tisza's seasonal flooding, that the Hungarians had embrasured for 50 guns.

Historically, Szőreg was a rearguard action by one Hungarian corps while the anxious Dembinski again retreated pre-emptively with most of his army to avoid the threat of being outflanked.  My scenario allows the Hungarians the option to have more of their troops turn and fight to try to give the Austrians a bloody nose, but at some hazard: a 'flank threat' rule stipulates that if the Hungarian players commit troops to battle that historically avoided it, they risk conceding victory points to the Austrians, representing being outflanked and cut off post-battle by two other Austrian corps that were bypassing them to north and south.

For our game, I donned the Hungarian kepi, Colin the Austrian shako, and Crispin the Russian pickelhaube. The allies elected to commit all of the Russian division to a big right hook towards Sz.-Ivan, leaving the Austrians to take on the dike defence alone. I therefore chose to gamble straight away. The two contingents of Guyon's IV Corps, starting on-table in the Hungarian rear, are supposed to retreat off-table by Turn 6 if they are to avoid the flank threat. I decided to push them forward initially to delay the Russians' advance.

AAR in five photos follows. Skip to the end if you just want to go straight to my reflections on the game. (Apologies for the fuzzy/grainy screenshot pics - this was played remotely, not because of pandemic but because I am away from home at the moment and Colin has moved up north.)

 End of Allied Turn 1 (allies moved first). View from the allied bridgehead. Bottom left: allied batteries bombard the Hungarian dike defence (out of shot to left) while Liechtenstein's infantry division and Bechtold's cavalry surge towards an undefended stretch of dike. Right centre, most of Panutine's Russian division is racing down the road alongside the River Tisza. In the distance, Panutine's vanguard is about to cross the dike and begin clearing Hungarian irregulars out of the Sz.-Ivan Wood (one of the six objective locations).

End of Hungarian Turn 2. Originally there were two Hungarian batteries in embrasures astride the two roads through the dike, each backed up by an infantry division. The battery between the red and yellow cubes has been pummelled by Austrian heavy guns and rockets - the cubes indicate it is Reduced and temporarily Silenced. An Austrian battery lower right has suffered similarly from Hungarian fire - but the second Hungarian battery that did the damage has run out of ammo entirely and been removed. An Austrian grenadier brigade by the River Maros has taken casualties and stalled under the Hungarian guns. Further to the right, Austrian and Russian troops have reached the dike but not crossed it. To counter their threat, Guyon's corps has moved from the furthest corner (top of pic) and deployed mostly astride the far road leading to Sz.-Ivan (village top left), with one division moving to support the guns on the dike. A cavalry division (upper left) commands the open ground in the centre and covers the sprawling village of Szőreg (left edge). 

End of Hungarian Turn 3. Three Austrian brigades have crossed the dike but are regretting it. Hungarian guns and jaegers lining the road have battered the second grenadier brigade. Some hussars (top right) have moved to pin the righthand Austrian brigade. Away to the right, out of pic, the Russians have advanced into the Sz.-Ivan wood but have yet to clear the defenders out of it.

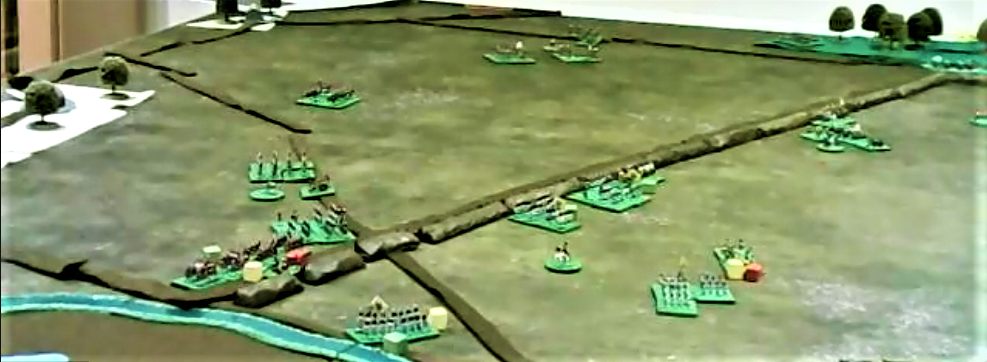
End of Allied Turn 4. The Russians have cleared the wood (out of pic to the right) and a Russian jaeger regiment is confronting Guyon's men on the Sz.-Ivan road (top right). Things start to go badly for the allies in the centre. Two more of Guyon's divisions centre of pic have advanced boldly, obliging the Austrian cavalry to evade back behind the dike, and are about to overwhelm a Russian jaeger regiment. The unit in the foreground is Simbschen's Austrian light cavalry brigade. This failed to support Lederer's cuirassiers who tried to charge across the dike again and attack the Hungarian hussars. This failed badly: the cuirassiers were destroyed, leaving the hussars free to turn and attack the rear of the Russian infantry next turn.

End of a disastrous Allied Turn 6. In three successive assaults I rolled three sixes, while two of the allies' dice came up as ones. They were repulsed from Szőreg with loss, then were countercharged and all but wiped out; an assault along the dike out of pic to lower left was also repulsed; and their isolated Russian jaegers were wiped out. The defenders now visible in Szőreg are the largely scythe-armed raw recruits of Gál's X Corps. I hadn't wanted to bring these on but the Austrian advance on the three objective locations in Szőreg obliged me to, thereby invoking a third 'flank threat' to add to the two already in play because I had kept all Guyon's corps in the field.
 
There are no more photos because it was getting really fast and furious now. At this point it was clear that the Austrians were done and would not take any more objectives. We therefore just played the Russian end of the table for the last two turns. This was a race for Sz.-Ivan, which they just managed to take with their lead regiment on the last turn. That plus the wood gave them two of the four objectives they needed for a draw (five for a win). The three flank threats (for committing both of Guyon's contingents and X Corps) were potentially another three objectives. These were resolved at the end of the game by rolling a D6 for each. On 4+, the allies gained an objective. Had they gained all three, they would have won; one or none and they would have been defeated; but of course, they got two, meaning the game was drawn!

Reflections

The now familiar pros and cons of the remote format: the poor ref having to scramble round the table adjusting the camera and moving the troops; the players struggling to see what was going on and explain their wishes to the ref; the game taking rather longer than if we were all round the same table; but nevertheless enjoyable and made it possible for us to have a game that couldn't have happened otherwise.

The scenario produced the ideal last-turn nail-biter. The 'flank threats' rule worked well in several respects: it gives the Hungarian side significant and interesting choices to make about how many troops to commit instead of retreating; that helps to keep the table-top action an even fight; and the die roll to see if the flank threats materialise keeps the result in doubt to the end. (And it proved well balanced.)

The virtue of unified command: as the sole Hungarian player, I think I had an advantage over the allies, who didn't always coordinate as well as a single player can. In particular, when the Russian jaegers crossed the dike in the centre, Crispin specifically asked for Austrian support; the Austrian cavalry crossed to back him up, but then scarpered when the Hungarians advanced, leaving him in the lurch.

Indecision costs lives. I think that on Turn 1 Colin was still recovering from a hard day at the office. He pushed an Austrian grenadier brigade forward mostly for the sake of pushing it forward, but it didn't take advantage of the Austrians' initial surprise deployment to assault, it just halted in canister range and duly paid the price.

Fortunes of war: my three sixes in a row for the assaults on Turn 6 were huge. On the other hand, on Turn 5 I had blown several easy movement rolls, which was why I had to call X Corps's scythe-wielders onto the table to defend Szőreg. That really mattered at the end, as it was that extra flank threat roll that saved the game for the allies.

Strategic choices, an unusual terrain feature, varied troop types, room to manoeuvre, and the flank threat question mark: this was a great combination that made for a great game.


Monday, 7 February 2022

Szeklers! Hungary 1848 #13: Sepsi-Sz.-György

Our Hungary 1848 campaign approaches its end. With less than a month of war left, the last major actions in Transylvania were fought around Sepsi-Szent-György in the far southeast of the country. These provided the setting for our 13th battle - unlucky for some.

Perhaps a little description of that setting is in order (with apologies to anyone about to be offended by my light-hearted caricaturing, which is intended for artistic purposes only).   

Strategic background: the war has less than a month to go. Hungary’s strategic objective is for its two main armies under Gorgei and Dembinski to link up in the desperate hope of inflicting a serious defeat on the Austrian main army: Gorgei in the north is therefore trying to dodge past the Russians and unite with Dembinski in the south, who is currently in the fortified camp at Szeged. The role of General Bem (the Hungarian C-in-C in this game) is to stop Russian forces converging on Dembinski from the rear through Transylvania. To achieve that he is striking at their line of communications through Kronstadt, which is guarded by Clamm’s Austrian corps.

The majority of Transylvania’s population were Vlachs (Romanians). These were generally the lowest social class, in fact had mostly been serfs until emancipated by the Hungarian govt during the war. The principality's Hungarian inhabitants lived predominantly in a central stripe running from the NW down to the very SE corner of Transylvania. (This was the stripe that Hitler gave back to Hungary in the Second Vienna Award in 1940.) They were free yeoman farmers or middle-class merchants and professionals, and the noble landowner class was largely Hungarian. The major towns were ‘Saxon’, with large urban populations of ethnic German artisans, merchants and professionals - the bourgeoisie.

Hungarian resistance in Transylvania was led by the Szeklers. The Szeklerland was the area in SE Transylvania. These proud, indomitable people thought of themselves as the descendants of Attila the Hun. The very SE tip, the ‘Háromszék’ (roughly ‘three parishes’) was more like Asterix the Gaul – even at the height of imperial invasion, a few small villages still held out against the Romans Austrians. They collected copper pans and church bells for their folk hero Áron Gábor to melt down and turn into cannon. They were hardcore and provided astonishing numbers of recruits for the Hungarian cause.

To our battle, then. The situation is that General Bem (actually a Polish exile who had fought against the Russians in 1830-1831, and before then under Napoleon) has his forces menacing the strategically vital town of Kronstadt along three different axes, keeping his opponent in doubt as to which direction he will attack from and with how many troops. Historically, the Hungarians pushed forward on the central and easternmost of these axes and drove the Austrians back some way. There was then a lull of a couple of days, during which Bem took a portion of his force east across the Carpathians to try and stir rebellion in Moldavia, but without success. In Bem's absence, the Austrian commander Clamm-Gallas moved his troops up the western axis, then left-hooked across some difficult mountainous terrain to retake villages on the central axis, successfully repelling the Hungarian threat to Kronstadt. However, Bem achieved his goal, as the Russians under Lüders turned back from their march down the Maros valley in order to finally crush the Szeklerland instead.

Our battlefield: the plain of the River Alt, with a wedge of densely forested mountains projecting into it from the north; more mountains in the far SE corner, infested with Hungarian irregulars. Kronstadt is off-table to the south. The three road axes converging on it each have three objectives along them (yellow counters = Austrian-held) that measure Hungarian progress towards the allies' line of communications.

Allied deployment. Clamm-Gallas's Austrian forces are deployed forward on the western and central axes, with a large reserve left of picture. The attached Russian contingent under Rennenkampf guards the eastern approach in the foreground. Sepsi-Szent-György is the village at the table edge, top right.

Frontal view of the Russians. They wear the same spiked helmets they will wear in the Crimea five years later.

Intense fighting rages around Szemerja, just south of Sepsi-Szent-György on the central axis. The Hungarians have smashed through the Austrian defenders there and planted a red counter in Szemerja, but Austrian reserves will soon arrive.

The scenario tries to reproduce the Austrians' uncertainty over where the Hungarians would attack and in what strength. Initially the Hungarians attack with two thirds of their force along any two of the three axes. After a night interval, they have the option of continuing with only those two thirds (the historical option), or committing the rest on the third axis at the cost of increasing the number of objectives they require for victory. Meanwhile, the Austrian reserves cannot be released until the Hungarians have made a certain amount of progress in terms of objectives taken or casualties inflicted: i.e., demonstrated that they are a serious threat rather than just a feint.

In our game, Mark and Dave attacked down the centre and east to start with. On my right wing, the Russians were singularly unresponsive to my orders (which was quite historically accurate for this battle). My centre had to fall back in the face of Hungarian numbers, losing badly enough to unleash my reserves to counter.

My other problem, apart from lethargic Russians, was the Hungarian irregulars lurking in the hills in the SE corner. These needed to be screened or smashed. Somehow I let them pin my cuirassiers for most of the game - my best unit. Between those two factors, I felt unable to spare a unit to reinforce the infantry and guns on my left wing.

During the Night Interval I did finally shift the Russian light cavalry towards my left, but couldn't move them far and fast enough. The Hungarians exploited my error by committing their third division on that axis. Although my grenadiers kept them out of the first village they hit, their hussars were able to dash around behind and head towards Kronstadt, taking two objectives.

At the end of the game, then, I was trying to retake these plus one they had captured in the centre. For their part, they were still trying to evict my grenadiers and sneak their irregulars forward to seize an objective. Thus on the last turn there were no fewer than five objectives being contested across all three axes. Inevitably and perfectly, the final score was - a draw!

Reflections

Strategic options add interest. The Hungarians have a big decision at the start as to which two of the three road axes to attack along. Immediately that means there are three significantly different plans possible. On the Austrian side, there is some latitude over where to deploy the reserves initially, which can also shape the game very differently.

'Triggered events' add interest. Odds are against the Austrians at the start. Once they lose badly enough to 'trigger' their reserves, the odds shift against the Hungarians, and it becomes a question of whether there is enough time for the Austrians to exploit their numerical advantage.

Uncertainty adds interest. The huge mid-game decision for the Hungarians is whether or not to commit more troops and shift the odds again, which means they have to take an extra objective - their job gets harder but they have more tools with which to do it. (Of course, players tend to want more toys on the table!) The Austrian player needs to juggle contesting the present threat while taking due precaution against the possible one.

A flank or rear threat adds interest. That single unit of Hungarian irregulars behind my flank - Raw, Passive and Fragile, in other words, rubbish - exerted an influence out of all proportion to their combat value.

A rarity: Aggressive Raw troops! I felt this was the right way to rate that half of the Hungarian units representing the newly-raised formations of poorly-trained, poorly-armed but enthusiastic Szekler recruits. It did give the game a different flavour and seemed to work right on the table.

The right time-space-force equation? This was a really nice swift, mobile, intense game: eight turns long, with 8-10 units a side, on 6'x4' of mostly open terrain punctuated by villages. It felt as though we crammed a lot of significant decisions and exciting fighting into two hours' play. (Contra my recent post in praise of loooong games!)


Wednesday, 22 September 2021

Hungary 1848 #11: Hegyes

Our Hungary 1848 campaign continues. The 11th of our planned 15 games took us to the southern front for the first time for the battle of Hegyes. This was the largest battle on that front, inflicted some of the heaviest losses suffered by the imperial side, and was Hungary's last major victory of the war.

The situation was an unusual one. Under pressure from invading Austrian and Russian armies in the north and west of the country, Hungary's government had decided to mass its forces in the south, knock the imperial Army of the South out of the war, and then base itself on the fortresses of Arad and Temesvár. The imperial C-in-C in the south was Jellachich, Bán of Croatia, commanding an army mainly composed of 3rd- or 4th-line Grenzers. He was holding the line of the Franzenskanal between the Danube and the Tisza in what is now northern Serbia. The Hungarian forces converging on him took one end of the canal, forcing him to choose: should he fall back behind the Danube immediately, or thrust forward to give the Hungarians a bloody nose in an attempt to deter and delay them?

Opting for the latter course, he took some 12,000 men on an overnight march to seize the village of Kis-Hegyes and its bridges over a minor river, the Barra, which he knew were Hungarian-held. Unfortunately for him, a similar-sized force of Hungarians under the English general Richard Guyon, well aware of Jellachich's approach, was hunkered down in Kis-Hegyes and the neighbouring villages of Szeghegy and Feketehegy. At 3:00 a.m., Jellachich walked into a division-scale ambush. His initial assaults on the villages were repulsed and Hungarian hussars lapped around his flanks. Hearing gunfire in his rear as well, he realised he was in danger of being cut off and captured. His assault turned into a fighting withdrawal which he executed rather well, but he lost over 1,000 men.

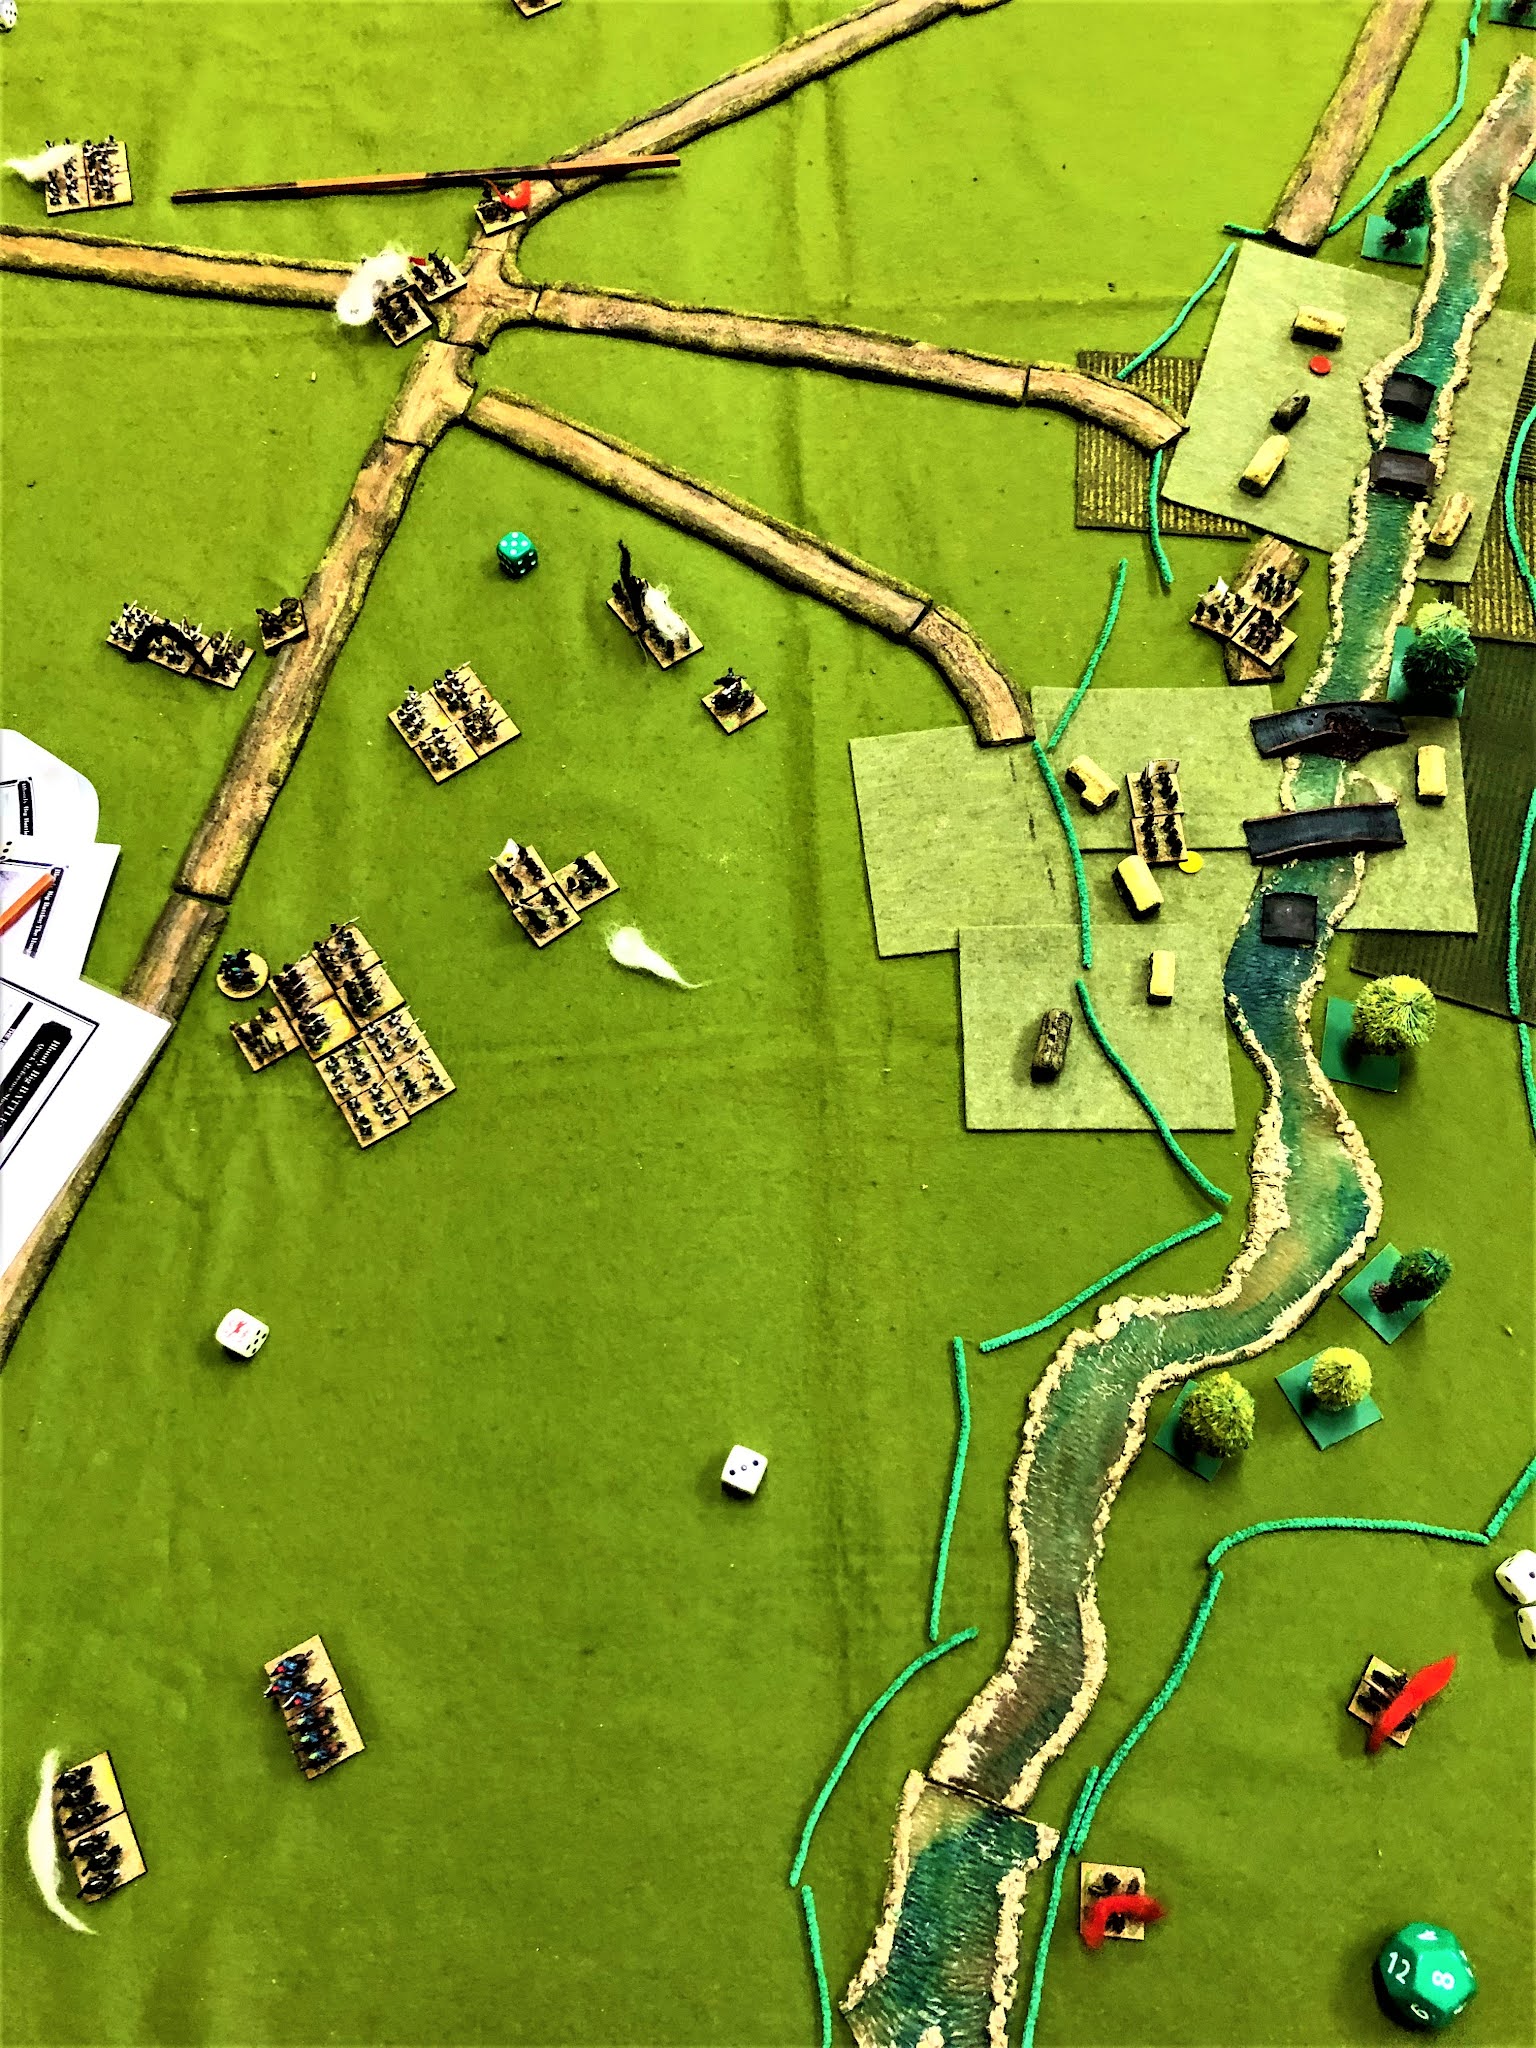
Unusual terrain: the Barra has carved itself a gully through the flat plain of the Bácska. The steep banks of the gully are denoted by the green lines of pipecleaners. Three sprawling villages straddle the tree-lined river, with vineyards on the slopes behind them. Jellachich's force has arrived from bottom left, then executed a wheel to the right to deploy for battle. The Hungarians lurk unseen in ambush.
 

This is tricky to capture in a wargame scenario because of the problem of hindsight. Unlike Jellachich, we players know that his assault is probably doomed to fail, and we know that an outflanking force will threaten to cut his line of communications. Rather than the usual simple formula of judging victory by who holds which objective locations at the end, I defined three strategic objectives for the Austrian side:

1. To seize one of the three villages, even if only temporarily;

2. To have at least one of the two Austrian cavalry units survive to cover the retreat and to have lost no more units Spent or destroyed than the Hungarians;

3. To have no Hungarian unit closer to the two line of communications road exits than all Austrian units.

The Austrians needed to achieve all three of these for a win or two for a draw (and had to have assaulted a village with at least two units).

The point of this mix of objectives is that the Austrian mission changed halfway through the battle from "seize a village" to "run away!". Thus the Austrians have to make a good-faith effort to attack the villages initially, but they are not required to hold any at game end.

The Austrian problems are compounded by a scenario rule to reflect the nervousness that gripped Jellachich's force when they heard cannon fire from the rear. Starting on Turn 4, the Austrian side must dice each turn to see if the whole Austrian force becomes Fragile. If it does not do so by Turn 6, it is ruled Complacent instead, and a Hungarian unit shows up in the Austrian flank or rear, followed by the Austrian reserve that historically got sent back to protect the retreat.

Last but not least, because this was an ambush, none of the Hungarian units are deployed on table initially or even plotted on a map. Instead, the Hungarian players can simply deploy them in a village as soon as the Austrians move within 3" of it, or in any village in their own turn.

I was a bit anxious about these unusual scenario special rules pre-game because 'funky' rules do not always work out as intended. I needn't have worried: they provided us with a distinctively different battle that still gave a close and exciting game and a decent representation of the historical battle.

As was always going to happen, the first Austrian unit to move up against Feketehegy (the Erzherzog Wilhelm and Piret infantry) was ambushed by a Hungarian firing line anchored by a battery at each end. The hapless Wilhelms/Pirets were immediately reduced to half strength, Spent, and played no further significant part in the battle.

However, the Hungarians could not be everywhere. They did declare troops in Szeghegy as well, but not enough to prevent Budisavlievich's Grenzers from pressing into the village. Intense fighting in and around both villages ensued.

At the northern end of the line, the Hungarian right wing (commanded by our new comrade and BBB novice, Simon) debouched from Kis-Hegyes. All that was in their way was Castiglione's cuirassiers. These carelessly loitered long enough to be blown away by Hungarian artillery, meaning the Austrians could not afford to lose their remaining cavalry on the other flank if they were to have a chance of winning.

At the start of Turn 4, the dice decreed that 'Austrian Anxiety' came into play, word spread through the Austrian ranks about the enemy advancing in their rear, and all Austrian units became Fragile. The Austrian players' morale was creaking at that point too, but I pointed out that they still had a chance of victory if they could clear one village. One Austrian unit in Szeghegy duly turned to the right and attacked the flank of the Hungarian defenders of Feketehegy, clearing them out and planting a yellow Habsburg victory counter in it.

 Circa Turn 5: the Austrians have cleared the large village of Feketehegy (upper right). Hungarians from the north approach the Austrian left anchored on the crossroads (upper left). Both sides' cavalry are disrupted after a clash on the southern flank (bottom right).
 

As the Hungarians from the north closed in, the Fragile Austrians were compressed back towards their precious line of communications exits. On their southern flank, there was a tense series of cavalry actions between hussars and cuirassiers, the latter being superior in combat but having to be cautious.

On the last turn, all three results were possible. The Austrians had suffered one more unit than the Hungarians Spent/destroyed; if they could kill the hussars in the south, they would rectify that and win. Conversely, if the Hungarians could get either hussar unit closer to either road exit, that would produce a Hungarian victory. In the event, neither transpired, and it was yet another classic honours-even draw to conclude an exciting and different game.

Game end: the Austrians have been driven back but managed to cover their line of communications. Red markers bottom right are on the Hungarian batteries that delivered the initial ambush but were then driven off with loss.

Reflections:

BBB proved again how easy it is for new players to pick up: Simon said he was daunted at first but comfortable by the end.

The simple special rule for the ambush deployment produced the right effect.

The mix of objectives to reflect the Austrian change of mission mid-battle likewise worked. (Phew!)

Perfect scenario for a Monday night at the club: simple terrain to set up, ~10 units a side, enough variety of troops to be interesting, both sides have to manoeuvre. Eight turns long so we were done in two hours' play, despite going in slow time initially to introduce Simon to the rules.

Our regular multi-player format is good for flexibility! When Simon was looking for a game, it was easy for us to fit him in as a third player on the Hungarian side. Conversely, we were expecting three Austrian players - one couldn't make it, but the game went on without him, whereas in a one-to-one game, if one player drops out, the other player's evening is written off as well.

And finally, John and I relished one thing remote gaming can't really provide: the post-battle pint together in the pub.