Monday 29 January 2024

FPW - Loire battlefields

The republican phase of the Franco-Prussian War of 1870-1871 is full of interest for us wargamers. The republican armies are a fascinating mix of troops: elite corps such as the Foreign Legion, Papal Zouaves, exotic spahis, sailors turned into infantry, a lot of 'régiments de marche' formed from depot units, irregular francs-tireurs, and of course the bulk provided by hastily trained and poorly equipped gardes mobiles. Pitting these against by now very experienced and increasingly tactically skilful German formations makes for excellent asymmetrical match-ups on the wargames table. In particular, I like the Loire campaign and am a great admirer of General Antoine Chanzy, who commanded the French 16th Corps and then the 2nd Army of the Loire and held his force together in considerable adversity. Three of the main battles of the campaign - Loigny, Beaugency and Le Mans - feature as scenarios in the "Bloody Big BATTLES!" rulebook and I have fought all of them, plus the opening action at Coulmiers, several times. Loigny is an especial favourite as it is very mobile and both sides have plenty to do.

However, apart from Le Mans, I had never actually visited the battlefields. Now that has been rectified. Herewith a brief (and in some respects incomplete) report of my battlefield tour and a few photos.

First some general observations. Coulmiers, Loigny and Beaugency were fought on the Beauce, a great agricultural plain. It is very flat and very open: dotted with villages, but few and small woods, and no hedges to break up the extensive vistas. This is handy for wargamers, as it makes the terrain simple to set up ... but it means not many dramatic key points for me to take photos of, just one field looking much like another. There was snow on the ground when we arrived but it had gone by the time we started our tour. This was a pity as I hoped to see the battlefields as they were described by one eyewitness, a chequerboard of white snowy fields and dark patches of villages and copses. 


1. Coulmiers

The Army of the Loire was formed in October 1870. Its main mission was to push north and attempt to relieve the siege of Paris. At the battle of Coulmiers, it pounced on the Bavarian I Korps screening Orléans. The Bavarians were driven back and the French then retook Orléans. (The Coulmiers scenario is a good small 'training game' and is in the BBB group files here. For a report of it being playtested, see here. For an exquisite 2mm game of it, see here.)

I didn't take any pics of where particular actions occurred, nor any general ones of the battlefield, as it just isn't that distinctive. There are two large monuments next to the main road on the northern edge of Coulmiers village.

The French monument

Inscription on the French monument: 'Here, on 9 November 1870, the Army of the Loire under General d'Aurelle de Paladines seized the Coulmiers park [the grounds of a small manor house], the Bavarian forces' last centre of resistance.'

The more modest Bavarian monument in the cemetery.


2. Loigny / Poupry

This was definitely the main event of the tour: the most interesting battlefield with the most to see. (For a full account of the history, see here. For our most recent tabletop outing of the scenario, see here.) There is a museum in Loigny dedicated to it, the Musée de la guerre 1870. Unfortunately it is closed in winter.

In rough outline: the French left advanced, drove back the Bavarians and captured Loigny. The German 17th Division held Lumeau in the centre; 22nd Division came up on the German left at Poupry and held off the French right wing coming through Artenay. The Bavarians retook Loigny and a famous climactic charge by the Papal Zouaves at Loigny was unable to save the day for the French.


This panel on a plinth just south of Loigny sketches out the battle.

A helpful panel on the side of the museum steers visitors to placards at various sites around the western half of the battlefield. These have QR codes on them that should provide more information. Unfortunately the links didn't work for me.

The 'Croix de Sonis', just south of Loigny, is dedicated to Louis-Gaston de Sonis, commander of the French 17th Corps at Loigny. He personally led the final charge and was wounded, subsequently losing his left arm but continuing to serve.

The panel about de Sonis.

View of Loigny from the 'Bois des zouaves' (the Zouaves' Wood) showing the ground the Papal Zouaves charged across. As previously stated: very flat (Loigny is on an almost imperceptible rise), very open.

Panel about the Bois des zouaves.

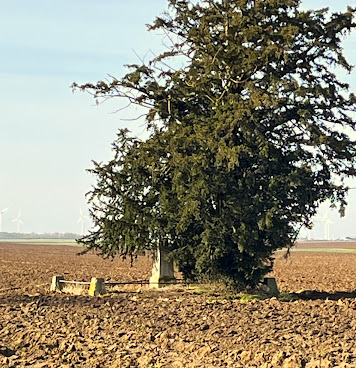
In the Bois des zouaves is this monument to one of their number, the Comte de Verthamon.

Plaque on the monument.


The only German monument, just north of Loigny. That field was too muddy to get any closer.

Explanation of the history of the German monument. There were two others that no longer exist.


The chateau at Lumeau: a manor house surrounded by walls and very sturdy buildings. This was the German stronghold in the centre.

No photos of Poupry, sorry: a pretty little village with a lot of woods behind it.


3. Beaugency

This was a sprawling battle on a 10-mile front. At its northern end, the Germans fought through the Foret de Marchenoir - a seriously large forest. At the southern end, they fought through the large town of Beaugency. Neither makes for good battlefield photos, while the centre was more flat Beauce country. Hence no pics of Beaugency at all, sorry.


If this seems a bit incomplete and half-baked, apologies. It was sort of impromptu so I wasn't as fully prepared as I might have been and wasn't able to do as detailed a tour as I otherwise might. Also I didn't get to Beaune-la-Rolande (another fun battle to refight) or the area of the 2nd Battle of Orleans (a scenario yet to be written, I think). Still, it was enough to get a feel for the nature of the terrain and a better understanding of the events of that freezing winter of 1870-1871.


Wednesday 17 January 2024

January Gamefest: Sino-Jap, La Haye Sainte, Ligny, Norway 1940

January brought our traditional four-day gamefest: excellent company, splendid wargames, fine victuals, wide-ranging learned conversation - altogether the epitomy of the HQGE. To summarise four days of gaming goodness in brief, we played:

1. Tai'erzhuang (Sino-Japanese War, 1938) in 20mm using homebrewed rules.

2. La Haye Sainte (1815) in 28mm using modified BBB.

3. Ligny (1815) in 15mm using BBB.

4. Roa (Norway, 1940) in 15mm using homebrewed rules.

Here are about 15 annotated pics to give you a tiny glimpse of how much fun we had.


Tai'erzhuang, as visited last January as well. CB's armies are too beautiful not to use at every opportunity and the scenario merits replaying. In the foreground is an incense burner that added to the atmosphere, literally and metaphorically. The AFV right foreground is the fearsome Japanese SS-Ki flamethrower tank.

We played TEZ twice. First time up I was the Chinese mobile force, including Sdkfz222, CV3/33s, PzI and Vickers E, seen here arriving ontable and immediately rueing not spreading out more (the skull shows where Japanese mortars have already caused casualties). The khaki Chinese troops are Mexican federales figures, I believe, complete with goggles on their caps.

Scott joined me with a mighty Chinese motorcycle battalion.
(I think the figures are actually sold as Polish.)

Game 2: La Haye Sainte! Young Charlie's scenario. Basically BBB rules, but a unit is just a couple of battalions, musket range increased to 6" and made a little more deadly. Worked really well. Mark F and I commanded the British line. Looks like Sharpe is in the sandpit.

LHS viewed from the French side. For the scenario, it was divided into two triangular halves that could each hold one unit. CB's columns are about to go in. Special rules for pioneers with axes, obviously.

View of most of the table. I think it was 12'x4'. Five French infantry brigades and associated cavalry versus the Prince of Orange, Picton and Alten, plus heavy cavalry offtable. Looks like a proper traditional wall-to-wall Napoleonic wargame line-out, doesn't it! But there were still decisions to be made and maneuvers to be executed.

Black Watch and Gordon Highlanders. Between them and the French in the distance you can see a blurry thin blue line of Dutch troops. There were three of these Dutch/Belgian units out front. These started the game Disrupted. For their first activations on Turn 1, Mark and I rolled three successive pairs of snake-eyes, meaning all three units lost a stand and retired behind the hedge, the Raw ones becoming Spent immediately. I make that a 46,656-to-1 chance. Our luck improved after that.

The French assault goes in on the hedgeline. Our left centre was soon breached and we took heavy casualties all along the line. My Hanoverian militia evaporated. Only the high quality of the British infantry kept us in the game. We were reeling and creaking until Mark unleashed the Household Cavalry. The French attack had opened a gap between the French units now in La Haye Sainte and those in the centre, where a couple of their units had taken a pounding already. The British heavies smashed into these, broke a square and wiped out another regiment, winning the game for the Allies - just as they did when we fought the whole of Waterloo in 6mm last year.

And so to Game 3: Ligny! This was basically Dave T's scenario from the BBB group files, but adapted by Rob to add some what-ifs (which did not transpire). Rob had put in a lot of work in the weeks before, making sure the troops, terrain and scenario were all ready to go, and it paid off. Here we see Bluecher next to the windmill with the Prussian centre around Ligny. (Proper Ligny church model, top left.)

The whole Ligny battlefield. More Prussians will arrive from lower left and lower right. French march on from the top board edge. Ligny centre of pic, left of my Grosse Batterie that was soon dismantled by the Imperial Guard Artillery. Crippling scenario rules for Prussian low ammo didn't help.

Les français arrivent. We held Ligny for a long time against 3:1 odds and repeated assaults but were eventually ejected by the Imperial Guard. Meanwhile, overlooking the fact that most of the important objectives were in our left rear, I had encouraged CB to commit the Prussian right wing against the French left flank in the irrelevant top right quarter of the battlefield. This left Tim's Prussian left wing of mostly raw Landwehr to be crushed by imperious French cuirassiers. It was a tough fight but we ended up soundly beaten. CB blamed Tim's inexperience. I blame my tactical error of washing down breakfast with Calvados, not to mention elevenses and lunch too. We discussed the merits of tweaking the victory conditions etc, but really they worked fine to give appropriate structure to what was a magnificent game with a properly Napoleonic look and feel.

Anyone remember this WWII skirmish ruleset that Scott and I published over 20 years ago? For our last game (a short morning session before I left), Scott set up Roa. This was the first skirmish scenario he published, set in Norway in 1940. We used his homebrewed rules that he is calling "Arc of Fire 2" but that don't really have much of AoF left - more BBB DNA in there, plus ideas from various other places.


The snowy Roa battlefield. Germans arrive from the left. Norwegians start hidden. They aim to hold the house and/or the hill in the top right corner; the Germans will try to exit troops off the right edge.

The German advance encounters nothing but reindeer initially. Behold the mighty Panzer I! Better than anything the Norwegians have, anyway.

The first ambush is sprung. Snowsuits have their pros and cons:
harder to spot than feldgrau, but they don't half show the blood.

Situation when we had to call it a day: mass combat developing around the bridge and the house objective. Sheep top left are unperturbed and unwilling to leave the little green circles they have nibbled through the snow.


The real weather outside matched the Roa game inside.

So endeth another fantastic January gamefest. Now for a bit of online gaming, followed by a stint of the regular Monday club games, and of course the next Bash Day coming up in May. If you can make it to Daventry on Sunday 19 May, you can be assured of an HQGE of your own!

Monday 1 January 2024

Balkan Wars campaign begins at Sarantaporo

The "Bloody Big Balkan Battles!" scenario book for the Balkan Wars of 1912-1913 was published back in 2019. A lot of these battles were fought over very mountainous terrain that takes time to set up, so is not ideal for a club night and better done at home. My war room at home has been out of commission for a while but is back in action now. To inaugurate the refurbished war room, I decided to host the first game in the BBBB book: Sarantaporo (which I playtested in 2017). I took advantage of the Christmas holiday to run it twice for different groups of friends.

The scenario sees a thin Turkish cordon defence in the mountains facing a much larger Greek attacking force. The strategic situation is that the Greeks are racing to reach Thessaloniki (some distance offtable) from the southwest before the Bulgarians can get there from the north. Victory therefore depends on how long the Turks can delay the Greeks before being inevitably overwhelmed.

Fourteen annotated photos tell the tale, followed by some reflections at the end.

Plan view looking north from the Greek side of the table. The wavy green line marking off the SE quarter is a steep slope between the flat and open river valley (Level 0, good going) and the rest of the table that is all difficult terrain and Level 1 or higher. The 'polystyrene jigsaw' hills are Levels 2 and 3. Those crested with pale lichen are impassable peaks. (For an essay on various ways to represent complex hilly terrain, see here.) At lower left edge is the fort at Lazarat, guarding a pass. The town of Sarantaporo is the church next to the road, upper centre. Red counters mark the five objectives (you can't see the one at Mikrovalto, halfway up the westernmost road, because the Turkish cavalry are sitting on it). Greeks have to take three of these to draw and four to win. Most of the Greek army starts massed in the SE corner but a couple of divisions, cavalry and evzones are along the western half of the southern edge.

View from the Greek SE corner towards Sarantaporo and the Skopia-Vigli hilltop objective. You can see roughly four of the Greeks' six divisions here (three 3-base regiments to a division; some little 2-base Evzone units). Blue counters are temporary to indicate Greek deployment areas. Ben and Luke modified this deployment before the game started and established a grand battery of 80+ guns along the stream and to the left of it.

The defenders of Sarantaporo. (6mm figures by Irregular Miniatures, painted and donated by Dave W.) Most of the Turkish force is raw, fragile Redifs (hastily conscripted reserves), as indicated by the absence of flags. All my Turks are in anachronistic 1877 uniforms rather than 1912 khaki. Never mind, red fezzes look pretty.

The Greeks retaliate with some red hats of their own: two bases of elite Evzone mountain troops (right of pic) prepare to advance alongside a couple of regiments of line infantry. (Evzone figures are actually French chasseurs alpins; line inf are British WWI.)

The Turkish strongpoint on Skopia-Vigli. These two regiments are veteran Nizam regulars (hence get flags). The one in the foreground has been given VIII Corps's entire company of nine machine-guns, giving it the Devastating Volleys attribute. The hilltop regiment has the advantage of a Skirmisher base. Entrenchments and sandbag emplacement are from Irregular Miniatures. The hilltop itself is carved from ammunition packing for added authenticity.

Luke, Ben and John M opted for a three-pronged attack. On the left, John pressed up the Lazarat pass and over the high ground either side of it. Luke and Ben avoided the Turkish 'killsack' in front of Sarantaporo and Skopia Vigli, Luke marching wide around the right. This pic shows Ben's central force working its way towards Sarantaporo from the south and pushing through the mountains west of it. Meanwhile, the Greek grand battery takes fearsome toll of the Turkish redifs who are soon spent and disrupted (black and white smoke markers).

Endgame on the right. The Greeks have taken Mikrovalto, Livadero and Sarantaporo, securing a draw. Can they take either Polirabo or Skopia-Vigli for the win? Luke's right hook approaches Skopia-Vigli - but the mountainous terrain has delayed him too much and he runs out of time. Dave T's defenders stand firm in the Turkish centre!

Ben's regiments storm forward through Sarantaporo, but they can't reach Skopia-Vigli in time either. And on the left ...

Mark S's Turkish reserves arrived in time to garrison the vital road junction at Polirabo. John's infantry can't quite get there. Only Soutsos's cavalry brigade can reach it. Sabres drawn, they charge into the teeth of Turkish Mauser fire - which fails to stop them! They rout the first redif regiment, exploit onward and drive out the second regiment as well. Victory to Greece! The Bulgarians shall not have Thessaloniki!

Game 2 saw me and Bob command the Greeks against Crispin's Turks. This shot shows most of my force on the Greek left and centre (cavalry and some more inf out of shot to the left), ready to advance on Livadero (red objective marker).

I didn't tell Bob how the previous game went, but he too opted for a grand battery in the centre and a right hook to avoid the 'killsack' of combined Turkish artillery, skirmisher and MG fire.

However, he soon realised that the difficult terrain would make it hard for a wide right hook to arrive in time, so he changed his plan and converged into the killsack after all. The grand battery had done much execution by now, as had the Greek infantry's rifle fire (seen here wreathed in brown smoke showing they are Low on Ammo after a high firing roll), so the weakened defensive fire was not able to stop the Greek advance.

Still, the combination of defensive fire and difficult terrain meant that only two Greek regiments were able to assault Skopia-Vigli on the last turn. Turkish fire repelled this desperate assault. As in the previous game, it all came down to what happened at Polirabo ...

... again the Greek cavalry charged, this time in support of an infantry assault with the bayonet. However, I had not been able to suppress the defenders beforehand, so their fire was effective - our charge was repelled and the Turks hung on to Polirabo. Match drawn!


Reflections:

Too tough for the Turks? While a draw is very achievable, we found it hard to see how the Turks could win. Perhaps if the Greeks neglect to set up a grand battery initially and try to rumble their guns forward? But bar some such major error, it would be nigh impossible for the Turks to hold three objectives. Maybe they should be rewarded if, say, 4 of their 9 inf and cav units survive on-table at game end (as Crispin managed against me and Bob, a game that felt like a defeat to us even though technically it was a draw).

Variable objectives? Crispin suggested variable objectives are a good thing, not necessarily just here but in general. In particular, my scenarios for Gettysburg and Königgrätz both have variable objectives that are not determined until after deployment (and in the Gettysburg case, after the first day of battle). This is good for replay value and also for producing some fog of war, obliging players to plan for uncertainty. Maybe I'll try to do more of that in future.

The battlefield shapes the battle. Everyone remarked on the huge influence of the difficult mountainous terrain, not just in slowing movement, but also in breaking lines of sight and creating shadows below steep slopes. Thus it both hindered and helped maneuver. Crispin said that one of his biggest pleasures from our BBB games is the terrain: the complexities and idiosyncrasies of realistic battlefields generate rich tactical decisions and make each game a different and unique tactical challenge.

Free deployment vs strict historical. Following on from the point about terrain generating decisions, we talked about deployment decisions. Sometimes scenario writers allow very free deployment - any troops anywhere within a broad deployment area. Others are very prescriptive and stipulate that every unit must start exactly where it did on the day of the battle. Perhaps the ideal is somewhere in between: some historical restrictions about which corps can be in which sector, but a fair amount of latitude about how the forces in each sector can deploy. That gives players some interesting choices at the start of the game and also increases the replay value by allowing more variety of plans.

Game-themed refreshments! As it was Greeks vs Turks, what else could I do but offer my guests a large tray of tasty baklava (as if any of us needed that sugar rush on top of the stimulation of an exciting BBB battle!).


Bloody Big Balkan Battles! is available in both print and PDF from Brigade Games.