A visit from my fellow Helion author and Hungary 1848 enthusiast, Nigel Smith (of The Honvéd War fame), provided the occasion to muster half a dozen of us for a game. Since we had the leisure of a long Sunday afternoon and a couple of the guys were going to miss the kick-off, I chose a largeish scenario that features substantial reinforcements mid-battle: Pered (whose anniversary fell the week before).
We last fought this a few times back in 2021 when we were still playtesting it for the Bloody Big Hungary '48 Battles! scenario book (see report here). It proved an ideal choice for our game.
Initially there were just four of us. Luke and Ben slotted comfortably into the role of the Hungarian revolutionaries, while Nigel opted to wield the forces of Imperial reaction. As he was relatively new to BBB, I acted as his technical advisor until Anton joined him for Day 2.
Pered is a battle fought on three days (with a few days' interlude after Day 1). As multi-day BBB battles generally do, this provided the players with important strategic decisions at different stages of the game, and produced very different phases of play.
Let me therefore offer a brief summary, followed by a more detailed photo-AAR for those who like these, then some reflections at the end.
In summary:
- Day 1 is when the Hungarian II Corps needs to drive back Herzinger's isolated and dispersed Austrian division far enough to encourage Hungarian III Corps to cross as well. Both sides conducted bloody and desperate charges and countercharges with heavy casualties. Net result was that the Hungarians didn't achieve their Day 1 goal, only taking one of the three objectives they needed.
- Day 2, both sides have important options. The Hungarians chose to convert III Corps's demonstration upriver behind the Austrian left flank into a serious crossing attempt at Sellye. The Austrians chose to gamble on bringing Perin's brigade (covering their rear off-table) south and on-table a day early, hoping that the off-table Hungarian I Corps would be too slow to exploit their absence and raid the Austrian rear. Both gambles paid off: III Cps crossed at Sellye, threatening the Austrian LOC and making space for the rest of the corps to deploy forward for Day 3; but I Cps failed to show, while Perin's grenadiers freed up all of Herzinger's division to contest the main Hungarian advance. The actual fighting on Day 2 consisted of II Cps slogging forward to take a second objective but at cost of further casualties.
- Day 3 was grand battle. Panyutin's Russian division reinforced the Austrians, who chose to form a solid line on II Corps's front, with isolated brigades guarding flank and rear. Meanwhile, all of Hungarian III Corps arrived. Luke and Ben decided to form this on their right and aim it at the hinge of the Imperial position. This looked like a good plan as they stormed into another two objective villages. However, Imperial counterattacks ejected them on the last turn, as well as recapturing one from II Corps to claim a last-gasp victory.
Now that you're oriented, here are the photos:
Sometimes troops would be issued schnapps or pálinka to fortify them before battle.
We made do with tea and coffee pre-game and saved the good stuff for after.
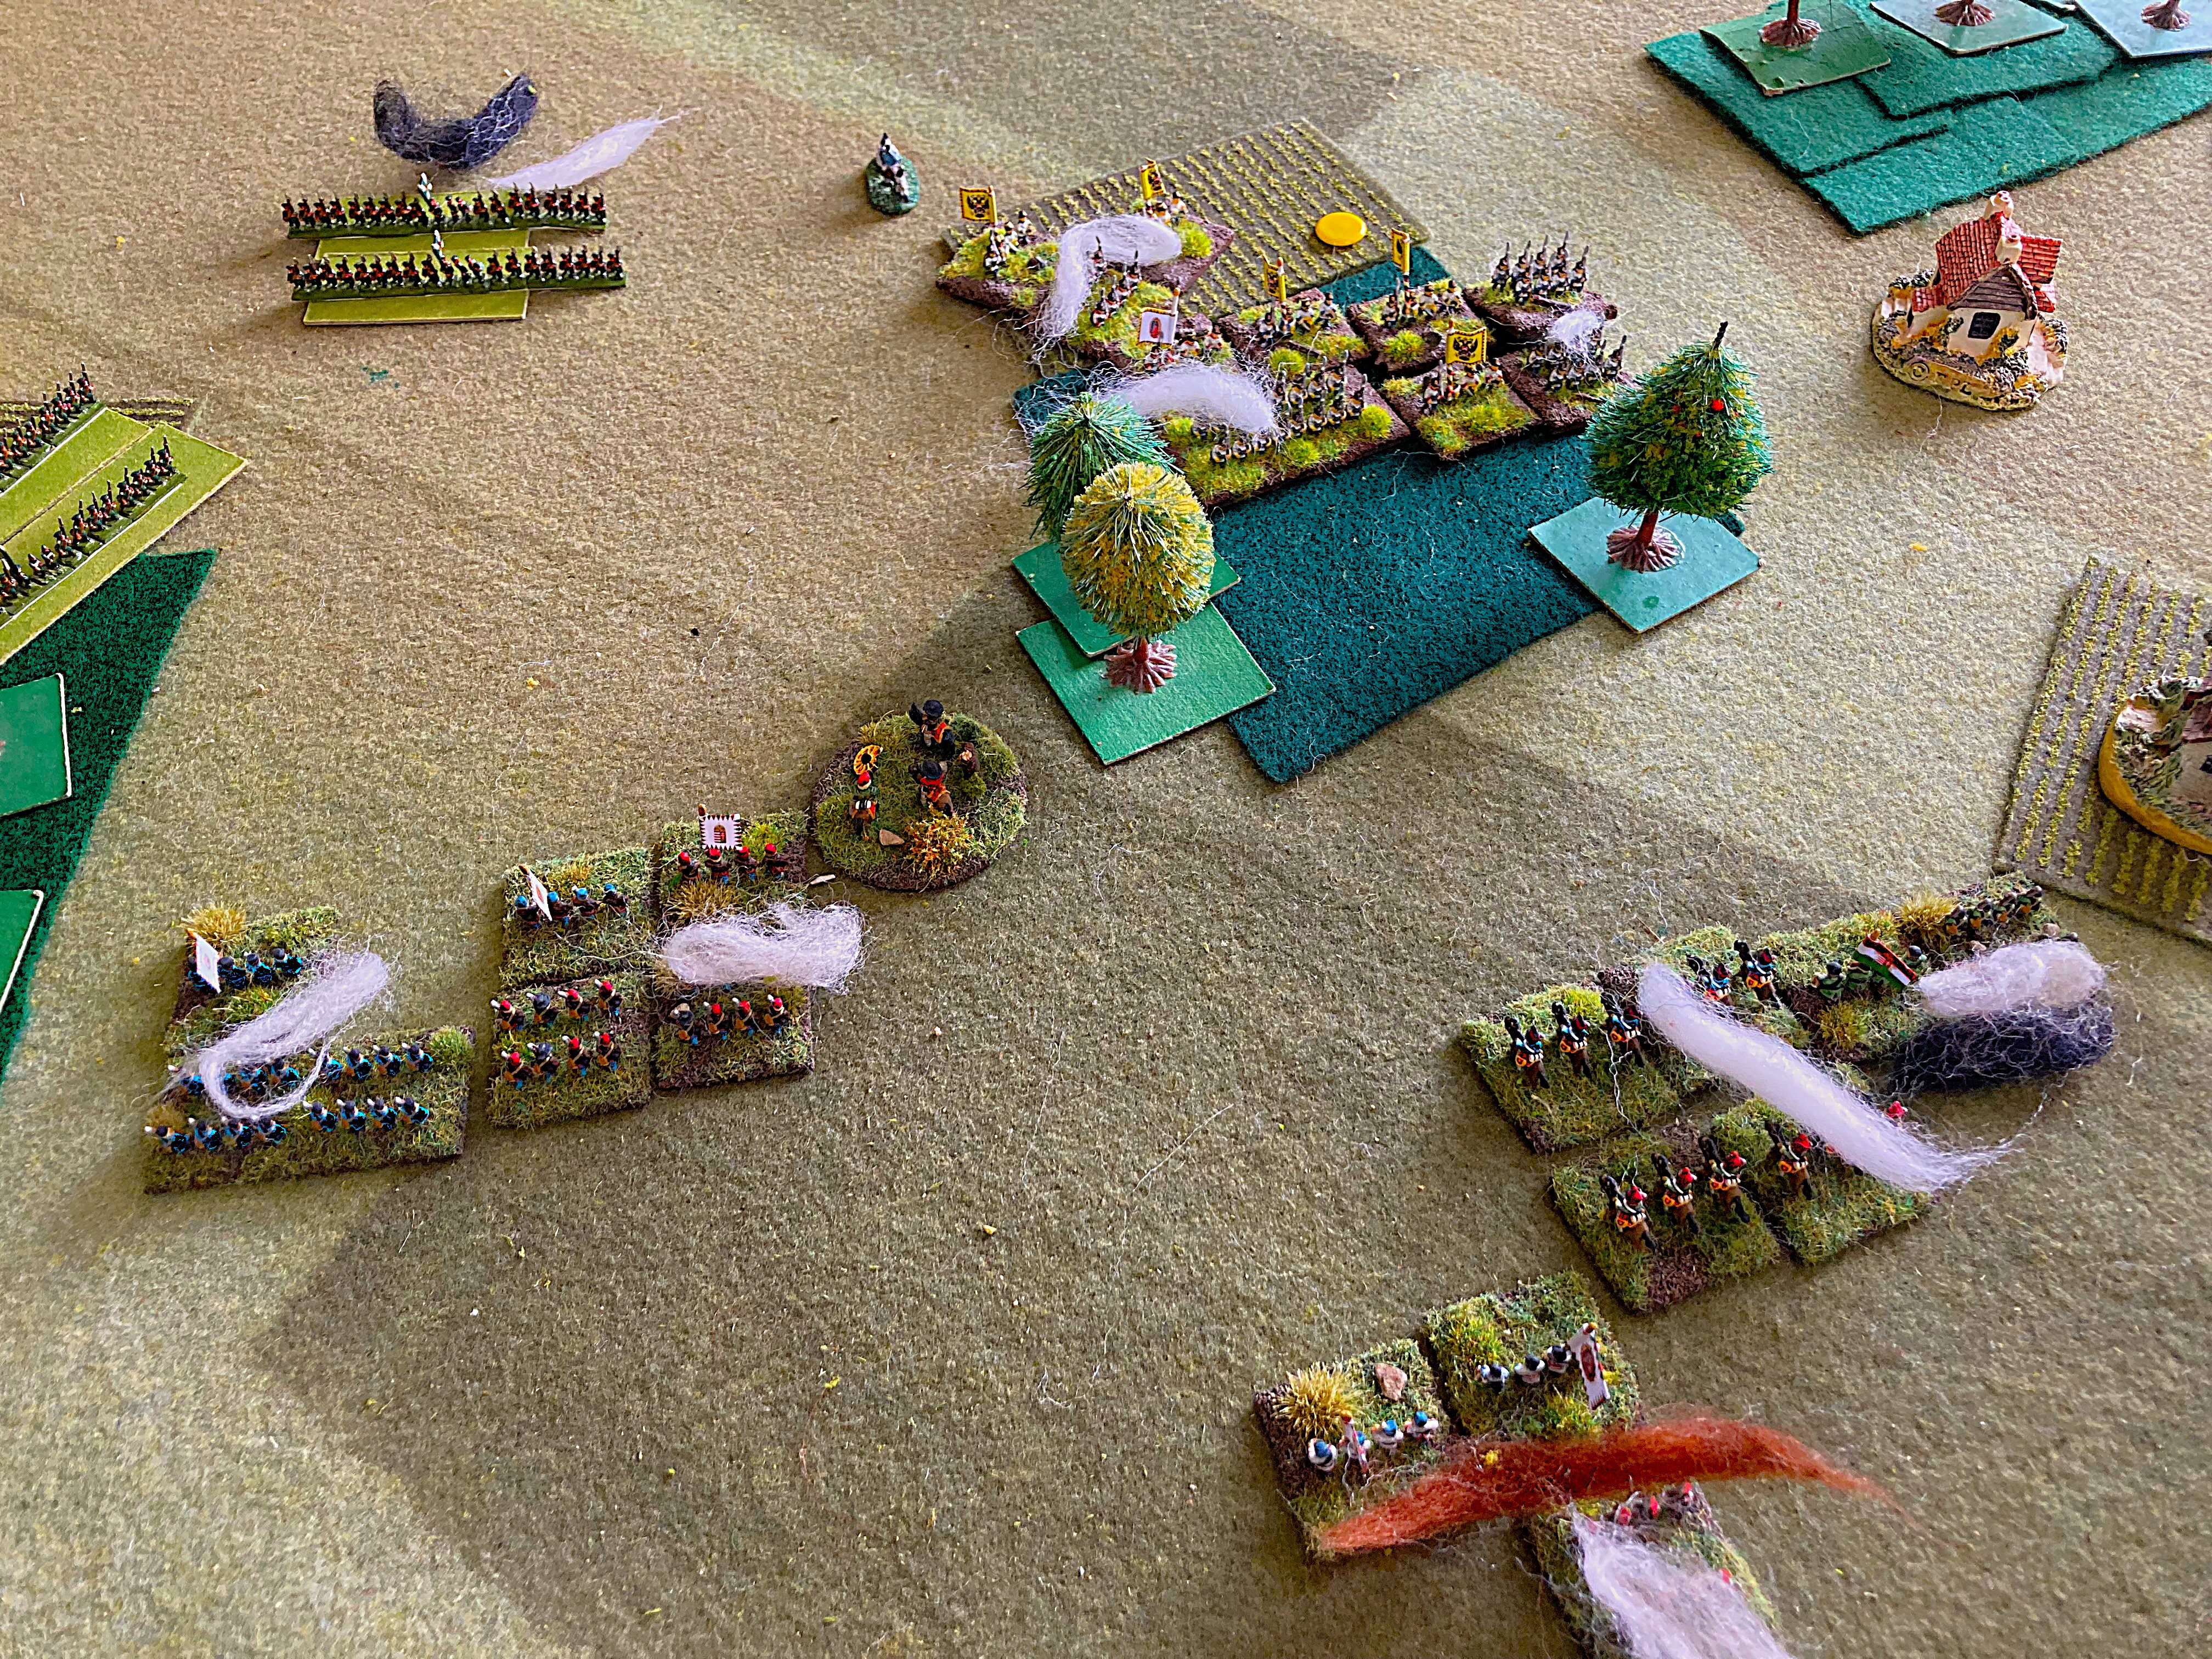
Initial set-up on a flat, marshy plain, north of the Danube. Ásboth's II Corps in the foreground prepares to assault the objective villages (yellow counters = Austrian-held) of Királyrév (left), Zsigárd (centre) and Pered (behind the wood, upper centre).
How it looks from the Austrian side, with the two units of Pott's brigade holding Zsigárd and Királyrév.
General Herzinger with the rest of his division: part of Theissing's grenadier brigade and Lederer's fearsome cuirassiers. I wish I'd planned my Austrian army better when I commissioned it. The grenadiers should have bearskins; the gunners should have broad-brimmed hats; I didn't get any grenzers or uhlans or chevaulegers ... oh well, you can get away with a lot in 6mm. Figures are proxied from various Baccus 6mm ranges.
Imperial reinforcements, from the left: C-inC General Wohlgemuth with more of Theissing's grenadiers; light cavalry; the two units of Perin's grenadier brigade, plus artillery and some rockets (the red trail); and the four mighty regiments of Panyutin's Russian 9th Division, plus guns. The 'Russians' are Prussian Landwehr figures by Heroics & Ros.

Hungarian C-in-C, General Görgei, reviews Knezics's III Corps. (Knezics gets sacked mid-game, so his corps actually gets led into battle by Leiningen.) Units with two flags and red hats are aggressive veterans: the famous 'red kepis' and the Polish Legion. The blue- and green-tunicked units are in early war national guard uniforms, which would have been replaced by standard brown honvéd tunics by the time of this battle - but they look good. Pikéty's hussars cavort at the rear.
Battle was ferocious on Day 1. The unit with black smoke (Spent), lower left, is what's left of Buttler's Hungarian division after recklessly trying to assault Királyrév across the bridge left of pic. However, the Hungarians have taken Zsigárd (red counter = Hungarian-held). Heavy casualties on both sides, including the entire cuirassier brigade.
The two sides reset for Day 2. Ásboth weights the left of his line to attack Királyrév. Herzinger braces his division to receive the Hungarian assault.
Meanwhile, behind the Austrian left, one of Knezics's brigades brings up pontoon bridges to demonstrate near Sellye. Alarmed, the Austrians call in Perin's grenadiers and dedicate three brigades to guarding objective villages in their rear: Deáki (upper left), Királyfalva (centre) and Tósnyárasd (right).
Austrian's-eye-view from behind Herzinger's line. I didn't manage to take any photos of the assault that ensued - another sanguinary one that expelled the Austrians from Királyrév with loss, but left a second II Corps brigade Spent.
Each of the three days consisted of four game turns. On Turn 8 (dusk of Day 2), the Hungarians got lucky and rolled a 6 to get Knezics's men across the river into Sellye. This had significant implications for the set-up for Day 3.
At end of Day 2, the Hungarians held two objectives - enough for a draw, needing one more for victory. Dawn on Day 3 therefore saw the Imperials commit most of the newly-arrived Russians to their line, as they needed to retake at least one objective if they were to win. Both sides formed substantial gun lines in this sector (at 18 guns per base, that's over 70 guns a side).
The Hungarians got to deploy their reinforcements second. Rather than just beefing up II Corps to try and hang on for a draw, they gambled to win. The crossing at Sellye opened up deployment space for them to the right of II Corps. They chose to commit all of Knezics's corps (now Leiningen's) there, outside the main Austrian line's left flank, and launch it at the objective villages behind the Austrian left rear.
Crunch! The Austrians had a turn to react and face left against Leiningen, who nevertheless thumped into them en masse. Although the righthand Hungarian units will bounce off Deáki (behind the wood centre right), they will smash the central Russian regiment, which reels back Spent. Meanwhile, the first Austrian attempt to retake Királyrév has been repulsed (top left) ...
... but the next one goes in, wiping out a Hungarian brigade. A Russian regiment advances towards the Hungarian gun line; Hungarian hussars behind it prepare to counterattack.
The Austrians launch a counterattack of their own against Leiningen, whose troops are driven back with heavy losses. The Austrians will advance to the edge of the wood.
This exposes them to a flank attack by Leiningen's indomitable red kepis and Poles. It is the Austrians' turn to suffer heavy losses. Not only does the Hungarian infantry take Deáki, but the hussars move north and seize Királyfalva (top right). The Hungarians hold three objectives - enough for victory. This means that on the last Imperial turn the Imperials must retake at least one to avoid defeat, or two to turn the result around.
The Imperial troops respond with alacrity and ardor (i.e., they get all their movement rolls). First the Poles are wiped out; then, assaulted on two sides, the Hungarian brigade in Deáki surrenders, leaving the red kepis to stand alone.
No better fortune for the Hungarians in Királyfalva, where the hussars are unable to stand against the Austrian infantry's assault.
The final Hungarian turn and a final charge by the red kepis. They manage to expel the Austrians from Deáki - but a few Russian boots are enough to retain possession of the village for the Imperials, and therefore to deny the Hungarians a draw and claim Imperial victory!
Reflections
The Narrative. As Bob H said on the io group after he participated in our BBB Bash Day convention a couple of weeks ago, "Every time I've played BBB I've come away with a narrative and the urge to revisit the scenario map to see if there's another way it could have played out". That absolutely applied here. As my brief summary shows, the game told a story in several chapters with dramatic twists and turns. There was no shortage of options for both sides to do things differently, and no shortage of moments where different dice could have made things turn out very differently. Eminently replayable to change the narrative!
Variable Reinforcements. Dicing to see whether reinforcements arrive is hardly an innovative game mechanism but doesn't feature in most BBB scenarios. It really helps to introduces some Clausewitzian gambles into this one and make it a nail-biter.
Councils of War. As noted above, the two Night Intervals in the battle produce major resets and present the players with major strategic decisions. As I was reffing rather than playing, I was able to stand back and enjoy the two command teams each debating their options and making their plans. My main demand of a game is that it should present players with plenty of interesting choices and challenging decisions. Pered definitely delivered.
The Social. As is traditional after our weekend games, four of us went for a post-battle curry. In its way, this was just as much fun as the game. Good times with good friends are precious.
First Significant Military Use of Railways? Panyutin's Russian division was only able to save the day because it had been shipped across Galicia by train before marching to the battlefield. People like to point to the Second Italian War of Independence as the first massive military use of railways, but perhaps the Imperials can claim the first significant one? The railway in Hungary also featured in various ways during the war, ferrying troops and supplies and even, on one occasion, sending a locomotive to raise the alarm and call for reinforcements. A nice footnote in history on which to end this post.
The Pered scenario is one of sixteen in the "Bloody Big Hungary '48 Battles!" campaign book for BBB.


A cracking good read! Who made the pontoon bridges?
ReplyDeleteThanks, Vincent! Pontoon bridge I believe is Heroics & Ros French Napoleonic MFN35 https://www.heroicsandros.co.uk/shop/Support-c50382054
DeleteBeautiful armies and presentation! Hope your heads weren't too sore after those beverages too :P
ReplyDeleteLuckily these days I know when to stop. :-)
DeleteI find the advanced years have pulled back on the reins. On the other hand, makes me a cheap date.
DeleteThis was no ordinary firewater, so I ration it rather than swigging it. Same with the 50-yr-old Calvados that only comes out on special occasions.
Delete