We at OWS were honoured with a visit by Matt of "Pushing Tin" fame. He lured us off our usual turf to the War of the Spanish Succession (1701-1714). Regular readers will be aware of my ignorant prejudice against pre-Napoleonic warfare. Matt overcame this by offering us a refight of the battle of Blenheim.
Blenheim Palace is just a couple of miles up the road from us, yet the closest I have come to gaming the battle was as a teenager. The 'grown-ups' at the club laid on a big Napoleonics club game. I had a bit part on the side of the defenders. We ended up being beaten, as we had let our reserves be sucked into defending the two villages anchoring our flanks, only to see the foe smash through our centre. The scenario designers were very pleased with themselves: it was a disguised scenario for Blenheim and they had managed to broadly replicate the historical event.
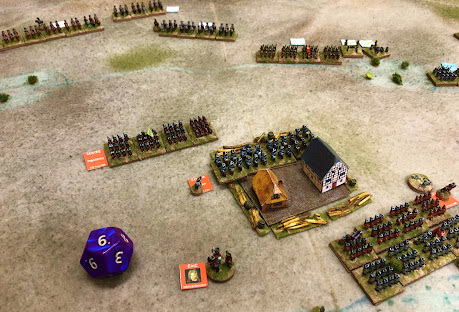
The historical situation (for those who share my relative ignorance of WSS): a Franco-Bavarian army is threatening Vienna. A disparate allied army of British, Austrians, Dutch, Danes, Prussians etc, under the Duke of Marlborough and Prince Eugene of Savoy, has dashed to the rescue from the Low Countries. The allies find the French lined up next to the Danube near Höchstädt in Bavaria. The French position is bastioned by three fortified villages: Lutzingen, Oberglau, and the eponymous Blindheim (or Blenheim).
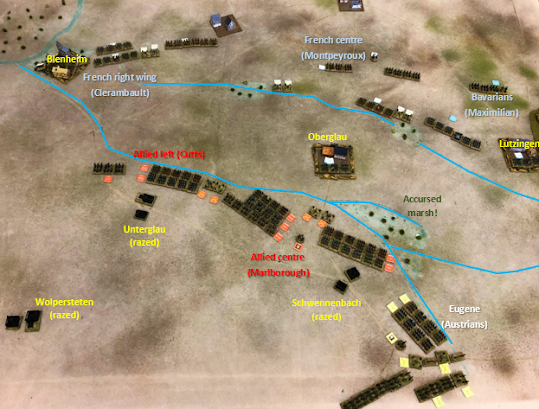
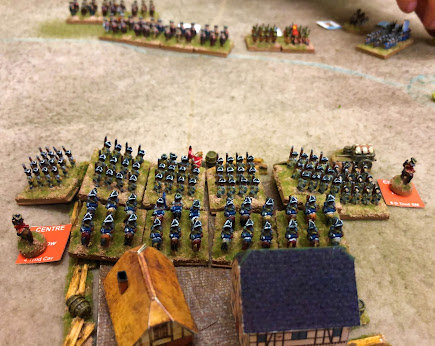
John and Dave W took the French and Bavarians. Mark, Matt and I commanded the allied right, left and centre respectively. That cast Mark as Eugene and me as John Churchill aka Marlborough. Our plan was that Mark and I should converge on the enemy's left wing via Oberglau and Lutzingen while Matt fended off any counterattack by the French right from Blenheim.
The rules were based on our beloved "Bloody Big BATTLES!". However, Matt has created a set of rule modifications to tailor BBB to the (very well-tailored) formal warfare of the 18th century. The main difference is that these mods rightly make manoeuvre much less free and easy than we are used to.
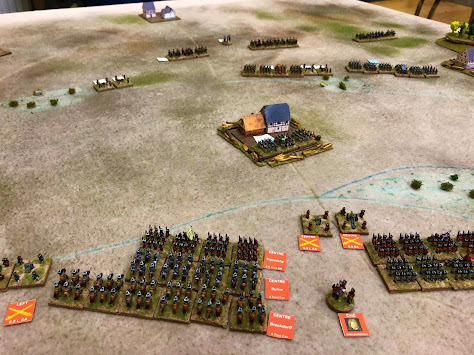
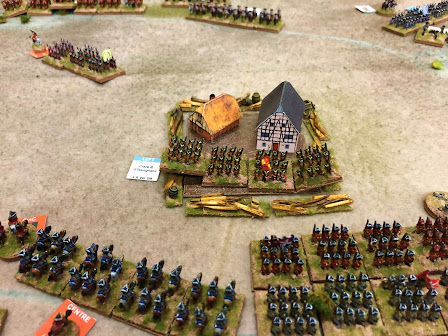
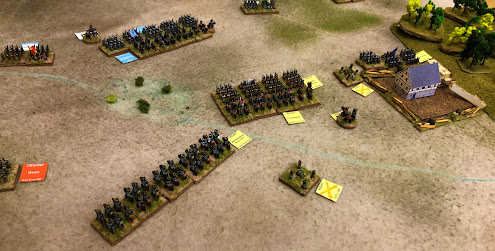
Consequently our attack started very badly. Mine was the critical role in the centre and I absolutely floundered. Most of my infantry had to cross the Nebel stream and squelch through a marsh to attack Oberglau. Unfortunately I hadn't pointed them in exactly the right direction to start with and pivoting is hard. They emerged to find themselves in range of the defenders but not in arc to reply effectively. Webb's infantry were battered by Bavarian guns. Rather than pushing through in support from behind Webb, Horn actually withdrew behind the Nebel again (rolled snake eyes). Horn spent the next several moves doing nothing, then trudging forward through the marsh for the third time.

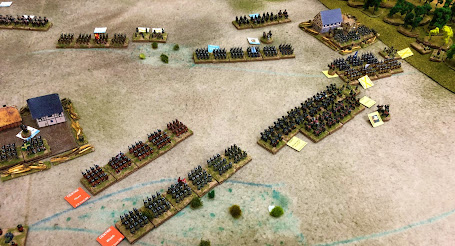
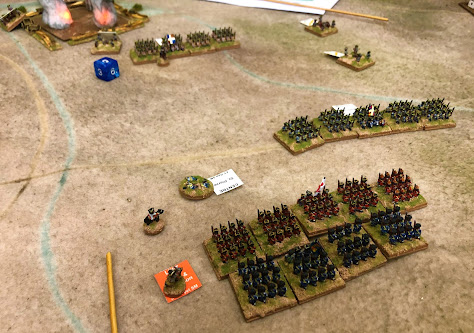
And what of my cavalry, east of Oberglau? Thanks to the rule mods, I utterly miscalculated, parking them too far away to charge the French guns in the centre, yet close enough to be bombarded by them. Brockdorff's potent contingent was soon spent without having yet struck a blow. In desperation, I finally launched them at the guns while Bülow's horse took on their French counterparts. Bülow was repulsed, but not before we took the guns.


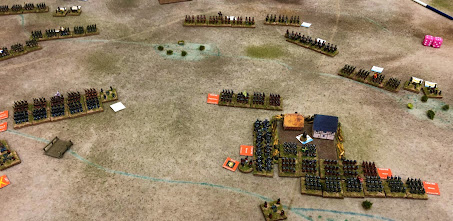
So ended the battle. The French right was shattered, their centre and left rebuffed and too weak to retake the lost villages. This was quite a second-half turnaround, seeing as we had spent most of the first half being repeatedly stalled and mown down by French guns. This was a hard-fought battle and a narrow victory. If a grateful nation rewards me with a palace, I shall call it ... Blenheim Oberglau!
Matt's WSS mods and his Blenheim scenario are available from the BBB group files.
***
Reflections
Matt's C18 movement mods work. The constraints on manoeuvre obliged us to think and act in a much more linear fashion appropriate to the era. It looked and felt right (to my inexpert eye).
Matt's C18 combat mods also work, reflecting such things as volley by rank vs 'Dutch' platoon fire, 'halt & volley' cavalry vs charging cavalry, dragoons, and cumbersome artillery.
There is sheer pleasure to be had simply from refighting a classic battle, almost regardless of how the game goes. I have now 'done' Blenheim. Huzzah!
Wrestling with new rules is hard! Happily this is something I rarely do these days myself. I have seen others suffer it quite recently, though, with half the session taken up by flicking frantically through a rulebook, and everyone making naive tactical errors because of unfamiliarity. The first few turns of this Blenheim game did give me a reminder of what this is like as I fell foul of rule mods thwarting my cunning plans and causing my hoped-for fluent manoeuvres to stumble and stutter.
Variety is refreshing. This was a stimulating game, not only because it was outside my usual period and had a different flavour, but also because we were using Matt's armies which we hadn't seen before, and Matt's terrain likewise. If we'd fought the same game but just on our usual felt terrain and proxying with our usual armies, it wouldn't have been quite so fresh and exciting. Clearly I need new toy soldiers. Every wargamer does.
Matt is working on scenarios for the rest of Marlborough's 'Big Four': Ramillies, Oudenarde and Malplaquet. Looking forward to these!
Most interesting. I have a lot of Seven Years War figures that could stand in for these guys.
ReplyDeleteGood to hear from you, Vincent. Yes: Matt's mods open up another whole century of battles to refight ...
DeleteI am looking forward to fighting some of the battle from the 18th C.
ReplyDeleteNick
Yes, me too - I have got sort of interested in Frederick the Great's wars lately!
DeleteNice write up and glad everyone enjoyed themselves, I certainly did!
ReplyDeleteMore, please, Matt!
DeleteThat's a lovely looking battle and one that felt right for the period. I've seen Blenheim played with other rules over the years and they all seemed to have struggled with this particular battle. Looking forward to more from the 18thC as and when time allows:).
ReplyDeleteInteresting. All the more kudos to Matt, then, for succeeding where others have struggled!
Delete