Thursday, 15 June 2023

Ukraine with FFT

My mate Graham spent the 1980s in Germany defying the Soviet threat. He still has a bucket-load of 1/300 West German and Soviet tanks from those days when he was winning the Cold War by playing it out on the tabletop.

We decided to dust them off to explore what is happening in the Ukraine right now. Apologies to any readers who feel current tragic real-world events are not an appropriate subject for a game. This was an exercise in technical curiosity, no political dimension and no bad taste involved. We set up a notional scenario loosely based on the Ukrainian offensive apparently in progress right now just to see how things might go. I say 'loosely' because we had only the sketchiest idea of what the Ukrainian and Russian forces look like and how they operate.

The scenario situation is that three battalions or so of Russians are dug in along a river line, some minor tributary of a larger tributary of the Dnepr. They have only a little armour on-table but a mechanized battalion in reserve. The Ukrainians will probe with three recce companies initially before deciding where to commit their main body.

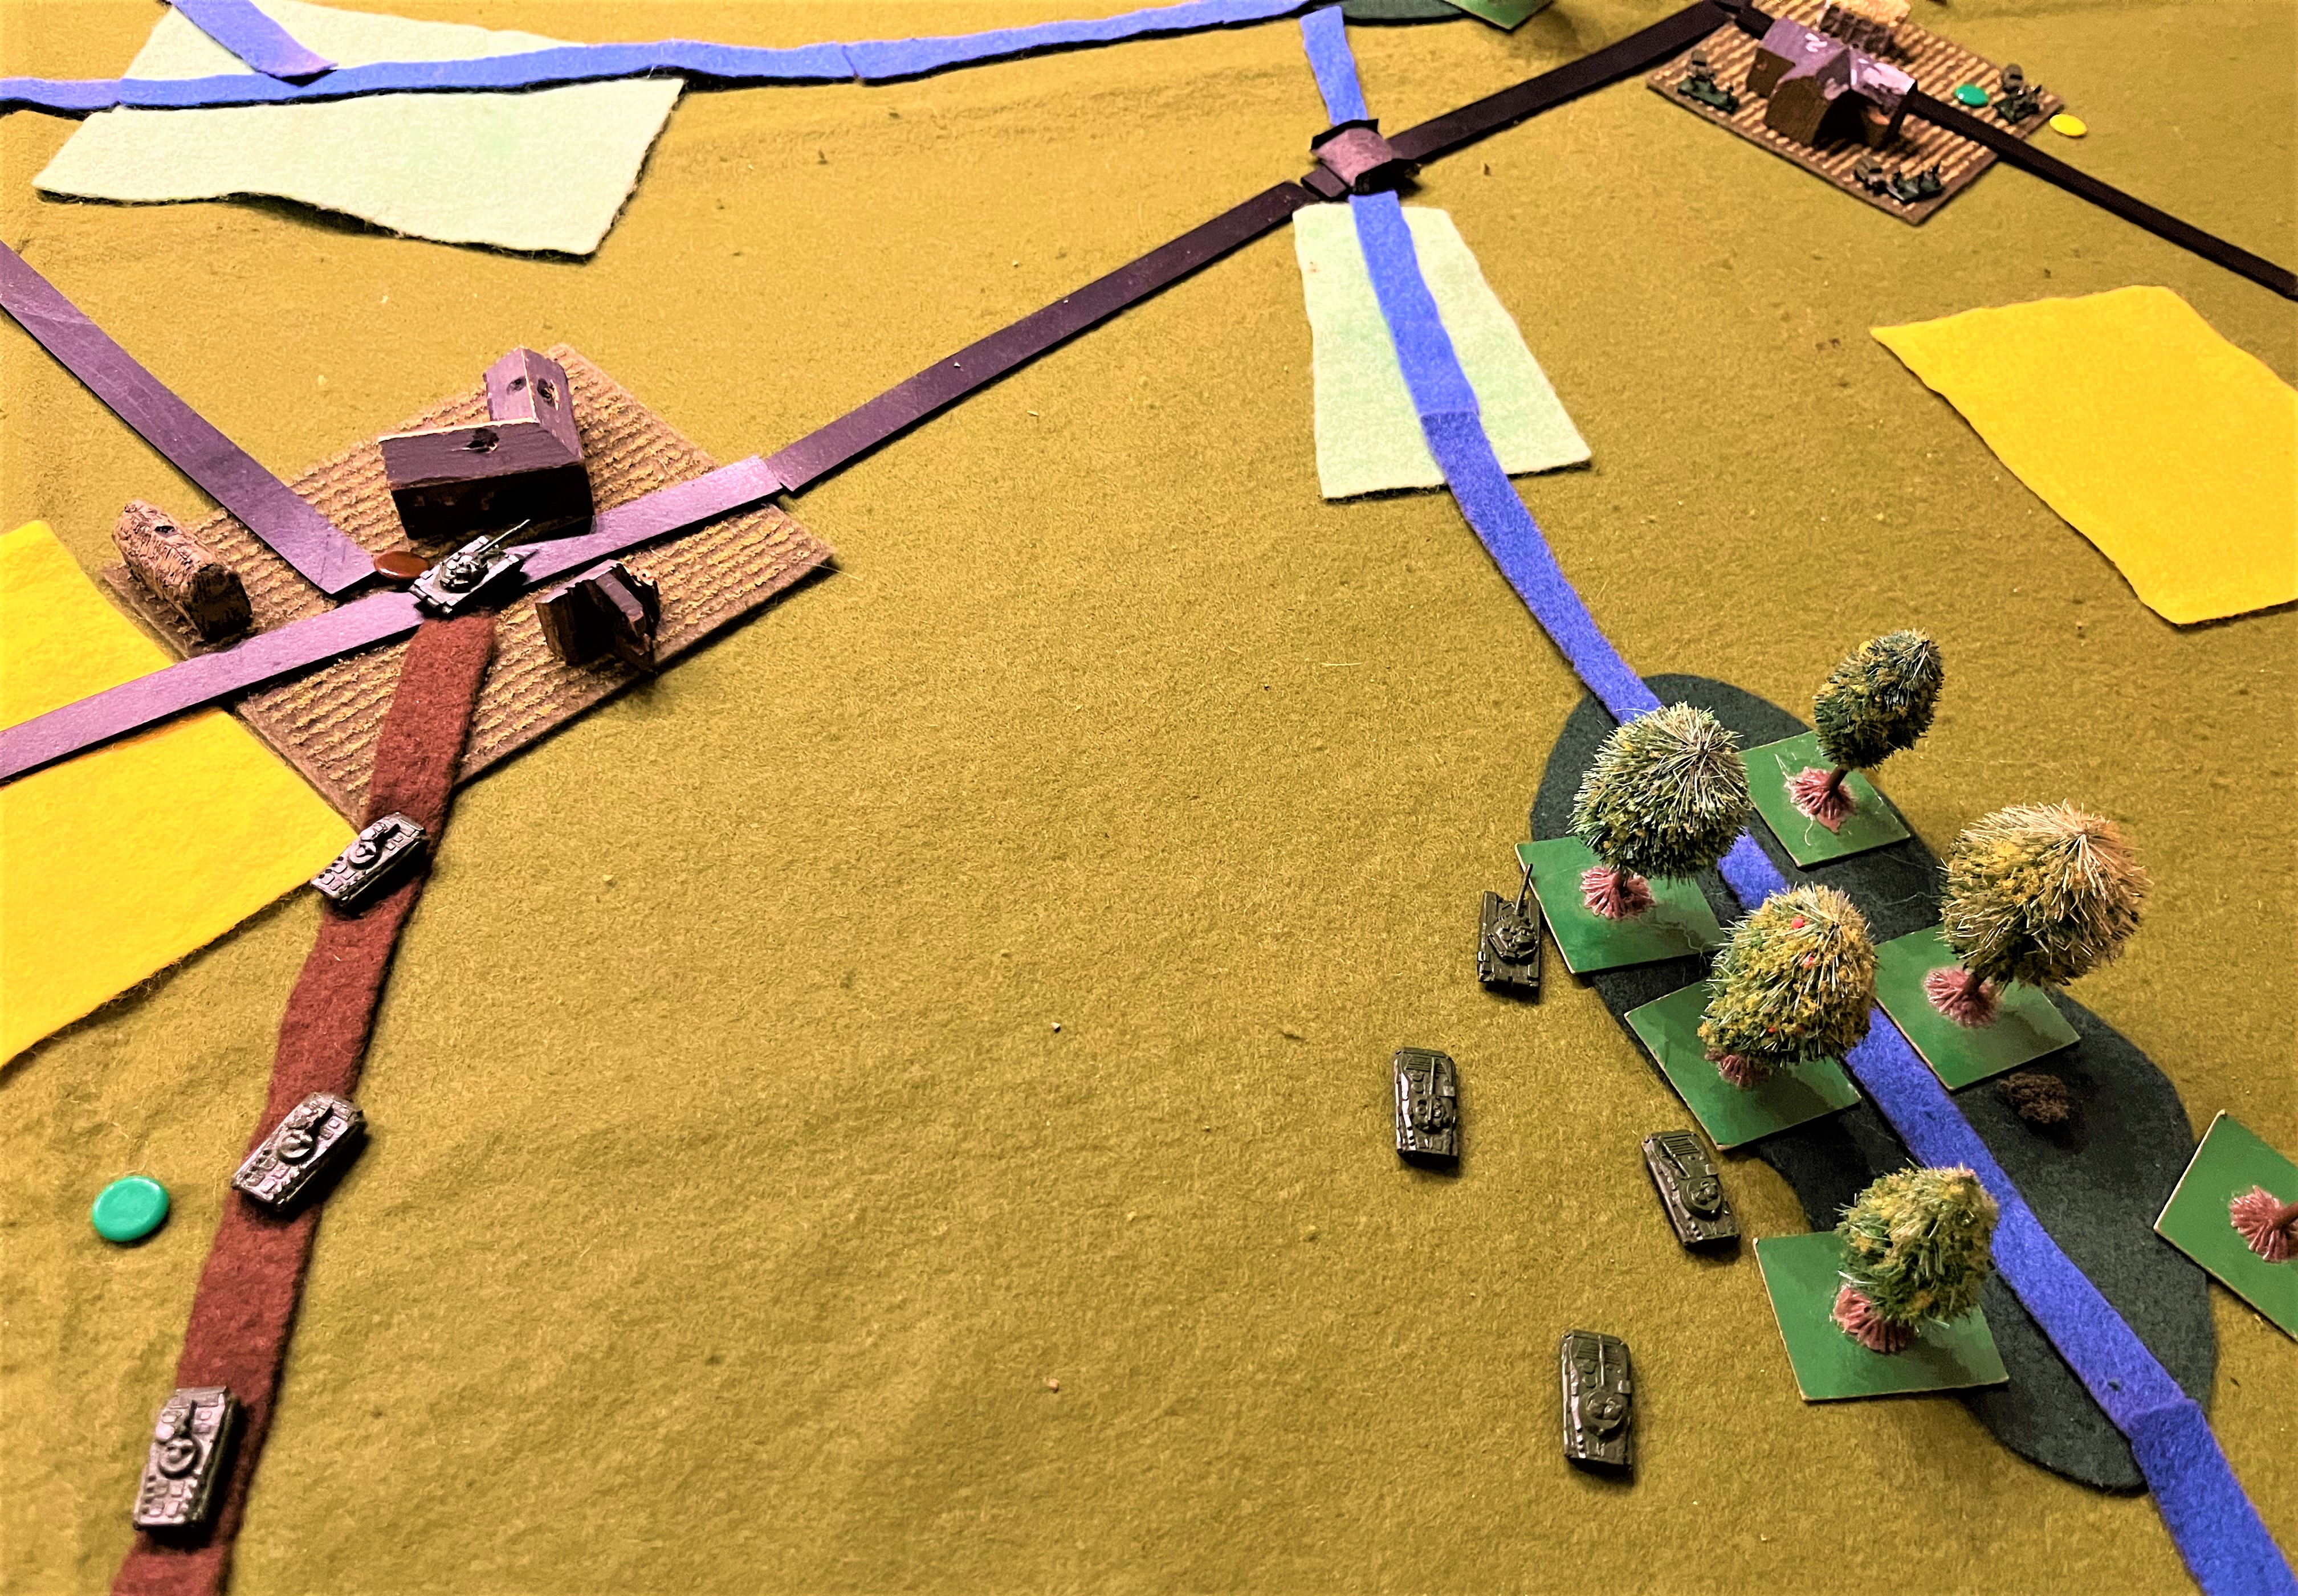
Here is some grainy drone footage of the battlefield, looking north from the Russian side. Mostly open country with occasional villages and small woods. Light green patches are marshy ground. Yellow patches are Ukrainian sunflower fields. The main river runs across the centre of the table from left to right, with minor streams feeding it. Three bridges cross the main river. The Ukrainians' nominal mission is to take one of these for a draw or two for a win.

Ukrainian recce probed the eastern bridge first and found it strongly defended by two infantry companies (one dug in behind the bridge, the other in the sunflower field top right) supported by a mech company in the village in the foreground. Plumes of smoke top of pic show how Luchs armoured cars fared against T-72s' 125mm rounds and BMPs' missiles. However, Ukrainian troops have got into the village top left and are about to bring down lots of artillery fire on the Russians.

Then the Ukrainian scouts snuck away to the west to investigate the central bridge. Amazingly, they found it undefended! (Rather than plot a prepared defence and map it, I had scattered twice as many counters as I had Russian units, then rolled a D6 as each was 'bumped'. On 4+ I deployed a company, otherwise it was a dummy. I had five or six counters around this bridge but they all evaporated. Our rationale was that the Ukrainians must have struck a seam between units like at the famous 'Bull Bridge' during Operation Bluecoat in 1944 - perhaps between the Wagner group and the Russian army?) The Ukrainian recce promptly jumped in and seized it, backed up by some prowling Leopards top of pic.

We decided that would probably trigger a Russian counterattack, so over the next two moves I brought on the reserve mech battalion. Here the first two mech companies approach from the southwest (we made reinforcement arrival points semi-random).

Graham's artillery fire had been singularly ineffective until now, struggling to roll any 5s or 6s. This is the reason why - he was using a couple of D3s. His luck improved after we realised this.

The Russian counterattack develops as a third mech company arrives from the southeast to envelop the Ukrainian defenders of the central bridge. Unfortunately for the Russians, the Ukrainians have decided to reinforce success, so more Leopards and Marders are arriving top of pic.

The ruleset we used was 'A Fistful of TOWs' (FFT). Combat in FFT is swift and lethal. Within a couple of turns, most of my mech battalion was burning wrecks as superior NATO equipment and training demonstrated the quality gap. The Ukrainians lost a few as well, but with their armour virtually all gone, the Russian infantry - though numerous - had no real option but to hunker down in their trenches. We stopped there, but the Ukrainians had secured a draw and looked good for an eventual win.

And to finish: a parade shot of just a fraction of Graham's collection that never made it onto the table. M113s, Jagdpanzers, Gepards etc, all in functional factory finish.

Reflections:

Just a Game: The first thing to say is that this bore little relation to reality. I just read yesterday that Ukraine is reporting advances of "200 to 500 metres" in fierce fighting, whereas our game of bold armoured manoeuvre produced a relatively swift and easy 3km+. I suppose what is actually happening is more like a WWII infantry assault against prepared defences, with lots of fire support on both sides to pin everyone down, and the Russians apparently conducting "manoeuvre defence" - planned fighting withdrawal through successive defensive lines - rather effectively. Our game was closer to a hastily improvised defence (albeit with trenches): none of the minefields and obstacles that I am sure the Russians have, minimal Russian artillery rather than the considerable support and effective fire plans they evidently have, we underrated the infantry's anti-armour weaponry, the undefended bridge was a highly unlikely fluke, and I played the Russian infantry as essentially passive rather than reacting as intelligently as they seem to be. Also, having read some studies that comment on the effects of drone surveillance and the resulting need for dispersion and mobility, I would have liked to add some scenario special rules to reflect those, but as I last played FFT a decade or so ago and Graham had never used them, that would have been a complication too far. All that said, I suppose our game with its unrealistic and unsuccessful Russian tactics at least partly illustrated why they have opted for the alleged manoeuvre defence instead.

Quality vs quantity: always a good match-up. You could say the game was rigged in that we rated the Russians as "Average" in FFT terms and the Ukrainians as "Good". This quality difference then plays out in both to-hit rolls and saving rolls. This really told once the HEAT and APFSDS started flying.

Lack of practice makes imperfect: although Graham and I are both broadly familiar with the characteristics of the modern kit we were using, how that translates into tabletop interactions using an unfamiliar ruleset is a different story. Our inept fumbling and consequent poor tactics probably made the game even less realistic than it already was.

Get the toys on the table: the gap since my last post betrays the fact that I've gone a few weeks without a game. It was good just to push some models around and roll some dice; doubly so because I rarely get to play a moderns game and some variety in gaming diet is both healthy and refreshing.

Unpredictability makes for interesting games: the semi-random mechanisms for revealing Russian defenders and for arrival of reinforcements worked very well, producing surprises of both pleasant and unpleasant varieties for both sides. While the undefended bridge was improbable in the intended real-world setting, it is by no means without precedent in other real-world situations, and it was great for creating a game narrative and giving both players something unexpected to react to.

Recommendations for future research (as academic papers usually end by saying): Notwithstanding my previous blog post about what dull games frontal assaults usually are, I just might try a more serious version of this, making a proper effort to set up a thoroughly prepared Russian defence - complete with successive defensive lines, obstacles, fireplans and planned withdrawals - and then try to crack it with a similarly well thought-out Ukrainian plan. It would take some effort but that could be justified by the reward.


Sunday, 23 April 2023

Can frontally assaulting redoubts make a good game? Düppel (1864)

How many games have we all seen or endured that are just a boring line-out, wall to wall troops from table edge to table edge, with few tactical options beyond grinding forward and hoping to roll high?

How much more painful is it when one side is entrenched and has virtually nothing to do except keep rolling fistfuls of firing dice?

OK, I know it is possible to revel in such games simply because of the occasion and the spectacle. People will refight Pickett's Charge, or the Charge of the Light Brigade, and it will be awesome just because the original was so epically disastrous and because recreating it with your buddies in glorious 28mm has to be fun, right?

But for those of us for whom a game should be about making interesting and challenging decisions every turn - no thank you. (No disparagement of any beautiful Pickett's Charge game intended, it's just not for me.) I want options, choices, the chance to make an actual plan and see it succeed or fail. I don't want everything straitjacketed and railroaded and all the important decisions already made for me in how the game is set up.

It's a cracker! Specifically - the Rolf Krake.
1/600 model of Denmark's 1864 ironclad, scratchbuilt by Crispin for his Dybbøl/Als game.

Therefore, when I was creating the scenarios for the "Bloody Big European Battles!" companion volume to the BBB rules, I was confronted by a conundrum. The major action in the Second Schleswig-Holstein War of 1864 was the Prussian storming of the Danish redoubts at Dybbøl, aka Düppel. This war had to be covered in the book, so this battle had to be there. Not counting the preliminary bombardment, it lasted three and a half hours, costing thousands of casualties, but can essentially be boiled down to this: Prussians storm the line of redoubts; Danish reserve brigade counterattacks; Prussians commit reserves in return; Danes surrender.

That really didn't appeal to me as a game. Perhaps there could be some tactical decisions for the Danes about whether/when/how individual battalions should fall back from the redoubts, or where/when/how to move the individual battalions of the reserve brigade. For the Prussians, perhaps some nuance about which battalion attacks which redoubt, or how to exploit success, and where/when/how to commit reserve battalions. But for a big battle game that should be about manoeuvring entire brigades or divisions and that should generate some ebb and flow ... there just wasn't enough there.

So what to do? I found salvation in the battle's prelude and aftermath: the minor outpost skirmishes in the two months before it, then the amphibious invasion of the island of Als two months later. These were not worth a BBB scenario in themselves - Als cost the Prussians fewer than 400 casualties - but they offered an opportunity to shape the actual assault on Dybbøl, to give it context and consequences, and (most importantly) to give the players on both sides more scope for decisions and manoeuvre.

It was feasible to fit all these actions on a single 6'x4' table at the modest scale of 1700m per foot. I therefore decided to treat them as three linked phases of the same scenario: Outposts Stage; Redoubts Stage; and Als Invasion Stage. Prussian numbers make Danish military defeat virtually inevitable. The trick to making it a challenge was to put the Prussians under time pressure with a turn limit. The idea is that the Danes are trying to buy time for the other great powers to intervene and lean on Prussia and Austria to call their dogs off. Thus, for each stage I set certain objectives the Prussians have to take before moving on to the next: e.g., if they overrun the outposts swiftly, they gain time for a more methodical assault on the redoubts, etc. Ultimately, they have to take all the objectives within 10 turns to win or 11 to draw; otherwise, they lose.

Crispin made a custom battlemat and rolled it out for us at OWS last week. Luke, Ben and John fancied defending the Danish cause, so Mark, Dave W and I took the Prussians. AAR in three captioned photos below, followed by some reflections.

Looking southeast across the battlefield. Top left is the island of Als, separated from the mainland by the Alssund. Pontoon bridge top centre links it to the high ground defended by the Dybbøl redoubts (the light green strips with gun embrasures). White counters mark the objectives. Prussians are marching on from bottom left and bottom right. One lone Danish brigade is forward in the lowest wood on the right; two more in the villages behind it; the other Danish division in the redoubts.

Mark commanded our left. As time was critical, his sensible advice was that we should ignore and bypass the forward brigade initially, press ahead as fast as possible, and let it be tackled by our follow-on forces arriving on Turns 2 & 3. However, I could not resist getting my jaegers into action , so I let two of my brigades get involved in a fight in the woods immediately. I did bypass with the other two, but carelessly failed to bring them on as far east as I could have.

My carelessness was compounded by a spate of dismal movement rolls across the Prussian army. One turn I rolled 2, 2 and 3 for three of my brigades, which therefore failed to move at all, while Mark did little better. Consequently, I think it took us 5 turns to take all the Outposts and be able to move on to the Redoubts Stage.

First Prussian assault on the redoubts. Our massed siege guns line the hill in the foreground. We outnumber the Danes about 4:1. The pic isn't big enough to fit all the Prussians in. The good news for the Danes is that the tardy Rolf Krake has finally got up steam and is raking the German attackers. That plus kind dice meant it took two goes before we could break into the redoubts. Turns 6 and 7 gone - we really needed to clear the remaining Danish brigade off the hill in Turn 8.

Keeping the red flag flying! That blue counter and Dannebrog flag belong to the last unit of the Redoubts garrison, a Spent 2-base Danish brigade, being assaulted by four Prussian brigades. It was swept aside, of course. However, the clock die reveals that it had survived the crucial Turn 8 the turn before, as most of our troops failed to get the movement they needed to reach it, and Danish fire stalled those that did.

We moved on to the Als Invasion Stage. We knew we needed at least two turns of movement to reach the Als objectives, so with nine turns gone it was impossible for us to take them on Turn 10 to win. A draw was still possible if fortune favoured us a little. But Lady Luck was against us - one more turn and we would have done it, but we had failed, and victory went to the gallant Danes.

Reflections:

It's a micro-campaign! I'm rather proud of the scenario structure. My Reflections on Wargaming essay on "Changing Situations Mid-Game" didn't mention this scenario, but probably should have. The three stages give two opportunities to reset and they create repeated peaks of excitement in between, as the Prussians try desperately to complete each stage and the Danes try to fend them off. The Danes also have important decisions about how many troops to commit and where during the first two stages. All told, it definitely has more options and more replay value than a straight assault would have.

Mistakes in Deployment are not Easily Rectified. Isn't that a von Moltke saying? Maybe Moltke the Younger in 1914? Anyway, I managed to prove it right this time. By letting myself be distracted by one irrelevant outpost brigade, I cost our advance precious time that we could never recoup.

The Maritime Dimension. Having a naval element in the game - in this case, the Rolf Krake (loved it) and then the crossing of the Alssund (albeit that is basically abstracted) - enhances both the aesthetic and the game interest. 

Right and Wrong Ways to Divide Command. On the German side, we didn't divide very sensibly: Mark on the left had a clear sector to himself, but on the right, I had the leading forces while Dave took the ones arriving on Turns 2 & 3 in the same sector. I'm sure that contributed to my carelessness. By contrast, the three Danish players decided they didn't have enough troops to divide up, so they made the interesting decision to divide command by time instead, each of them commanding in a different stage of the game (except Luke got the Rolf Krake throughout as his stage was going to be the shortest). This meant they always had unified command and therefore a clearer, more focused approach, vindicated by victory.

Yes, Assaulting Redoubts Can Make a Good Game! (To answer my own question in the headline.) It was a rocking good time, complete with whoops of success, cries of woe and wails of dismay. Even though the Danish force was largely wiped out, the Danish players greeted each turn that they survived with jubilation. Happy days!


Friday, 14 April 2023

"Hungary 1849" reviewed: "a cracking read"!

I was delighted today to see the first review of my recently published book, "Hungary 1849: The Summer Campaign". I am obliged to Colin Ashton for reviewing it on his "Carryings On Up The Dale" blog, here.

Colin gave a very generous review to the previous volume, "Hungary 1848: The Winter Campaign". This time he is equally kind. Phrases like "Chris Pringle has again done a superb job" and "a sympathetic translation, forensically researched and presented, and a cracking read to boot!" are calculated to warm any author's heart. (As is giving it five stars on Amazon - thanks, Colin.)

I hope I might have a chance at some wargame show or other such event to express my appreciation to Colin in person, but for now let me publicly thank him here.

Tuesday, 11 April 2023

Golan Heights tank battle: Nafah (1973) (oh, and Ramillies again)

The long Easter weekend provided a rare opportunity for a game with Bob Mackenzie. As I'm getting plenty of BBB horse and musket action at OWS these days, I put in a bid for a tank battle and Bob kindly obliged. (Earlier in the week I also got another go at Ramillies - see brief report at foot of this post.)


The setting was the Yom Kippur War in 1973. Bob's scenario can be found along with many other good things on his website. The scenario depicts the action around the Israeli base at Nafah on the Golan Heights on the second day of the war. The Syrians have broken through on this southern sector of the Golan and are hooking right to cut off the Israeli defenders on the northern sector. The Israelis are responding by frantically scrambling troops from all directions to fill the gap.

It's a classic contest of quantity versus quality: roughly four big Syrian brigades vs three small Israeli ones. Especially in the early moves, the Syrians have a big numerical advantage which they can exploit to envelop the few defenders who start on the pitch and to race towards undefended objectives on the far side of the table. However, it doesn't take much for the poor quality Syrian units to become spent and therefore much less useful in attack and very vulnerable in defence.

The 17 photos below tell the story of the game. They're followed as usual by my reflections arising from it. (And then by a brief Ramillies photo-AAR and more reflections on that too.)

View looking NW. All Syrians enter from SE (bottom table edge). They will find a couple of Israeli units in the middle of the table and a tiny garrison in Nafah (the buildings). Syrian objectives are Nafah, the three road exits at top, and the top right hill (Tel Avital).

Not sure which is more fearsome: Israeli Centurions, or Israeli artillery (in this case, M7 Priests). All the models in this game are from Bob's collection - mostly Heroics & Ros, I believe.

More Centurions, this time supported by M50 155mm - oh, and some recce jeeps (who will wisely enter the table last after the serious fighting is over)

Had to give these exotic creatures a pic of their own: T-34/122, a Syrian conversion.

The meat and potatoes: Syrian T-62s (there were also a lot of T-55s).

On Turn 1 my 51st Brigade tried to bully the isolated Israeli delaying force. Sukhoi Su-7B joins the fun. Unfortunately the Centurions have us outnumbered more than one to two ...

Same episode seen from the other side of the table.

Turn 3. The only Israeli units are the now damaged 266th Bn, 188 Bde HQ, and the Nafah garrison. The small 2-model 82nd Bde has been wiped out. However, most of my units are Disrupted (marked by craters) and the two at right and bottom of pic are Spent and Low on Ammo (marked by hospital tents and ammo crates). The poor quality Syrian units can't take nearly as much punishment as the Israelis.

Turn 4 and Israeli counter-attacks arrive from two directions, NW and SW, hitting my front and left). Here comes the frontal hit - I think my mech bde miraculously survived this time but still had to fall back.

The hit from the left was brutal and soon put paid to any ideas I might have had about storming Nafah. The quality difference gave the Israelis a +2 advantage in every assault and fire combat. This is huge on 2D6. Oh, and my Sukhois are done for the day and it is time for Israeli Skyhawks to arrive.

The metaphorical and literal high point of the Syrian attack: 43 Bde's Mech Bn ensconces itself on the top of the Tel Avital objective and sets up its Sagger missile launchers. 

Turn 6, the halfway mark. Most of my force mills around in the middle of the table. The Syrians are all rated Passive, a -1 penalty on all their activation rolls when in good order. That doesn't half slow your blitzkrieg down. No such problems on the Israeli side as their 96th Tank Bn ploughs on through my left flank. 

By now, the Israelis have got four artillery units into action. Here we see those M50s close up. All that firepower was devastating.

Turn 7. Not so many Syrian green unit labels visible now, and more white Israeli ones are pushing forward from the left of pic and in the centre. Two arty bns park on the road exits at top edge. One joins the Skyhawks in obliterating my hilltop battalion, top right. So much for that objective.

It was one-way traffic for the next three turns as the Centurions steamrollered my disorganised, outflanked, rubbish formations. Turn 10 sees me commit my last intact unengaged tank battalion - unengaged because it failed to move for four successive turns despite the bde HQ being next to it ... every artillery piece and aircraft in Israel opens up to make sure it's not going anywhere. Holding zero objectives meant I was one short of a draw. I can console myself with the fact that it's still a pretty historical result. Bob said I'd done better than he did when he played the Syrians.

In fairness, I had inflicted a dreadful toll in white metal alloy on Bob's force - no fewer than 8 strength points. That's a lot of damaged Centurions.

Against the Israelis' 8 SP lost, I think I count a mere 43 Syrian casualties. Clearly a Pyrrhic victory for the Israelis, then.

Reflections:

I do like tank games. As with C19 horse and musket, the mix of the three different major arms (infantry, armour, artillery) makes the tactics interesting and produces battles with depth and scope for manoeuvre - a good recipe for fast-moving games with changing situations.

Nice scenario. It's almost as though Bob follows his own advice - see his great essay on scenario design. Room for manoeuvre, grand tactical options for different plans, both sides having to move a lot, action across most of the table ...

Victory conditions: Bob did say he felt the victory conditions were too difficult for the Syrians. He has now adopted modified conditions based on my suggestion. The Syrians no longer have to hold objectives, they get victory points just for reaching/taking some 'high water mark' locations. The Israelis for their part get VPs by reaching locations along the Syrian baseline, representing the degree to which they cut off or crush the Syrian force. (And giving those Israeli jeeps something useful to do.)

Quality vs quantity: always a nice contrast. The game demonstrated very well how the quality difference produced the actual historical result. It prompted a long post-game discussion between us about the importance of leadership, right down to NCO level, as illustrated in many a conflict down the ages.

Knowing the rules helps. We were using Bob's WWII/Moderns adaptation of "Bloody Big Battles!", BBWW2B. On previous occasions I've enjoyed Bob's WWII and modern games but had to rely on Bob a lot because I found the rules a bit fiddly, I guess because of the wide variety of armour and anti-tank ratings and resulting complex interactions. This time, almost all the tanks were effectively the same, it was crew quality that made the difference, so I found it easier. Even so, ignorance cost me at times: eg, if I had known my Saggers were so useless and my infantry so vulnerable, I might have had 43 Mech Bn hide behind the objective rather than on top of it.

Beautiful models. Bob is a craftsman and it is a pleasure to play his games and use his armies.

===

Now let us step back nearly 300 years to the War of the Spanish Succession. Matt reran the scenario we played last August (AAR here). This time I commanded the French left wing. AAR in the photo captions, followed by further reflections.


Initial French set-up before the allies deploy. Essentially: beefy garrisons in each of the three main objectives (fortified villages) and also in the village on the river on the right flank. Massed cavalry on the heights guard the open ground on our right. More cavalry in reserve behind our left wing.

The bourbon fleur-de-lys flutters gaily over Autre-Eglise, whose gallant defenders will soon become gallant attackers to threaten English-held Foulz.

Marshal Villeroi himself stands ready to hurl his cavalry reserve forward to support the attack on Foulz.

The allied dispositions are revealed, presaging determined and repeated assaults on Ramillies itself (lower left), with cavalry in support to push back our right wing.

How it ended up. Red labels are allies, pale labels are Franco-Bavarian. Left of pic, early high dice for my defenders' fire soon stymied any thought Matt had of taking Autre-Eglise. This encouraged Mark and me to commit reserves and push towards Foulz. However, the marshy valley and some deadly British volleys in return stalled us. Top left can be seen two British cavalry units who must have been commanded by the Duke of York, as all they did all battle was march slowly and with frequent halts to and fro along the Foulz ridge. Right centre: Ramillies fell to the fourth British assault, I think. Mark mounted a couple of counter-attacks but couldn't retake it. However, he did hang onto Taviers, and although his cavalry were pushed back they prevented the allied horse from breaking through to the road exit objective in our rear. Thus, the allies barely scraped a draw.

Reflections:

Linear warfare! With Matt's rule mods, this is a very different game. It becomes crucially important to plan a couple of moves ahead and ensure your troops are pointing in the right direction from the start. It definitely feels as though it captures the essence of 18th-century warfare. It certainly had us all pretending to have powdered our wigs and starched our lace so we could bow and flourish appropriately before inviting our opponents to fire first.

What to do with cavalry? I demonstrated again that I am a light infantryman at heart and should not be trusted with horse. (Just self-deprecating for effect - maybe I could have done better with them but I didn't do anything disastrous either.)

The fun factor of special units. In amongst all the regular field and light artillery, Matt mixed in a couple of units of siege guns and mortars with special capabilities. Siege guns rated Devastating but had to reload (miss a shot) after every shot; mortars negated one column shift for cover. Players had fun firing with these and trying to nullify them.

Beautiful models (again) - just a feast for the eyes.


Wednesday, 29 March 2023

Mahdists and Magyars - another fun club night at OWS

OWS's rude health continues. This week's game was so over-subscribed we had to lay on a second so everybody could play. The two battles were very different, but similar in both being obscure and both presenting very distinctive tactical challenges:
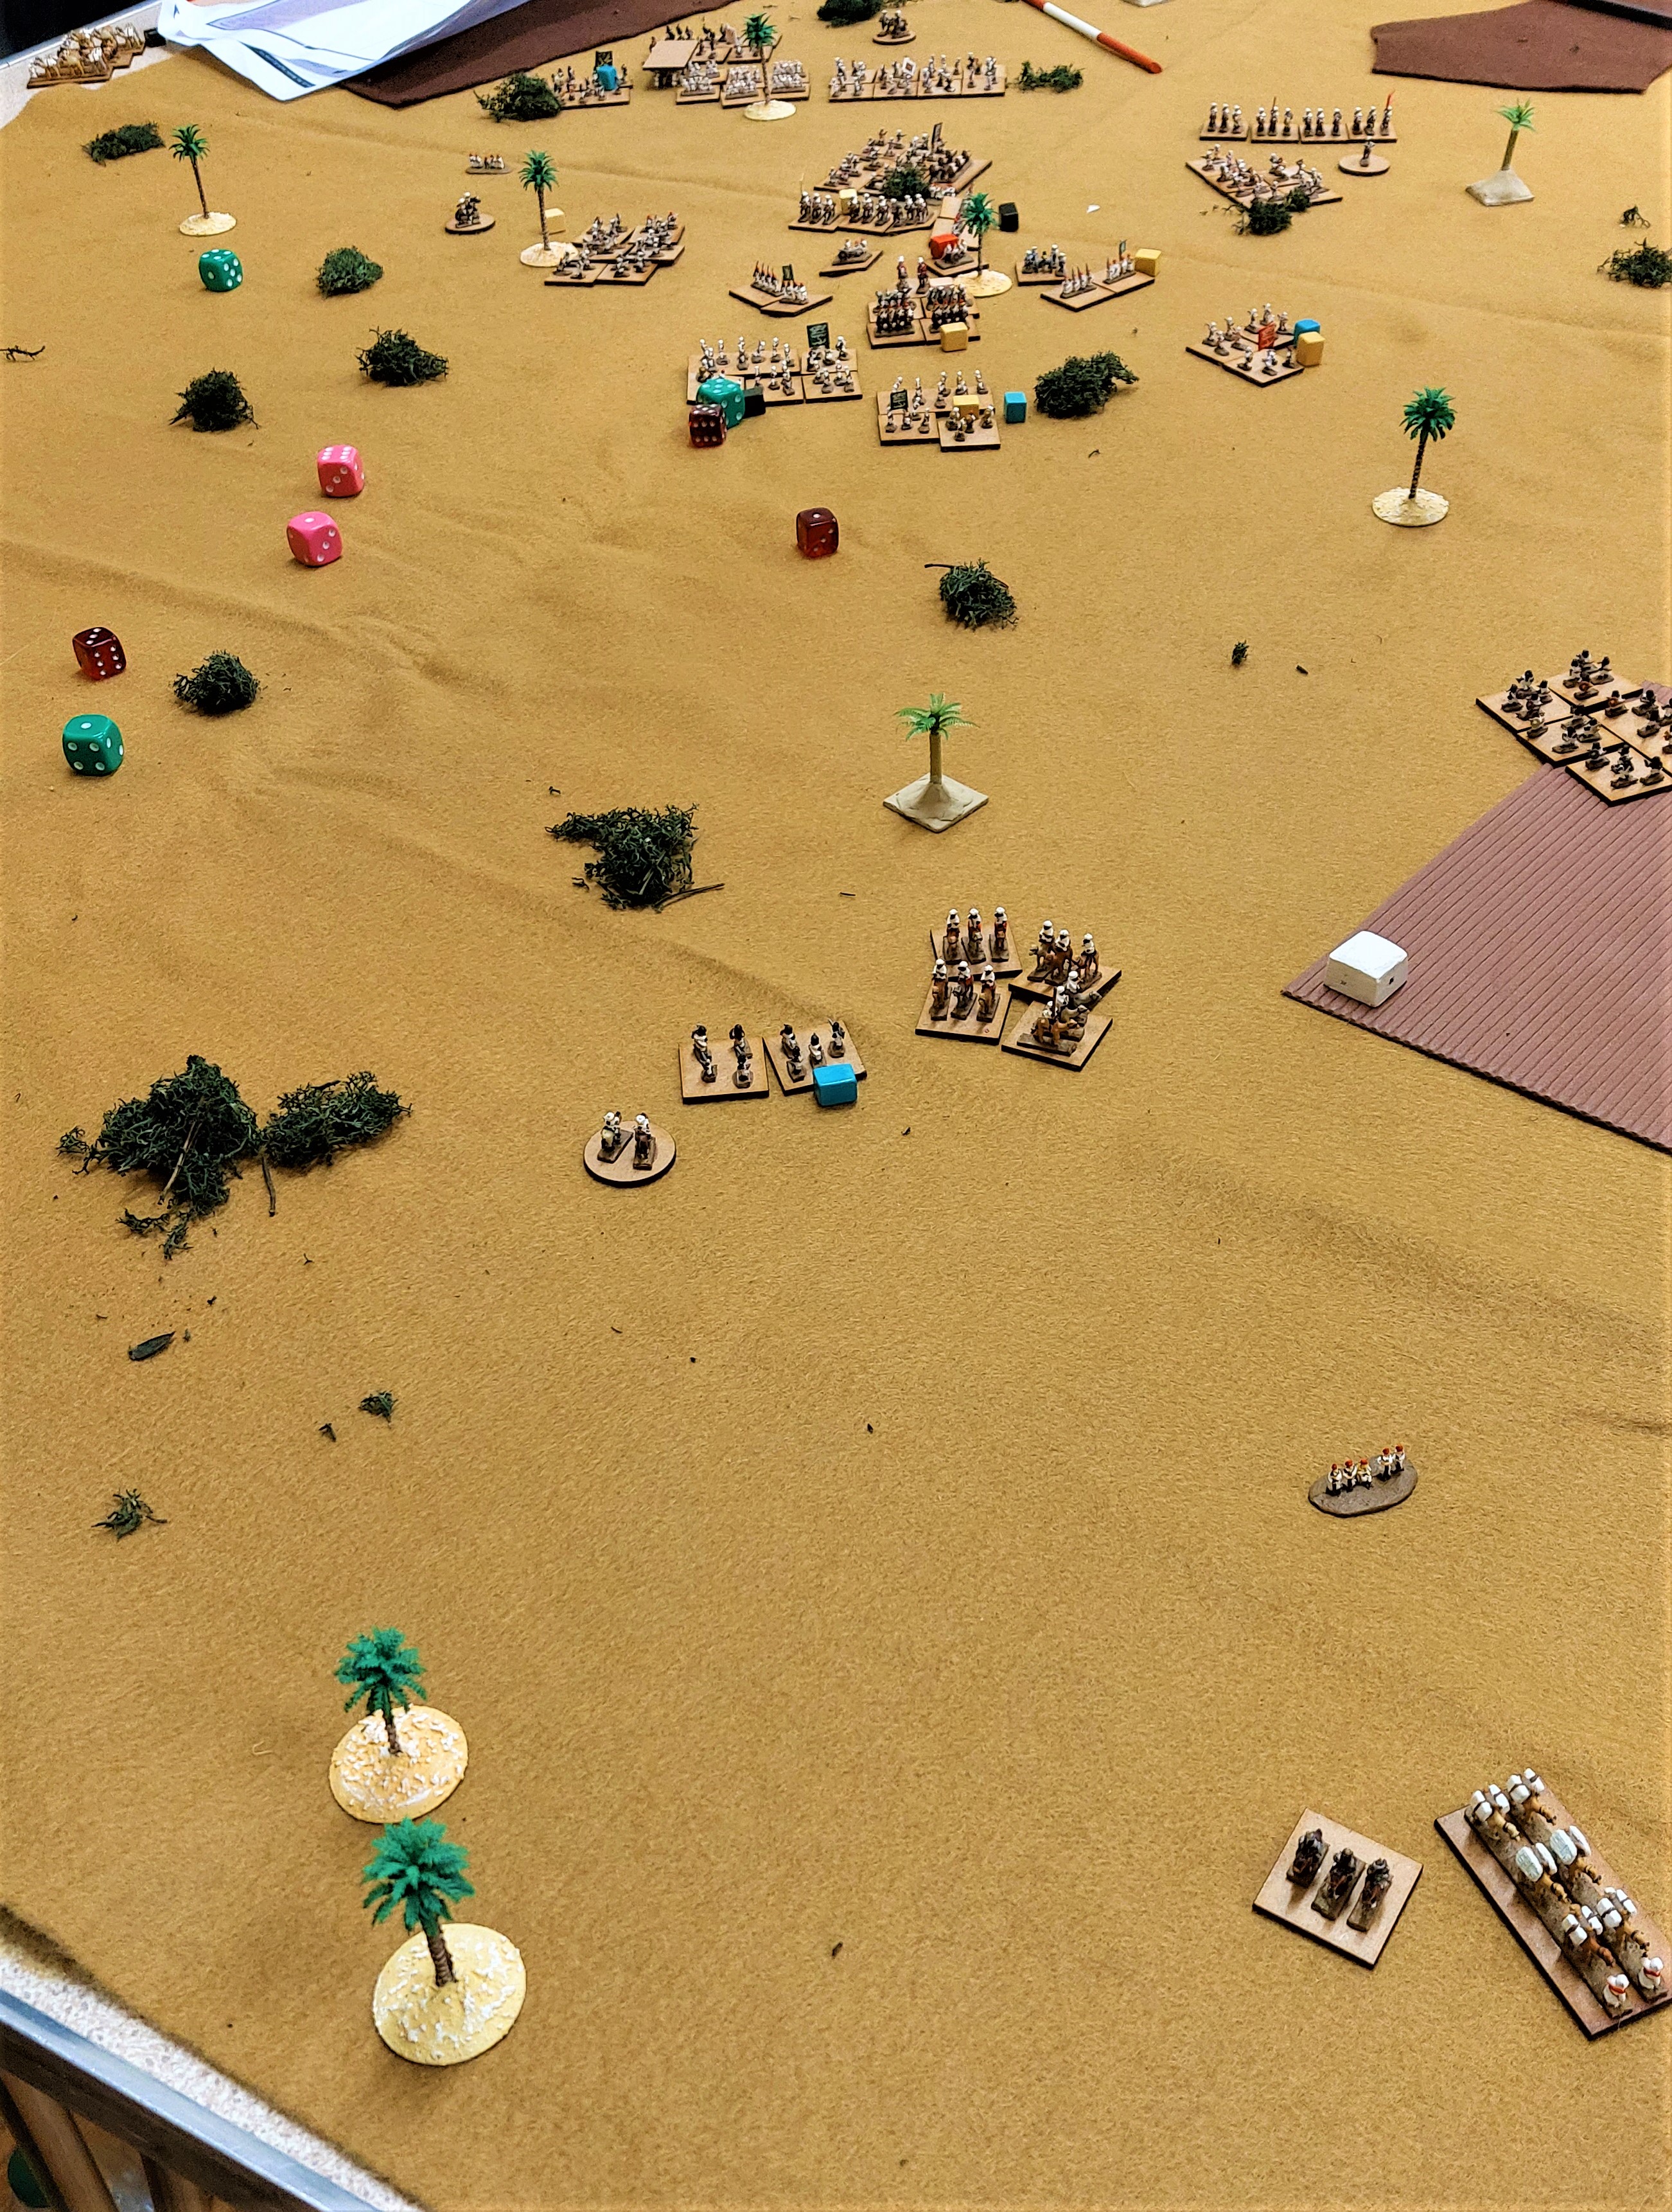
- Shaikan (1883), in which 40,000 Mahdists massacred Hicks Pasha's 10,000 or so hapless Egyptians;

- Szőreg (1849), in which retreating Hungarians fight a delaying action against imperial Austrian and Russian forces breaking out across a defended dike.

Both games were so exciting and absorbing that there is a paucity of pictures. I'll offer the few that Dave T and I did take and describe the games in the captions, followed by some reflections as usual. Two for Shaikan first:

Essentially this scenario is a race in which the Egyptian force has to dash from one corner of the table (top of photo) to the opposite one (bottom right of photo) and exit a certain number of units. The photo shows most of the Egyptian force being massacred mid-table, but some are about to get away - will it be enough?

Close-up of the one cavalry unit and one baggage train that did escape - enough for Dave T to claim a draw. He said the scenario is an interesting combination of moving fast (the Egyptians need 6 full moves out of 9 turns to reach the far corner) while being able to concentrate the fire of a couple of units to take on the big Mahdist units. As they are rated Aggressive, if the Mahdist units close they can easily wipe out one Egyptian unit and then overrun a second. 

And now two photos of the climax of our Szőreg game. (We last played this scenario a year ago; report here gives more background.)

View from the Hungarian side with one turn remaining. The imperials have broken out from their entrenched bridgehead (top right), easily cleared some irregulars out of the wood objective top left, but not advanced far enough to take the village beyond it (out of shot, lower left of pic). On our right, the Polish Legion did a great job of delaying the allied advance across the embrasured dike that runs across upper centre of pic. The Poles (pink hats, bottom right) and friends are now holding two of the three Szőreg village objectives (foreground) against three disrupted Austrian brigades (the white-uniformed chaps with the yellow Disruption markers). Thus the Austrians only hold two objectives (the dike and the wood); they need two more for a draw and three for a win.
 
The Austrians needed everything to go right for them on their final turn. Their small unit upper left got the full move it needed to seize the empty village lower left. Both units in the centre managed to rally and charge. The rockets (top centre) moved up and added crucial fire, meaning that when the Austrians rolled boxcars for their attacking fire, my defending infantry were not just disrupted or damaged but wiped out. The small hussar unit on its own could not withstand the massed assault, so the Austrians took the central village objective as well. Finally, because we had failed to withdraw some troops scheduled to retreat, there was a 50-50 roll; this succeeded and gave the Austrians the final objective they needed for victory.

A word about this last point. Historically, most of the Hungarian army withdrew without fighting because other Austrian corps were conducting strategic outflanking to north and south. The 50-50 'flank threat' rolls are incurred if any of three Hungarian contingents are committed instead of withdrawing. We withdrew two of the three. In retrospect, we would have done better to commit the lot, giving good guarantees of holding a couple more objectives, and take our chances on the 50-50 rolls. I'm sure Clausewitz would agree.


Reflections:

What a happy club! Great to have so many players and two such exciting games.

Unusual situations make for good games. I was pleased that both Mark and Crispin separately enthused about Szőreg's distinctive nature. It presents unique challenges for both sides, which makes it interesting for the players. Evidently the same was true of Mark's Shaikan race-against-massacre game.

Principles of war apply on the wargame table. I've been reading a lot of Clausewitz again lately. (Some readers may not know I've published translations of three histories by Clausewitz.) Reviewing my actions through a Clausewitzian lens, I can see I transgressed some of his advice (again). Must try harder.

Good scenario design makes for great games. As I said, both games were so absorbing, we hardly took any photos. They both produced super-exciting, tense, close finishes that came down to the last few dice. It takes judicious scenario design to achieve that fine balance. Special kudos to Mark for making such a good game out of such a one-sided massacre as Shaikan.


Szőreg is one of the scenarios in the "Bloody Big Hungary '48 Battles!" campaign book.


Wednesday, 15 March 2023

Gorgeous Alma game

The Battle of the Alma (1854) is one of the best-known battles of the Crimean War. A scan of wargame forums suggests it is fought reasonably regularly. Unfortunately it tends to be treated as a dull frontal assault: across the river, up the slope, into the teeth of the Russian guns and massed columns. Some people enjoy games like that; I prefer to have more choices to make.

So, when I came to write the Alma scenario for the "Bloody Big European Battles!" scenario book, I tried to make it more interesting. I looked at the options available to the Russians and saw that a viable alternative strategy for them might have been to deploy further east and threaten the allies' flank, rather than directly barring their way to Sevastopol. Meanwhile, as I recall, there was some argument between the allies, with the French keen to press forward as swiftly as possible and the British being more cautious.

The scenario therefore gives both sides the opportunity to choose between their two options, resulting in four possible permutations of aims and victory conditions. A direct recreation of history is one possible outcome. However, when we fought the Alma this month using Matt's gorgeous display game layout, the result was a kind of 'alternative Alma' in which the action was somewhat displaced from its historical location but still very much captured the flavour.

The Russian team chose the 'flank position', while the allies opted for 'cautious'. This meant the allies had to deal with the flank threat before advancing on Sevastopol, so they had 8 turns to drive the Russians back along their line of the communications to the southeast. (Had the allies chosen 'aggressive', they would have focused on exiting French units off the south board edge, while preventing Russians descending towards the allies' supplies piled on the beach behind them.) I was on the allied side in the minor role of commander of the Turkish division.

After the first few turns it looked dire for the allies, thanks to aggressive Russian defence and bad allied dice. The allies had advanced in march columns so as to get through the vineyards and across the river as quickly and easily as possible. Unfortunately, Russian attack columns pounced on the British as they ascended the far slope and gave them a very bloody nose, effectively putting one division out of action. As for the French, they repelled the Russian onslaught but dismal movement dice then had them sitting around for coffee and croissants for a couple of hours. I thought we were set for humiliating defeat.

But of course, as the game went on, the Russian hordes melted away in the face of superior allied firepower. The British cleared the road between Kanysch and Uleschel (our first objective), and French panache and elan were carrying the zouaves and friends far into the Russian left. On the last turn we even had a chance of seizing the next stretch of road for an unlikely win. Equally, a late Russian counterattack could have claimed victory for the Tsar.

Of course it wasn't to be and the game ended as an honourable draw. Well played to all my gallant comrades and opponents alike.

Three captioned photos below are followed by some reflections. 

View of Matt's gorgeous layout from the Black Sea. Terrain boards with custom hills; the mosque in Bourliouk (top centre); the half-built telegraph tower (top right); the allied fleet of steam & sail warships - note the smoke coming out of their funnels. It really was fabulous work and a privilege to push troops across it.

 Situation circa Turn 2. French on the right have dashed across the bridge at Bourliouk; British on the left make slower progress because the Russians have set light to Kanysch (centre left of pic - Matt actually had flickering flames). Russian columns menace from top of pic. In the foreground, my Turkish division snakes from right to left to support the British. Beautiful figures on beautiful terrain.

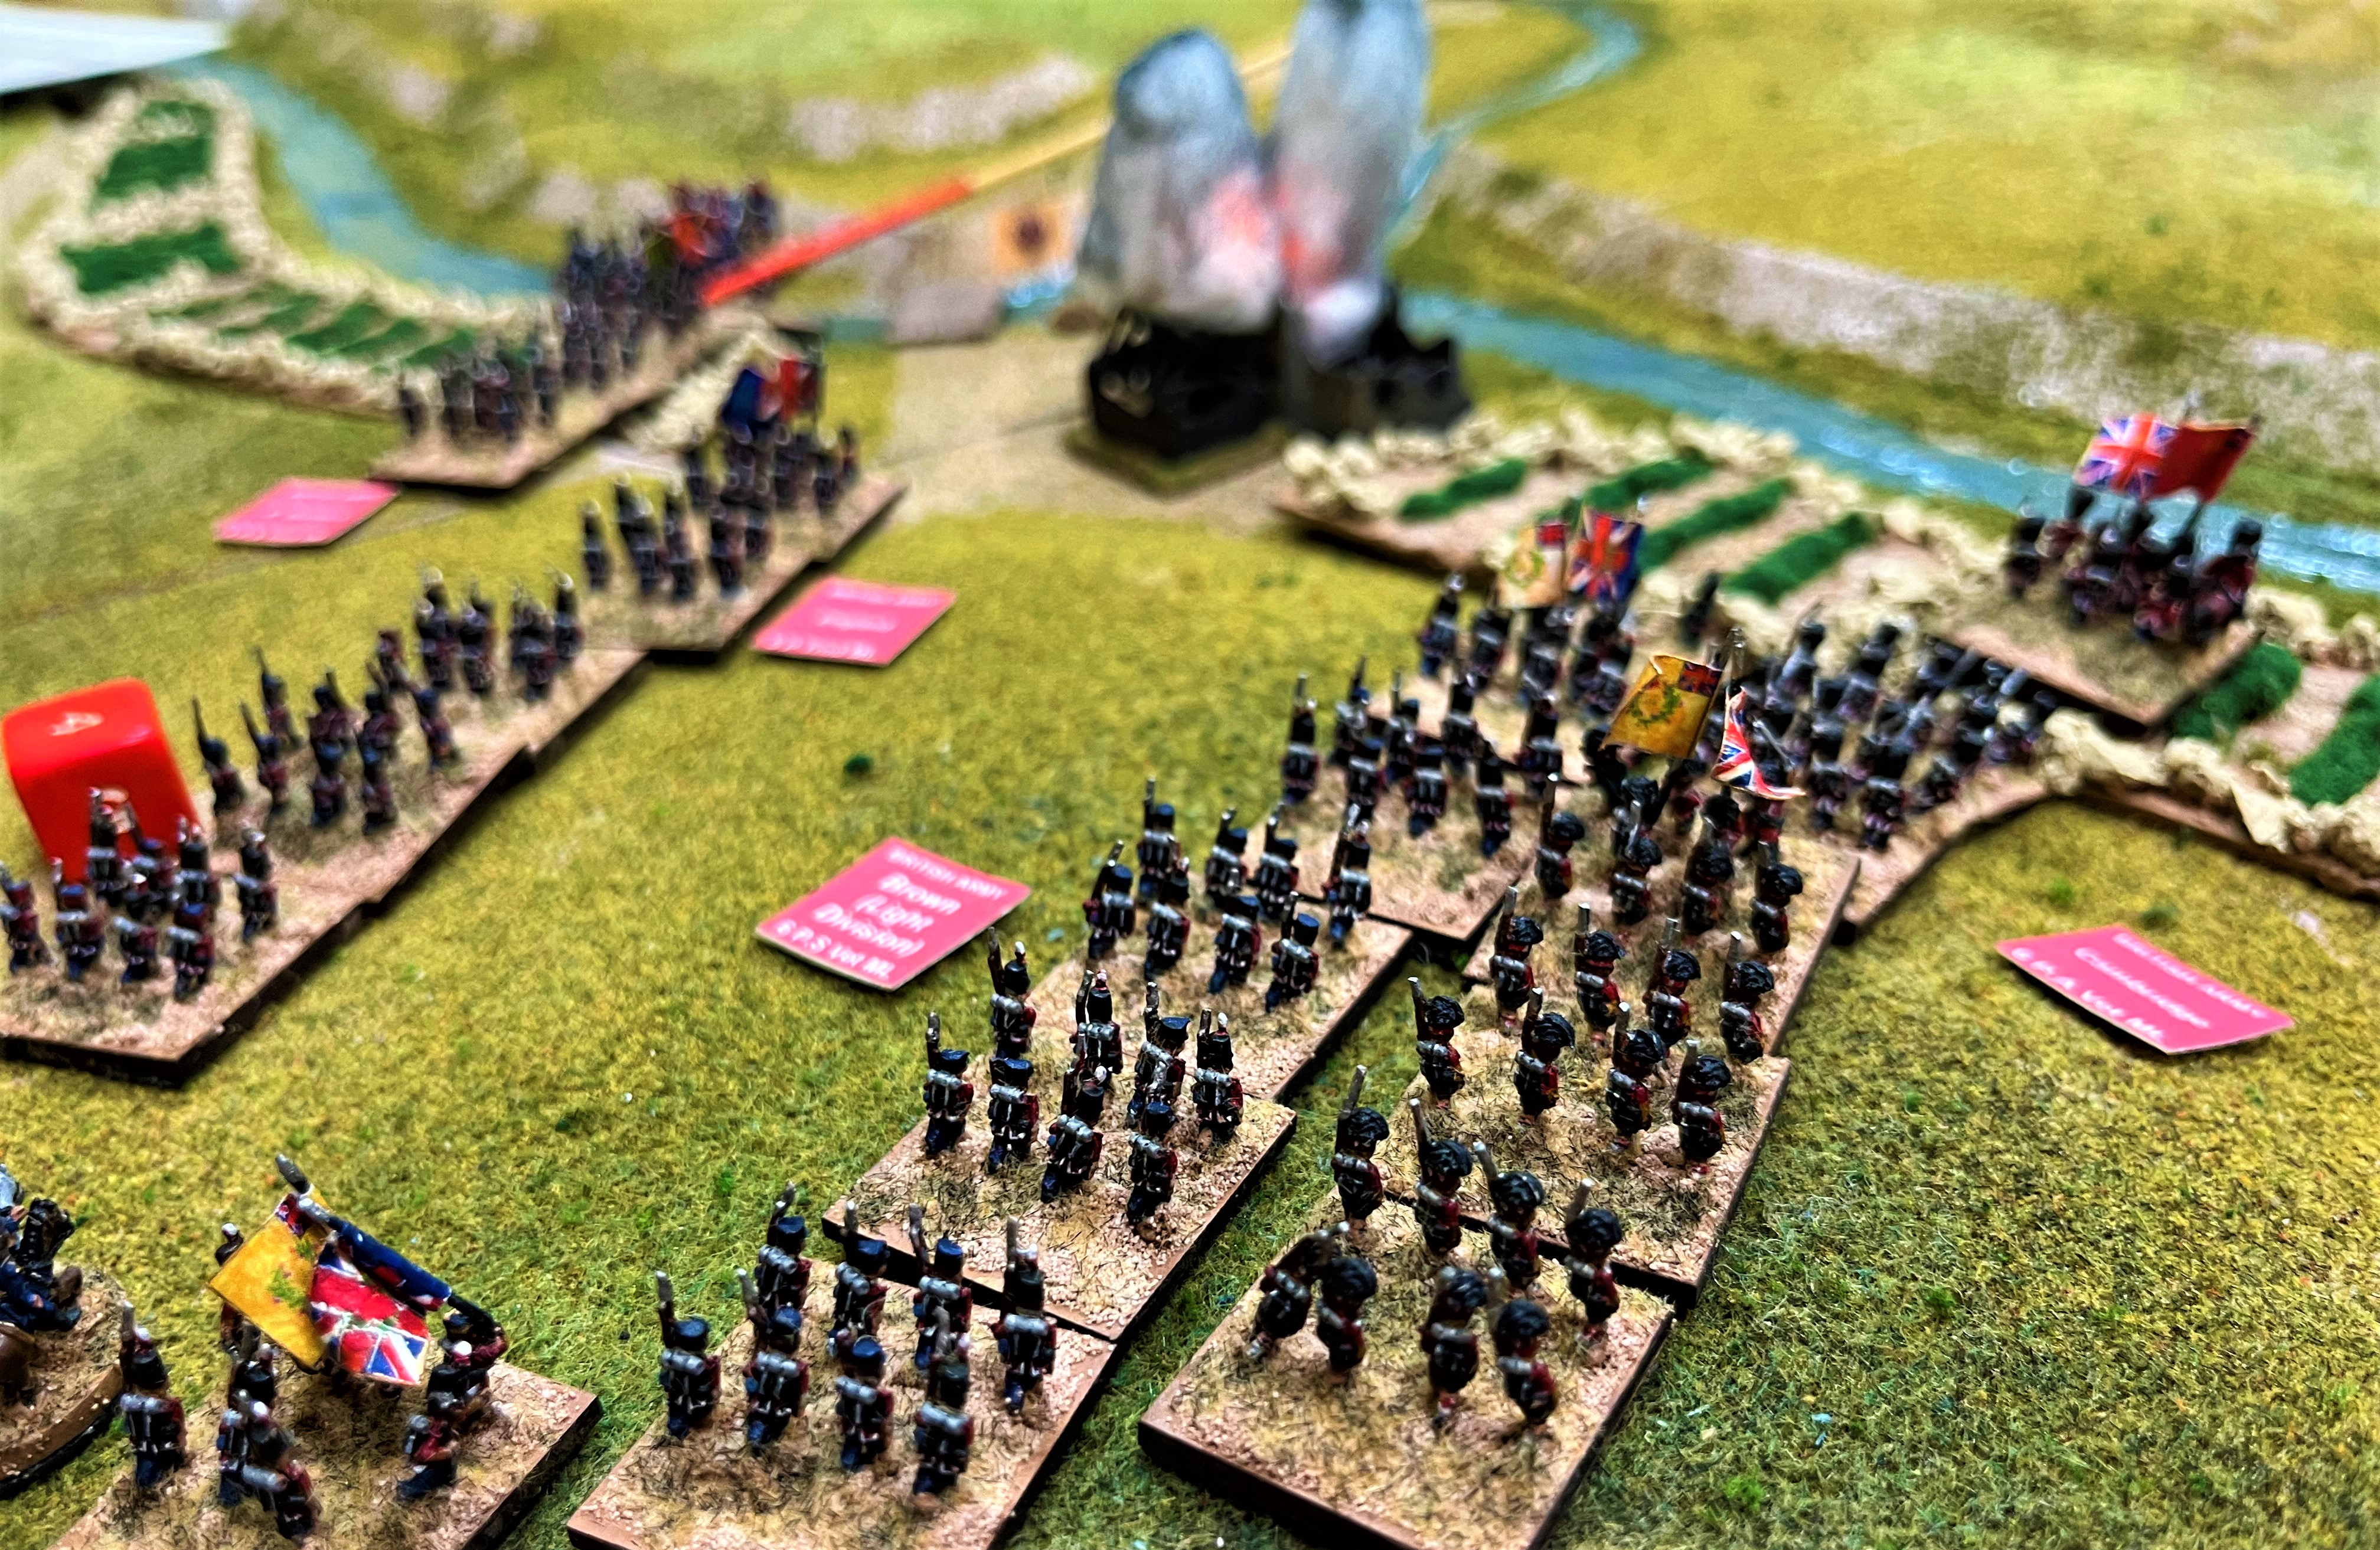
Close-up of the British columns fording the Alma. Highlanders on the right following the guards' bearskins. The division top left is about to be sent reeling back with heavy casualties.


Reflections:

Similar but different. Interestingly, even though the Russian choice of flank threat rather than historical blocking position shifted most of the action away from the historical battlefield, it still captured much the same historical flavour. We still had Brits battling their way across the river and up steep bluffs against massed Russian counterattacks and formidable artillery redoubts; we still had French bogged down for a while until the zouaves went on a big right hook.

Gorgeous game. I can't overstate how much work Matt had put into the terrain, the troops, the fleets and the counters (low ammo, disruption etc were all appropriate little models). Consequently the game looked great, which helps to make our mental pictures more vivid as well, and to tell the story of the battle.

Quality vs Quantity. Asymmetry makes for interesting match-ups. The contrast between the Russian army (Tactically Inept, not great musketry but plenty of artillery) and the allies (lots of longer-ranged rifles, capable skirmishers, hence deadly small arms fire) was dramatic. The Russians did a good job of exploiting such advantages they had, but ultimately quality told and changed the course of the game.

Dice can stink! I have rarely seen so many pairs of snake-eyes as Phil rolled for the French, paralysing their advance for half the game. One can rationalise that as the French commander being taken aback by the Russian aggression and pausing, unsure what more might be over the next hill.

Hurrah for Johnny Turk. You can't see it as I didn't take many photos, but right at the end it was my Turkish division that interposed to prevent a Russian counterattack that could have snatched victory. I therefore claim all the credit for the allies' (partial) success.  ;-)


The Alma scenario is one of four that form a Crimean War mini-campaign in the "Bloody Big European Battles!" scenario book: Kurudere, The Alma, Inkerman and The Chernaya. BBEB is available from all the usual BBB retailers. There is also a Balaclava scenario available free from the files of the BBB group on groups.io.


Friday, 3 March 2023

The balloon goes up at Chancellorsville!

Back in January I had a fantastic time fighting Chancellorsville. This week we rolled it out again for a different set of players at OWS.

To avoid repeating myself, let me direct you to my previous AAR for some background on the battle. Here I'll just offer a brief summary of how it went this time, a few annotated photos, and then some further reflections.

Our Union plan was basically to press forward with our right hook from Chancellorsville initially, unleashing the left against Fredericksburg once the Confederate defenders there had been forced to thin out and head west. This broadly worked, aided (a) by an entire Confederate division being wiped out on Day 1 in a sanguinary struggle with Sykes's regulars and (b) by Banks's Ford being left unguarded for us to infiltrate across overnight before Day 3. Even so, it was a see-saw game: Day 1 seemed to go very well, but Confederate redeployment overnight saw them smash some big holes in our right wing on Day 2. On Day 3 our left wing came into play and, thanks to the division that crossed at Banks's Ford, closed in and took the Tabernacle Church, the objective we needed for victory. Even so, there would still have been time for the Confederates' superior infantry to rally, storm back in and not only retake the Church but actually seize Banks's Ford and claim a win. Fortunately for us, the three divisions in question all missed their movement rolls and we hung on. Hurrah for the Union!

Reflections and some other info follow after the pretty piccies.

The balloon of the title of this post. The Union had not one but two observation balloons in action in this battle: Eagle and Washington. This model is from Irregular Miniatures, complete with the correct generator wagons, correctly painted up as Washington by Crispin. Here it is spying on Fredericksburg.

The initial setup. Crispin needs to invest in some more lichen ... US forces are those with darker bases. The right hook is massed around Chancellorsville (centre right edge of pic) while the left sits mostly behind the Rappahannock (lower left corner) facing the line of Confederate entrenchments.

How it looked from my point of view as we were about to launch our right hook forward from Chancellorsville (the two buildings and white objective marker in the left foreground).

Serious battle about to be joined. Anderson's Confederate division will step out of its defences (centre of pic) and advance to mutual massacre. Lower right, US divisions head south, both to fend off Stuart's cavalry (out of shot) and to threaten Confederate lines of communication. Another Confederate division marches to respond to that threat (top right).

Situation at start of Day 3 (I think). Top of pic: Confederated have pulled back from Fredericksburg to shorten their line. US left follows them. Lower right edge, Confederates have neutralised the threat to their LOC from that direction. Upper left (just below and left of the counter tin), a US division has snuck across Banks's Ford. It will be joined by others left and right of it converging on Tabernacle Church (white counter, centre of pic), where the climactic big fight determined victory.

Reflections

Replay value! The third time of playing this scenario and it was very different again from the previous two, with the clear potential for the game to go in many different directions. I can see this one being played again and again.

Changing situations mid-game: the two strategic redeployments overnight really make the game. They give players the opportunity to make major game-changing decisions, they create some drama and tension and surprises, and they capture something of the nature of the historical battle. See also my essay on this topic in my series of Reflections on Wargaming.


The scenario is now in the BBB group files.

It is also likely to be one of the participation games at the next BBB Bash Day convention, to be held in Leeds UK on Saturday 1 July, the day before Baccus's wonderful Joy of Six show in Sheffield. If you like the look of this scenario and are in striking distance of Yorkshire, make a weekend of it!