Sunday, 5 June 2022

Brittany: fortifications and museums

I took advantage of a week's holiday in Brittany to explore several centuries' worth of fortifications and museums. (See also my previous military museum raid on Brittany to St Cyr.) Most of this reconnaissance was done during day's tour of the Crozon peninsula along the Route des Fortifications. The Crozon tourism office provides a nice downloadable brochure here.

Captioned photos below give the details. In summary:

Wars of Religion: Pointe des Espagnols

C17: Tour Vauban

French Revolution/Napoleonics: coastal batteries and garrison towers; Musée Vendée Chouannerie; Phare d'Eckmühl

C19: Fort Kador; coastal batteries

WWI: 32cm gun

WWII: lots of coastal bunkers; Battle of the Atlantic museum; Lorient submarine pens.

(The photos are grouped by site rather than in any special chronological or geographical order, so if you're interested in one conflict or site in particular, sorry but you'll just have to search/scroll.)


The Pointe des Espagnols

Spanish Point commands the approaches to Brest. The placard below tells the story. In 1594 the Spanish landed; 400 of them fortified the place and defended it for a month against the Huguenots and their English allies. Subsequent centuries saw layers of batteries and fortifications added.

This massive piece of ordnance is a 32cm gun that was deployed here in the 1880s. During WWI it was used as a railway gun at the Somme. It fired so much, it wore out its rifling and was rebored to 34cm calibre!


Fort Kador

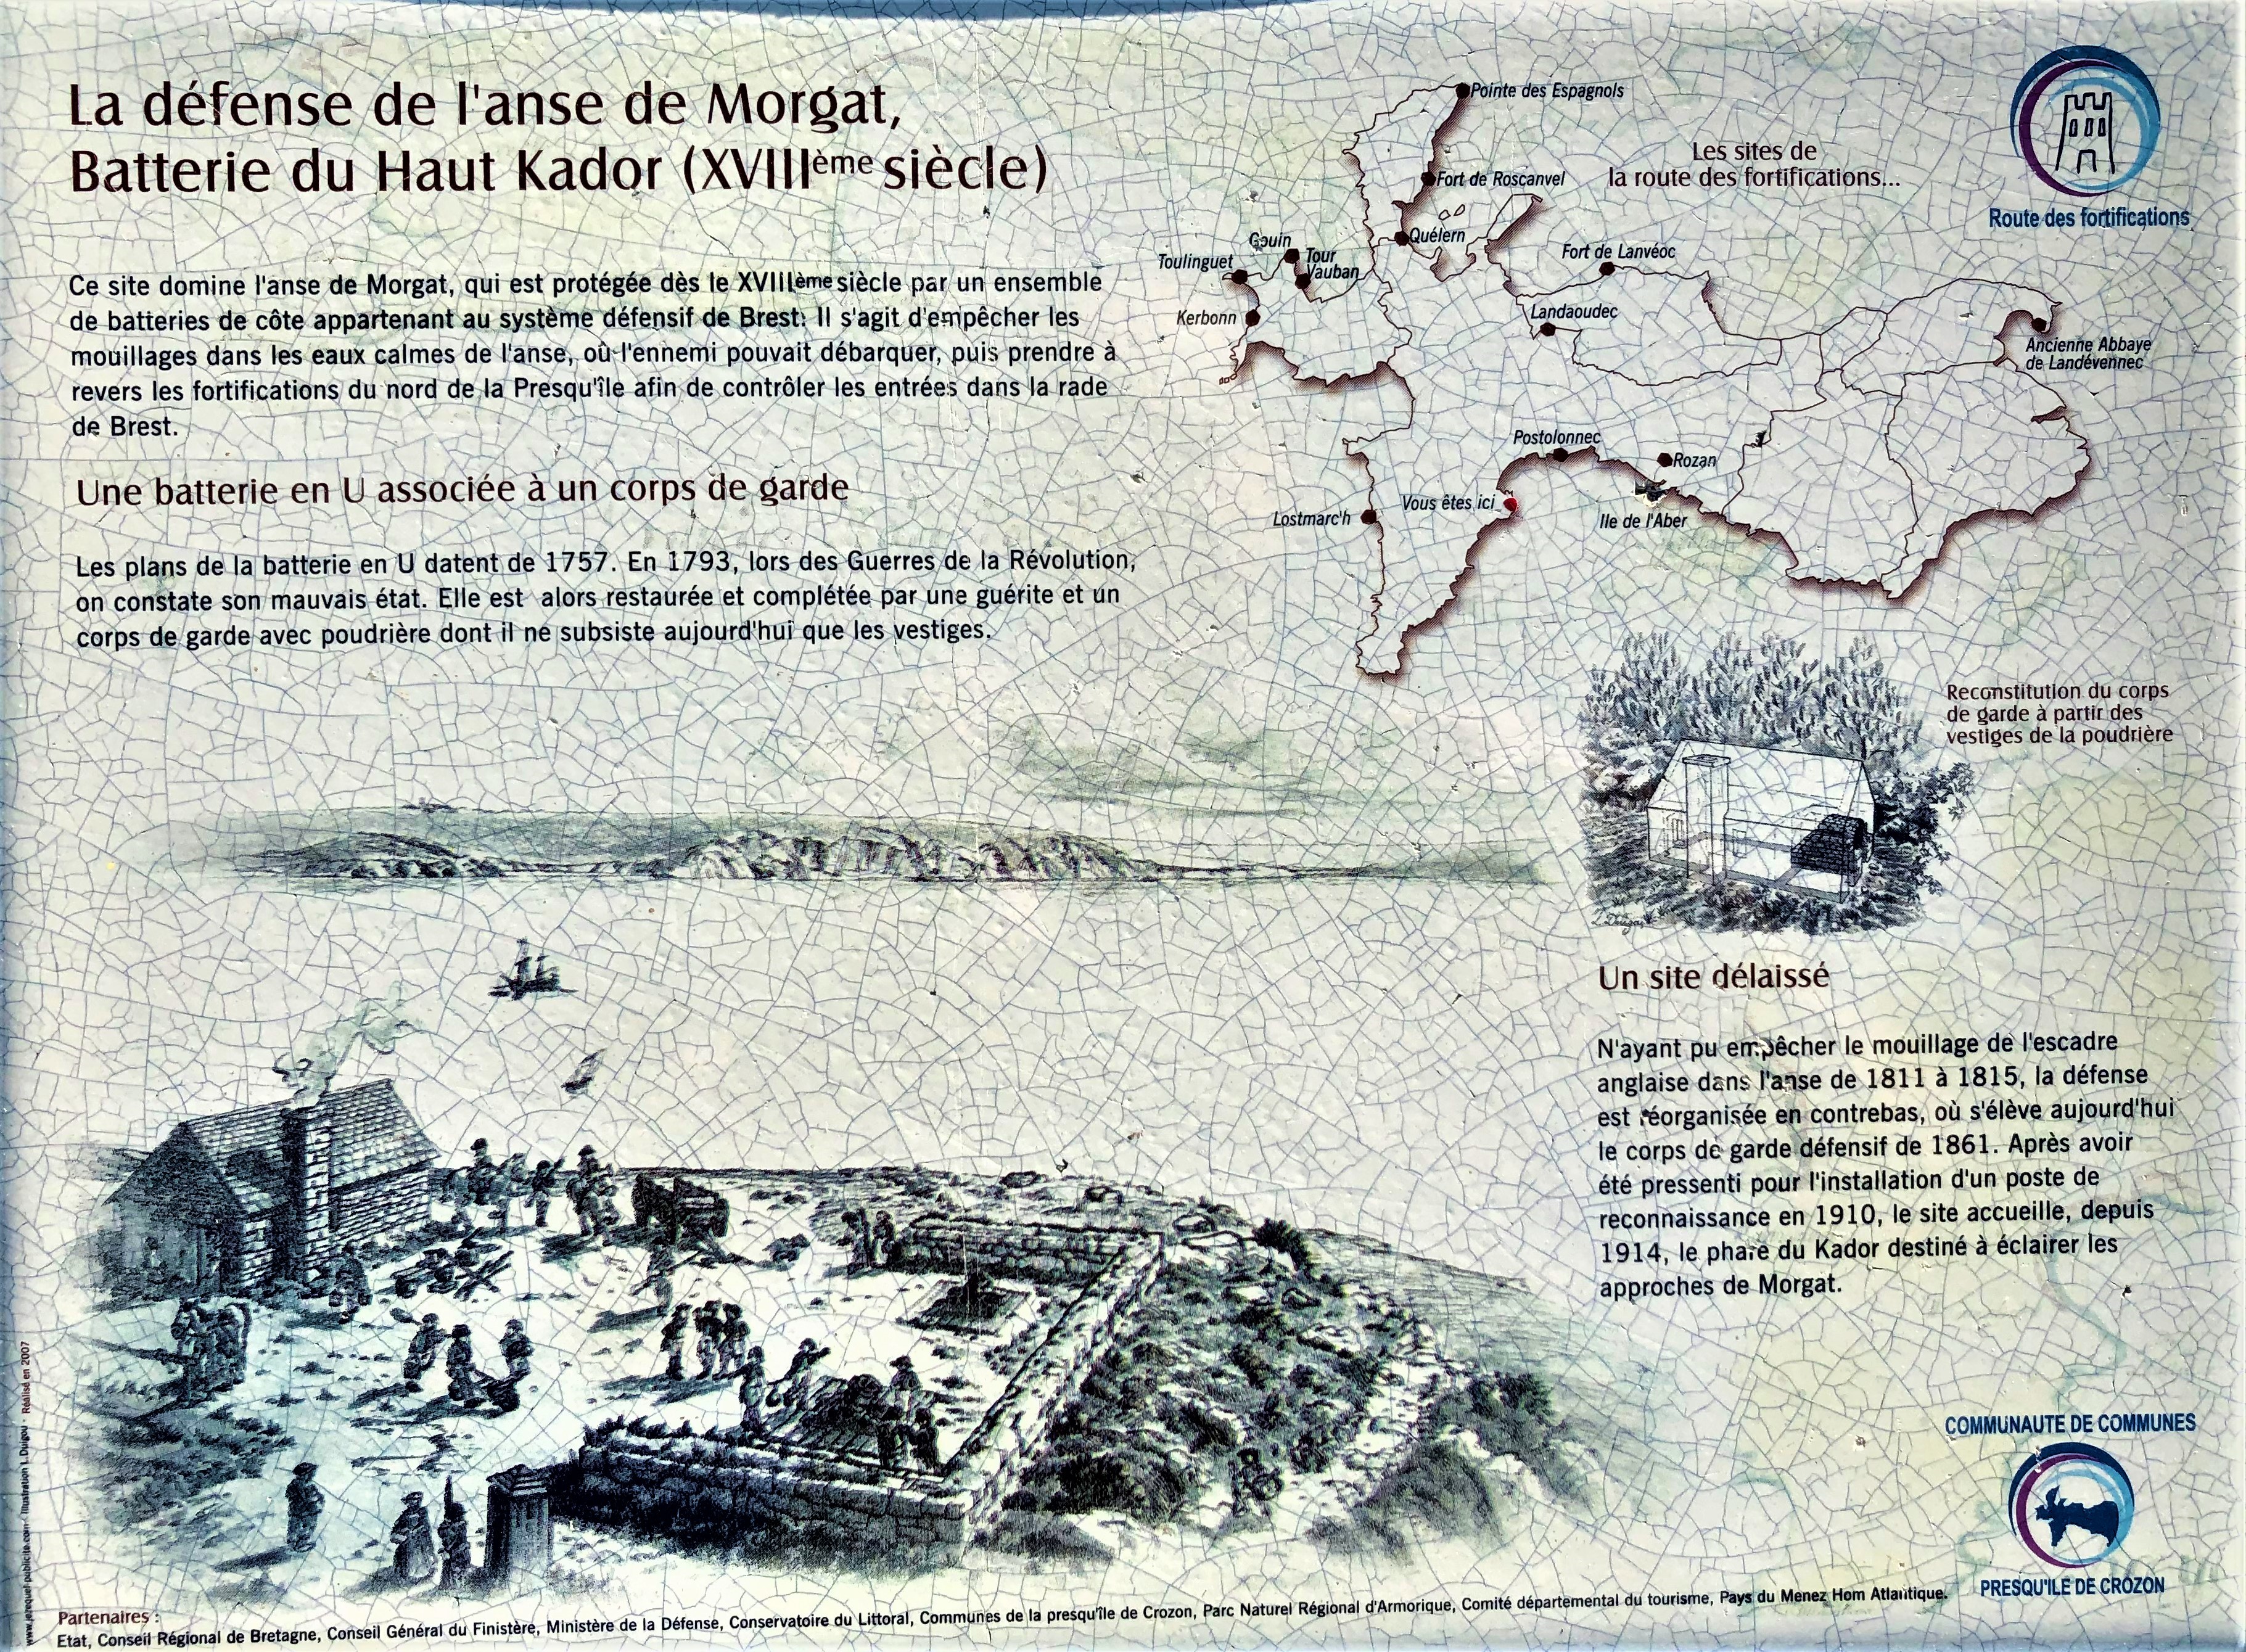
Morgat is the small port of Crozon on the south coast of the peninsula. In the mid-C19 a system of fortifications was built to defend it, including the upper and lower Kador batteries.


The upper battery actually dates back to the Seven Years War: a simple U-shaped mortar position supported by a garrison hut and powder magazine.

The battery (left of pic) - not much left to see!

... but the powder magazine is still there ...

... and so is this substantial casemate behind its earthen ramparts at the lower battery. This fortification now protects a bat colony.


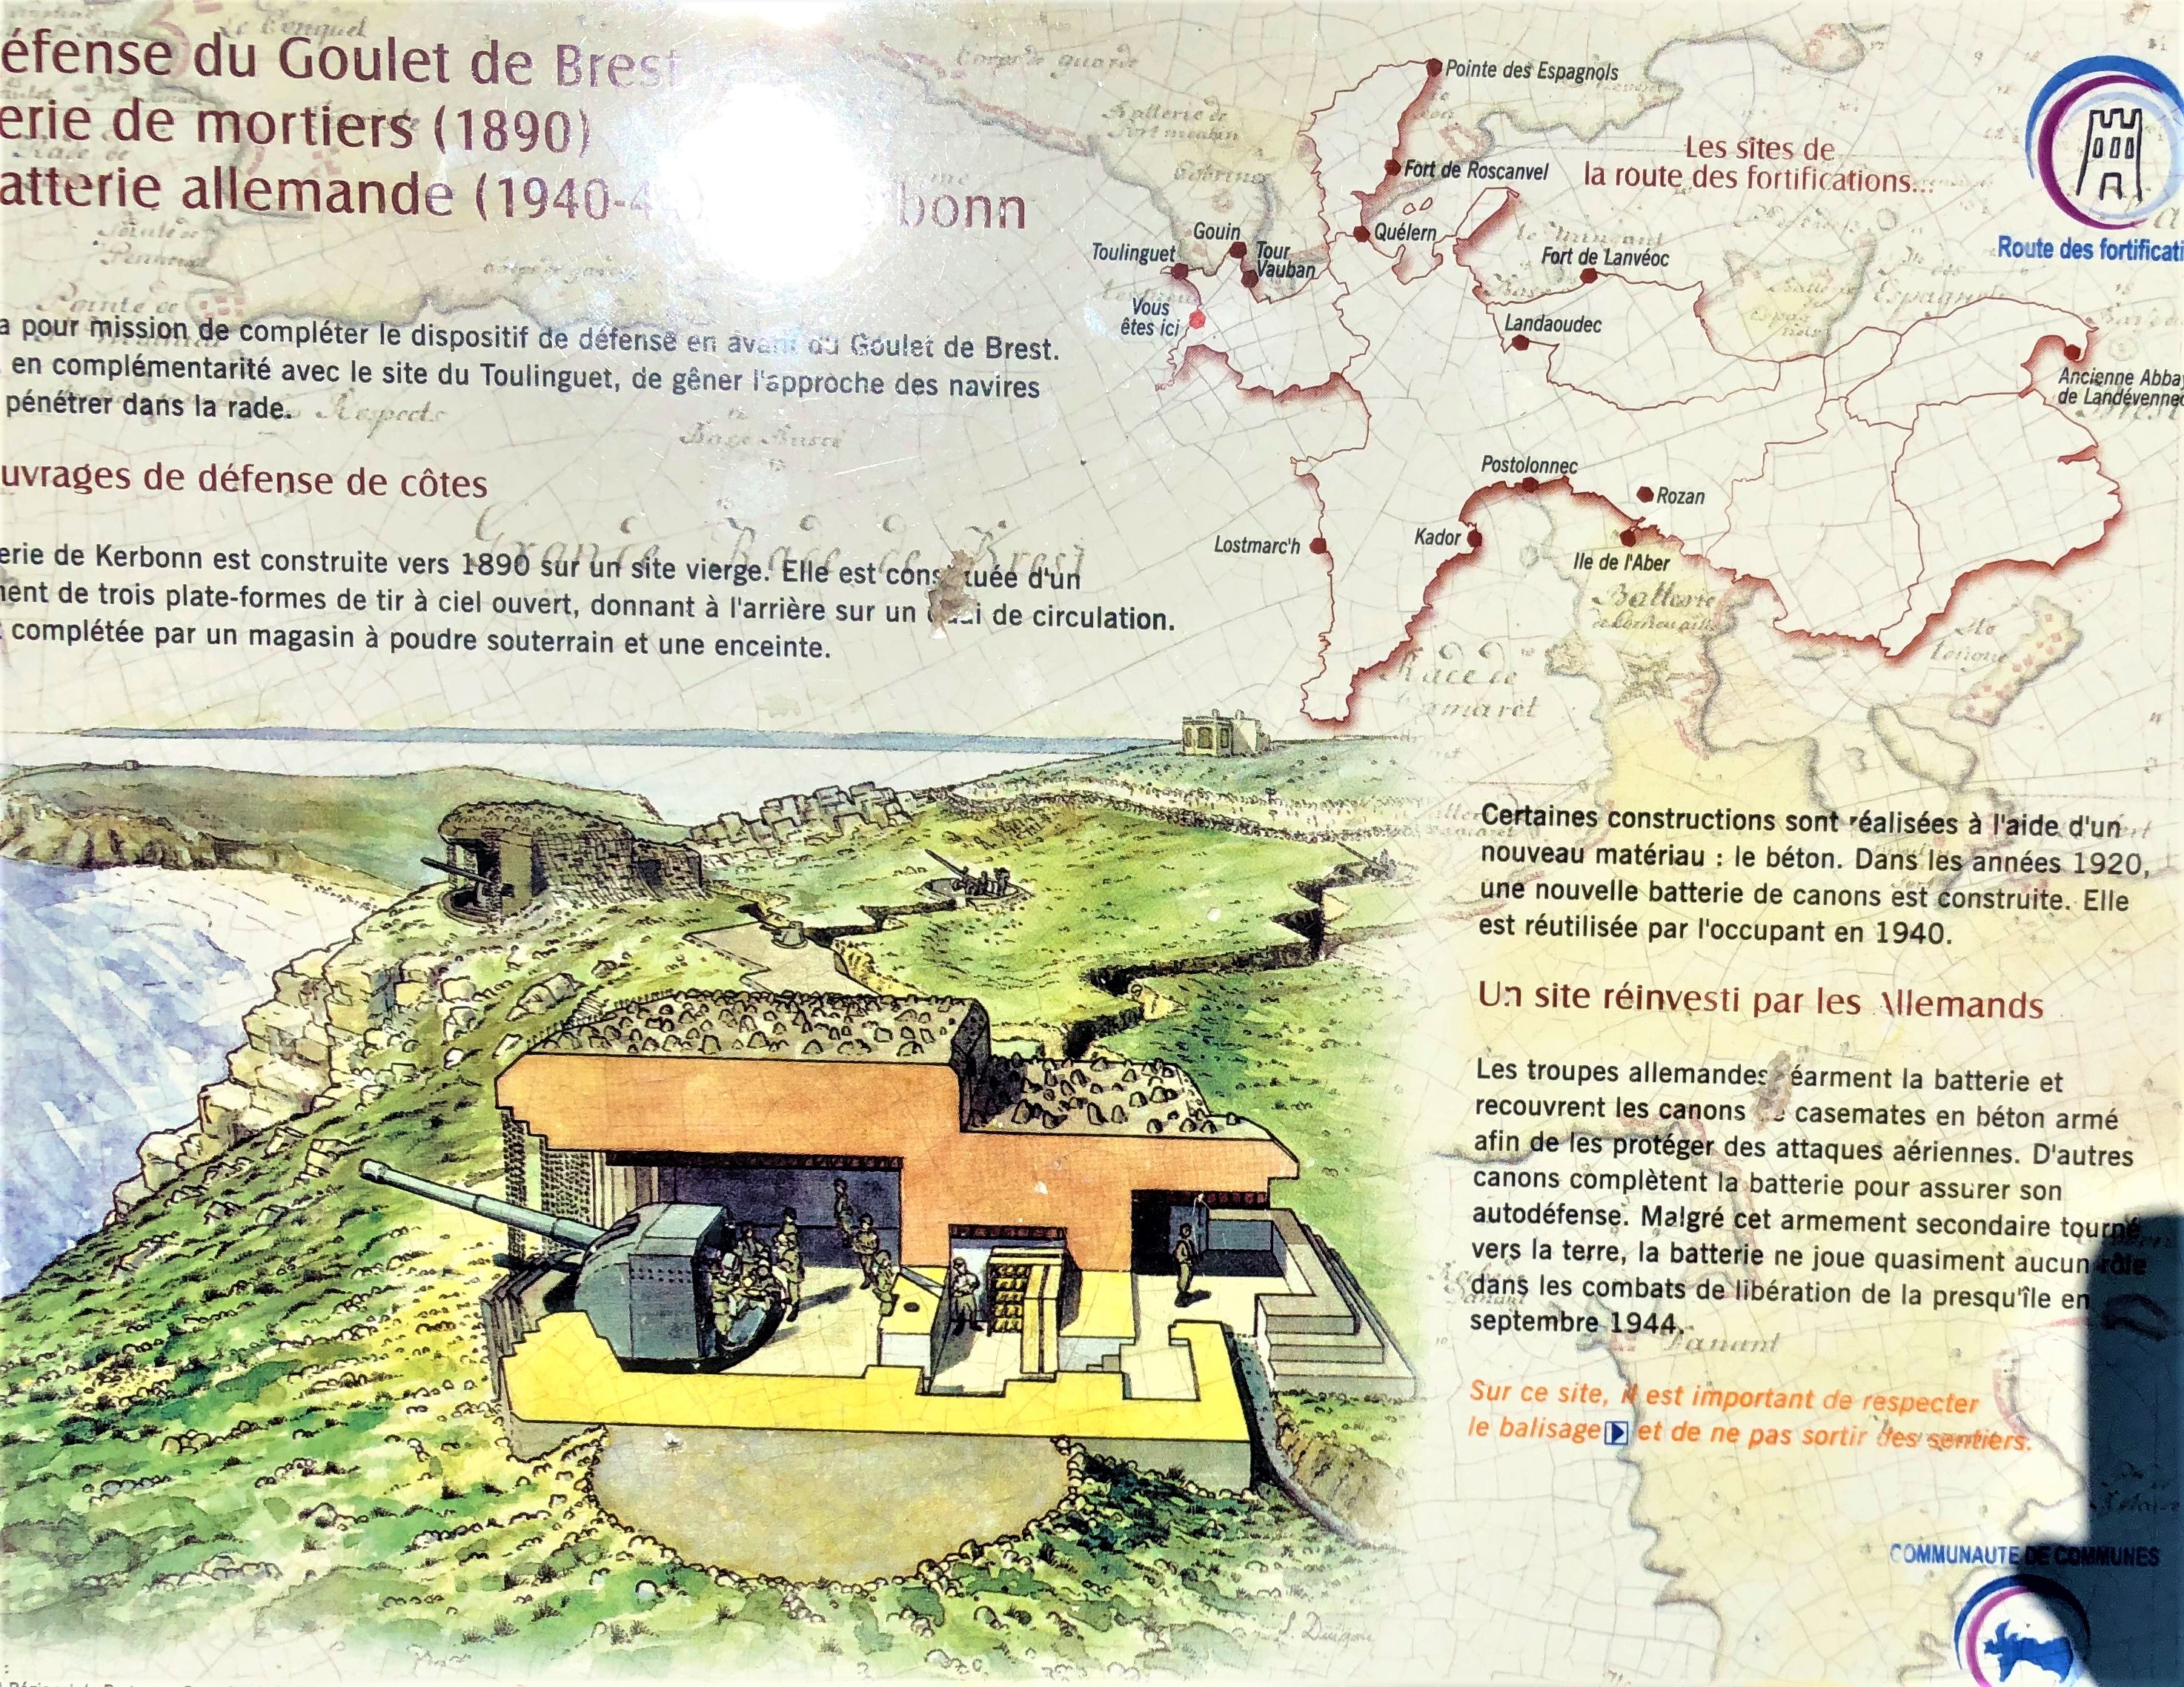
On the west coast of the peninsula is a set of German bunkers. These were built on top of C19 mortar battery positions to house a coastal defence battery in WWII. Nowadays, one of them is home to the excellent Musée Mémorial Bataille Atlantique. 

The museum is approached via an avenue lined with anchors, mostly from French warships. These massive things are three times as tall as me. And it's not that I'm short.

The museum is also guarded by a sea mine and an 88mm off a U-Boat. (Not a very successful one - five missions, 64 days' sailing, no kills, captured in a French port, if I remember right.) The museum is absolutely packed with such treasures.

Stonework betrays the C19 ancestry of the position.


Fort de la Fraternité

On the west coast while heading up to Pointe des Espagnols we found this small fort complex. Originally built in 1793, then updated mid-C19, then taken over and added to by the Germans (of course) in WWII. The hyperlinked source explains better than I can.

The main fort has an extensive loopholed curtain wall (left of pic) and a central powder magazine (right of pic).

It is on the north shore of a cove. Looking south across the cove you can see the German bunker at the point, and a well protected building centre of pic. Incidentally, these sported some better-quality graffiti than the usual - quite artistic, in fact.


Toulinguet is the westernmost tip of the Crozon peninsula. Consequently for Vauban to install a battery, then more added in Napoleonic times, plus an enceinte and tower to protect the landward side; then further batteries in the late C19. A naval surveillance station still operates from the site, hence no entry past the enceinte wall..

The tower is outside the enceinte. This held 18 men.


The charming seaside town of Camaret boasts this fine tower and battery constructed by Vauban. It has a museum inside but time did not permit so I can't report on it. A pity, as apparently there was a serious battle here in 1694 with Vauban himself present. But I can report that Camaret has plenty of nice waterside bars and restaurants to refresh a thirsty student of military history.


Phare d'Eckmühl (Penmarc'h Lighthouse)

At the southwest corner of Brittany, near Penmarc'h, is the Eckmühl lighthouse - so called because it was built with funds donated by Marshal Davout's daughter to commemorate his exploits at the eponymous battle in 1809 which earned him the title of Prince of Eckmühl.

The Phare is just one of a series of four towers along the point. Two of the other three were previous lighthouses, superseded as taller lights were required. As at Toulinguet, the white tower at the end is still an active naval surveillance station.


Lorient U-Boat Base

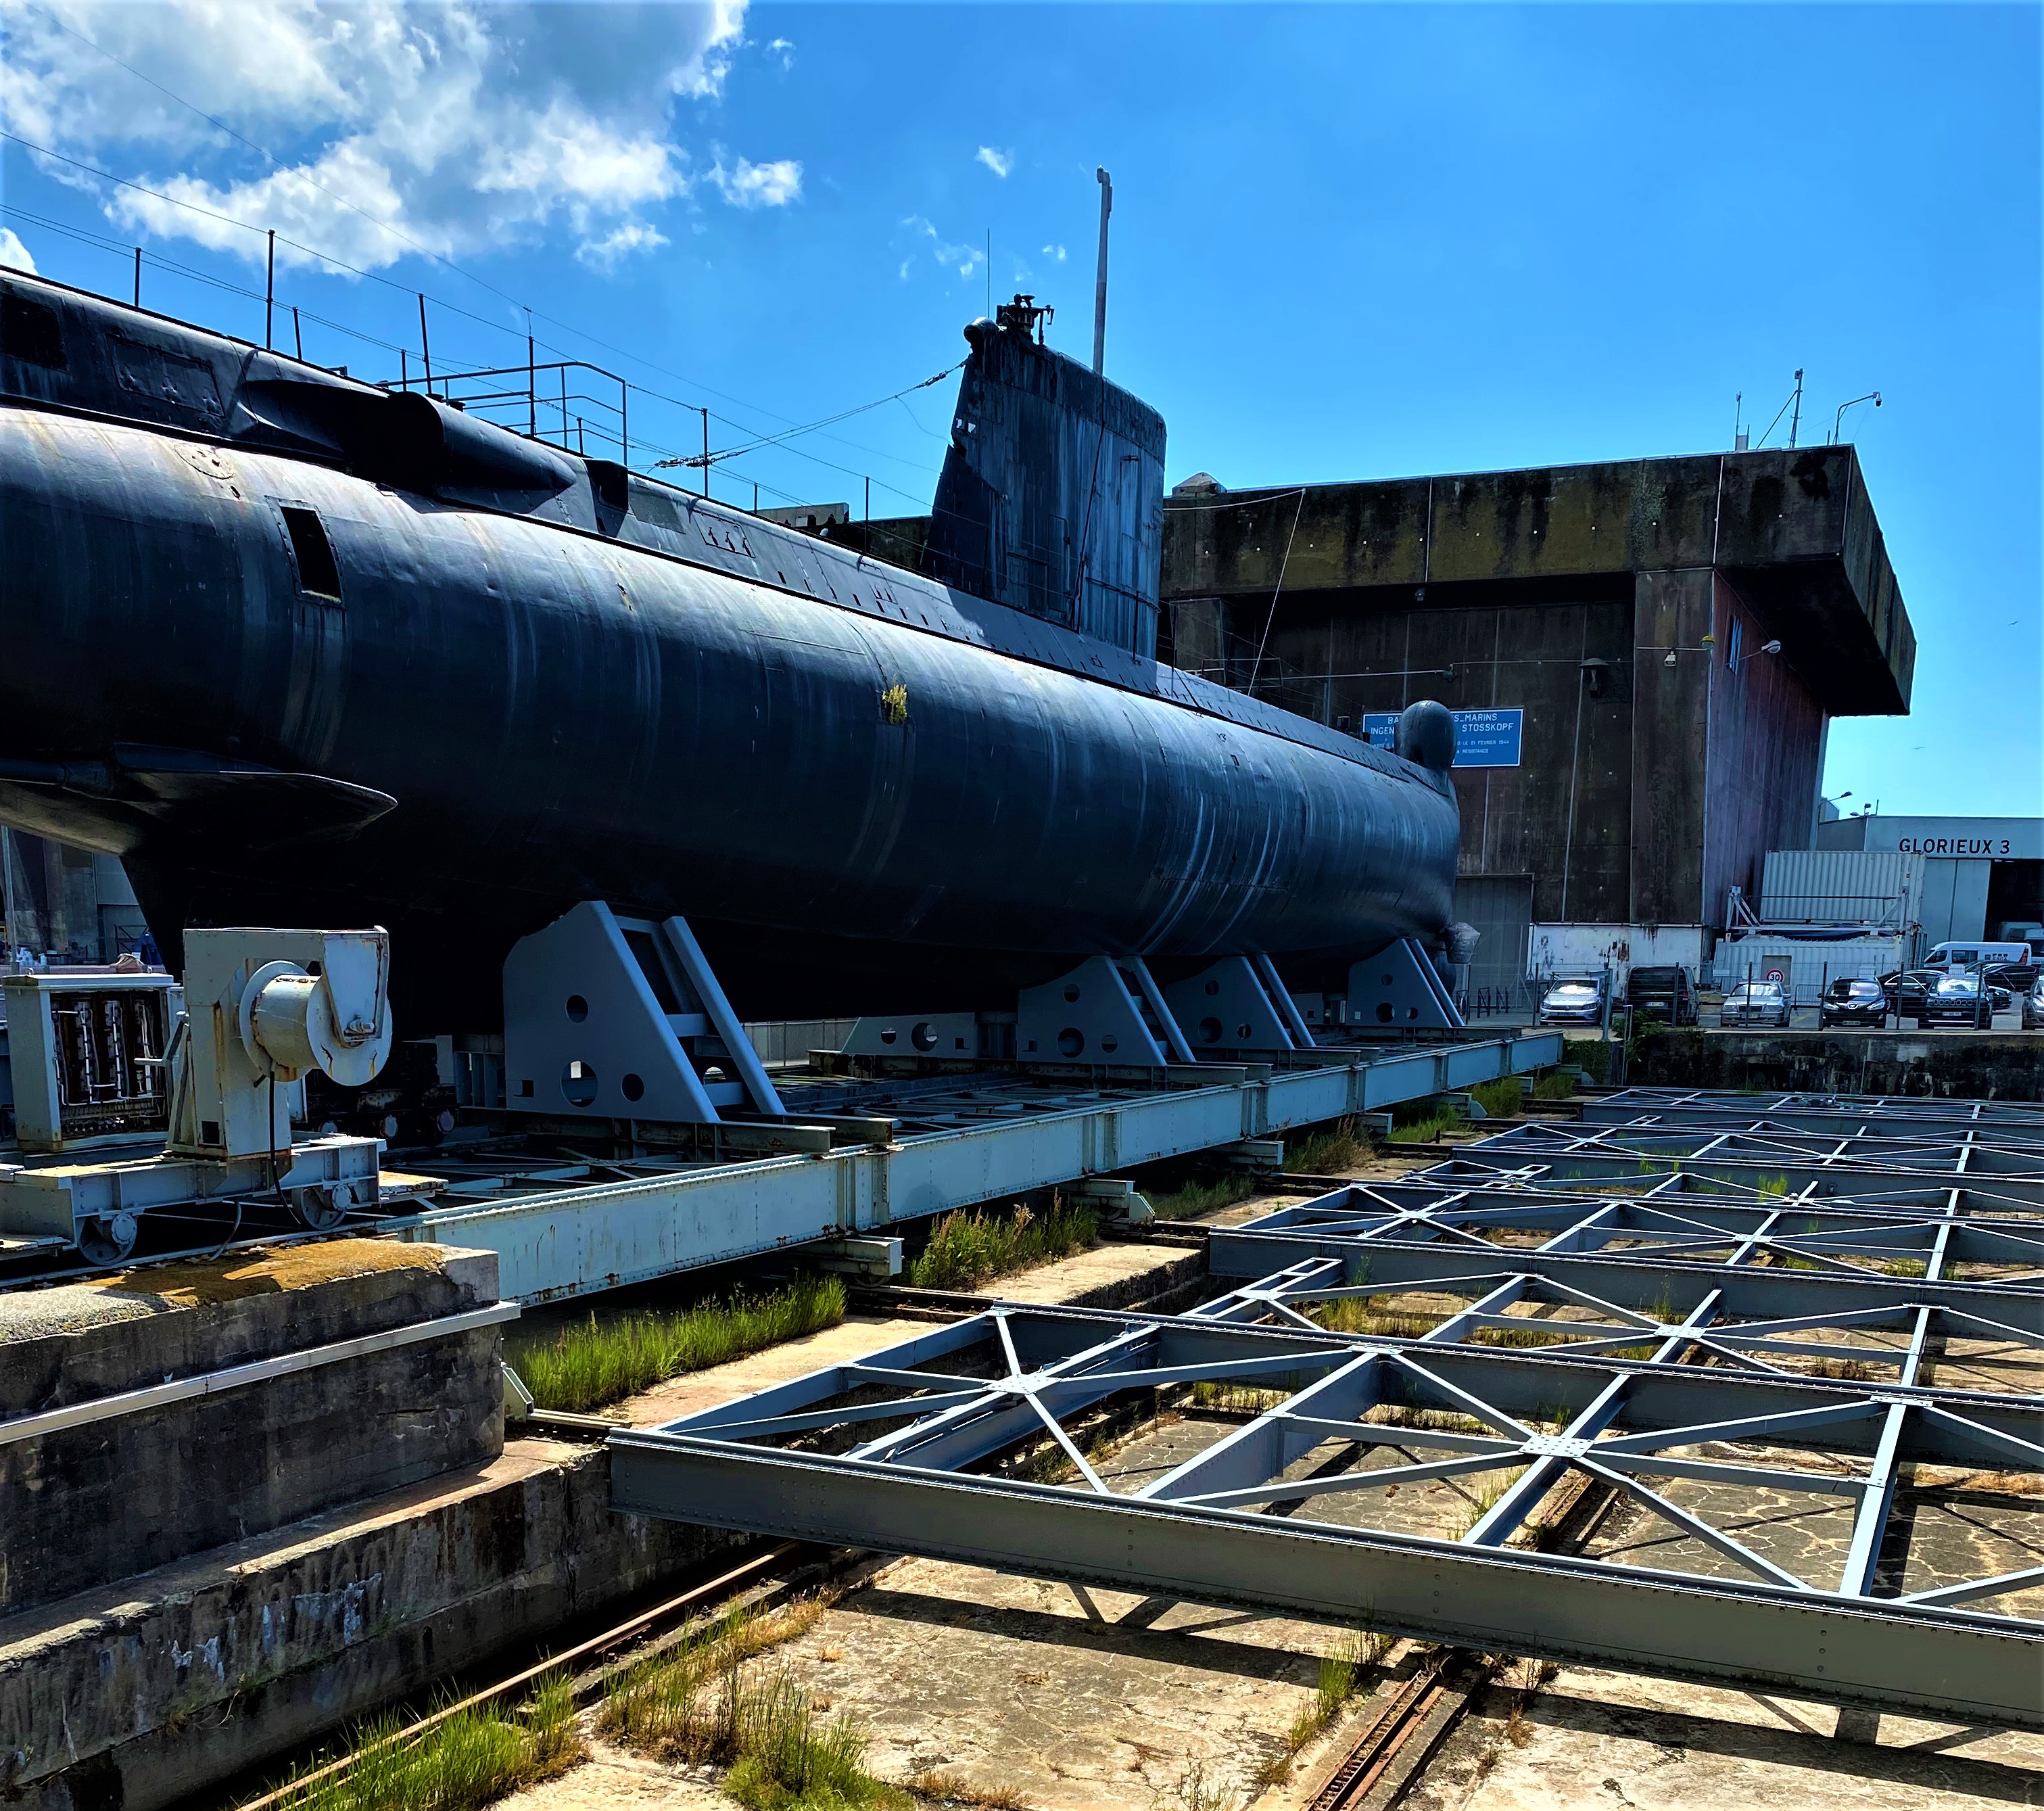
A trip to Brittany would not have been complete without visiting the massive U-Boat pens at Lorient on the south coast. Three huge concrete bunkers had 17 docks in all and an elaborate lift and carriage mechanism to move subs between them.

K1 was closed on the day of our visit; K3 only visitable by guided tour in French; my French is OK but an hour and a half would have been too arduous; so we just went to the K2 exhibit about submarines in general.

That did include a tour of a 1950s French sub, the Flore. Sufficient to confirm that submariner would not have been an ideal job for me.

Didn't make it to Brest but here is a view of the Brest U-Boat pens across the water from Pointe des Espagnols:


Musée Vendée Chouannerie
(Saving the best until last - this one's for you, Vincent!) The Musée des Guerres de l'Ouest (as it also calls itself) is in a former hospital bunker, part of a large complex built by the Germans to defend Quiberon Bay. The museum is devoted to the Breton Chouannerie (a series of uprisings from 1794 to 1832) and the War in the Vendée (1793-1796).

The bunker complex:

I had not appreciated the scale of these conflicts. A map in the museum shows the locations of some 30 battles or significant skirmishes; the Vendéan army fielded 10s of 1000s of men; and well over 100,000 Vendéans died either in action, or of disease or hardship, or in Republican reprisals. Feelings can still run high today: while we were in the museum shop, one of the museum staff was in a heated argument with another visitor. It ran something like this: "The Vendéans were counterrevolutionaries - they had it coming." "What, the women and children burned to death in a church had it coming?" A grim business. As they say, war doesn't decide who's right, only who's left.

A French Revolutionary hussard de la mort - 'Death Hussar'

A distinctive feature of the museum is its rank upon rank of charmingly characterful model soldiers. Here we have some of the Republican forces sent to suppress the uprising.

Not so charming: Republicans pacifying a Vendéan village.

Towards the end, the Vendéan army tried to escape pursuit by crossing the Loire, as depicted in the painting and diorama below:

... and a close-up of the diorama:

The museum had far more than these pictures can do justice to, and more than we could absorb in a short hour's visit. Paintings, uniforms, documents, weapons, artifacts ... I came away armed with a book to learn a bit more about it all. Recommended!


Tuesday, 24 May 2022

The Unluckiest All Black

Surely all wargamers and amateur military historians enjoy reading about the deeds of braver and better men than ourselves. In that vein, let me depart from this blog's usual military scope and pay tribute to an illustrious forebear whose notable exploits were performed on the rugby pitch rather than the battlefield (his military service being on the home front).

Alexander 'Nugget' Pringle (1899-1973) played rugby for New Zealand, earning one All Black cap in 1923. He would surely have merited more, but fickle fate in the form of injury, illness or other misfortune thwarted him repeatedly - hence the title of his newly published biography, 'The Unluckiest All Black'. This is available in paperback for a modest £9.95 or as an ebook, eg on Kindle for just £4.99. It has been described as 'the latest addition to the New Zealand rugby canon' by noted author and historian, Dr Ron Palenski, who kindly provided invaluable assistance during preparation of the book.* I hope it will be of interest to some readers of this blog.

(Disclaimer: I helped prepare the book too, mainly with the graphics.)

* Incidentally, as well as his sports books, Dr Palenski is an authority in our usual military history domain as well. His military books include 'Kiwi Battlefields' and 'Men of Valour: New Zealand and the Battle for Crete.

Thursday, 19 May 2022

Smash, bang, wallop: Dresden!

As most wargamers and readers of this blog probably know, Dresden (1813) was one of the biggest battles of the Napoleonic Wars, with over 300,000 men engaged. This makes it a must-do for any serious grognard. Mark Smith duly obliged and ran a game of his BBB Dresden scenario for us.

Just as the historical battle was fought over two days, so was ours. In our case it was two remote sessions on successive weeks. Consequently the French command changed at half-time, with Colin taking over from Crispin as Napoleon to fend off the allies commanded by me and Graham.

It's very much a battle of two halves. On Day 1, the French are outnumbered but have all their best troops on the pitch - including the entire Imperial Guard - with which to prevent the Austrians, Russians and Prussians gaining a foothold in the suburbs around Dresden. On Day 2, both sides are reinforced, but the allies gain guards and grenadiers to stiffen them against the French counterattack.

Scenario map. Red stars indicate victory locations. NB - the redoubts only matter on Day 1. Inevitably there will be tough fighting around the city, but there is also room for manoeuvre on both flanks.
 
The scenario design puts pressure on the allies to attack initially, rewarding them with 1 or 2 Victory Points if they manage to hold 1 or 2 of the redoubts at the end of Day 1. Graham and I calculated that attacking offered other advantages too: once in the Gross Garten or the suburbs, our troops would benefit from cover; and compressing the French front line would make it hard for the enemy to use all his combat power.

We therefore launched multiple serious attacks: against Friedrichstadt in the northwest, against the Gross Garten in the south, and against the three redoubts between them. After a couple of turns of attack, counter-attack, and counter-counter-attack, we had got into but not gained control of the Garten and the 'stadt; all three redoubts had changed hands, but we only held onto one of them. Still, at least that was one VP in the bank that could not be taken away from us.
 
 
Webcam view late on Day 1. Plenty of fog of war! Looking south from behind Dresden. The rectangular hedge left centre is the Gross Garten, with both sides' troops contesting it. Austrians and Prussians line the ridge in the distance; blue 'Spent' markers are the legacy of the Old Guard retaking a redoubt from Kleist's Prussians. Masses of French hold Dresden. Their high quality is shown by the green cubes ('Aggressive') and purple counters ('Shock' cavalry).

For Day 2, Colin inherited something of a traffic jam, with the French army virtually all in the semi-circle of Dresden and its suburbs. On the French right there was some space to breathe and a chance for Marmont to break out and threaten the objectives behind the Allied left wing. Unfortunately for him, stalwart Austrian defence and some lamentable French movement rolls meant Marmont never managed to eject Gyulai from Friedrichstadt. This in turn impeded French efforts to attack in the centre towards the bridge at Plauen and caused losses in precious French cavalry who were exposed to fire against their rear. On the allied right, late in the piece the French did attempt to send some troops around the flank against the objective at Seidnitz, but this was too little too late, as by then the Russian heavy cavalry was there to counter this. Added to the mix were some lethal allied firing and combat dice at a couple of crucial moments, wiping out potent French cavalry formations.

Real-world fatigue on the French side meant we couldn't play the last turn, so "at that point we called it": Mark's assessment as umpire was that it would probably be an allied win, though with a reasonable possibility that the French might have taken enough objectives to salvage a draw. Given what I think was a decent allied plan plus some help from the dice, that seemed a fair result.

Reflections:

Claustrophobia! The high troop density provided a very different feel from more open battles. With so many units packed into a narrow frontage, the French especially suffered from masking their own guns and struggled to attack out of the difficult terrain of the city in anything like a coordinated manner. Whenever either side attacked, instead of sweeping manoeuvre and knockout blows, it was more like two boxers in a clinch exchanging repeated body-blows. Every attack left the attacker disrupted and vulnerable to a counterattack, and the troop density meant there was usually a second enemy line ready to deliver one. Real punch and counter-punch.

Despite the compressed front line, the nuances of terrain and different troop types meant there were still plenty of tactical decisions to be made. It was pleasing that BBB produced the right level of granularity to achieve that but still fight a big-picture grand battle.

Guns that aren't firing are guns wasted; putting them in the right place to start with is crucial. Napoleon was an artilleryman. He knew.

The fog of war of remote gaming. Colin overlooked units that were behind houses. For our part, a couple of times Graham and I advanced our cavalry into range of enemy guns that were off-camera. These were minor frustrations that actually enhanced the game in a sense, in that such blunders are a feature of real battle and it is more realistic than our usual perfect 'helicopter view'.

The time-inefficiency of remote gaming. With Mark having to dance around the table carrying out moves for all of us one at a time, and having to explain what we could see or do, it took us two evenings to not quite finish a game that could comfortably have been concluded in a single session if we'd all been round the table. But it's still way better than no game at all.

How nice to have a battle where you legitimately field the entire Imperial Guard! (Mind you, they were seen off by my iron Landwehr.)

Great game, very atmospheric. Big thanks to Mark for laying it on.

***

If you enjoyed this AAR, you can use the 'Napoleonic' label on this blog or search by year label (e.g., '1813') to find reports of our other Napoleonic BBB battles.

Tuesday, 10 May 2022

V-E Day visit to Musée de la Libération de Berjou

This V-E Day, 8 May 2022, was a suitable day for a pilgrimage to a hidden gem of a museum in Normandy:

The Musée de la Libération de Berjou is dedicated to the history of the battle around Berjou on 15-17 August 1944. This was the moment when German 7th Army was scrambling to escape the Falaise Pocket, which was about to be sealed. The British Operation Bluecoat had covered the flank of the American breakout (Operation Cobra) and brought British 2nd Army down past Vire. To cover their retreat, the Germans had tried to establish a new defensive line facing west, anchored on Flers and Condé-sur-Noireau. Now 2nd Army launched Operation Blackwater to cross the River Noireau (i.e., "black water") and breach this last German line.

Berjou is on steep wooded high ground 5km east of Condé, covering the flank of the German line. At dawn on 15 August, 214 Brigade of 43rd (Wessex) Division crossed the Noireau at several points. The next morning, the German 276 Infanterie-Division launched a violent counter-attack. The arrival of the Sherwood Rangers Yeomanry's tanks helped to repel this. Then, after a powerful artillery barrage, 1st Battalion the Worcestershire Regiment liberated Berjou. The battle cost the lives of 70 British troops, several hundred Germans, and between 15 and 30 civilians.

The museum commemorates this action in a building absolutely packed with artifacts, all recovered from the battlefield. Because it has so much stuff now, they are planning to extend it. The building itself had a German gun position next to it and still bears the scars of battle damage. Exhibit highlights include an intact 81mm mortar, a rare Gw-43 German automatic rifle, an SS colonel's uniform, and (bizarrely) half a German sea mine (apparently jettisoned by a German plane, it blew out every window in the village), but these are just a few out of hundreds of items of kit, weaponry and miscellanea of all kinds. This is a very substantial collection which is still being added to: just last week, two Lee-Enfields, a Kar-98K and a Sten in good condition were discovered in a case concealed in a building wall. Our group was treated to a personal guided tour by the grandson of the man who owned the building during the war. (The owner was serving in the French military and was taken prisoner by the Germans in 1940, I believe; his uniform, POW documents etc are on display.) Our guide himself was responsible for many of the finds retrieved from locals' attics or metal detecting in the fields around about, and his knowledge and enthusiasm made the visit even better.


The museum is only open on Sunday afternoons, 14:00-18:00, from May to September. If you should find yourself in Normandy in those months, do make the effort to go to Berjou - it's well worth it and much better than some bigger and better-known museums in Normandy.

The museum has a Facebook page here.


.

Tuesday, 5 April 2022

Hungary 1848 #15: Temesvár - an army disintegrates

 And lo, 'tis done: the final battle in our 15-month, 15-game Hungary 1848 campaign has been fought.

The climactic battle of Temesvár (nowadays Timisoara in western Romania) is notable in a couple of ways. It is the decisive final battle of the war and also the largest, pitting about 30,000 Austrian and Russian attackers against 60,000 Hungarians. It is remarkable in that it was decided entirely by the artillery and cavalry, with the infantry scarcely firing a shot and certainly not crossing bayonets. This is because many of the Hungarian infantry were unarmed raw recruits, and all of them were exhausted and demoralised by constant retreating. The action opened with the usual artillery duel along the whole front; there was considerable manoeuvre by both sides, including several Hungarian spoiling attacks, one even by infantry; but ultimately the Hungarian artillery ammunition ran out, some raw troops on the right broke under fire, and this turned into an infectious rout covered by the hussars. Allied casualties were light, Hungarian losses devastating (mostly prisoners or just 'missing'), and most of the Hungarian formations were left worthless for combat.

Translating such a battle to the wargames table is a challenge. Do you script in the infectious rout? Do you make the Hungarian infantry unfit for combat from the start? Or do you give them a real chance of inflicting a bloody nose and pause for thought on the allies as their commander, General Bem, intended?

I opted to downgrade the Hungarian infantry's combat abilities significantly but not cripplingly. Any 'Aggressive' ratings were stripped away (even from the fabled Polish Legion). Even the best units were made Fragile, penalising them in both assault and movement. Most were rated XF - 'Extra Fragile' - making them much more likely to run away once disrupted. Many were rated as Ragged Volleys to reflect their armament with scythes rather than muskets.

The result was an excellent game, but one that only partly matched the history. Much of the Hungarian force was routed but, as the Austrian commander, I made some poor decisions that earned me a very bloody nose indeed. If you're interested in the detailed action, read the photo-AAR below. If not, you might want to skip to the end to see my reflections on the game. 

The battlefield is bisected by the marshy Nyárad stream, the line the Hungarian C-in-C Bem tried to defend. Off-table to the SE (top edge) is the Austrian-held fortress of Temesvár, whose epic siege is about to end. The yellow patches indicate that much of the battlefield was covered by tall maize, limiting visibility. White counters are the objectives: at top, the bridges leading to Temesvár; below them, an inn on each road, roughly representing the Hungarians holding a line; bottom right, two villages on the allied line of communications; and on the left, the stone bridge on the highway leading to Arad and the possibility of Bem linking up there with Hungary's other remaining field army under Görgei. All the Hungarians are on top half of the field already. Allied advance guard is lower right of picture. Main body arrives bottom right Turn 1; others bottom left T1 or 2 and (out of view) left edge T 2 or 3.

Ramberg's III Cps on the start line on the Austrian right.

The "10,000 scythe-armed national guards" around the Szt András inn on the Hungarian right wing
(in reality probably the several battalions of unarmed recruits belonging to X Corps). These are the troops who historically sparked the Hungarian rout. 

 Lázár's IX Corps in the Hungarian centre (including the Polish Legion) links up with Kmety's division which is about to cross the Nyárad on their left.

End of Turn 2. All of the Austrian left wing, Liechtenstein's IV Corps, has arrived. His grenadiers march onto the heights above Szt András (bottom right) while Brigade Siegenthal pushes forward on the left (bottom left). The Hungarians brace themselves to receive the attack. Note the wagon and white counter next to the line of poplars: this represents the Hungarian baggage train trying to escape to Arad. In the unlikely event that the wagon manages to cross the Nyárad and survive, the Austrians will lose a victory point. Meanwhile, top right, Panyutin's Russians are visible advancing to the Nyárad.

End of Turn 2 on the allied right: a formidable Hungarian force under Lázár and Kmety is debouching across the Nyárad (top right) to threaten the allied line of communications. The Italian Legion has been left to hold the Besenyő inn (top left). Wallmoden's cavalry (bottom right) have given ground while the infantry march up and the guns deploy along the road. Top centre, I pushed Brigade Dossen forward to delay the Hungarian advance. This was careless - what I thought was a unit of hapless raw recruits was actually the honvéds of Division Jászvitz with their dangerous jaegers. I would soon rue this move.

End of Turn 3 and things are looking good on my (allied) left. Siegenthal has stormed across the Nyárad (left of photo), rendering a raw Hungarian unit Spent (blue counter) and disrupting the honvéd line behind it (yellow counters = disruption). Herzinger's grenadiers press forward to the Nyárad (bottom centre). That unit in line in the maize field, upper right, is a bold Russian jaeger regiment.

 Also T3:  more Russians push forward in my centre to threaten the Besenyő inn (left of picture). The corps heavy artillery has deployed to soften up the Italian Legion defending the inn. (Green counters = Devastating 12-pdrs.) However, the Hungarians have rumbled up two artillery units - 48 guns - to canister Dossen and drive home just how serious an error I had made.

End of Turn 4 and on my left, it just gets better and better. Siegenthal has inflicted another blue Spent counter on a second raw Hungarian unit. Herzinger's grenadiers are across the stream and ready to join in the fun. The Russians in the centre are fending off weak Hungarian counterattacks and preparing for their own assault on the Besenyő inn (top right).

But on my right, the tragic waste of Brigade Dossen is complete and they are back in the box. On the positive side, the Hungarian flanking move has barely moved at all, as my horse artillery is compounding their poor movement rolls to delay them.

Not satisfied with squandering Brigade Dossen, on Turn 5 I committed an even worse sin on my left. Siegenthal's success caused a rush of blood to my head. I launched both my potent grenadier brigades against a honvéd line that looked thin but was armed with jaegers and two artillery units. The jaegers repelled one brigade with loss and the combined canister fire wiped out the other entirely - note the embarrassing gap in my ranks in front of my general by the road. Stupid, stupid, stupid.

Turn 5 was quite exciting on the right too, but better for me. My 12-pdrs began tearing holes in the Italian Legion (top left). The Hungarian left-flanking force tried to assault Wallmoden's cavalry division. The cavalry prudently evaded to safety; their guns smashed back the infantry attacking them frontally, then managed to survive the hussars' charge as well. My gallant horse artillery can be seen heading for the line of poplars, leaving a cluster of yellow-countered Disrupted Hungarians behind them. One of the yellow counters belongs to my Brigade Wolf (white coats, top centre, near their general). Undeterred by the loss of their sister Brigade Dossen, I sent these on another spoiling attack, this time with greater success.
 

Turn 6: the good news on my left is that the Hungarian jaegers are low on ammo (black counter). The bad news is that they've used it all to wipe out the rest of my grenadiers (big gap lower centre). Brigade Siegenthal by the Arad bridge looks very lonely. With hussars creeping towards my left flank (top left and top centre-left), barring the way to Arad just got much harder. 

Progress on my right, though. With only two turns remaining and quite a lot of my troops in the way, the Hungarians at top right are probably still too far away to threaten my line of communications seriously. Two Russian regiments have ejected the Italian Legion from the Besenyő inn (top left) and captured their guns. Thus, the three objectives in this picture are looking secure; I need one more for a draw and two to win. Also, notice the single-base cavalry unit on the bridge at centre left, Brigade Veigl. This will shortly have an important part to play.

End of Turn 7. The disaster on my left gets worse. Now Siegenthal's brigade has gone as well - those whitecoats you see on the bridge to Arad are the victorious honvéds, closely followed by their baggage train. All is not lost, though: the Russian jaegers have driven back their foes in the centre, then wheeled left to storm the Szt András inn - my fourth objective - while Haynau himself canters forward with Veigl's cavalry (centre-right), seeking to dash across a bridge for that fifth objective to claim a win.

Turn 7 on the right: the Hungarians have the consolation of overrunning my horse artillery but are forced to accept that my line of communications is out of reach and secure.

End of Turn 8, the final turn of the game. The Hungarian baggage crosses the Arad bridge, costing me an objective! Drama around the Szt András inn as well, which desperate scythemen briefly recaptured, only to be definitively expelled again by the Russian jaegers. I have four minus one = three objectives, one short of a draw ...

... and it is the commander-in-chief who achieves it, just as Haynau did historically when, as dusk fell, he led a mad dash through the debris of the Hungarian army to the gates of the fortress to relieve the siege!

Reflections


As a game, it was great: plenty of options and decisions and movement for both sides, see-saw action, and a rollicking finish with objectives changing hands repeatedly and the result in the balance right to the end. Don't change the scenario!

Yet, as history, it felt strangely unsatisfactory. It reproduced the Hungarian thrust around the allied left, and recreating Haynau's mad dash at the end was wonderful. But the intense infantry fights we had just didn't happen in the real thing, and it's hard to know how (or whether) to prevent that. I think the answer is to offer a scenario option that ups the Austrian victory target while (probably) handicapping the Hungarian infantry further, making them either more shaky under fire, or even worse in close combat, or even more reluctant to move, or a combination of the above - all depending on a random die roll. This could be a good way to represent the imponderables of army morale and come closer to the historical event for players who want that and who don't mind if the game is a bit more one-sided as a battle.

Good to field Crispin's new Hungarian army for the first time. That now makes three of us at OWS with full armies for both sides for the '48. I doubt any clubs outside Hungary could match that.

Exotic troop types enhance a game. Those extra-fragile scythemen may not have had much combat value, but they provided plenty of entertainment value. The baggage train was a nice addition too.

You can't legislate for stupidity. I am still shaking my head at my own recklessness in squandering not one but three brigades with such rash advances. I bet my opponents Mark and Crispin couldn't believe their luck. I don't know how I got away with a draw despite that. Maybe my judicious use of Haynau and Veigl's cavalry made up for it.

We completed a campaign! Inevitably, travels and lockdowns and other real-life inconveniences meant it took a little longer than planned and some of the core group missed out on some of the games. Because of these interruptions, we also lost some of the feeling of campaign continuity, though we managed to retain the overall 'story arc'. Even so, one campaign battle a month (and some of them being fought more than once) for fifteen months is a respectable achievement. Generals and formations acquired personality and character in our eyes over time and became old friends. After spending so long immersed in the drama of the '48, we have absorbed its history. No doubt we will visit it again, but for now: Mission Accomplished!

 
Next mission: compile all the campaign scenarios together, write an introduction, design a cover and publish "Bloody Big Hungary 1848 Battles!". Actually, that work is almost all done already in anticipation of this last game. I should therefore be able to get BBHB published very soon. Start saving your forint/Schilling!


PS - if these reports have got you interested in the Hungarian War of Independence, you might want to take a look at my books on it from Helion:




Hungary 1848 #14: Szőreg

We arrived at the penultimate clash in our year-long Hungary 1848 campaign: Szőreg.

The historical situation was this: Hungary's southern army, commanded by 'the disastrous Dembinski', had been occupying a large entrenched camp at Szeged on the west bank of the River Tisza. As Haynau's Austro-Russian columns approached, Dembinski was fearful of being surrounded, so he abandoned the camp without a fight and fell back to the east bank of the river. He then allowed the Austrians to establish a bridgehead in front of him, again with barely a fight. When the Austrians broke out from their bridgehead, the battle of Szőreg ensued. A distinctive feature of the battle was a massive dike, built to contain the Tisza's seasonal flooding, that the Hungarians had embrasured for 50 guns.

Historically, Szőreg was a rearguard action by one Hungarian corps while the anxious Dembinski again retreated pre-emptively with most of his army to avoid the threat of being outflanked.  My scenario allows the Hungarians the option to have more of their troops turn and fight to try to give the Austrians a bloody nose, but at some hazard: a 'flank threat' rule stipulates that if the Hungarian players commit troops to battle that historically avoided it, they risk conceding victory points to the Austrians, representing being outflanked and cut off post-battle by two other Austrian corps that were bypassing them to north and south.

For our game, I donned the Hungarian kepi, Colin the Austrian shako, and Crispin the Russian pickelhaube. The allies elected to commit all of the Russian division to a big right hook towards Sz.-Ivan, leaving the Austrians to take on the dike defence alone. I therefore chose to gamble straight away. The two contingents of Guyon's IV Corps, starting on-table in the Hungarian rear, are supposed to retreat off-table by Turn 6 if they are to avoid the flank threat. I decided to push them forward initially to delay the Russians' advance.

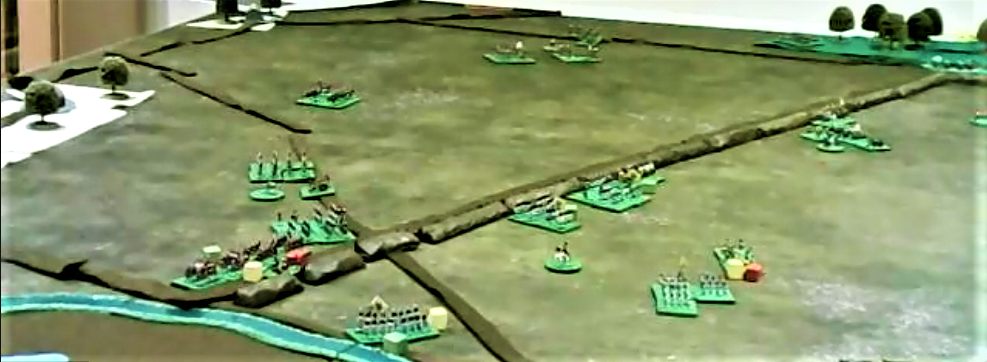
AAR in five photos follows. Skip to the end if you just want to go straight to my reflections on the game. (Apologies for the fuzzy/grainy screenshot pics - this was played remotely, not because of pandemic but because I am away from home at the moment and Colin has moved up north.)

 End of Allied Turn 1 (allies moved first). View from the allied bridgehead. Bottom left: allied batteries bombard the Hungarian dike defence (out of shot to left) while Liechtenstein's infantry division and Bechtold's cavalry surge towards an undefended stretch of dike. Right centre, most of Panutine's Russian division is racing down the road alongside the River Tisza. In the distance, Panutine's vanguard is about to cross the dike and begin clearing Hungarian irregulars out of the Sz.-Ivan Wood (one of the six objective locations).

End of Hungarian Turn 2. Originally there were two Hungarian batteries in embrasures astride the two roads through the dike, each backed up by an infantry division. The battery between the red and yellow cubes has been pummelled by Austrian heavy guns and rockets - the cubes indicate it is Reduced and temporarily Silenced. An Austrian battery lower right has suffered similarly from Hungarian fire - but the second Hungarian battery that did the damage has run out of ammo entirely and been removed. An Austrian grenadier brigade by the River Maros has taken casualties and stalled under the Hungarian guns. Further to the right, Austrian and Russian troops have reached the dike but not crossed it. To counter their threat, Guyon's corps has moved from the furthest corner (top of pic) and deployed mostly astride the far road leading to Sz.-Ivan (village top left), with one division moving to support the guns on the dike. A cavalry division (upper left) commands the open ground in the centre and covers the sprawling village of Szőreg (left edge). 

End of Hungarian Turn 3. Three Austrian brigades have crossed the dike but are regretting it. Hungarian guns and jaegers lining the road have battered the second grenadier brigade. Some hussars (top right) have moved to pin the righthand Austrian brigade. Away to the right, out of pic, the Russians have advanced into the Sz.-Ivan wood but have yet to clear the defenders out of it.

End of Allied Turn 4. The Russians have cleared the wood (out of pic to the right) and a Russian jaeger regiment is confronting Guyon's men on the Sz.-Ivan road (top right). Things start to go badly for the allies in the centre. Two more of Guyon's divisions centre of pic have advanced boldly, obliging the Austrian cavalry to evade back behind the dike, and are about to overwhelm a Russian jaeger regiment. The unit in the foreground is Simbschen's Austrian light cavalry brigade. This failed to support Lederer's cuirassiers who tried to charge across the dike again and attack the Hungarian hussars. This failed badly: the cuirassiers were destroyed, leaving the hussars free to turn and attack the rear of the Russian infantry next turn.

End of a disastrous Allied Turn 6. In three successive assaults I rolled three sixes, while two of the allies' dice came up as ones. They were repulsed from Szőreg with loss, then were countercharged and all but wiped out; an assault along the dike out of pic to lower left was also repulsed; and their isolated Russian jaegers were wiped out. The defenders now visible in Szőreg are the largely scythe-armed raw recruits of Gál's X Corps. I hadn't wanted to bring these on but the Austrian advance on the three objective locations in Szőreg obliged me to, thereby invoking a third 'flank threat' to add to the two already in play because I had kept all Guyon's corps in the field.
 
There are no more photos because it was getting really fast and furious now. At this point it was clear that the Austrians were done and would not take any more objectives. We therefore just played the Russian end of the table for the last two turns. This was a race for Sz.-Ivan, which they just managed to take with their lead regiment on the last turn. That plus the wood gave them two of the four objectives they needed for a draw (five for a win). The three flank threats (for committing both of Guyon's contingents and X Corps) were potentially another three objectives. These were resolved at the end of the game by rolling a D6 for each. On 4+, the allies gained an objective. Had they gained all three, they would have won; one or none and they would have been defeated; but of course, they got two, meaning the game was drawn!

Reflections

The now familiar pros and cons of the remote format: the poor ref having to scramble round the table adjusting the camera and moving the troops; the players struggling to see what was going on and explain their wishes to the ref; the game taking rather longer than if we were all round the same table; but nevertheless enjoyable and made it possible for us to have a game that couldn't have happened otherwise.

The scenario produced the ideal last-turn nail-biter. The 'flank threats' rule worked well in several respects: it gives the Hungarian side significant and interesting choices to make about how many troops to commit instead of retreating; that helps to keep the table-top action an even fight; and the die roll to see if the flank threats materialise keeps the result in doubt to the end. (And it proved well balanced.)

The virtue of unified command: as the sole Hungarian player, I think I had an advantage over the allies, who didn't always coordinate as well as a single player can. In particular, when the Russian jaegers crossed the dike in the centre, Crispin specifically asked for Austrian support; the Austrian cavalry crossed to back him up, but then scarpered when the Hungarians advanced, leaving him in the lurch.

Indecision costs lives. I think that on Turn 1 Colin was still recovering from a hard day at the office. He pushed an Austrian grenadier brigade forward mostly for the sake of pushing it forward, but it didn't take advantage of the Austrians' initial surprise deployment to assault, it just halted in canister range and duly paid the price.

Fortunes of war: my three sixes in a row for the assaults on Turn 6 were huge. On the other hand, on Turn 5 I had blown several easy movement rolls, which was why I had to call X Corps's scythe-wielders onto the table to defend Szőreg. That really mattered at the end, as it was that extra flank threat roll that saved the game for the allies.

Strategic choices, an unusual terrain feature, varied troop types, room to manoeuvre, and the flank threat question mark: this was a great combination that made for a great game.