The "Bloody Big Balkan Battles!" scenario book for the Balkan Wars of 1912-1913 was published back in 2019. A lot of these battles were fought over very mountainous terrain that takes time to set up, so is not ideal for a club night and better done at home. My war room at home has been out of commission for a while but is back in action now. To inaugurate the refurbished war room, I decided to host the first game in the BBBB book: Sarantaporo (which I playtested in 2017). I took advantage of the Christmas holiday to run it twice for different groups of friends.
The scenario sees a thin Turkish cordon defence in the mountains facing a much larger Greek attacking force. The strategic situation is that the Greeks are racing to reach Thessaloniki (some distance offtable) from the southwest before the Bulgarians can get there from the north. Victory therefore depends on how long the Turks can delay the Greeks before being inevitably overwhelmed.
Fourteen annotated photos tell the tale, followed by some reflections at the end.

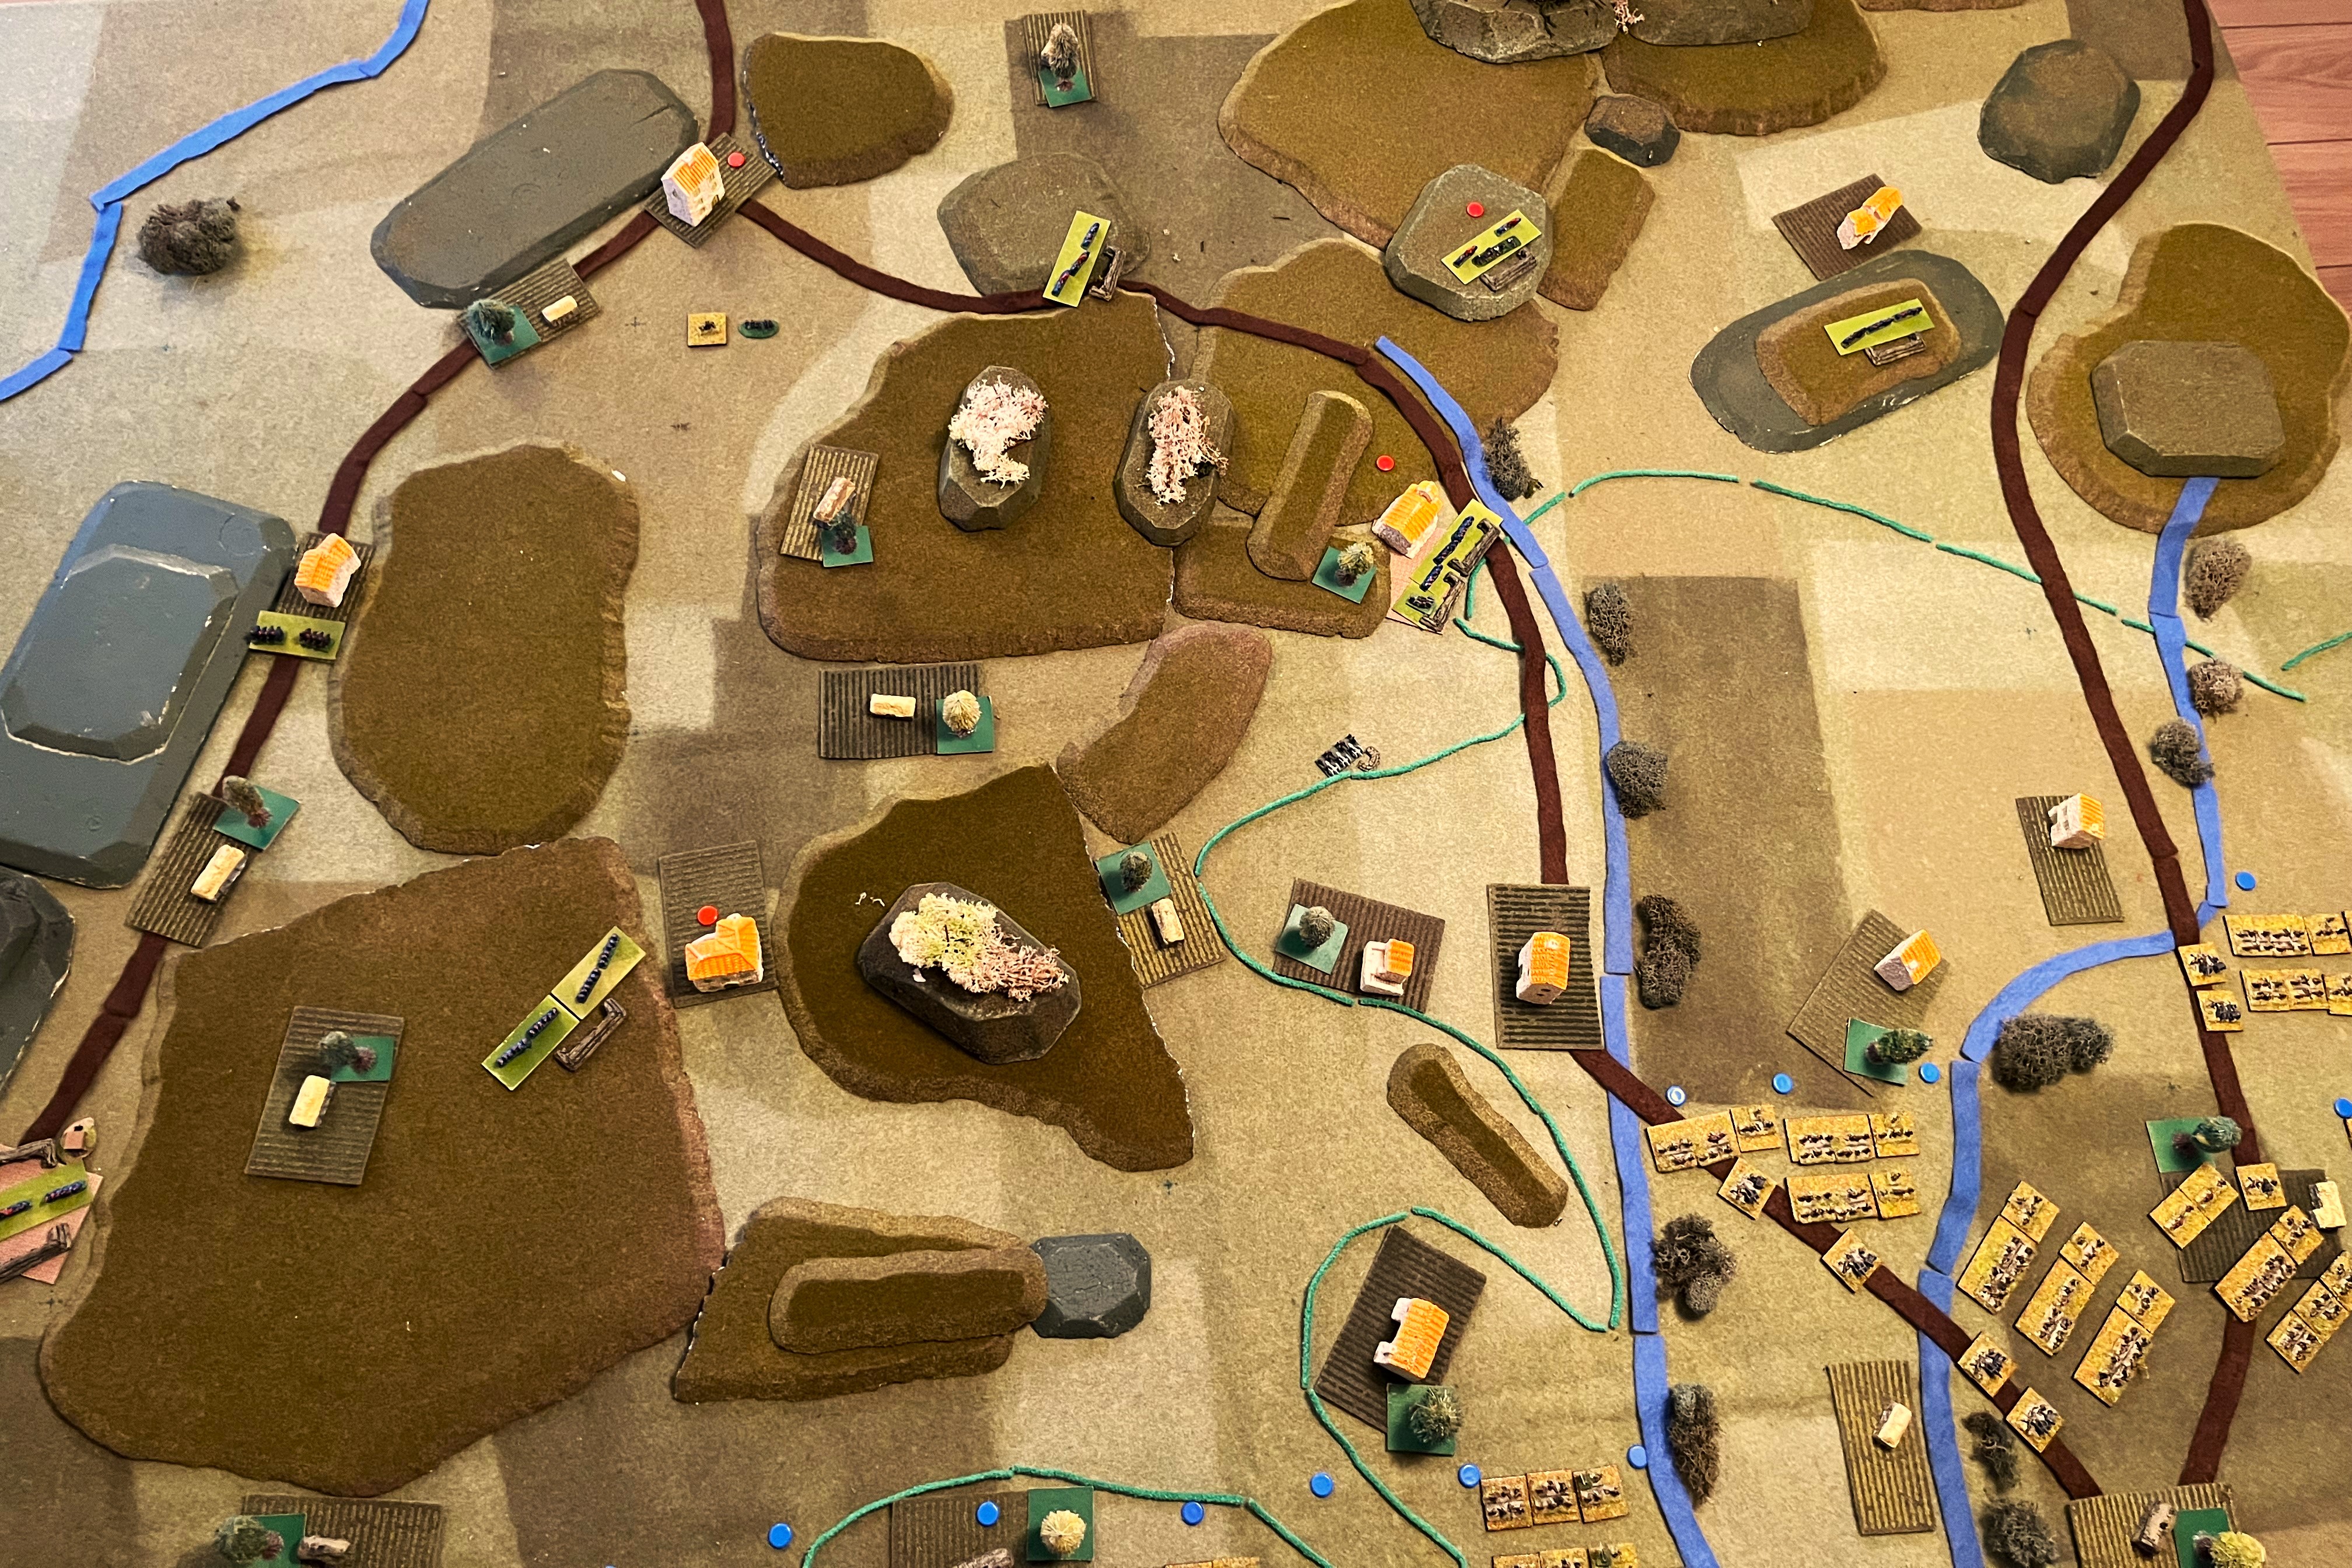
Plan view looking north from the Greek side of the table. The wavy green line marking off the SE quarter is a steep slope between the flat and open river valley (Level 0, good going) and the rest of the table that is all difficult terrain and Level 1 or higher. The 'polystyrene jigsaw' hills are Levels 2 and 3. Those crested with pale lichen are impassable peaks. (For an essay on various ways to represent complex hilly terrain, see here.) At lower left edge is the fort at Lazarat, guarding a pass. The town of Sarantaporo is the church next to the road, upper centre. Red counters mark the five objectives (you can't see the one at Mikrovalto, halfway up the westernmost road, because the Turkish cavalry are sitting on it). Greeks have to take three of these to draw and four to win. Most of the Greek army starts massed in the SE corner but a couple of divisions, cavalry and evzones are along the western half of the southern edge. 
View from the Greek SE corner towards Sarantaporo and the Skopia-Vigli hilltop objective. You can see roughly four of the Greeks' six divisions here (three 3-base regiments to a division; some little 2-base Evzone units). Blue counters are temporary to indicate Greek deployment areas. Ben and Luke modified this deployment before the game started and established a grand battery of 80+ guns along the stream and to the left of it.
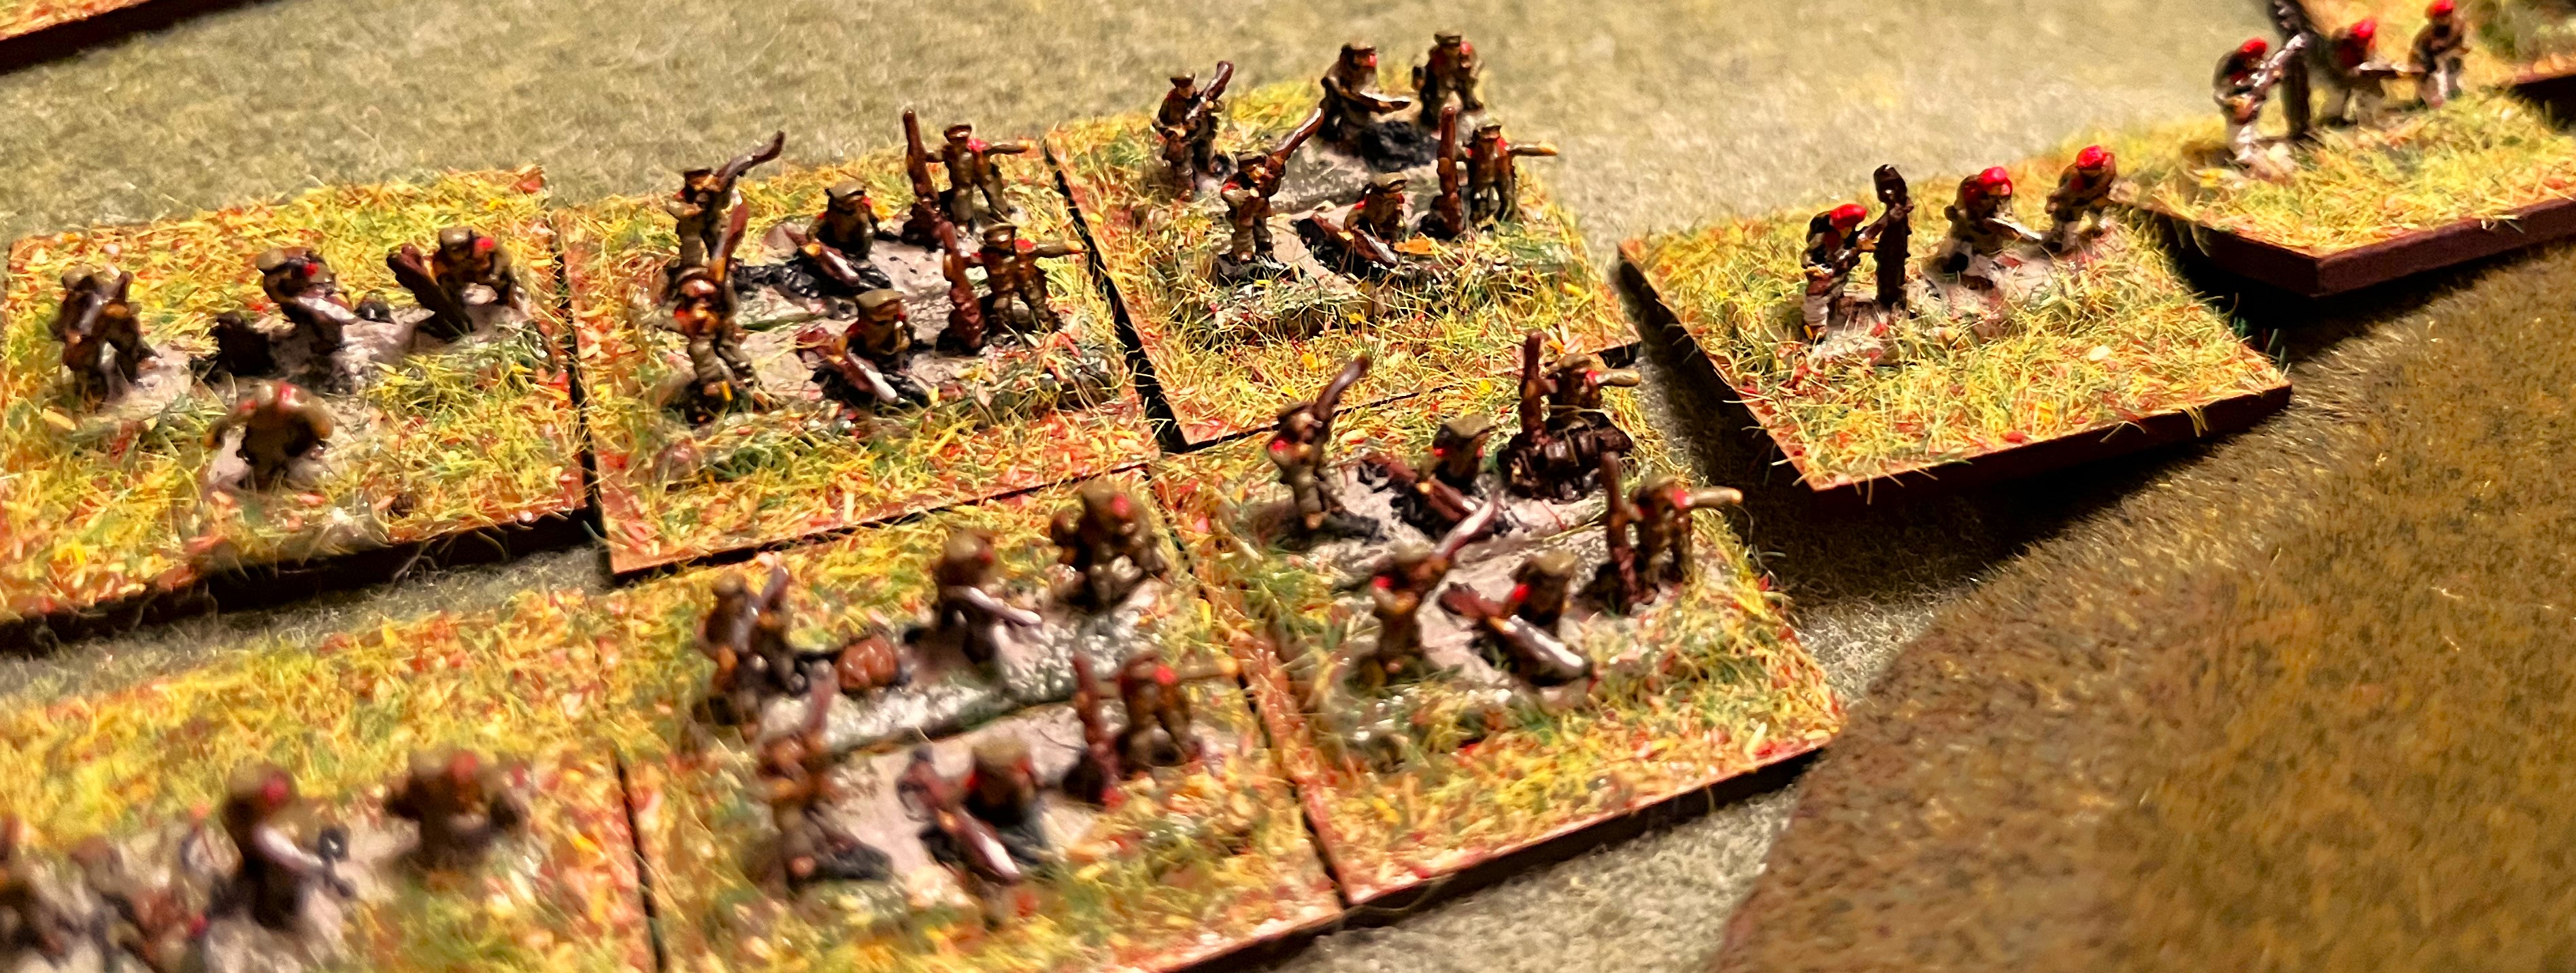
The defenders of Sarantaporo. (6mm figures by Irregular Miniatures, painted and donated by Dave W.) Most of the Turkish force is raw, fragile Redifs (hastily conscripted reserves), as indicated by the absence of flags. All my Turks are in anachronistic 1877 uniforms rather than 1912 khaki. Never mind, red fezzes look pretty. The Greeks retaliate with some red hats of their own: two bases of elite Evzone mountain troops (right of pic) prepare to advance alongside a couple of regiments of line infantry. (Evzone figures are actually French chasseurs alpins; line inf are British WWI.)
The Turkish strongpoint on Skopia-Vigli. These two regiments are veteran Nizam regulars (hence get flags). The one in the foreground has been given VIII Corps's entire company of nine machine-guns, giving it the Devastating Volleys attribute. The hilltop regiment has the advantage of a Skirmisher base. Entrenchments and sandbag emplacement are from Irregular Miniatures. The hilltop itself is carved from ammunition packing for added authenticity.
Luke, Ben and John M opted for a three-pronged attack. On the left, John pressed up the Lazarat pass and over the high ground either side of it. Luke and Ben avoided the Turkish 'killsack' in front of Sarantaporo and Skopia Vigli, Luke marching wide around the right. This pic shows Ben's central force working its way towards Sarantaporo from the south and pushing through the mountains west of it. Meanwhile, the Greek grand battery takes fearsome toll of the Turkish redifs who are soon spent and disrupted (black and white smoke markers).
Endgame on the right. The Greeks have taken Mikrovalto, Livadero and Sarantaporo, securing a draw. Can they take either Polirabo or Skopia-Vigli for the win? Luke's right hook approaches Skopia-Vigli - but the mountainous terrain has delayed him too much and he runs out of time. Dave T's defenders stand firm in the Turkish centre!
Ben's regiments storm forward through Sarantaporo, but they can't reach Skopia-Vigli in time either. And on the left ...
Mark S's Turkish reserves arrived in time to garrison the vital road junction at Polirabo. John's infantry can't quite get there. Only Soutsos's cavalry brigade can reach it. Sabres drawn, they charge into the teeth of Turkish Mauser fire - which fails to stop them! They rout the first redif regiment, exploit onward and drive out the second regiment as well. Victory to Greece! The Bulgarians shall not have Thessaloniki!
Game 2 saw me and Bob command the Greeks against Crispin's Turks. This shot shows most of my force on the Greek left and centre (cavalry and some more inf out of shot to the left), ready to advance on Livadero (red objective marker).
I didn't tell Bob how the previous game went, but he too opted for a grand battery in the centre and a right hook to avoid the 'killsack' of combined Turkish artillery, skirmisher and MG fire.
However, he soon realised that the difficult terrain would make it hard for a wide right hook to arrive in time, so he changed his plan and converged into the killsack after all. The grand battery had done much execution by now, as had the Greek infantry's rifle fire (seen here wreathed in brown smoke showing they are Low on Ammo after a high firing roll), so the weakened defensive fire was not able to stop the Greek advance.
Still, the combination of defensive fire and difficult terrain meant that only two Greek regiments were able to assault Skopia-Vigli on the last turn. Turkish fire repelled this desperate assault. As in the previous game, it all came down to what happened at Polirabo ...
... again the Greek cavalry charged, this time in support of an infantry assault with the bayonet. However, I had not been able to suppress the defenders beforehand, so their fire was effective - our charge was repelled and the Turks hung on to Polirabo. Match drawn!
Reflections:
Too tough for the Turks? While a draw is very achievable, we found it hard to see how the Turks could win. Perhaps if the Greeks neglect to set up a grand battery initially and try to rumble their guns forward? But bar some such major error, it would be nigh impossible for the Turks to hold three objectives. Maybe they should be rewarded if, say, 4 of their 9 inf and cav units survive on-table at game end (as Crispin managed against me and Bob, a game that felt like a defeat to us even though technically it was a draw).
Variable objectives? Crispin suggested variable objectives are a good thing, not necessarily just here but in general. In particular, my scenarios for Gettysburg and Königgrätz both have variable objectives that are not determined until after deployment (and in the Gettysburg case, after the first day of battle). This is good for replay value and also for producing some fog of war, obliging players to plan for uncertainty. Maybe I'll try to do more of that in future.
The battlefield shapes the battle. Everyone remarked on the huge influence of the difficult mountainous terrain, not just in slowing movement, but also in breaking lines of sight and creating shadows below steep slopes. Thus it both hindered and helped maneuver. Crispin said that one of his biggest pleasures from our BBB games is the terrain: the complexities and idiosyncrasies of realistic battlefields generate rich tactical decisions and make each game a different and unique tactical challenge.
Free deployment vs strict historical. Following on from the point about terrain generating decisions, we talked about deployment decisions. Sometimes scenario writers allow very free deployment - any troops anywhere within a broad deployment area. Others are very prescriptive and stipulate that every unit must start exactly where it did on the day of the battle. Perhaps the ideal is somewhere in between: some historical restrictions about which corps can be in which sector, but a fair amount of latitude about how the forces in each sector can deploy. That gives players some interesting choices at the start of the game and also increases the replay value by allowing more variety of plans.
Game-themed refreshments! As it was Greeks vs Turks, what else could I do but offer my guests a large tray of tasty baklava (as if any of us needed that sugar rush on top of the stimulation of an exciting BBB battle!).
Bloody Big Balkan Battles! is available in both print and PDF from Brigade Games.


I had a cracking time in gam time playing the Greeks
ReplyDeleteIt was an absolute shock how bleeding awful the terrain was. If I was doing it again I'd dispense with any manoeuvre on the Greek side and just charge forward. Its the only way to give a good chance to reach the rear objectives with enough firepower to blow the Turks away. I'm even tempted to do it in column all the way and trade casualties for speed.
The mountain at the back right (as the Greeks see it) is probably not amenable to a close assault, probably better to shoot the defenders away then occupy, but that puts even more premium on Greek speed.
The Turkish defenders of the mountain get trenches plus TWO steep slops for a nett +4 modifier in their favour in close assault!
Glad you enjoyed it!
DeleteHappy New Year Chris! I consider this my present ;).
ReplyDeleteAs one of the scenario writers I wanted to note that Sarantoporo and Yiannitsa were both really hard to balance. This is a clear case were mistakes by the Ottoman goverment at the strategic level doomed any operational level efforts.
Hasan Tahsin Pasha was given a unenviable task. This is supposition on my side, but I believe he was brought out of retirement (he was a gendarme officer) and given the Thessaly front based on the expectation of the Ottoman high command that the Greeks would not enter the war. Ergo he was given inadequate forces to cover the front (which he noted).
He was Greek educated, and possible had met Venizelos in his service in Crete, so I think the logic was he would be able to avoid any escalation of the usual greek insurgency efforts into a full out war. Thus a safe hand if you wish to keep a quiet front.
Also like the Bulgarians, the Ottomans a) underestimated the Greek army based on the 1897 performance (Bulgarians did the same with the Serbians based on the 1886 performance) b) thought that if the Greeks entered the war they would focus on Epirus, were in 1897 they had some success.
Thus they gave Hasan Tahsin inadequate forces. Now they also expected that the Sarantoporo position would be impregnatable. Von Der Goltz had promised that it would become the cemetery of the Greek army. And that would had been the case if Tahsin had two corps rather then one under-strength one.
Thus this is one of those battles were focusing on making the draw result the modal result makes more historical sense. The Ottomans should not have an easy time winning. They have been doomed by strategic decisions. So in designing it I will confess I focused more on that than on making it fair in both sides having a good chance of winning.
Essentially the Ottoman wins if the Greek player makes stupid mistakes. Historically the battle was far harder than the Greeks than it should be thanks to the incompetence of Prince Constantine, and greek officers. Historically the flanking movement by the various detachments and I Division was the key to the Greek success. But that movement started late, and the Greek infantry paid a heavy price as it was fed into frontal assaults in dense skirmish masses and columns (despite the French doctrine calling for fire and maneuver, Greek officers had a nasty habit of preferring easier to control mass tactics). The artillery actually entered the battle late as due to bad management it was bogged down in a massive traffic jam.
Considering the above, some options for balancing the scenario are
a) Have all the Greek artillery arrive later in the game, to simulate the traffic jams.
b) Perhaps take away the Greek general element? Make Greek units Passive?
Also another option is to try and alternative scenario were Hasan Tahsin actually had received more serious forces. Give him maybe two more redif divisions and see if Von Der Goltz was right.
All in all, I am very excited to follow this campaign.
As for terrain. You made the Silvinitsa scenario :p That is like the nightmare of nightmares :D
Many thanks for the commentary - and indeed for the scenario. Everyone had a great time with it and both games had exciting tense finishes. Obliging the Greek artillery to start limbered might be sensible to better represent its poor management.
DeleteBy the way here is a depiction of the battle using the unit movements on the KuK map of the region
ReplyDeletehttps://blogger.googleusercontent.com/img/b/R29vZ2xl/AVvXsEjqm_xbDNdbxuIq5ZGO2EC7FWqbRii0h1IjC6pyfyLR-i3so_qbvbhIzQhmvVRIBdISHnp1qpcfuNJZrLyEAWz3dBZQgi9_9uLQYUAvdV1nnRtTYTqlB-I1g1pY7bafLaNYETBB0SdOUiLF4LRf8RtdgCr_d255Do7OrxBeHXNQs-2amCfC4mn0TNNgYg/s1558/KirkGcherit-Sranataporos.png
Looks a lot like our games!
Delete