My current project is to create and play BBB scenarios for all the biggest battles of the American Civil War. In several cases, I am exploiting the BBB ruleset's elastic scale and making a single scenario cover battles so large in time and space that most conventional rulesets would split them down into several different smaller actions: Chancellorsville, Spotsylvania, Cold Harbor, Petersburg ...
Perhaps the most extreme example is the Seven Days Battles. In an area of some 30 x 15 km, between 26 June and 1 July 1862 (ignoring a preliminary skirmish on 25 June), Robert E. Lee's Confederate Army of Northern Virginia fought four substantial battles against McLellan's Army of the Potomac: Beaver Dam Creek (Mechanicsville); Gaines's Mill; Glendale; and Malvern Hill.
Of course, I could just write conventional scenarios for each of these. No doubt eventually I or another BBB enthusiast will. But I think these are less interesting individually than as episodes of the larger whole, and anyway, I'm sure they've been done that way many times before. I therefore wrote a scenario for the whole Seven Days. Ambitious! But feasible - as we proved this week.
The historical background is the Peninsula Campaign, McLellan's attempt to capture Richmond by advancing NW up the Virginia Peninsula, taking advantage of Union naval superiority. After a couple of months of slow advance involving a few actions of moderate size, the main result of the otherwise inconclusive battle of Fair Oaks (aka Seven Pines) was that the Confederate C-in-C, Johnston, was wounded and replaced by Lee. Within a month, Lee planned and prepared his attack. Leaving a small force under Magruder covering his own right, he massed most of his forces against McLellan's right wing, both attacking it frontally and outflanking it from the north. Over the next few days, the Union army was driven back, forced to switch its line of communications, and eventually gave up and escaped by sea. However, Lee's repeated attempts to envelop and crush it had failed, ending in an especially costly repulse at Malvern Hill.
Our scenario compresses all this into a 6'x3' table and 9 or 10 game turns (originally 12, but that was too many), punctuated by two nominal 'Night Intervals' that are really strategic pauses and resets, given that each turn represents about half a day. You'd think that might work out kinda funky, but in fact it seemed to go pretty much as per the history without feeling silly or 'gamey'. Let me explain with the help of eight photos, followed by some Reflections.
Send a gunboat! This represents USS Mahaska and USS Galena on the James River. Malvern Hill just visible top right of pic. Model from Crispin's collection.
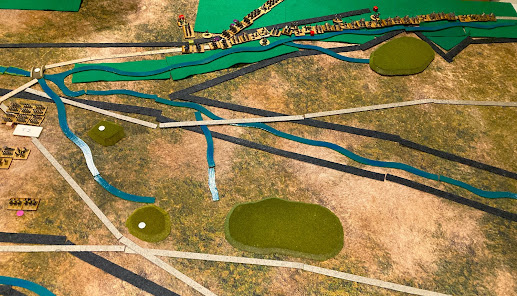
OK, let's get you oriented with a view of (almost) the whole battlefield, looking north. Confederates are on the brighter green bases, left and top of pic. The force top right is Jackson's, poised to fall on the Union right flank and rear. Their ultimate target is the Union line of communications, the rail exit guarded by Union cavalry, centre right edge. Top left is Longstreet, about to assault Beaver Dam Creek. Centre left, Magruder has a thin screen protecting the Confederate LOC rail exit.
The balloon facing Fair Oaks is actually a US balloon, but represents the "Magruder Effect". Historically, Magruder conducted a brilliant deception by generating lots of fake activity for the Union to observe, making himself look much stronger than he was. In game terms, this meant on Turns 1-4 any Union unit trying to move within 9" of Magruder was penalised with a -2 on its movement roll.
Most of the Union forces are in the line, either waiting to fend off the Confederate assaults in the north or to launch their own frontal attack against Magruder in the south. However, the force lower right - IV Corps (Keyes) - is about to execute a swift route march around the Confederate right, into the bottom left corner of the pic, to threaten Magruder's flank and rear.
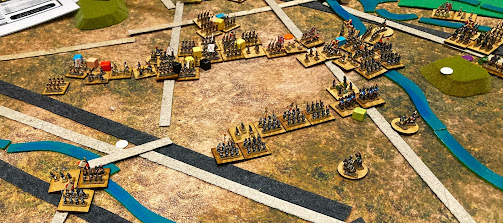
A closer look at Jackson's force about to cross the Totopotomoy Creek and attack the Union right around Beaver Dam Creek and Gaines's Mill. Figures are
Baccus 6mm from Crispin's collection. Roads and rivers by Rob's Scenics.

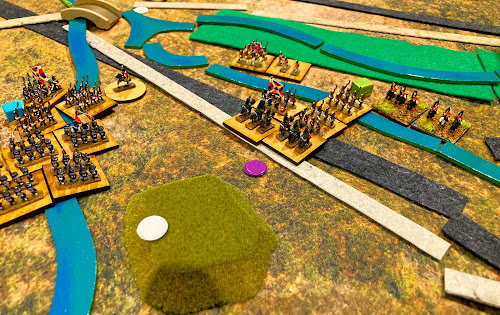
Now we leap ahead to Turn 5. The game allows Strategic Redeployment during the two Night Intervals. This is also when the Union can choose to switch its LOC exit from the railroad to the James River. That's what has happened here. Despite inflicting historically significant casualties on the Confederates at Beaver Dam Creek and Gaines's Mill, the Union forces have suffered badly themselves, as witness the black puffs on several Union divisions that are now Spent and have been left to fight rearguard actions around Savage's Station (where that happened historically). The Union has formed a new line behind White Oak Creek, in front of Glendale (the blue counter and building centre of left edge) while still attacking Magruder (top of pic). Yet again the Confederates will try to combine frontal assault with envelopment of the Union right (again, rather historical).
Close-up of Jackson's Rebs about to overrun a Union rear guard division.
Lee about to do likewise at Savage's Station and Seven Pines.
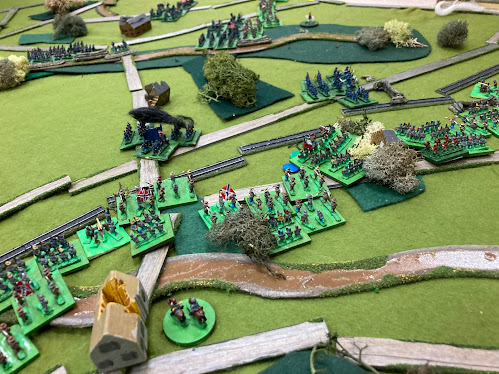
Turn 7 and the Confederate assault against the Union line in front of Glendale is in full swing. Top left, a Union division spontaneously fell back before it was hit - a bad movement roll that was actually perhaps the smart move, pre-empting the Confederate envelopment.
Game end: the Confederates have broken through, the retreating Union army is in disarray, the pursing Rebs are rampant and (out of shot, below right of pic) wrapping round the Union right, while JEB Stuart's cavalry menace the James River LOC.
Reflections
Now that's what I call grand tactical. Or maybe 'operational'. I was really happy with how this ambitious scenario worked out. The game moved quickly all across the table (OK, it was only a 6'x3' table), with intense action throughout, and the lines pivoting through more than 90 degrees. We didn't quite get to Malvern Hill, but otherwise, all the historical sub-battles pretty much happened along the way - each only lasting a turn or two. And it did leave the Union players as shell-shocked as McLellan and the Confederates suitably historically jubilant. Operational-scale maneuver but with a tactical tabletop feel. Lovely!
Multi-day actions multiply the fun. Said it before, say it again: games with Night Interval 'resets' so often make the best games as they generate more decisions and more interesting situations. I discussed this at more length in one of my
Reflections on Wargaming essays,
Changing situations mid-game.
One man's 'grand' is another woman's 'busy'. To me, the opening pic looks grand: a layout like an aerial view of historical terrain, the two armies with battlelines drawn, and 6mm giving that great mass effect. My clubmate Linda wandered over for a chat. She always plays ancient/renaissance tournament games with armies that preferred flat open plains, hence minimal terrain. She said our table looked 'busy' and maybe too confusing for her - but admitted she'd like to join our BBB games for a change ...
Special rules can make a game special. This game has two. One is a provision for units to lose bases in the Night Interval if they are 'Out of Supply' (unable to trace a clean route to their LOC). It didn't come into play directly during the game, but did influence players' maneuvers and the Union decision to switch LOC. The other is the Magruder Effect, which worked very well to protect the weak Confederate right in a plausible way. And it was a good excuse to put a balloon on the table.
Victory Conditions. These have mutated through the development of this scenario (which I first drafted in 2016). I think we'll settle on essentially a typical BBB formula - three objective locations along the battleline (Gaines's Mill, Fair Oaks, Glendale) plus LOC objectives - but with a twist: rather than all being calculated at game end, the Union will earn objectives by holding them until a given game turn. That should give the right incentives, give the Union some big decisions to make about when to fall back, plus make for an interesting decision for the Union about if/when to switch LOC. And BBB games should be all about making interesting decisions.


