Wednesday, 29 March 2023

Mahdists and Magyars - another fun club night at OWS

OWS's rude health continues. This week's game was so over-subscribed we had to lay on a second so everybody could play. The two battles were very different, but similar in both being obscure and both presenting very distinctive tactical challenges:

- Shaikan (1883), in which 40,000 Mahdists massacred Hicks Pasha's 10,000 or so hapless Egyptians;

- Szőreg (1849), in which retreating Hungarians fight a delaying action against imperial Austrian and Russian forces breaking out across a defended dike.

Both games were so exciting and absorbing that there is a paucity of pictures. I'll offer the few that Dave T and I did take and describe the games in the captions, followed by some reflections as usual. Two for Shaikan first:

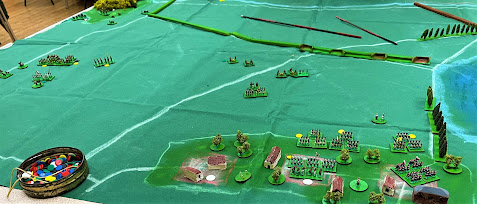
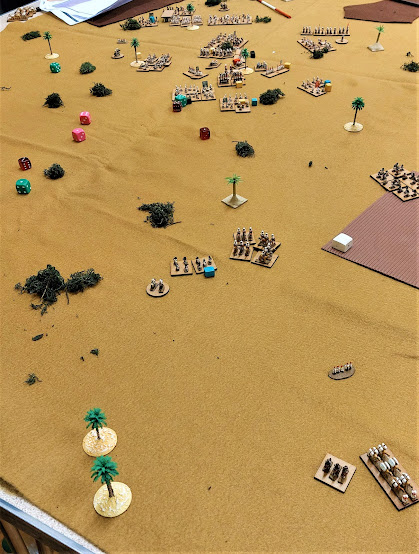
Essentially this scenario is a race in which the Egyptian force has to dash from one corner of the table (top of photo) to the opposite one (bottom right of photo) and exit a certain number of units. The photo shows most of the Egyptian force being massacred mid-table, but some are about to get away - will it be enough?

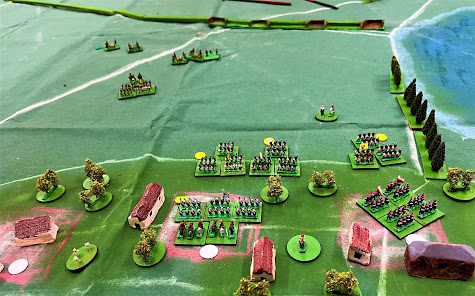
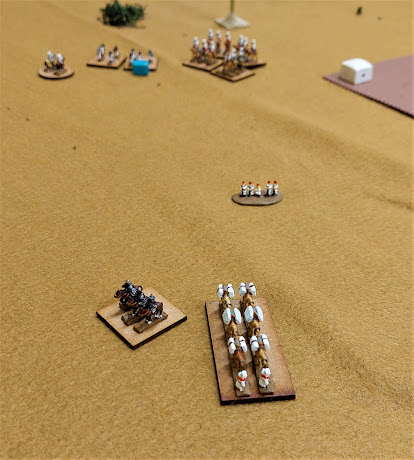
Close-up of the one cavalry unit and one baggage train that did escape - enough for Dave T to claim a draw. He said the scenario is an interesting combination of moving fast (the Egyptians need 6 full moves out of 9 turns to reach the far corner) while being able to concentrate the fire of a couple of units to take on the big Mahdist units. As they are rated Aggressive, if the Mahdist units close they can easily wipe out one Egyptian unit and then overrun a second. 

And now two photos of the climax of our Szőreg game. (We last played this scenario a year ago; report here gives more background.)

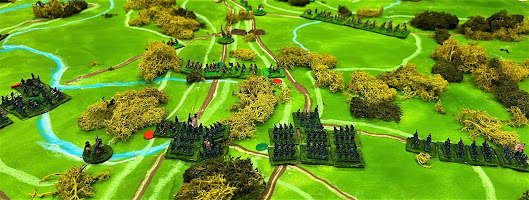
View from the Hungarian side with one turn remaining. The imperials have broken out from their entrenched bridgehead (top right), easily cleared some irregulars out of the wood objective top left, but not advanced far enough to take the village beyond it (out of shot, lower left of pic). On our right, the Polish Legion did a great job of delaying the allied advance across the embrasured dike that runs across upper centre of pic. The Poles (pink hats, bottom right) and friends are now holding two of the three Szőreg village objectives (foreground) against three disrupted Austrian brigades (the white-uniformed chaps with the yellow Disruption markers). Thus the Austrians only hold two objectives (the dike and the wood); they need two more for a draw and three for a win.
 
The Austrians needed everything to go right for them on their final turn. Their small unit upper left got the full move it needed to seize the empty village lower left. Both units in the centre managed to rally and charge. The rockets (top centre) moved up and added crucial fire, meaning that when the Austrians rolled boxcars for their attacking fire, my defending infantry were not just disrupted or damaged but wiped out. The small hussar unit on its own could not withstand the massed assault, so the Austrians took the central village objective as well. Finally, because we had failed to withdraw some troops scheduled to retreat, there was a 50-50 roll; this succeeded and gave the Austrians the final objective they needed for victory.

A word about this last point. Historically, most of the Hungarian army withdrew without fighting because other Austrian corps were conducting strategic outflanking to north and south. The 50-50 'flank threat' rolls are incurred if any of three Hungarian contingents are committed instead of withdrawing. We withdrew two of the three. In retrospect, we would have done better to commit the lot, giving good guarantees of holding a couple more objectives, and take our chances on the 50-50 rolls. I'm sure Clausewitz would agree.


Reflections:

What a happy club! Great to have so many players and two such exciting games.

Unusual situations make for good games. I was pleased that both Mark and Crispin separately enthused about Szőreg's distinctive nature. It presents unique challenges for both sides, which makes it interesting for the players. Evidently the same was true of Mark's Shaikan race-against-massacre game.

Principles of war apply on the wargame table. I've been reading a lot of Clausewitz again lately. (Some readers may not know I've published translations of three histories by Clausewitz.) Reviewing my actions through a Clausewitzian lens, I can see I transgressed some of his advice (again). Must try harder.

Good scenario design makes for great games. As I said, both games were so absorbing, we hardly took any photos. They both produced super-exciting, tense, close finishes that came down to the last few dice. It takes judicious scenario design to achieve that fine balance. Special kudos to Mark for making such a good game out of such a one-sided massacre as Shaikan.


Szőreg is one of the scenarios in the "Bloody Big Hungary '48 Battles!" campaign book.


Wednesday, 15 March 2023

Gorgeous Alma game

The Battle of the Alma (1854) is one of the best-known battles of the Crimean War. A scan of wargame forums suggests it is fought reasonably regularly. Unfortunately it tends to be treated as a dull frontal assault: across the river, up the slope, into the teeth of the Russian guns and massed columns. Some people enjoy games like that; I prefer to have more choices to make.

So, when I came to write the Alma scenario for the "Bloody Big European Battles!" scenario book, I tried to make it more interesting. I looked at the options available to the Russians and saw that a viable alternative strategy for them might have been to deploy further east and threaten the allies' flank, rather than directly barring their way to Sevastopol. Meanwhile, as I recall, there was some argument between the allies, with the French keen to press forward as swiftly as possible and the British being more cautious.

The scenario therefore gives both sides the opportunity to choose between their two options, resulting in four possible permutations of aims and victory conditions. A direct recreation of history is one possible outcome. However, when we fought the Alma this month using Matt's gorgeous display game layout, the result was a kind of 'alternative Alma' in which the action was somewhat displaced from its historical location but still very much captured the flavour.

The Russian team chose the 'flank position', while the allies opted for 'cautious'. This meant the allies had to deal with the flank threat before advancing on Sevastopol, so they had 8 turns to drive the Russians back along their line of the communications to the southeast. (Had the allies chosen 'aggressive', they would have focused on exiting French units off the south board edge, while preventing Russians descending towards the allies' supplies piled on the beach behind them.) I was on the allied side in the minor role of commander of the Turkish division.

After the first few turns it looked dire for the allies, thanks to aggressive Russian defence and bad allied dice. The allies had advanced in march columns so as to get through the vineyards and across the river as quickly and easily as possible. Unfortunately, Russian attack columns pounced on the British as they ascended the far slope and gave them a very bloody nose, effectively putting one division out of action. As for the French, they repelled the Russian onslaught but dismal movement dice then had them sitting around for coffee and croissants for a couple of hours. I thought we were set for humiliating defeat.

But of course, as the game went on, the Russian hordes melted away in the face of superior allied firepower. The British cleared the road between Kanysch and Uleschel (our first objective), and French panache and elan were carrying the zouaves and friends far into the Russian left. On the last turn we even had a chance of seizing the next stretch of road for an unlikely win. Equally, a late Russian counterattack could have claimed victory for the Tsar.

Of course it wasn't to be and the game ended as an honourable draw. Well played to all my gallant comrades and opponents alike.

Three captioned photos below are followed by some reflections. 

View of Matt's gorgeous layout from the Black Sea. Terrain boards with custom hills; the mosque in Bourliouk (top centre); the half-built telegraph tower (top right); the allied fleet of steam & sail warships - note the smoke coming out of their funnels. It really was fabulous work and a privilege to push troops across it.

 Situation circa Turn 2. French on the right have dashed across the bridge at Bourliouk; British on the left make slower progress because the Russians have set light to Kanysch (centre left of pic - Matt actually had flickering flames). Russian columns menace from top of pic. In the foreground, my Turkish division snakes from right to left to support the British. Beautiful figures on beautiful terrain.

Close-up of the British columns fording the Alma. Highlanders on the right following the guards' bearskins. The division top left is about to be sent reeling back with heavy casualties.


Reflections:

Similar but different. Interestingly, even though the Russian choice of flank threat rather than historical blocking position shifted most of the action away from the historical battlefield, it still captured much the same historical flavour. We still had Brits battling their way across the river and up steep bluffs against massed Russian counterattacks and formidable artillery redoubts; we still had French bogged down for a while until the zouaves went on a big right hook.

Gorgeous game. I can't overstate how much work Matt had put into the terrain, the troops, the fleets and the counters (low ammo, disruption etc were all appropriate little models). Consequently the game looked great, which helps to make our mental pictures more vivid as well, and to tell the story of the battle.

Quality vs Quantity. Asymmetry makes for interesting match-ups. The contrast between the Russian army (Tactically Inept, not great musketry but plenty of artillery) and the allies (lots of longer-ranged rifles, capable skirmishers, hence deadly small arms fire) was dramatic. The Russians did a good job of exploiting such advantages they had, but ultimately quality told and changed the course of the game.

Dice can stink! I have rarely seen so many pairs of snake-eyes as Phil rolled for the French, paralysing their advance for half the game. One can rationalise that as the French commander being taken aback by the Russian aggression and pausing, unsure what more might be over the next hill.

Hurrah for Johnny Turk. You can't see it as I didn't take many photos, but right at the end it was my Turkish division that interposed to prevent a Russian counterattack that could have snatched victory. I therefore claim all the credit for the allies' (partial) success.  ;-)


The Alma scenario is one of four that form a Crimean War mini-campaign in the "Bloody Big European Battles!" scenario book: Kurudere, The Alma, Inkerman and The Chernaya. BBEB is available from all the usual BBB retailers. There is also a Balaclava scenario available free from the files of the BBB group on groups.io.


Friday, 3 March 2023

The balloon goes up at Chancellorsville!

Back in January I had a fantastic time fighting Chancellorsville. This week we rolled it out again for a different set of players at OWS.

To avoid repeating myself, let me direct you to my previous AAR for some background on the battle. Here I'll just offer a brief summary of how it went this time, a few annotated photos, and then some further reflections.

Our Union plan was basically to press forward with our right hook from Chancellorsville initially, unleashing the left against Fredericksburg once the Confederate defenders there had been forced to thin out and head west. This broadly worked, aided (a) by an entire Confederate division being wiped out on Day 1 in a sanguinary struggle with Sykes's regulars and (b) by Banks's Ford being left unguarded for us to infiltrate across overnight before Day 3. Even so, it was a see-saw game: Day 1 seemed to go very well, but Confederate redeployment overnight saw them smash some big holes in our right wing on Day 2. On Day 3 our left wing came into play and, thanks to the division that crossed at Banks's Ford, closed in and took the Tabernacle Church, the objective we needed for victory. Even so, there would still have been time for the Confederates' superior infantry to rally, storm back in and not only retake the Church but actually seize Banks's Ford and claim a win. Fortunately for us, the three divisions in question all missed their movement rolls and we hung on. Hurrah for the Union!

Reflections and some other info follow after the pretty piccies.

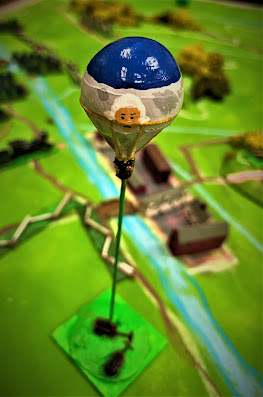
The balloon of the title of this post. The Union had not one but two observation balloons in action in this battle: Eagle and Washington. This model is from Irregular Miniatures, complete with the correct generator wagons, correctly painted up as Washington by Crispin. Here it is spying on Fredericksburg.

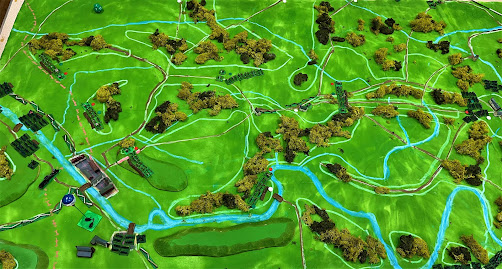
The initial setup. Crispin needs to invest in some more lichen ... US forces are those with darker bases. The right hook is massed around Chancellorsville (centre right edge of pic) while the left sits mostly behind the Rappahannock (lower left corner) facing the line of Confederate entrenchments.

How it looked from my point of view as we were about to launch our right hook forward from Chancellorsville (the two buildings and white objective marker in the left foreground).

Serious battle about to be joined. Anderson's Confederate division will step out of its defences (centre of pic) and advance to mutual massacre. Lower right, US divisions head south, both to fend off Stuart's cavalry (out of shot) and to threaten Confederate lines of communication. Another Confederate division marches to respond to that threat (top right).

Situation at start of Day 3 (I think). Top of pic: Confederated have pulled back from Fredericksburg to shorten their line. US left follows them. Lower right edge, Confederates have neutralised the threat to their LOC from that direction. Upper left (just below and left of the counter tin), a US division has snuck across Banks's Ford. It will be joined by others left and right of it converging on Tabernacle Church (white counter, centre of pic), where the climactic big fight determined victory.

Reflections

Replay value! The third time of playing this scenario and it was very different again from the previous two, with the clear potential for the game to go in many different directions. I can see this one being played again and again.

Changing situations mid-game: the two strategic redeployments overnight really make the game. They give players the opportunity to make major game-changing decisions, they create some drama and tension and surprises, and they capture something of the nature of the historical battle. See also my essay on this topic in my series of Reflections on Wargaming.


The scenario is now in the BBB group files.

It is also likely to be one of the participation games at the next BBB Bash Day convention, to be held in Leeds UK on Saturday 1 July, the day before Baccus's wonderful Joy of Six show in Sheffield. If you like the look of this scenario and are in striking distance of Yorkshire, make a weekend of it!