Thursday 24 February 2022

Blenheim (or should that be "Oberglau"?)

We at OWS were honoured with a visit by Matt of "Pushing Tin" fame. He lured us off our usual turf to the War of the Spanish Succession (1701-1714). Regular readers will be aware of my ignorant prejudice against pre-Napoleonic warfare. Matt overcame this by offering us a refight of the battle of Blenheim.  

Blenheim Palace is just a couple of miles up the road from us, yet the closest I have come to gaming the battle was as a teenager. The 'grown-ups' at the club laid on a big Napoleonics club game. I had a bit part on the side of the defenders. We ended up being beaten, as we had let our reserves be sucked into defending the two villages anchoring our flanks, only to see the foe smash through our centre. The scenario designers were very pleased with themselves: it was a disguised scenario for Blenheim and they had managed to broadly replicate the historical event.

The historical situation (for those who share my relative ignorance of WSS): a Franco-Bavarian army is threatening Vienna. A disparate allied army of British, Austrians, Dutch, Danes, Prussians etc, under the Duke of Marlborough and Prince Eugene of Savoy, has dashed to the rescue from the Low Countries. The allies find the French lined up next to the Danube near Höchstädt in Bavaria. The French position is bastioned by three fortified villages: Lutzingen, Oberglau, and the eponymous Blindheim (or Blenheim).

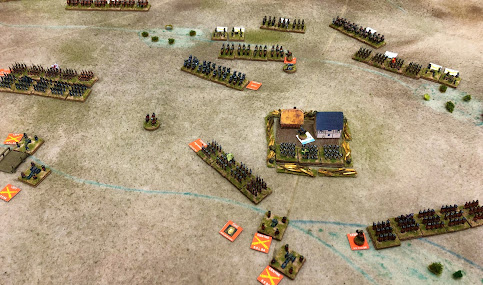
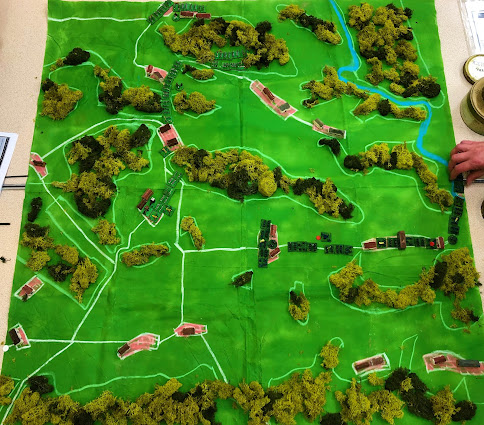
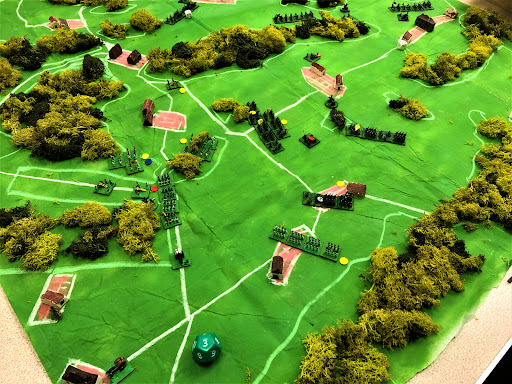
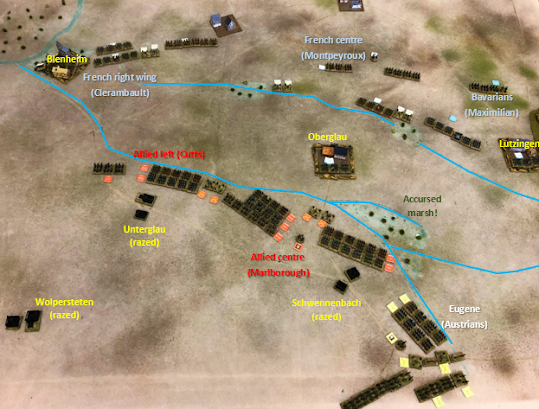
The initial deployments. Matt had made a very nice custom cloth. Apart from at Oberglau, which holds a French garrison, the allies have to cross two streams - or in Eugene's case, three - to get at the French. (I've marked the streams to make them more obvious in this overview).

John and Dave W took the French and Bavarians. Mark, Matt and I commanded the allied right, left and centre respectively. That cast Mark as Eugene and me as John Churchill aka Marlborough. Our plan was that Mark and I should converge on the enemy's left wing via Oberglau and Lutzingen while Matt fended off any counterattack by the French right from Blenheim.

The rules were based on our beloved "Bloody Big BATTLES!". However, Matt has created a set of rule modifications to tailor BBB to the (very well-tailored) formal warfare of the 18th century. The main difference is that these mods rightly make manoeuvre much less free and easy than we are used to.

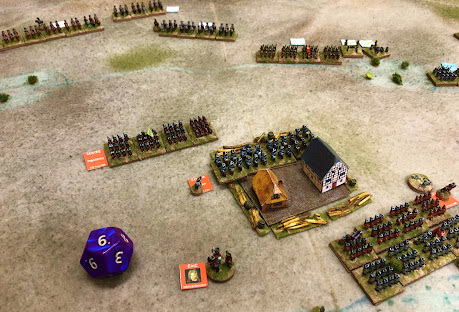
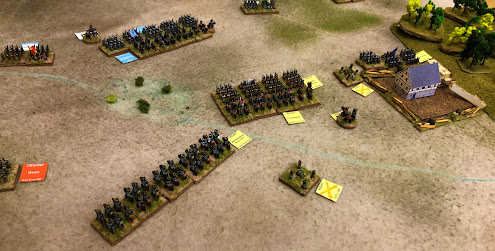
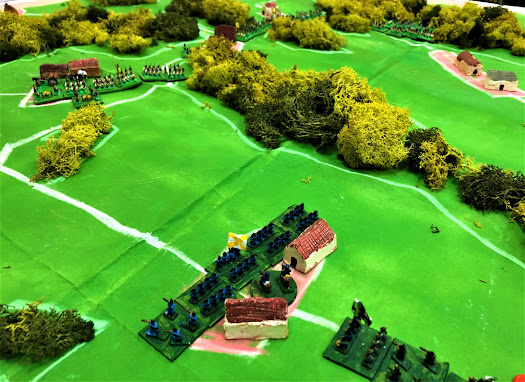
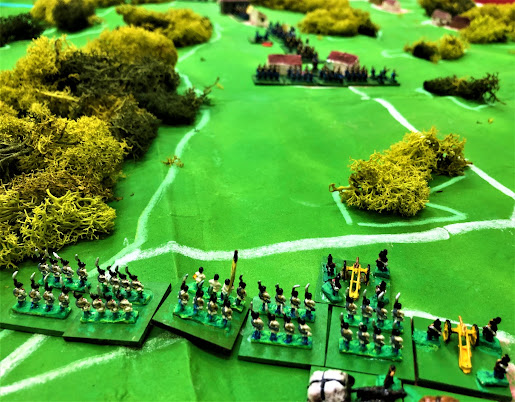
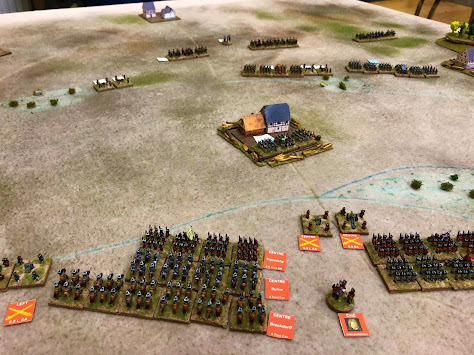
 My troops in the centre contemplate how to storm Oberglau.

Consequently our attack started very badly. Mine was the critical role in the centre and I absolutely floundered. Most of my infantry had to cross the Nebel stream and squelch through a marsh to attack Oberglau. Unfortunately I hadn't pointed them in exactly the right direction to start with and pivoting is hard. They emerged to find themselves in range of the defenders but not in arc to reply effectively. Webb's infantry were battered by Bavarian guns. Rather than pushing through in support from behind Webb, Horn actually withdrew behind the Nebel again (rolled snake eyes). Horn spent the next several moves doing nothing, then trudging forward through the marsh for the third time.

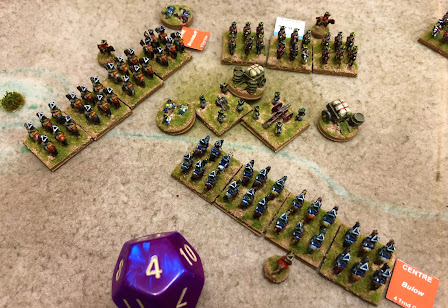
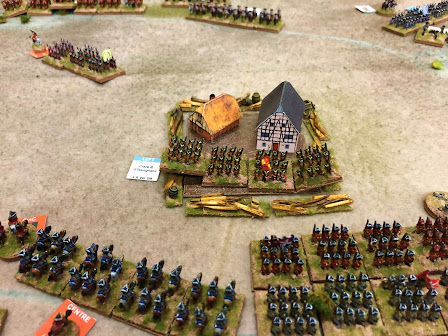
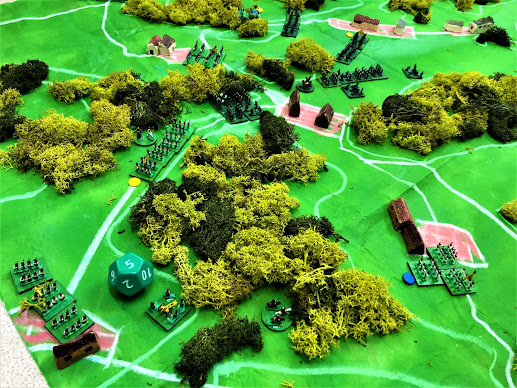
My attack develops. Cutts's infantry cover my left. My cavalry press through the centre towards the French guns. My infantry try to envelop Oberglau, but Webb (on the right) stalls under publishing artillery fire, while Horn falls back out of the picture entirely (retreated off bottom right).

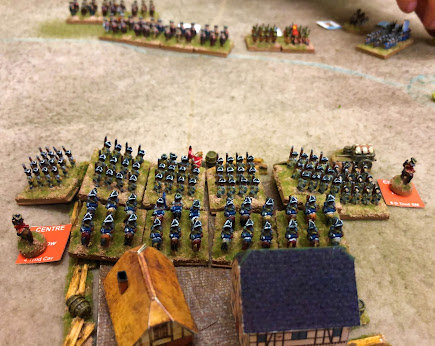
And what of my cavalry, east of Oberglau? Thanks to the rule mods, I utterly miscalculated, parking them too far away to charge the French guns in the centre, yet close enough to be bombarded by them. Brockdorff's potent contingent was soon spent without having yet struck a blow. In desperation, I finally launched them at the guns while Bülow's horse took on their French counterparts. Bülow was repulsed, but not before we took the guns.

 
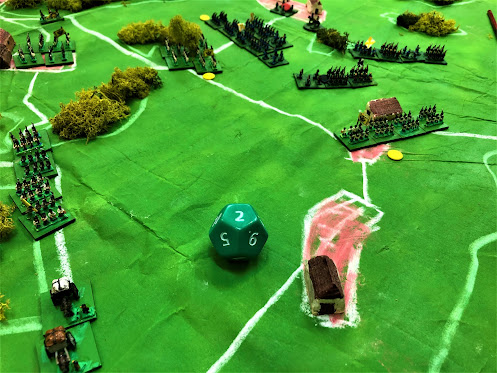
My cavalry performing their initial dither under fire.

Glorious! Finally, on Turn 4 (of 10), my horse redeem themselves with a gallant charge. Bülow is repulsed by du Bourg, but not before Brockdorff has carried the guns. 


Turn 5 saw a French counter-charge wipe out Brockdorff and both sides restored their lines in the centre. My artillery's pummelling of Oberglau was finally starting to tell. Horn returned (bottom right) to take a renewed interest in the idea of assaulting the village.

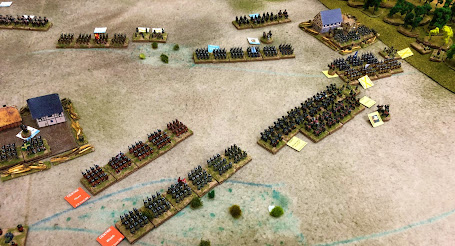
Meanwhile, on our right, Eugene had been patiently crossing streams and marshalling his forces in preparation to assault Lutzingen (upper right).

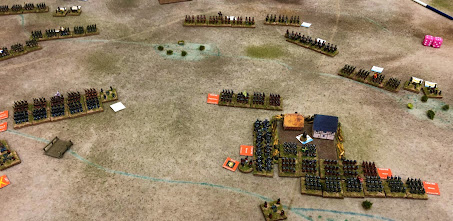
Turn 6: my assault goes in on Oberglau. All quiet on our left so far, but the laggardly Clerambault is emerging from Blenheim and will soon be attacking Cutts.

The Duke himself directs the attack. Oberglau falls! But Webb's infantry recoil from the storm of French roundshot, leaving only our cavalry to guard our prize ...

... which they do but briefly. Clare's Irish "Wild Geese" cross the Nebel and drive us out!


This is Horn's cue. He and his men have done nothing all day but trudge to and fro through the marshes without firing a shot. Now is the moment: their surge of cold steel ejects the Irishmen from Oberglau!

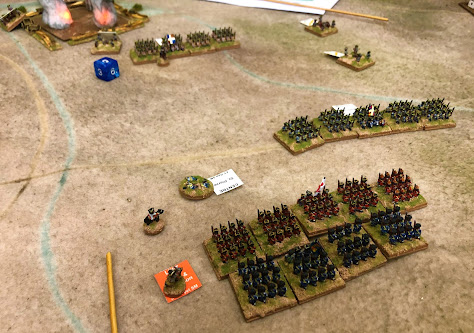
Fortune favours our arms on the left as well. Clerambault's contingent looked imposing, but his numbers were no match for Cutts's quality and British phlegm. A cluster of bodies marks the spot where the French lost the contest, leaving the field to the massed allies in the foreground. In the distance, Blenheim burns (Matt's beautiful battery-powered flames).


We likewise enjoyed success on the right. Eugene stormed Lutzingen at the third attempt. The battered Bavarians had no real prospect of retaking it.

So ended the battle. The French right was shattered, their centre and left rebuffed and too weak to retake the lost villages. This was quite a second-half turnaround, seeing as we had spent most of the first half being repeatedly stalled and mown down by French guns. This was a hard-fought battle and a narrow victory. If a grateful nation rewards me with a palace, I shall call it ... Blenheim Oberglau!

Matt's WSS mods and his Blenheim scenario are available from the BBB group files.

***

Reflections

Matt's C18 movement mods work. The constraints on manoeuvre obliged us to think and act in a much more linear fashion appropriate to the era. It looked and felt right (to my inexpert eye).

Matt's C18 combat mods also work, reflecting such things as volley by rank vs 'Dutch' platoon fire, 'halt & volley' cavalry vs charging cavalry, dragoons, and cumbersome artillery.

There is sheer pleasure to be had simply from refighting a classic battle, almost regardless of how the game goes. I have now 'done' Blenheim. Huzzah!

Wrestling with new rules is hard! Happily this is something I rarely do these days myself. I have seen others suffer it quite recently, though, with half the session taken up by flicking frantically through a rulebook, and everyone making naive tactical errors because of unfamiliarity. The first few turns of this Blenheim game did give me a reminder of what this is like as I fell foul of rule mods thwarting my cunning plans and causing my hoped-for fluent manoeuvres to stumble and stutter.

Variety is refreshing. This was a stimulating game, not only because it was outside my usual period and had a different flavour, but also because we were using Matt's armies which we hadn't seen before, and Matt's terrain likewise. If we'd fought the same game but just on our usual felt terrain and proxying with our usual armies, it wouldn't have been quite so fresh and exciting. Clearly I need new toy soldiers. Every wargamer does.

Matt is working on scenarios for the rest of Marlborough's 'Big Four': Ramillies, Oudenarde and Malplaquet. Looking forward to these!
Tuesday 15 February 2022

"At that point we called it" - who cares if we don't finish the game?

In recent weeks I've experienced opposite ends of the game duration spectrum. Last month I had a wonderful long weekend in which I played three 9-hour games, two of which were still far from finished when we had to stop. I reported that here: "In praise of loooong games".

Then the last three Mondays were regular club nights in which it was back to my usual fare of <3 hours for a BBB battle: Trautenau (Austro-Prussian War, 1866), Sepsi-Sz.-György (Hungary 1849) and Soor (1866 again). This last was remarkable in that we fought the same scenario to conclusion twice in just over two hours' play.

This set me to thinking about all the many times I have read other wargamers' game reports (and indeed written a couple of my own) that conclude with "At that point we called it" - i.e., "we ran out of time and had to just make an educated guess as to who would have won". I've been in that situation. Sometimes it's OK. Other times it's not: it's frustrating, disappointing, unsatisfactory.

"At that point we called it"

My question for today's post, then:   

Does it matter if we don't finish the game?

The answer to that will vary from player to player and from game to game. Some of my previous "Reflections on Wargaming" have touched on this. One in particular, on "how much 'war', how much 'game'?", teased out the relative importance of the result as opposed to the context and the process. In that, I suggested that those most interested in the result tend to be the tournament gamers, whereas our BBB games are nearer to the "historical context" and "(fun) game mechanics" corners of the triangle. The further your preferences are from the "result" corner, the less important it becomes.

Interestingly, when I wrote about "The Quest for the High Quality Gaming Experience", I notably didn't say anything at all about needing a result. Rules and scenario were both listed as important factors, though. I could argue that "good rules" implicitly means a ruleset that enables you to complete a game. Likewise, a "good scenario" would be one that you can fight to a finish and that enables you to determine who has won. But I managed to avoid making it an explicit requirement that a game should reach a conclusion in order to provide the HQGE.

You might think that reveals that I do not really care whether we finish a game. That's not quite right: I do care whether we finish, I just don't much care who wins. (Though as I have said before, "It's not about winning - it's just losing I can't stand".) I suppose that means that, of the three ingredients - context, process, result - I attach less weight to result than to the other two.

The result does interact with the other two, though. My overarching interest in the history behind a battle means I want to see how it plays out on the tabletop, including what effect different plans might have had on the outcome. To be able to gauge that really requires an outcome to be reached. An unfinished battle is therefore unsatisfactory in that respect. As for game mechanics and the entertainment they generate along the way: whether we mean just the die rolls, or random events, or cunning manoeuvres etc that the game mechanisms enable, all of these fortunes of war are only significant insofar as they contribute towards victory or defeat. Yes, when the disordered raw troops inflict an embarrassing repulse on the guards, we can find that hilarious as a single incident in isolation. But it becomes much more entertaining if it proves to have been the pivotal moment that decided the battle - which we can only know once the battle has been decided.

My simple conclusion, then: for me and for many likeminded gamers, it is not crucial to finish a game, as most of the pleasure comes from the journey rather than the destination. However, it is much better if the game can be completed, since that enhances the pleasure to be had from the other elements.

This of course is in line with the philosophy behind "Bloody Big BATTLES!" When we set out to create BBB, we wanted to fight entire battles, not fractions of them; and we wanted to be able to do so in the course of a regular 3-hour club night, on a regular 6'x4' table, with manageable amounts of troops and typically 4-6 players. The fact that BBB has now been our staple diet at OWS for over a decade - bringing together competition gamers, history devotees, modellers who just love the aesthetic, and the guys who don't mind what happens so long as they get to launch a charge at some point - is testimony to the successful application of that philosophy.

Now that's a result!

***

Updated 20 February 2022:

This has proved to be one of my most popular “Reflections onWargaming” to date, generating scores of comments. I am grateful to everyone who took the trouble to respond, whether at thoughtful length (like Steve J in his comment at foot of this blog post itself) or with pithy brevity (OSHIROmodels, “Nope!”, on LAF). It seems only right that I should in turn summarise all these responses.

Finishing when it’s “obvious”

A number of people remarked that they would stop when it was obvious that one side would win, rather than “finishing” the game. My post did refer to “calling it” as meaning “running out of time”. As etothepi said on TMP, “If the outcome is obvious, then you did finish the game”.

Carrying on after it’s “obvious”

Hobgoblin on LAF reported often playing on beyond the point where nominal victory conditions had been achieved, and indeed with the “defeated” side often ending up winning – and that such games were among the most enjoyable. A twist in the tail like in some of the best movies? (See movie-related point below.)

The value of a permanent venue

Some lucky respondents are in the happy position of having a permanent venue, whether a dedicated clubhouse or their own “war room”. Consequently, games never end unfinished, as they can just run over multiple sessions until completed. This can bring additional pleasure between sessions as one savours the prospect of the resumption.

Campaigns

On a related note, Steve J’s blog comment points out the value of campaign context in determining when a game is “finished”. The campaign element was mentioned on the Pendraken forum as well.

Value or otherwise of scenario parameters

Views were expressed both pro and con tight scenario parameters in terms of turn limits and victory conditions. As Dragon Gunner noted on TMP, “Scenario design is critical” to finishing a game on time. However, UshCha on TMP was strongly against “polished” scenarios with turn limits and specified victory conditions, suggesting these tend to be “stereotypical”, “sterile”, “repetitive”, and that they constrain players’ options too much.

Robh and Polkovnik on LAF joined the chorus against “tournament style” fixed turn limits – “Real battles didn’t last for a set period of time” – though Polkovnik is in favour of clear victory conditions such as take and hold a village.

For myself, while I accept the point that victory conditions create a pre-defined and limiting set of ways to win, I still favour them. The only way to do away with constraint entirely is surely some kind of role-playing Kriegsspiel, isn’t it? So long as we’re talking about tabletop games with toy soldiers, the limited-turns game with victory defined by holding objective locations is an excellent formula for generating exciting games that are nevertheless plausible as historical simulations. For fuller discussion of this question, see my Reflection on Victory Conditions in Wargames. (Turn Limits deserve a blog post of their own.)

Down the rabbit hole

The Pendraken forum provided the largest number of comments. Unsurprisingly, it also provided the most digressions into other topics, each worthy of a “Reflections” post of its own:

  •          “Fighting retreat games”, and how these are “an element of warfare that most rules handle poorly” (Steve Holmes & Stewart Gibson). Permit me merely to note that in the last two months I have enjoyed two excellent “fighting retreat” games, Vác (1849) and Soor (1866).
  •            Fatigue as an important factor in battle, and one that computer-moderated rules handle best (Stewart Gibson & John Cook). Great point. Lots to say on this, but some other time, I think.
  •           Reserves as an important factor in battle, and one that many rulesets handle poorly (Steve Holmes). Another great point worth future discussion.
  •            Why there is such a plethora of rulesets and no perfect “One Ruleset to Rule Them All”.
  •           Whether Napoleon could/did beat Russia …

The book/movie/sporting contest analogy

One of my favourites was Thuseld’s comment on TWW on the narrative nature of a game and how it needs to reach a satisfying conclusion, just as a book or movie should. That is a great analogy and one I have used myself in the past, suggesting each game turn should be like a chapter or episode that offers new developments or plot twists. The analogy might be extended by likening it to a sporting contest: a football/cricket/rugby/[insert your preferred sport] match. In all these cases, it is possible to enjoy an excerpt, be it for the quality of the cinematography/writing/athleticism, or for the convivial company sharing the experience, and the ending/result is rarely the be-all and end-all; but a satisfying conclusion surely adds to it, especially if it is a close-fought/surprising nail-biter.

But in the end

Let’s close with the sentiment expressed by Warwell on TWW(among many others): ultimately, “all that matters is having fun”.


Tuesday 8 February 2022

Bohemian border battle: Soor (1866)

Last month I enthused about our Trautenau game from the Austro-Prussian War. This week we fought the sequel, Soor (also known as Burkersdorf).

Soor was one of the battles fought along the Bohemian border in 1866. At Trautenau, the Austrian X Corps under Gablenz had repelled the Prussian 1st Corps. The next day, Gablenz discovered the Prussian Guard Corps had crossed the border further south and was threatening to outflank his right and cut off his line of retreat. A running battle developed as the Austrians tried to escape to the southwest through Soor. X Corps got away but was badly mauled, losing over 6,000 men vs about 1,000 Prussian casualties.

Our game therefore revolved around how many Austrian units could retreat off the designated exit. Or I should say, exits (plural), as there was about 75% chance that a second exit road would become available to them during the game. This was one possible result from a random events table which was rolled on every Prussian turn. The other possibilities included early release of the Austrian rear guard; arrival of help from Austrian IV Corps on the southern flank; Prussians stalled for a turn because of commanders' uncertainty; or a random Austrian unit obliged to halt or assault.

The whole battlefield fitted on 4'x4', on a larger ground scale than Trautenau. Last month's Trautenau scenario on 6'x4' was fought on roughly the upper left quarter of this map. The Austrian columns snake south from Trautenau (just out of shot, top centre) to Burkersdorf (middle left); they have to escape via the white counter at Soor, lower left table edge. Alternative exit may open at Altenbuch (centre of left edge). Prussians are queuing up from the east to march through Staudenz and cut off the Austrians' retreat.

The Prussian advance guard starts in Staudenz. Knebel's depleted brigade and the Austrian corps artillery await the Prussians at Burkersdorf. Austrian baggage wagons can be seen in Burkersdorf.

The thin white line! The same situation seen from Knebel's point of view. Those guns did a good job.

We Austrians benefited from some crucial dice in the first two turns. First, our fire halted the Prussian advance guard on Turn 1, meaning all the units marching down the road in column behind it were halted for a turn as well. Then at the start of Prussian Turn 2, the random events table sent us aid in the form of part of Brigade Fleischhacker of IV Corps materialising in Kaile behind the Prussian flank. 

Consequently, after Prussian Turn 3, although we had suffered some casualties (one regiment with a blue Spent counter, several with yellow for Disruption), both our baggage units were well on their way to the exit, with an infantry regiment and a couple of artillery units destined to follow. That would provide 5 against our target of 7 units exited for a draw or 8 to win. But where would the others come from? Four infantry regiments are still stranded out of sight above the top left of picture, with Prussians racing forward from the right to intercept them.

Once again, the random events table came to our rescue. This is the situation at the start of Austrian Turn 5. Two of the Austrian rearguard regiments and some guns have evaded the Prussian interception force and reached the vicinity of Altenbuch on the west edge of the table, with Gablenz in the woods nearby to motivate them. At exactly this perfect moment, the random roll opened up an alternative exit for us at Altenbuch, and all three units duly made their movement rolls to escape. The pursuing Prussians' needleguns mowed down our rear ranks, but not enough to stop us exiting our 8 units. Hurrah - another pyrrhic Austrian victory!

This all happened so quickly that we were able to reset and play through the whole game again. The second game was very different: the Prussians did a better job of closing off the primary exit early, so we only got three units off there; the second exit never opened up at all; Austrian Stosstaktik failed to break through the Prussian needleguns; we were quite thoroughly trapped and wiped out. 

Reflections

Random events tables are fun but, well, random. The random roll each turn did inject unpredictability and therefore excitement, which is good. On the other hand, the two games' very different outcomes were affected quite strongly by the random events, perhaps more than by players' plans. That's OK sometimes - I've used random events tables a few times before, eg for Coulmiers (Franco-Prussian War) - and it was certainly good value on this occasion. But you wouldn't want every game to be like that.

Fighting withdrawals make for good games. This was demonstrated by last month's Vác (1849) game too. At Soor, essentially you have two columns colliding at right angles, which is nice geometry for producing lots of manoeuvre and tactical choices for both sides.

Stosstaktik vs Needlegun - give me that asymmmetry. In our Trautenau game, the needleguns were outranged and defeated. Here at Soor, those Prussian breechloaders were devastating.

Four players plus an umpire is a very good formula. Crispin laid on the game for us, arbitrated as required, and policed the scenario special rules etc. Two of us on each side meant we all had enough to do, we could play in parallel (Mark vs Dave on our left, me vs John on our right) and get through the turns quickly.

Playtesting: the two radically different results did make us review and revise the victory conditions a bit. Even so, for an untested scenario, it gave us two damn fine games and needed very little tweaking. The untweaked version is one of the 100 or so freely available from the BBB groups.io files. (Go on, join the group - it's easy, no hassle, and >900 members can't be wrong.)

How fast and exciting was that! OK, so the first game was cut a bit short as the Austrians escaped on Turn 5 (out of 8). But we fought the second game to the bitter end. That's 13 turns of action, plus resetting the battlefield between games, yet the two games combined took just two and a quarter hours. It was intense!


Monday 7 February 2022

Szeklers! Hungary 1848 #13: Sepsi-Sz.-György

Our Hungary 1848 campaign approaches its end. With less than a month of war left, the last major actions in Transylvania were fought around Sepsi-Szent-György in the far southeast of the country. These provided the setting for our 13th battle - unlucky for some.

Perhaps a little description of that setting is in order (with apologies to anyone about to be offended by my light-hearted caricaturing, which is intended for artistic purposes only).   

Strategic background: the war has less than a month to go. Hungary’s strategic objective is for its two main armies under Gorgei and Dembinski to link up in the desperate hope of inflicting a serious defeat on the Austrian main army: Gorgei in the north is therefore trying to dodge past the Russians and unite with Dembinski in the south, who is currently in the fortified camp at Szeged. The role of General Bem (the Hungarian C-in-C in this game) is to stop Russian forces converging on Dembinski from the rear through Transylvania. To achieve that he is striking at their line of communications through Kronstadt, which is guarded by Clamm’s Austrian corps.

The majority of Transylvania’s population were Vlachs (Romanians). These were generally the lowest social class, in fact had mostly been serfs until emancipated by the Hungarian govt during the war. The principality's Hungarian inhabitants lived predominantly in a central stripe running from the NW down to the very SE corner of Transylvania. (This was the stripe that Hitler gave back to Hungary in the Second Vienna Award in 1940.) They were free yeoman farmers or middle-class merchants and professionals, and the noble landowner class was largely Hungarian. The major towns were ‘Saxon’, with large urban populations of ethnic German artisans, merchants and professionals - the bourgeoisie.

Hungarian resistance in Transylvania was led by the Szeklers. The Szeklerland was the area in SE Transylvania. These proud, indomitable people thought of themselves as the descendants of Attila the Hun. The very SE tip, the ‘Háromszék’ (roughly ‘three parishes’) was more like Asterix the Gaul – even at the height of imperial invasion, a few small villages still held out against the Romans Austrians. They collected copper pans and church bells for their folk hero Áron Gábor to melt down and turn into cannon. They were hardcore and provided astonishing numbers of recruits for the Hungarian cause.

To our battle, then. The situation is that General Bem (actually a Polish exile who had fought against the Russians in 1830-1831, and before then under Napoleon) has his forces menacing the strategically vital town of Kronstadt along three different axes, keeping his opponent in doubt as to which direction he will attack from and with how many troops. Historically, the Hungarians pushed forward on the central and easternmost of these axes and drove the Austrians back some way. There was then a lull of a couple of days, during which Bem took a portion of his force east across the Carpathians to try and stir rebellion in Moldavia, but without success. In Bem's absence, the Austrian commander Clamm-Gallas moved his troops up the western axis, then left-hooked across some difficult mountainous terrain to retake villages on the central axis, successfully repelling the Hungarian threat to Kronstadt. However, Bem achieved his goal, as the Russians under Lüders turned back from their march down the Maros valley in order to finally crush the Szeklerland instead.

Our battlefield: the plain of the River Alt, with a wedge of densely forested mountains projecting into it from the north; more mountains in the far SE corner, infested with Hungarian irregulars. Kronstadt is off-table to the south. The three road axes converging on it each have three objectives along them (yellow counters = Austrian-held) that measure Hungarian progress towards the allies' line of communications.

Allied deployment. Clamm-Gallas's Austrian forces are deployed forward on the western and central axes, with a large reserve left of picture. The attached Russian contingent under Rennenkampf guards the eastern approach in the foreground. Sepsi-Szent-György is the village at the table edge, top right.

Frontal view of the Russians. They wear the same spiked helmets they will wear in the Crimea five years later.

Intense fighting rages around Szemerja, just south of Sepsi-Szent-György on the central axis. The Hungarians have smashed through the Austrian defenders there and planted a red counter in Szemerja, but Austrian reserves will soon arrive.

The scenario tries to reproduce the Austrians' uncertainty over where the Hungarians would attack and in what strength. Initially the Hungarians attack with two thirds of their force along any two of the three axes. After a night interval, they have the option of continuing with only those two thirds (the historical option), or committing the rest on the third axis at the cost of increasing the number of objectives they require for victory. Meanwhile, the Austrian reserves cannot be released until the Hungarians have made a certain amount of progress in terms of objectives taken or casualties inflicted: i.e., demonstrated that they are a serious threat rather than just a feint.

In our game, Mark and Dave attacked down the centre and east to start with. On my right wing, the Russians were singularly unresponsive to my orders (which was quite historically accurate for this battle). My centre had to fall back in the face of Hungarian numbers, losing badly enough to unleash my reserves to counter.

My other problem, apart from lethargic Russians, was the Hungarian irregulars lurking in the hills in the SE corner. These needed to be screened or smashed. Somehow I let them pin my cuirassiers for most of the game - my best unit. Between those two factors, I felt unable to spare a unit to reinforce the infantry and guns on my left wing.

During the Night Interval I did finally shift the Russian light cavalry towards my left, but couldn't move them far and fast enough. The Hungarians exploited my error by committing their third division on that axis. Although my grenadiers kept them out of the first village they hit, their hussars were able to dash around behind and head towards Kronstadt, taking two objectives.

At the end of the game, then, I was trying to retake these plus one they had captured in the centre. For their part, they were still trying to evict my grenadiers and sneak their irregulars forward to seize an objective. Thus on the last turn there were no fewer than five objectives being contested across all three axes. Inevitably and perfectly, the final score was - a draw!

Reflections

Strategic options add interest. The Hungarians have a big decision at the start as to which two of the three road axes to attack along. Immediately that means there are three significantly different plans possible. On the Austrian side, there is some latitude over where to deploy the reserves initially, which can also shape the game very differently.

'Triggered events' add interest. Odds are against the Austrians at the start. Once they lose badly enough to 'trigger' their reserves, the odds shift against the Hungarians, and it becomes a question of whether there is enough time for the Austrians to exploit their numerical advantage.

Uncertainty adds interest. The huge mid-game decision for the Hungarians is whether or not to commit more troops and shift the odds again, which means they have to take an extra objective - their job gets harder but they have more tools with which to do it. (Of course, players tend to want more toys on the table!) The Austrian player needs to juggle contesting the present threat while taking due precaution against the possible one.

A flank or rear threat adds interest. That single unit of Hungarian irregulars behind my flank - Raw, Passive and Fragile, in other words, rubbish - exerted an influence out of all proportion to their combat value.

A rarity: Aggressive Raw troops! I felt this was the right way to rate that half of the Hungarian units representing the newly-raised formations of poorly-trained, poorly-armed but enthusiastic Szekler recruits. It did give the game a different flavour and seemed to work right on the table.

The right time-space-force equation? This was a really nice swift, mobile, intense game: eight turns long, with 8-10 units a side, on 6'x4' of mostly open terrain punctuated by villages. It felt as though we crammed a lot of significant decisions and exciting fighting into two hours' play. (Contra my recent post in praise of loooong games!)