Sunday 31 July 2022

Nice review of BBB for Napoleonics

I was interested to see that 'Shugyosha' of the 'Wargaming Everything' blog has embarked on an ambitious endeavour: 'The Ultimate Napoleonic Wargame Rules Review and Comparison'. Especially happy to see that he (I assume 'he', but forgive me if I'm wrong) had some very nice things to say about BBB:

"When thinking of the biggest battles of the era, [...] BBB makes it actually possible in a manageable time frame. [...] Among all true army level systems it is probably the best middle ground between playability and period flavor. This might sound like a compromise, but it is not. BBB stands on its own, and for me among the very top.".

Ultimately it's a matter of taste, of course - but I'm glad BBB is to Shugyosha's, and I very much appreciate him taking the trouble to share his reviews of BBB and many other rulesets in this way.

Oh, and I had to look up 'Shugyosha'. Now I know it means a samurai warrior pilgrim. Thanks, pilgrim!

For more collected reviews of BBB, see here.


Tuesday 19 July 2022

A hot day's fighting at Fredericksburg (ACW)

On a day of record-breaking temperatures here in UK, three intrepid souls chose to test their fortitude by rolling dice for three hours in Wolvercote Village Hall.

I have wargamed nearly all the major battles of the American Civil War. On this occasion we filled one of the gaps: Fredericksburg (1862). I've been there and admired the stone wall, but to say I knew about the battle would be stretching it. Thankfully, Matt had done the reading for me and created a draft scenario for us to try. The background in brief: after Antietam, McClellan was removed from command of the Union army and replaced by the reluctant Burnside. Burnside devised a good plan: to change strategic direction, move southeast down the Rappahannock, and attempt to surprise Lee by crossing around Fredericksburg. This was stymied by the late arrival of the pontoon bridges, so although Burnside managed to secure a bridgehead in Fredericksburg, by the time he did so Lee's army was entrenched on the heights above the town. The battle therefore became a frontal assault against prepared positions. The Union left, south of Fredericksburg, made good ground but was ultimately repelled by Confederate counterattacks. Meanwhile, the attack out of the town itself, intended only as a pinning diversion, failed bloodily. Burnside retreated and was relieved of command a month later.

Looking north across the battlefield. The rebel line upper left is solidly entrenched in front of the sprawling town of Fredericksburg (top center). The mass of US troops in the town and the additional mass top right will not be enough to carry the rebel trenches. Not so in the south, where Jackson's two lonely infantry units and his cavalry (bottom right) will find it tough to fend off Franklin's grand division (lower right - more of it off camera).  Red counters mark the edges of the objective areas. Black line is railroad. More photos at end of post.

I am not generally a fan of frontal assault scenarios as the options tend to be limited and the games consequently dull. Not so this time, at least for me as Lee and for Dave W commanding the Union left. (John on the Union right might care to differ, though he did say it was very entertaining.) In terms of options, both sides have lateral roads they can take advantage of to shift reserves left and right and change the focus of their efforts or counter enemy success. For the first two turns, fog limits visibility and hampers command and coordination. The Union can use this just to cover forming up and preparing for an assault, or actually exploit it to assault immediately but with risk of going in piecemeal. In the south, on Prospect Hill, it is a more open and mobile game. The rebels need to advance and then fight a delaying action against greatly superior numbers.

In our game, Prospect Hill was where the game was won; or you might say, Marye's Heights was where it was lost. It took the US a long time to get enough troops across into Fredericksburg to be confident of attacking. Then, the Passive penalty for poor command and the Difficult Terrain penalty for a town meant that only a few units emerged initially. These were easily repulsed and shattered. After that, John was understandably wary of repeating the exercise. Fighting on that front degenerated into an inconclusive firefight.

That left one Confederate brigade free to head south from there to Prospect Hill, where on Turn 9 (out of 10) Dave's boys in blue had expelled all mine from the objective. However, thanks in part to the reinforcement from Marye's Heights, I was able to get back in on the last turn. As the objective was contested, the US had failed to claim the single objective they needed to earn a draw. Yeehar!


Reflections

The game did capture the feel of a massive, ponderous Union army having to bang its head against a stone wall. We also got a sense of why (at least on the Marye's Heights sector) an attack out of Fredericksburg against the rebel defences was both necessary and doomed - or at least, doomed to heavy casualties.

Just a little variety in troops can provide plenty of tactical nuance. We had a mix of veteran, trained and (on the US side) raw units; a small number were also rated Aggressive; each side had one cavalry brigade. This was enough to make for richer tactical decisions in the Prospect Hill fight.

Larger area objectives can work well. Usually, in my scenarios anyway, victory revolves around holding a few small or point objectives: villages, hilltops, bridges etc. Matt opted for three rather larger area objectives, a foot or more across, which the Union had to clear entirely of CSA troops to capture. This meant there were several ways I could try to defend each of them, perhaps more so than for a point objective.

Thank and well done to Matt on a very good scenario. For what was supposedly a draft, it produced a well balanced and exciting game and we thought needed minimal changes.

I need more terrain! I've got quite a lot of green felt for woods, but it still wasn't enough to entirely cover the wooded hills in this game. Likewise I've a fair amount of brown and blue felt strips for roads and rivers, but this isn't the first time I've had to leave out some of the less crucial sections marked on the map. Time to upgrade!


"Well, lookee here - Danish immigrants!" (See the Dannebrog flags upper left - Dave didn't have quite enough US troops so had to conscript some proxies from his other armies.) Longstreet's thin grey line on Marye's Heights waits for the blue-jacketed horde to sally from Fredericksburg. 10mm figures, mix of Kallistra and Pendraken.

And now a view of the rebel right, where Prospect Hill (the dark green area right of pic) looks very weakly defended. Is that General Lee himself reconnoitering by the stream? 

Mist rising from the river will screen the advance of more Union troops across the Rappahannock into Fredericksburg - if there's room! John also initially sent guns across, but the gunners were swiftly shot down, so he redeployed them behind the Rappahannock south of the town.


Wednesday 13 July 2022

"Gordon's alive!" - Khartoum (1885)

With his India scenario book newly published, Mark changed continents and took us to Africa. We turned up at his war room to find a splendid, striking layout awaiting us. On an arid plain dotted with palm trees, in the angle of the Blue and White Nile rivers, a line of entrenchments protected a cluster of white buildings: Khartoum!

The baking Sudanese sun shines on the golden vista of Khartoum. Mahdist hordes approaching from the left, about to assault the line of obstacles and entrenchments between them and the city. More pics at foot of post.
 

For any who don't know the background: Major General Charles Gordon ("Chinese Gordon") was sent to help the Egyptian government against the Mahdist revolt in the Sudan. He was supposed to evacuate Khartoum but instead chose to defend it. He held out for almost a year; a British relief force was sent and arrived just two days too late, after the Mahdists had stormed the city.

Dave and Bruce took charge of the Mahdist hordes. I was given the role of Gordon, commanding a mixture of tough Sudanese troops, nervous Egyptians, and assorted irregulars and desperate armed citizenry.

The attackers' numbers should mean the defenders are probably doomed, so the scenario is a race against the clock: the Mahdists have just 8 turns in which to overrun the entrenchments (which include 4 bastion objectives) and take enough of the vital locations beyond (forts, barracks, arsenal/cathedral, palace, town sectors) to achieve a total of 7 for a draw or 8 for victory.

Historically, a fall in the river's waters left a gap on the flank of the entrenchments. The scenario reproduces this faithfully. The key to the assault is how fast the Mahdists can swarm through that gap (though they will need to assault frontally elsewhere as well). In our first go at the scenario, Dave's warriors got bogged down there for a couple of turns too long. Between that and the fact that (as we subsequently agreed) Mark had slightly overrated the strength of the defences and slightly underrated the Mahdists' determination, the assault was defeated.

We then fought it a second time with said adjustments. This produced a much more finely balanced game. Despite an active and well-commanded defence and galling enfilade fire from the defenders' gunboat, the Mahdists broke through and past the entrenchments, across the open ground, and rampaged into much of the city. On the last turn, so many objectives were in charge range that the Mahdists' total could have reached 10 if everything went their way. As it was, when time ran out, there were precious few defenders remaining apart from Gordon, wrestling with his conscience over whether it would be a mortal sin to blow himself up along with the arsenal ... but the attackers had only taken 7 objectives, one short of a draw. Victory for Gordon!

Reflections

The aesthetic matters. It's such an important part of the HQGE. Mark's table was stunning just because it was so different from our usual green tables; his armies looked great; details like the gunboat added to it.

City assaults can be fun! I tend to be leery of straight assaults as they sometimes offer very limited options for either attacker or defender and it becomes a mere dicefest. In this scenario, though, both sides had plenty of choices to make and there was loads of manoeuvre.

Learning by doing: I knew virtually nothing about this battle beyond the fact that it had happened and that Gordon didn't make it. The character and shape of the action are now vividly imprinted on my brain.

Exotica add flavour. Gordon had his gunboat, some Gatling guns, and an armoured barge full of riflemen; the Mahdists had camelry.

Fast and furious! We fought this through in its entirety twice in under four hours, with a proper nail-biter finish second time round.

Have I mentioned before that asymmetric armies make for good games?


And the rest is the annotated photos:

The veteran Sudanese present a striking appearance in their white uniforms and red fezzes as they defend the entrenchments. They are backed up by rather less impressive bashi-bazouks in a fort.

 The opposition: the massed Mahdist left wing with its gaudy banners.

And a closer look. The 'fuzzy-wuzzy' spear-chuckers at the back only have hand-to-hand weapons, but about two thirds of the Mahdist infantry are armed with modern breechloading rifles captured from the Egyptian army.

Gordon and his staff sip gin next to the 20-pdr gun mounted on the roof of the palace and admire their river gunboat. Historically this played no part in the actual battle as key personnel prudently made themselves scarce, but the scenario allows a chance of it coming into action.

Game 1: Dave's left hook bogs down in the mud next to the Nile. Bottom right is the armoured barge moored in the river to protect the flank of the entrenchments. The camels refused to move any further, in fact next turn the unit rolled snake-eyes and disintegrated - as Dave said, 'got the hump'.

Waves of Mahdists tried repeated frontal assaults without success across the slightly too powerful defensive belt of broken glass and mines.

End of Game 1: the Mahdists have finally overwhelmed the right half of the entrenchments but are nowhere seriously threatening the city, which is still defended by a thin line of Egyptians and Sudanese. Blue markers show that half of the Mahdist units are spent.

Game 2. This time the Mahdist left wing has piled through rather more swiftly and in force. Not having it all their own way, though, as the pinning frontal assaults are repelled with heavy loss.

Turn 6 of Game 2 and the Mahdists are rampant. The few defenders along the edge of Khartoum look distinctly beleaguered. The remaining two turns would see them even more beleaguered and even fewer in number as the Mahdists swarmed into the barracks (top right) and two of the town sectors - not quite enough to prevent a victory for Gordon (albeit still only a moral one).


Thursday 7 July 2022

Newly published: "Bloody Big Battles in INDIA!"

I am delighted to announce the publication of the third BBB campaign supplement: "Bloody Big Battles in INDIA!" (BBBI), by Dr Mark Smith. This covers the Second Maratha War (1803-1806) where Wellington made his name; the Gwalior campaign of 1843; the Sikh Wars; and the Indian Mutiny.

From helping Mark to playtest these sixteen scenarios, I can report that they are super games. The asymmetrical armies make for interesting tactical challenges (how best to use camel-mounted rockets ... ?). So too do the situations, e.g., protecting baggage against marauding cavalry, or the unusual cityfight in Lucknow. Furthermore, Mark writes very nice clean unfussy scenarios with well-designed objectives. I've provided the full back cover 'blurb' and a list of the battles included at the foot of this post. To get a flavour of the scenarios in the book, here are a few battle reports: Delhi (1803); Argaum (1803); Laswari (1803); Maharajpore (1843); Punniar (1843); Aliwal (1846).

The book is published by SkirmishCampaigns. It should be available from all SC's usual retailers shortly - shipping out this week or next, I think - but let me give a special shout out to North Star Military Figures, who snapped up a big order within 30 seconds of hearing about BBBI! (At time of writing, not yet listed on their website, but drop them a line if you want a copy.) BBBI joins the two existing BBB campaign supplements: "Bloody Big EUROPEAN Battles!" (BBEB) and "Bloody Big BALKAN Battles!" (BBBB). The fourth is in press and will appear later this year: "Bloody Big HUNGARY '48 Battles!" (BBHB). A couple more collections are in fairly advanced preparation as well, so expect more BBB books in 2023.

Thank you to everyone involved: Mark for all his hard work and skill in creating such a fine collection and introducing me to these wars about which I knew very little; our merry group of playtesters at OWS; Scott at SkirmishCampaigns; all the retailers who carry the BBB books; and, of course, the 1,000s of you out there who read this blog, or are members of the BBB group or Facebook page, and whose shared enthusiasm for this period is what really keeps the BBB project going.

===

[From the back cover of BBBI]

The major states of India, especially the Maratha Confederacy and the Sikh state in the Punjab, were among the most redoubtable opponents of the extension of British power in the sub-continent. The size and technological sophistication of their forces posed major problems for East India Company commanders in the field and frequently threatened them with defeat. BBBI lets you refight sixteen of the most important battles of the period from the Second Maratha War (1803-1806) to the Sepoy Uprising (‘Indian Mutiny’) of 1857-1858. This collection gives you:

·       The battles where Wellington made his name!

·       A wide range of terrain and tactical situations!

·       Balanced scenarios with asymmetrical armies!

·       Unusual troops – Gurkhas, camel rockets, ghazis!

·       An engaging game of constant decision-making!

·       Battles you can fight to the finish in an evening!

Many also offer scenario options to explore ‘what-ifs’ and increase replay value. Campaign options allow players to link battles so that each has consequences for the next.

===

Battles covered:


The Second Maratha War (1803-1806) – 4-scenario mini-campaign

    Delhi

    Assaye

    Laswari

    Argaum

The Gwalior War (1843) – two individual scenarios

    Punniar

    Maharajpore

The First Sikh War (1845-1846) – 4-scenario mini-campaign

    Mudki

    Ferozeshah

    Aliwal

    Sabraon

The Second Sikh War (1848-1849) – 3-scenario mini-campaign

    Kyneerie

    Chillianwallah

    Gujrat

The Sepoy Uprising (‘Indian Mutiny’) (1857-1859) – 3-scenario mini-campaign

    Second Battle of Lucknow

    Third Battle of Lucknow

    Bareilly


Update 31 March 2023: the fine French wargames magazine Vae Victis has devoted almost a whole page to a nice positive review of BBBI. (Issue No. 167, March/April 2023.) VV's verdict: "Like all the BBB supplements, the content is extremely informative and, in the present case, enables you to recreate some very unusual and colourful battles." Merci, Nicolas!


Tuesday 5 July 2022

"Joy of 1866": the Joy of Six show, then Skalitz

Been an intense couple of days wargaming-wise. Sunday: my second ever visit to the wonderful Joy of Six show; Monday: a tense and exciting BBB Austro-Prussian War battle.

Joy of Six

Joy of Six, for anyone unfamiliar with it, is (in normal non-COVD years) an annual event in Sheffield UK run by the excellent folk at Baccus. It is dedicated entirely to wargaming in 6mm scale. I went along with my old friend Colin and new recruit Luke. I was committed in advance to helping Tim Carne run his Gettysburg game. However, the day before the show I learned that a game had dropped out, so I decided to throw a box in the boot of the car in case. A good move, as it turned out. When we arrived I was introduced to Pete of Baccus, asked him if he'd like another game, he said yes. Fortunately, the gap in the ranks was next to Tim's game. I'd brought a specially printed battlemat so we were able to roll out the battle of Isaszeg (1849), from the Hungarian War of Independence, and set the whole thing up in about 10 minutes. That done, I left a note on the table saying to find me next door at Gettysburg.

Tim's game was much admired, especially his very effective woods - cut from soft 'pebble' bath mats and sprayed green (I guess this one from Dunelm) - his armies were very nice too and the whole layout looked good. Special mention of his ingenious and convincing cemetery arch. He had a regular stream of interested persons passing comment, asking questions, taking photos, and of course a number actually sitting down to play. The game rocked along; the Union lost several units entirely quite early on and even with copious reinforcements never really recovered from those setbacks, so the Confederacy managed to reverse history. But it's more about the journey than the destination and all the travellers aboard seemed to have a good time. Meanwhile at the Isaszeg table, in the afternoon Colin introduced Luke to his first game of BBB. We talked to a lot of people and evidently the two BBB games provided a lot of ideas and inspiration. The fact that our layouts were simpler than the many more lavish productions was a nice contrast and showed games that were very 'do-able' for the average gamer.

In between whupping them Yankees, we did manage a tour of the show, drinking in all the wonderful sights on display. Others have done good photo reports, eg Whirlwind's here or Ithoriel's here, which is just as well as I didn't take any pics. I particularly liked Per's Swedes in the snow; the fabulous Imjin hills and paddy fields; the Khorramshahr cityfight; the CWC townscape ... there were plenty of traders present too, apologies to them that they didn't get any of my £££ this time, but I'd like to think I steered some custom to them indirectly by stimulating others to start new projects.

All in all it was just a great day, enjoyed equally much by newbie Luke and old lags Colin and me. So good to catch up with so many old friends and new and to enjoy such a feast of 6mm goodness.


Skalitz (1866)

Then it was back to the club for a regular Monday night's gaming. Crispin laid on the sequel to last week's Nachod game, Skalitz. Like Nachod, this was one we had only fought once before remotely as a PBEM. I'd revised the scenario a bit on the strength of that first playtest. The new version gave us a game that was very one-sided in terms of casualties - just like the real thing - but utterly gripping game-wise. The tension came from the fact that the Prussians were up against the clock. Turn 6 was the first deadline, by when we (the Prussians) could achieve an early victory if we could take 3 objectives. It was a turn of high drama as we launched mass assaults which took a second but just failed to capture the third. On to the next deadline, then: Turn 8, by when the victory count was four. On Turn 8 we stormed into two objectives to take our total to five; Austrian counterattacks ejected us from one, but narrowly failed to retake the other. Thus we won a turn early. Had their second counterattack succeeded, that would have taken us into a final Turn 9 in which we would have needed to recapture both and claim all five objectives for victory - by no means guaranteed.

The Austrian army was thoroughly battered, though, and the Austrian players did query the scenario balance. I may have over-corrected after the previous playtest, but on reflection I think perhaps not. The Austrians were unfortunate not to inflict a couple more casualties on our Prussians by fire in the early turns, and they launched some assaults mid-game that could have enjoyed more success than they did, yet the end-game was still pretty tight. OK as it stands, I reckon.

There now follow half a dozen photos of the Skalitz game with brief captions. If those don't excite you, I suggest you skip past them to find two sets of Reflections: first on Joy of Six, then on Skalitz.

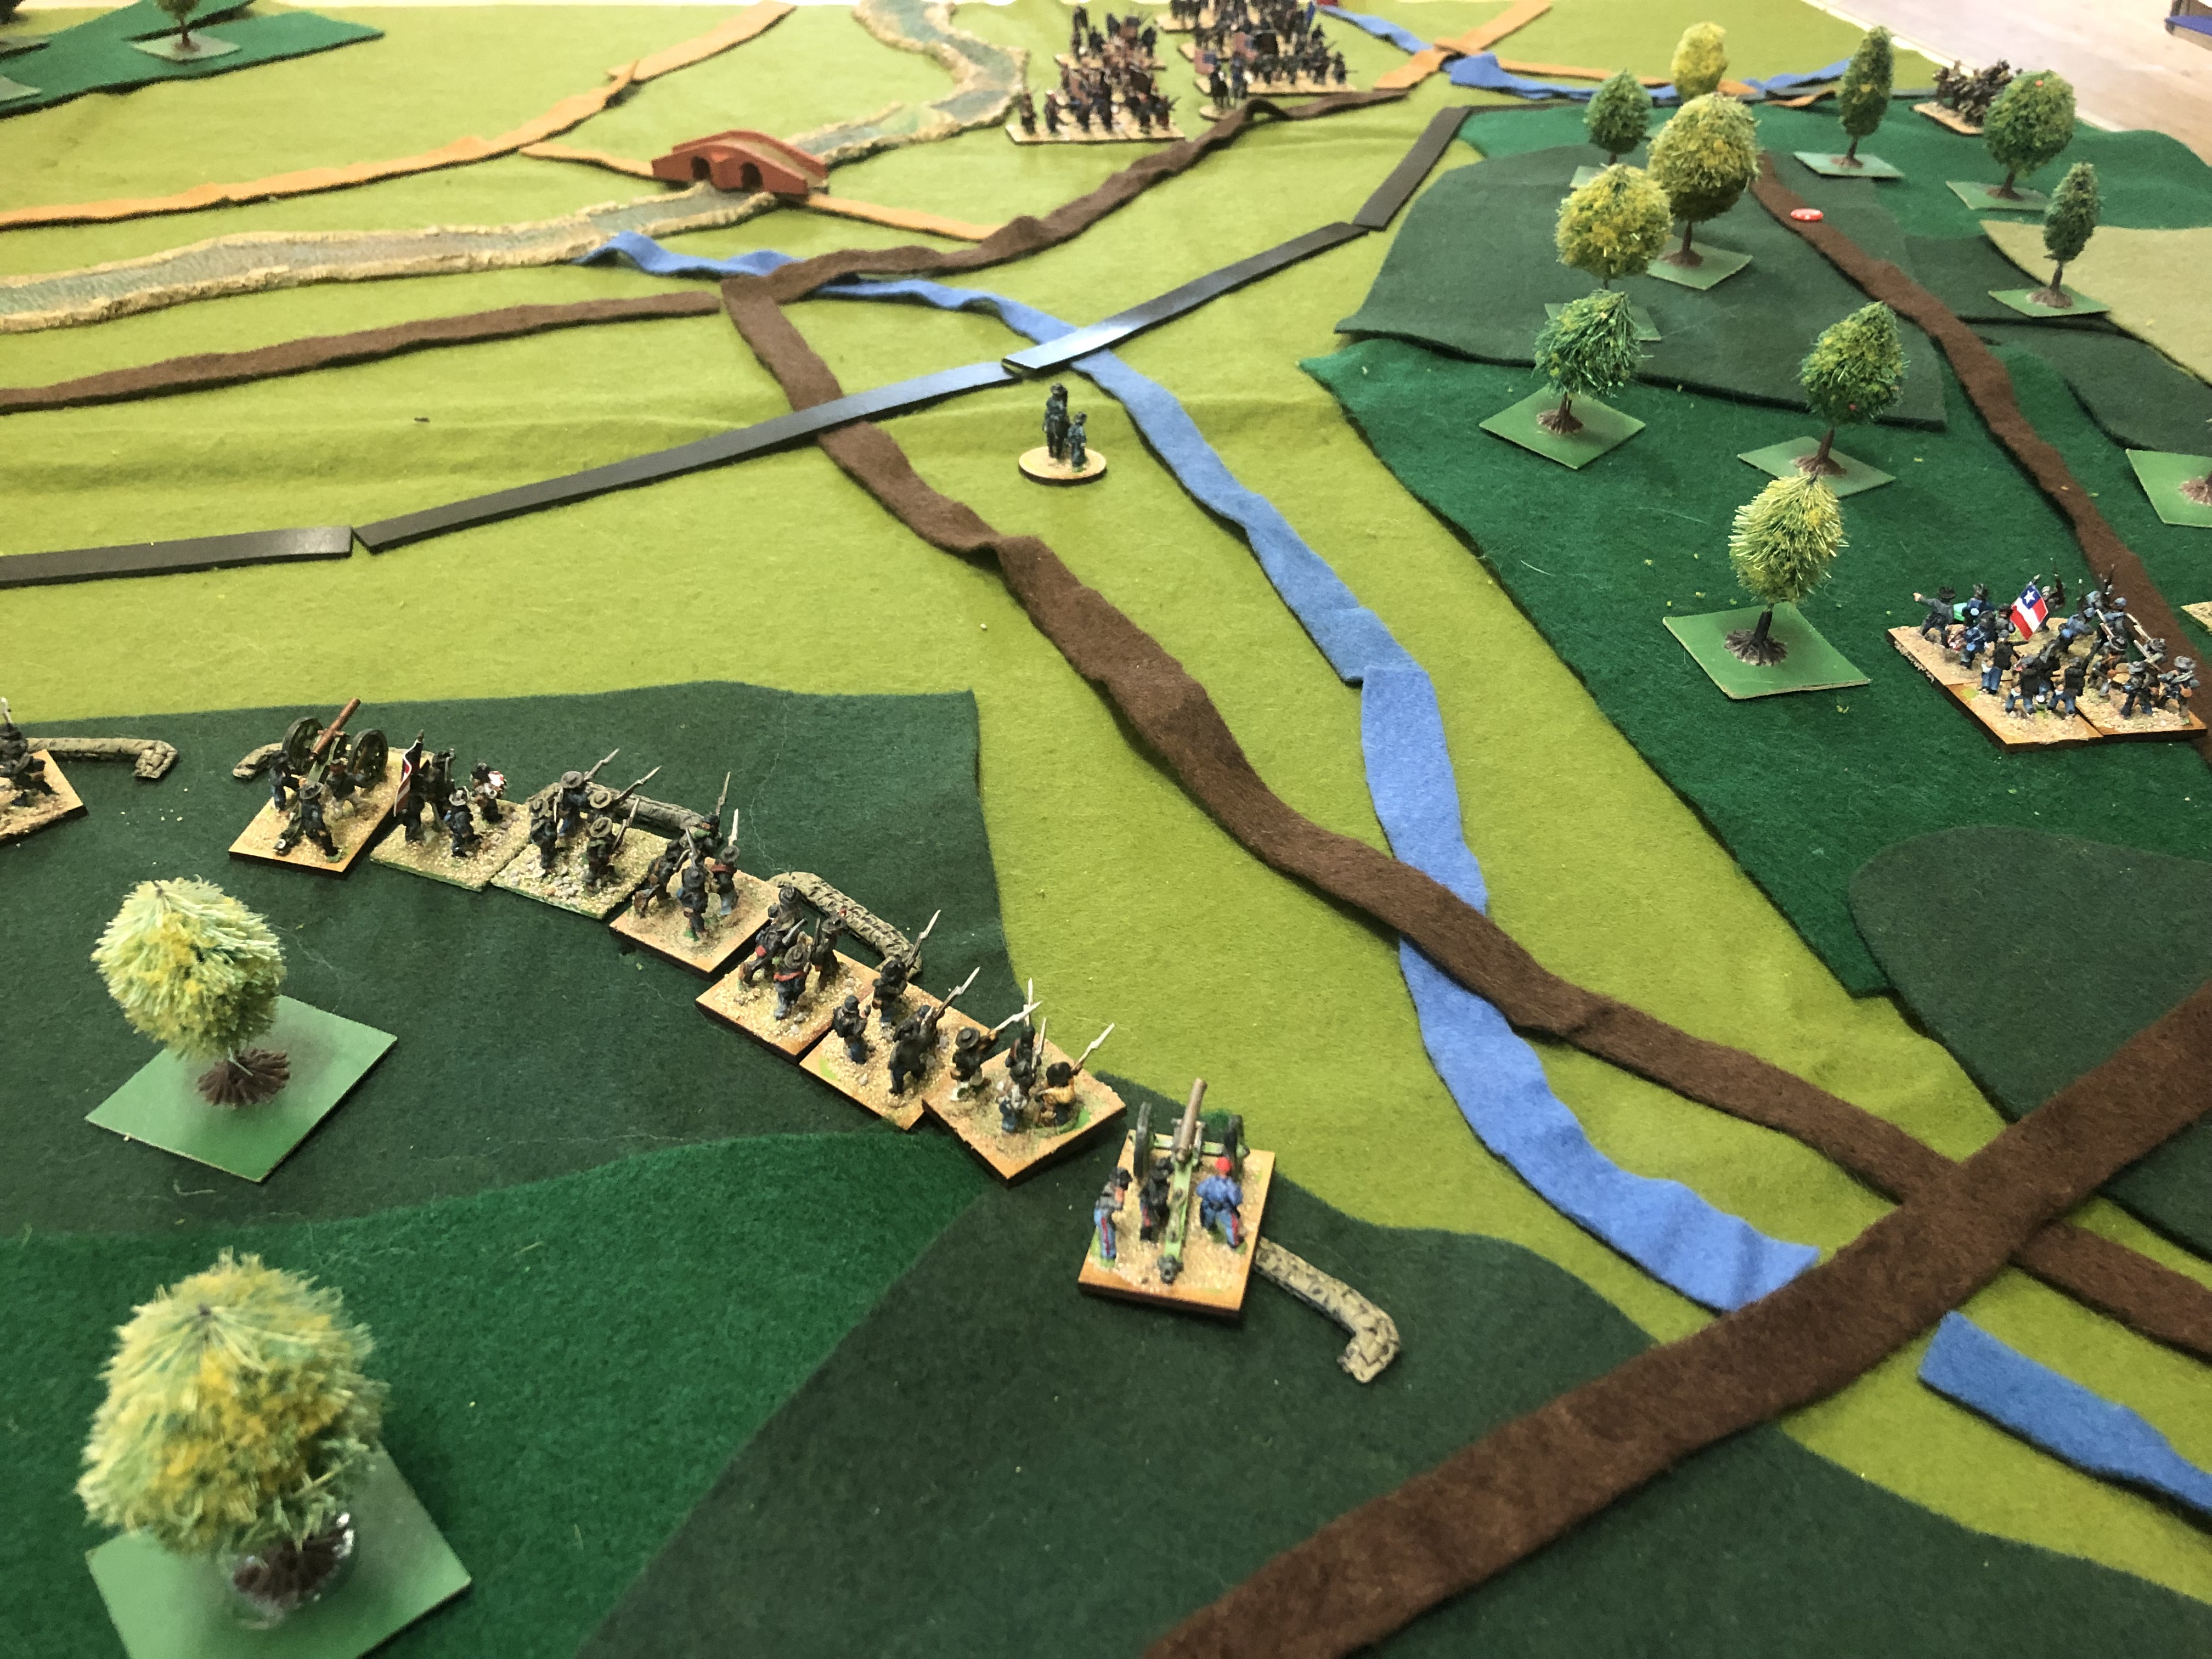
The battlefield. Austrian columns are visible around the top centre of pic (west edge), about to push forward to meet the thin dark blue lines of Prussians arriving from the east (bottom of pic). The five objectives are the two woods in the centre; the gentle rise south of them (brown contour line with a white objective counter); Zlitsch (the church upper right); and Skalitz station (top left/centre). The Prussians also earn an objective if they kill both Austrian cavalry units, which explains why those stayed well out of the fight until the desperate last turn.

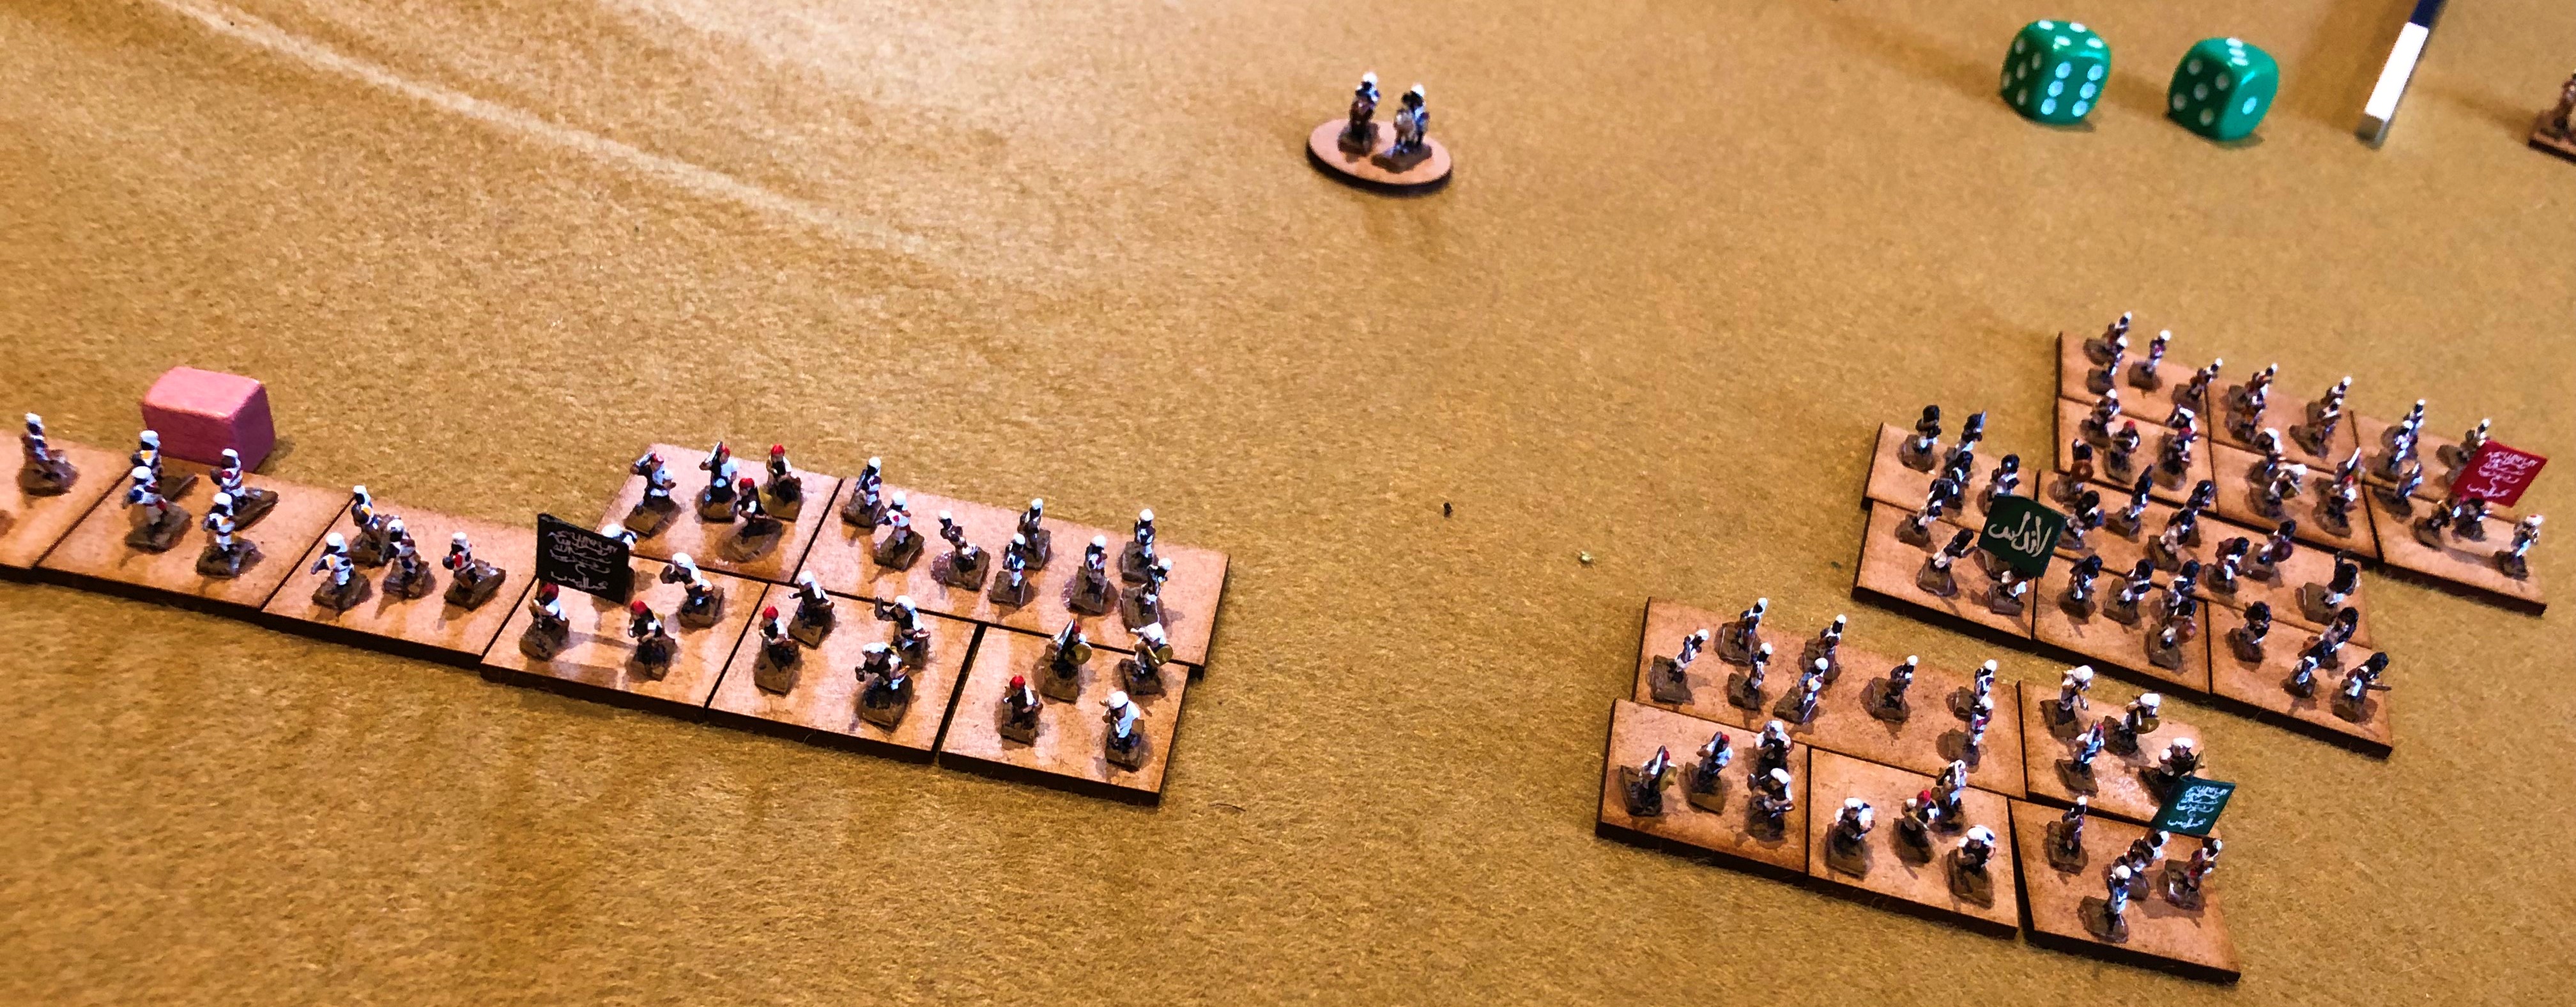
The Prussian advance guard moves to envelop the Austrian jaegers' outpost in the woods. The numbers don't look good for the jaegers but they are playing at home. They lasted a fair while.

Austrian columns arrive to beef up the jaegers' resistance and hold the forward position until Turn 6. Other Austrians lurk around the Prussian flanks, hence those Prussian flank units facing out.

Smash! Charge and counter-charge as the Prussians try to expel the Austrians from the woods and capture the adjacent rise. The Austrians get a bonus in the assault for their Stosstaktik - but only if they manage to survive the defenders' fire and close with the bayonet.

The crucial Turn 6 and there are a lot fewer Austrians than there were. That is largely explained by the black counters indicating Prussian units now low on ammo, having done much execution. (Yellow is disruption, blue is spent because of casualties, red indicates a half-strength artillery unit.) The Prussians haven't quite managed to clear the Austrians off the rise, though, and suffered some casualties of their own in the attempt.

Two turns later and the Prussians have just managed to achieve their victory condition. The woods and the rise have been taken. Zlitsch is still Austrian-held, but the station has fallen and the cuirassiers and jaegers in the south were unable to retake it. Game over, man!

Reflections on Joy of Six

Great to be back at a show again! Looking forward to my next one already (Colours, Newbury, 10 September - be there - free entry this year!).

Apart from the actual gaming, it is so stimulating to meet and talk with fellow gamers about all and sundry, including some legendary names in our hobby. Thank you to everyone who stopped by our two games to roll dice, to chat and share ideas, or just to say hello.

6mm has been my preferred scale since I was a teenager and I still love it. If I were to start again now, I might go with 10mm which still provides the mass battle effect I want but is easier for older eyes ... but I'm so invested in 6mm that I'm not changing now. It's still brilliant.

Huge kudos to Pete and Lindy of Baccus for such a wonderful show - and congratulations and best wishes for their impending nuptials!


Reflections on Skalitz

A super game for a Monday night, large enough to be interesting, small enough to be done and dusted in a couple of intense hours.

Asymmetry! Said it before, say it again: clashes between very different armies in terms of weapons and doctrine make for tactically interesting games.

The unusual victory conditions added extra drama. Usually it's saved up for the last couple of turns, but this delaying action scenario's phase lines meant more high points along the way. It could have backfired, I suppose: if we had actually taken three objectives for an early victory on Turn 6, we'd have been finished half an hour earlier, which might have been a bit deflating. So I wouldn't script every game that way, but for this one it worked well.

Potential campaign day? Dave W suggested running the two pairs of Bohemian border battles - Nachod & Skalitz, Trautenau & Soor - as linked micro-campaigns all on the same day, with teams of players rotating among them. People at Joy of Six were also asking about when we might run the next BBB Bash Day (our plans for Bash Day IV having been scuppered by COVID-19). Won't happen this year, but we should definitely start thinking about Bash Day IV for 2023.