Showing posts with label 1854. Show all posts

Wednesday, 15 March 2023

Gorgeous Alma game

The Battle of the Alma (1854) is one of the best-known battles of the Crimean War. A scan of wargame forums suggests it is fought reasonably regularly. Unfortunately it tends to be treated as a dull frontal assault: across the river, up the slope, into the teeth of the Russian guns and massed columns. Some people enjoy games like that; I prefer to have more choices to make.

So, when I came to write the Alma scenario for the "Bloody Big European Battles!" scenario book, I tried to make it more interesting. I looked at the options available to the Russians and saw that a viable alternative strategy for them might have been to deploy further east and threaten the allies' flank, rather than directly barring their way to Sevastopol. Meanwhile, as I recall, there was some argument between the allies, with the French keen to press forward as swiftly as possible and the British being more cautious.

The scenario therefore gives both sides the opportunity to choose between their two options, resulting in four possible permutations of aims and victory conditions. A direct recreation of history is one possible outcome. However, when we fought the Alma this month using Matt's gorgeous display game layout, the result was a kind of 'alternative Alma' in which the action was somewhat displaced from its historical location but still very much captured the flavour.

The Russian team chose the 'flank position', while the allies opted for 'cautious'. This meant the allies had to deal with the flank threat before advancing on Sevastopol, so they had 8 turns to drive the Russians back along their line of the communications to the southeast. (Had the allies chosen 'aggressive', they would have focused on exiting French units off the south board edge, while preventing Russians descending towards the allies' supplies piled on the beach behind them.) I was on the allied side in the minor role of commander of the Turkish division.

After the first few turns it looked dire for the allies, thanks to aggressive Russian defence and bad allied dice. The allies had advanced in march columns so as to get through the vineyards and across the river as quickly and easily as possible. Unfortunately, Russian attack columns pounced on the British as they ascended the far slope and gave them a very bloody nose, effectively putting one division out of action. As for the French, they repelled the Russian onslaught but dismal movement dice then had them sitting around for coffee and croissants for a couple of hours. I thought we were set for humiliating defeat.

But of course, as the game went on, the Russian hordes melted away in the face of superior allied firepower. The British cleared the road between Kanysch and Uleschel (our first objective), and French panache and elan were carrying the zouaves and friends far into the Russian left. On the last turn we even had a chance of seizing the next stretch of road for an unlikely win. Equally, a late Russian counterattack could have claimed victory for the Tsar.

Of course it wasn't to be and the game ended as an honourable draw. Well played to all my gallant comrades and opponents alike.

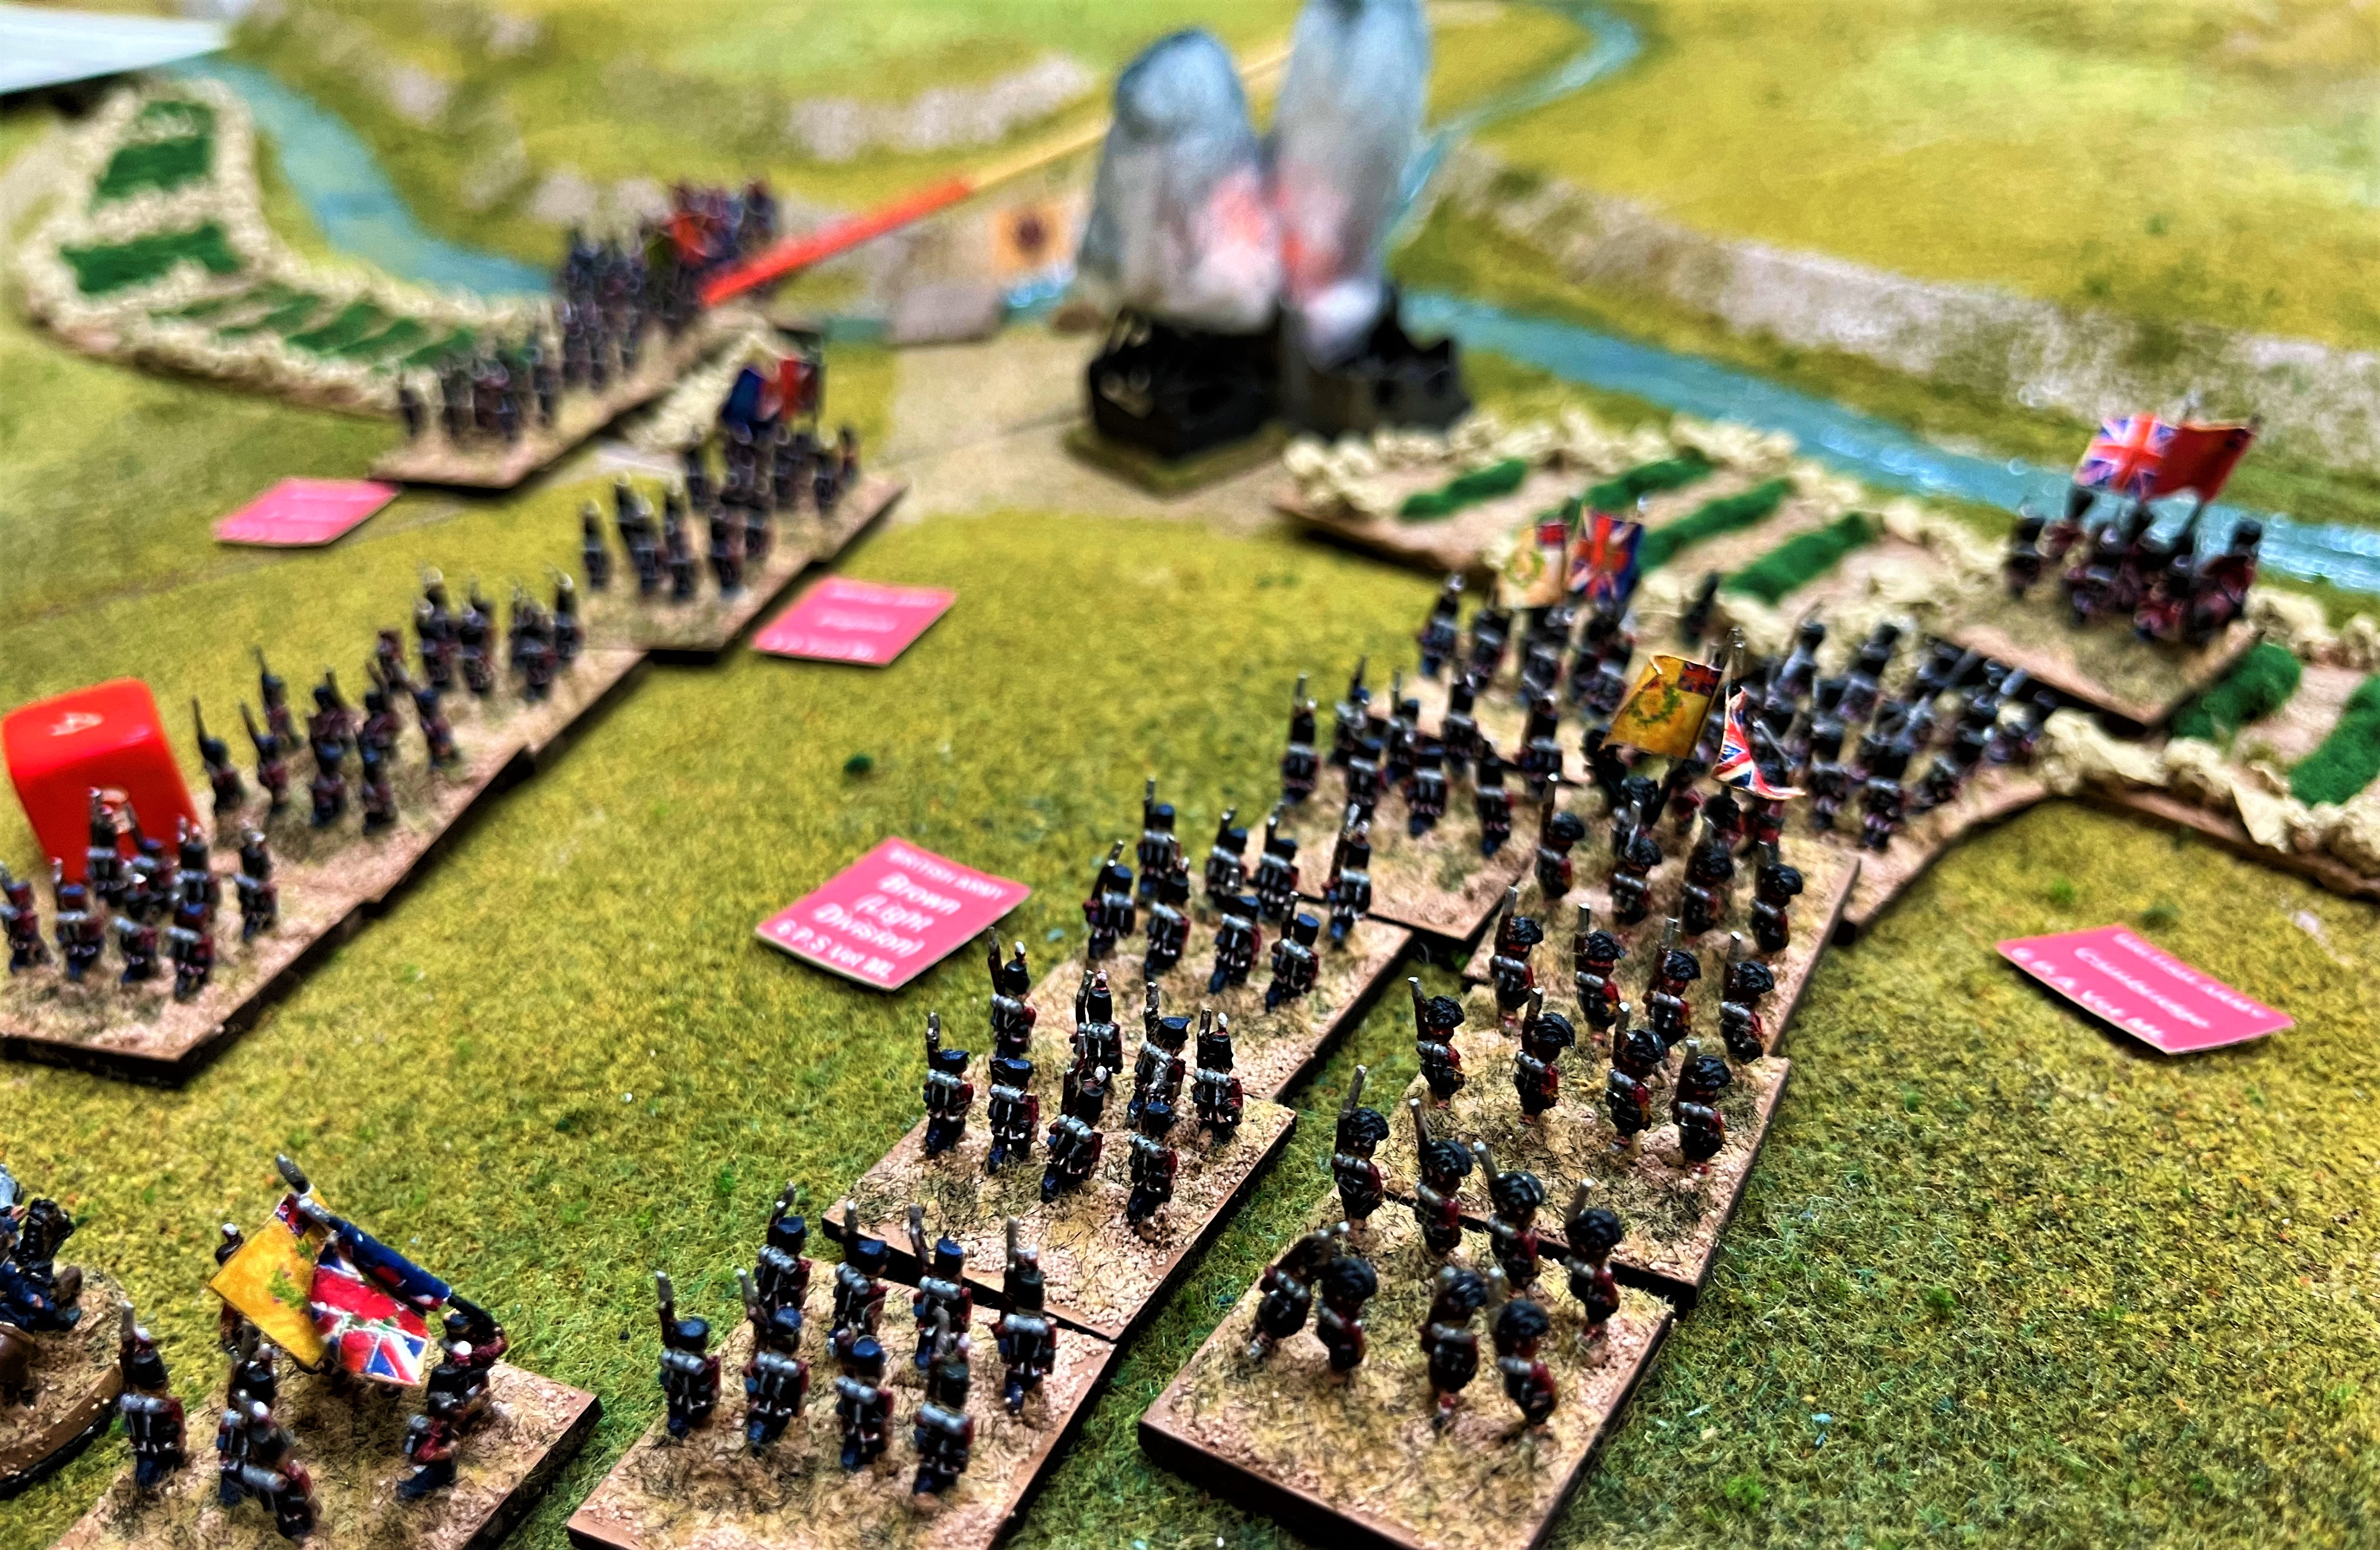
Three captioned photos below are followed by some reflections. 

View of Matt's gorgeous layout from the Black Sea. Terrain boards with custom hills; the mosque in Bourliouk (top centre); the half-built telegraph tower (top right); the allied fleet of steam & sail warships - note the smoke coming out of their funnels. It really was fabulous work and a privilege to push troops across it.

 Situation circa Turn 2. French on the right have dashed across the bridge at Bourliouk; British on the left make slower progress because the Russians have set light to Kanysch (centre left of pic - Matt actually had flickering flames). Russian columns menace from top of pic. In the foreground, my Turkish division snakes from right to left to support the British. Beautiful figures on beautiful terrain.

Close-up of the British columns fording the Alma. Highlanders on the right following the guards' bearskins. The division top left is about to be sent reeling back with heavy casualties.


Reflections:

Similar but different. Interestingly, even though the Russian choice of flank threat rather than historical blocking position shifted most of the action away from the historical battlefield, it still captured much the same historical flavour. We still had Brits battling their way across the river and up steep bluffs against massed Russian counterattacks and formidable artillery redoubts; we still had French bogged down for a while until the zouaves went on a big right hook.

Gorgeous game. I can't overstate how much work Matt had put into the terrain, the troops, the fleets and the counters (low ammo, disruption etc were all appropriate little models). Consequently the game looked great, which helps to make our mental pictures more vivid as well, and to tell the story of the battle.

Quality vs Quantity. Asymmetry makes for interesting match-ups. The contrast between the Russian army (Tactically Inept, not great musketry but plenty of artillery) and the allies (lots of longer-ranged rifles, capable skirmishers, hence deadly small arms fire) was dramatic. The Russians did a good job of exploiting such advantages they had, but ultimately quality told and changed the course of the game.

Dice can stink! I have rarely seen so many pairs of snake-eyes as Phil rolled for the French, paralysing their advance for half the game. One can rationalise that as the French commander being taken aback by the Russian aggression and pausing, unsure what more might be over the next hill.

Hurrah for Johnny Turk. You can't see it as I didn't take many photos, but right at the end it was my Turkish division that interposed to prevent a Russian counterattack that could have snatched victory. I therefore claim all the credit for the allies' (partial) success.  ;-)


The Alma scenario is one of four that form a Crimean War mini-campaign in the "Bloody Big European Battles!" scenario book: Kurudere, The Alma, Inkerman and The Chernaya. BBEB is available from all the usual BBB retailers. There is also a Balaclava scenario available free from the files of the BBB group on groups.io.


Tuesday, 28 March 2017

Balaclava: famous, yet little-known?

A couple of years ago, I had to eat some of my own words (or at least, to gnaw on them a bit). Specifically, they are those I wrote right in the front of the "Bloody Big European Battles!" scenario book for BBB:

“What, no Balaclava!?” That’s right, no Balaclava. Although this is one of the most famous episodes in military history, at a mere 30,000 or so combatants all told it just isn’t big enough to qualify for inclusion in this book.

But then, by popular demand (i.e., I think, my mate Dave) I found I had to write a scenario for Balaclava after all. That meant researching the battle; and that meant finding out that I didn't know nearly as much about it as I thought I did.

 
Turn 2 of our game - Russians slow to get off the mark - 
but the thin red line is looking very thin

 As I wrote in my potted history for the scenario:

Six weeks had passed since the Allied victory at the Alma. Both sides had been reinforced. Sevastopol was under siege. The French army had established its supply base at Kamiesch, the British at the tiny port of Balaclava.

This port was the target of a Russian attack by Liprandi’s corps. Some episodes in this battle have become famous or notorious: the Russians overrunning the screen of Turkish-manned redoubts; the ‘thin red streak’ of the 93rd Highlanders repelling Russian cavalry by Kadikoi; Scarlett’s Heavy Brigade driving off several times their number; the ‘gallant six hundred’ in the charge of the Light Brigade; and the glorious attack of the Chasseurs d’Afrique upon the Fedoukine Heights.


But some aspects of the battle are less well-known. The British 1st and 4th Divisions marched down to join the 93rd near Kadikoi but then just held their position. The French corps d’observation on the Sapoune Ridge did no more than observe; Zhabokritski’s force opposite them was similarly inactive. In fact, most of the forces present seem to have faced each other off, neither side wishing to commit to a decisive engagement, both fearing defeat more than they craved victory.


The outcome was therefore a minor victory for the Russians. They had inflicted a tactical reverse on the British, and were left in possession of the Causeway and Fedoukine Heights, from which they feinted during their next attack: Inkerman.


Now I realise plenty of dedicated Crimean War gamers are familiar with all of this, so I don't want to project my previous ignorance onto them. But I suspect the average wargamer probably has limited preconceptions similar to what mine were. Reading in detail about the battle, I was particularly struck by the aspect highlighted in bold in that third paragraph above: "both fearing defeat more than they craved victory".

For me as a scenario designer, that posed an unusual and fascinating challenge. How could I reflect that caution on both sides and discourage players from (unhistorically) committing all the troops available, without tying players' hands entirely? Could I actually exploit the situation to give them some interesting decisions to make during the game?

The approach I settled on was to make all the troops present potentially available, but to attach an element of risk to committing them. It was pretty simple: for each reserve division committed, there was a roll of the dice, with a chance that committing those reserves would concede an Objective (a victory point, if you prefer) to the enemy. The idea was that this represented a larger strategic or political risk, to be balanced against the immediate tactical one: "But sir, if we are obliged to call on the French for help, it won't go down well in Whitehall!"

Since I wrote the scenario, others have played it at the Oxford club, while Pat and Malc from the Wargames Association of Reading put it on as a fine participation game in 2mm scale at the Warfare show, and again at the first BBB Bash Day, with great success.


This week, though, I actually got to play it myself for the first time, and a thoroughly good evening's entertainment it proved to be. We fought it as battle #3 in the Crimean War mini-campaign. As the Allies had 'lost' at the Alma last week, after a draw in the opening clash at Kurudere, for Balaclava they were penalised by the deduction of a single base of infantry - a loss which sounds small but which proved quite significant.

It is a classic match-up of ponderous Russian quantity against heavily outnumbered Allied quality. Dave and I as the Russians really struggled in the first couple of moves - and it's only a 6-turn scenario, mind - to get our troops off the start line. Indeed, as it turned out, thanks to me rolling 3 pairs of snake-eyes during the game, after two of my units eventually did tentatively advance, they then retreated back to their initial positions or beyond, taking no actual part in any fighting. Meanwhile the Allies had opted for an aggressive defence, pushing their cavalry round the Russian right to engage Zhabokritski's division (the one which historically did very little), and stripping Balaclava of its garrison to support the Turks in the redoubts.

But then we finally did get the Russian steamroller rolling. My guns blew away a small British unit - the one already depleted from the Alma. Our infantry smashed aside a flimsy Turkish regiment which exposed the flank of another British unit, which was overrun in its turn. With the British right wing destroyed, we were able to swarm into two of the redoubts.

The way to Balaclava now lay open! Except that at this point the British 4th Division marched briskly onto the table and interposed itself. The last turn was all-action, with everything in the balance. On the Russian right, after being softened up by French and Turkish guns, Zhabokritski's battered force was bundled off the Fedoukine heights by British cavalry. (Perhaps that's why my two units that rolled snake-eyes retreated, to protect the Russian line of communications?) But in the centre, we managed to capture the last redoubt on the Causeway Heights, shatter the Chasseurs d'Afrique, and blow away a rash counterattack by the Heavy Brigade across the 'Valley of Death'. On our left, Russian infantry, jaegers and cossacks all charged the 4th Division, trying to seize the Kadikoi hill and Balaclava. But the 4th proved to be not so much a 'thin red streak' as a solid scarlet stripe, and we were bounced off.

At game end, we held three of the victory locations. As that stood, it was a narrow Allied victory. However, we passed our 'Commitment' roll for Zhabokritsky getting involved, whereas the Allies blew theirs for the 4th Division. This gave us one more objective, so we had salvaged a draw. Clearly, Prince Menshikov was not fazed by the battering his army took - plenty more serfs where those came from - whereas Raglan's despatch must have been distinctly windy. Urra!

The game was a lot of fun, and I was happy that the scenario design achieved its aim. It gives players plenty of options while staying within the historical parameters; and it produced a tense and exciting game that was in the balance right to the last few dice.

Next stop: Inkerman!

PS - the scenario is in the BBB Yahoo group files.