Most of my wargaming for the past decade and more has been historical refights of nineteenth-century battles using the "Bloody Big BATTLES!" ruleset (BBB). Fortunately for us (if less so for many of the nations and peoples involved), the C19 covers a huge number of wars which generated a huge number of battles, so there's no prospect of us running out of fresh scenarios to game any time soon. Nevertheless, for various reasons, our group fights some battles multiple times. As we've done a couple of these refights this month, I thought this a worthy topic for another of my "Reflections on Wargaming". Basically, the question is: what is the point of going over the same ground again (and again and again)?
In my popular post on "Reasons not to refight historical battles", one of the main objections several commenters raised to any historical refight was "We know what happened": we already know what reinforcements will arrive where and when, which generals made what mistakes, there's no surprise element, it's obvious what one side or the other should have done. Replaying a scenario is effectively a refight of a refight, so if these factors are a problem the first time, surely they're a problem squared come the replay, right? Any novelty there might have been has to have worn off, the best plan for both sides will have been discovered if it wasn't already, we'll just be going through the motions. Why waste our time on such a tired game when we could be doing something new and different?
Well, let's take a look at this month's two re-refights and see how they played out and whether they were worth it. The games in question were Loigny/Poupry (Franco-Prussian War, 1870) and Nachod (Austro-Prussian War, 1866).
Loigny/Poupry
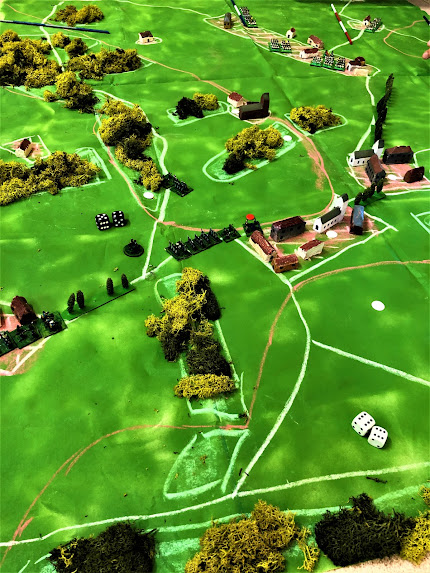
This is one of the scenarios in the BBB rulebook. I wrote it in 2013. Obviously we playtested it several times before publication, but it has made it onto the table several times since then as well. It has several virtues as a game: the terrain is reasonably easy to set up; both sides have plenty of manoeuvring to do and choices to make; it's a fun match-up of German quality vs French quantity.
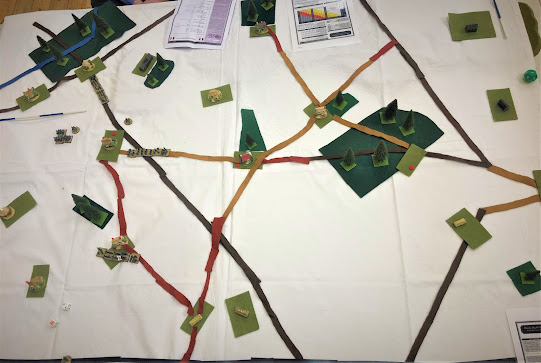
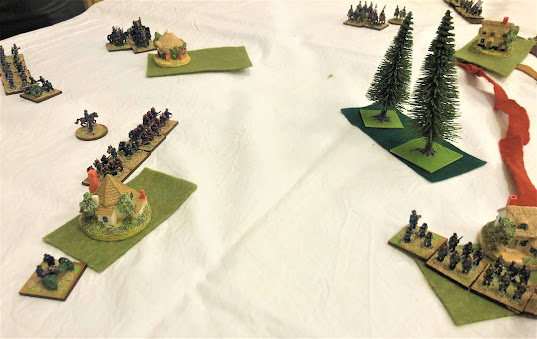
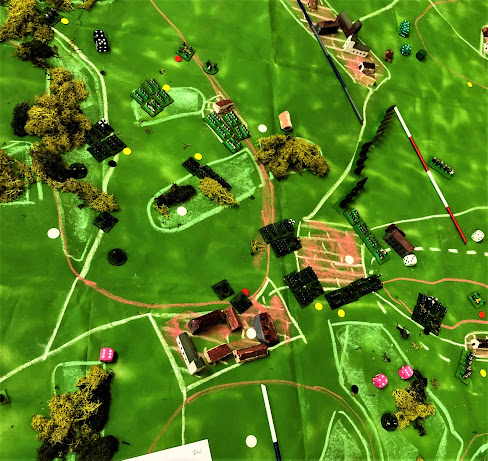
I have never, ever seen it produce such an emphatic French victory as we saw this month. The battle revolves around three victory locations that define the German line. Two of them are vacant initially, as the only German troops on the table are the Bavarians around Loigny on the German right. It's a two-day battle, and on the first day the French only get one corps that arrives on their left to take on the Bavarians. Both sides get more troops on day two that arrive on the other half of the table around Poupry.
Victors and vanquished alike were all stunned. Admittedly we had tweaked the scenario a little, treating the built-up areas as 'Villages' rather than 'Towns', which reduces their defensive value and makes it easier for the objectives to change hands. This perhaps favoured the French attackers more than the German defenders, but as there were lots of villages that the French could use from which to develop their attacks, it was a two-way street rather than a one-sided tweak, so we can't blame the German defeat entirely on that. The French may have had slightly the best of the dice, particularly in an artillery duel that developed in the centre and saw the German gun line driven back, but the dice weren't outrageously skewed either. It has to come down to the German plan misfiring.
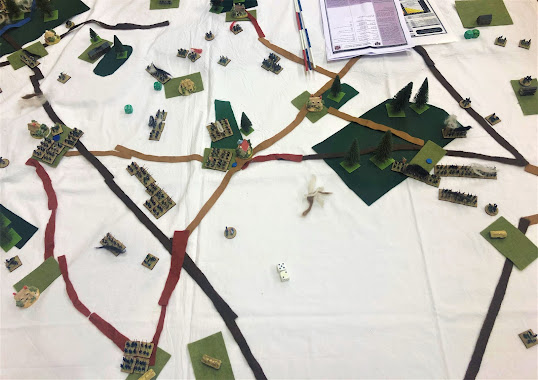
Endex. All three red counters have turned blue to show they are now French-held. The German force has been reduced to a few scattered remnants in the top half of the picture north of the road between the objectives. French quantity beat German quality on this occasion.
So, was it stale and tired? No! Had the novelty gone? No! It was a most exciting and entertaining game that followed a most unexpected course. A previously untried German plan made for a very different battle from any of our previous refights and offered fresh grand tactical lessons. And, last but not least - it's always nice to field the Foreign Legion and the Papal Zouaves.
Nachod
This scenario is of more recent vintage: I wrote it in early 2020, just before COVID lockdown struck. Consequently it provided one of our first remote games that April (AAR here), but it hadn't yet made it onto the table for a face-to-face encounter. Crispin was keen to lay it on again. In fact he was the only one of our group this time who had played it first time round (I GM'd then), as we had some different personnel for the reprise, including a new recruit - Philip - whom we only met and roped in 5 minutes before kick-off.
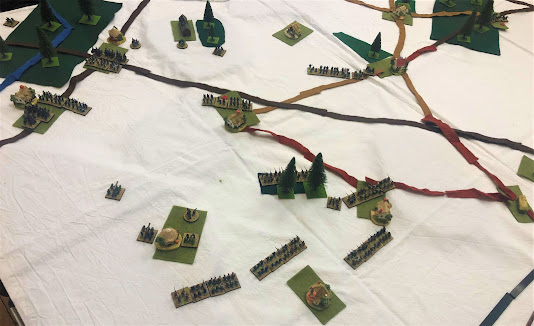
It's a fun battle. The Prussians start with just a small advance guard on table, which has to deploy quickly into suitable positions to hold off advancing swarms of Austrians in increasing numbers until the Prussian main body arrives mid-game. This makes it a game of two halves, as the Austrians have to seize vital ground initially, then fend off the inevitable Prussian counter-attack. It also makes it a good game for a new player such as Philip, who was able to learn the rules while handling just a couple of units at first, then get more to do as more troops marched on.
The Austrians definitely had the rub of the green in the crucial early turns. A combination of dire dice on Philip's part and a careless error on mine, squandering von Wnuck's improvised cavalry brigade, saw the Austrians swiftly occupy the three (out of a possible six) objectives they needed for victory, inflicting heavy losses on our Prussians as they did so.
The tide turned, though. It took us half the game before we caused a single Austrian casualty, but once we got serious numbers on the table, Austrian losses mounted exponentially. Philip particularly remarked on seeing the asymmetry of weapons and doctrine between the two armies play out on the tabletop. In classic BBB fashion, several objectives were in play on the last couple of turns, thus all three results were still possible; but, again in classic BBB fashion, while we Prussians were able to kick the Austrians out of one objective, they comfortably held a second and just clung onto the tiniest toehold in another for a draw.
Given the mostly different players, it was only a refight of a refight for Crispin and me, but we certainly both got value out of it as we were playing different roles. It was also a rollicking seesaw game. It played out somewhat differently from the remote game too: in that, the Austrians steamrollered as far forward as they could and at their highwater mark held five of the six objectives, too many for the Prussians to roll them back from, hence a (suitably Pyrrhic) Austrian win; in this one, Crispin and Dave chose to consolidate once they had the minimum three for a win, but could only hang onto two for a draw.
Reflections
- The only real reason against (or perhaps two sub-reasons), (a) the risk of staleness/lack of novelty, and (b) 'we know what happened', were emphatically dispelled in both games. Both played out differently from their previous incarnations, Loigny radically so.
There turned out to be plenty of reasons in favour of wheeling out the same game again:
- It gives you a chance to try solving the same grand tactical problem with a different plan (which can backfire entertainingly, as the Prussian one did at Loigny)
- You can see the problem from the other side, as Crispin did by playing the Austrians at Nachod (he'd been Prussian in the remote game)
- If you've painted up some exotic unit like the Papal Zouaves that only featured in one or two battles historically, a refight may be the only way to get them on the table again in a historical scenario
- Refights allow exploring different 'what-ifs'. For Loigny, we tried a tweak that changed how the terrain effects were depicted (reducing the defensive value of the villages). Other scenarios offer historical options such as the arrival of troops that didn't quite get there historically, etc.
- Refights are obviously essential for playtesting. Nachod is still in draft. After the first outing, the remote game, I did a second draft that handicapped the Austrians by making them Passive. But we didn't apply that change in the second game, and having seen how that went I think it unnecessary.
- Some scenarios become 'old friends' because they offer enduringly enjoyable tactical challenges; others because they are easy and convenient to set up quickly for a club night. Loigny qualifies on both these counts; Nachod more so on the first (though Crispin had prepared another of his battlemats so actually we were able to just roll it out and set up in 5 minutes); the ones I always recommend as BBB 'training scenarios', Montebello and Langensalza, meet these criteria too.
- What is familiar to some may still be fresh to others. For Crispin, Nachod was a refight wearing a different hat; for me, it was a refight where I got to play rather than umpire; for Mark and Dave it was their first go at the scenario; and for Philip it was his BBB baptism of fire.
Final reflection:
- Saying it myself, I know, but BBB just makes for exciting, fun games - the HQGE. I hadn't played for a few weeks before coming back to these two games in succession. Both were dramatic and exciting in different ways: Nachod a classic ebb-and-flow, will-they-won't-they rollercoaster; Loigny more of an oh-my-god that just got worse and worse for the Germans to the extent that the German players had to laugh at their own misfortunes. The games were as fresh now as when we first started kicking rules ideas around in 2009, and showed why BBB has attracted such a diverse group of players to our corner of the club and remained our staple ruleset for over a decade.
===
Update 2 July 2022: this was another popular post that generated a
good 100 or so comments on various forums. These are the links if you want to
see the full discussion there:
To summarise/paraphrase the negative ones first:
“You can’t actually do a historical refight” or “I don’t like historical refights” or “Is a refight just an exercise in seeing who can roll better dice?”. (I like your cynicism, hammurabi70!) I think this was sufficiently addressed in my previous post on “Bloody Big BATTLES Blog: Reasons NOT to refight historical battles” so I’ll say no more on that here.
“Historical battles are too big for my table”. Hmm: well, that’s why we created BBB, to fit pretty much any battle on a modest 6’x4’ …
“Generally not – there are so many battles to choose from, there’s no need to fight any of them more than once unless you feel like it.” Isn’t that “no but yes”?
“Don’t use dice. As random number generators they are indifferent at best.” A bit left field, John – where did that come from? There’s a discussion to be had there, but probably in a future post rather than this one.
Some scenarios lose their charm, particularly if not balanced or not many tactical choices, or once you’ve worked out the optimal play. Certainly true. Others lose their charm if they rely on some surprise event/element that can’t be repeated. Even more certainly true. Deephorse sums it up well: “Ultimately it’s down to the quality of the scenario”.
“No – each game should push me to paint more figures. That means minimum repetition!” I quite like this one. For me, the primary motivation is the game, but I can sympathise with those for whom the game is secondary to the aesthetic of the collection of armies. Bravo.
As for the positive:
“Yes, if only to play the opposite side.” Several made this point. I might add, if the scenario itself is unbalanced, playing it from both ends evens that out in a way. Or maybe it just gives players two chances to complain that the scenario is biased against them and they couldn’t have won anyway …
That “what if?” question. It’s the main reason for doing a historical game to start with; it still applies to refighting the refights to explore all the options or even see if a plan that failed can succeed with a bit of better luck.
Replaying the same scenario with different rules has value. Certain scenarios can become standard ones for testing rulesets.
Replaying the same scenario with different armies in a different period has value. Fighting Waterloo with the armies from Gettysburg was the example given. I’ve played Blenheim with Napoleonic armies.
Scenarios, historical or otherwise, are a good way to get a game started; replays reduce the (practical and mental) effort to set up.
Several commented from a gamemaster/umpire point of view. Of course if you’ve prepared a game for a convention, for instance, you probably want to run it a couple of times beforehand to test and practise it; and you might want to run the same game several times at one or more conventions, or even just for different groups of players at your club.
Yes, especially if you’ve invested in designing a scenario, creating bespoke terrain, painting specific armies or units for it – you should replay at least a couple of times to justify the effort!
Summing up: the consensus (among those who actually like
to do historical refights at all) was that not every scenario is suitable, and you
wouldn’t want to do the same one again and again forever, but there are so many
good reasons in favour that “yes, of course you should do refights of refights”.
Huge thank yous to everyone who took the trouble to comment – it’s enthusiastic feedback like yours that keeps this blog going.
