Wednesday 24 August 2022

Ramillies yespillies!

(Yes, I know it should be pronounced more like "ra-mee-yee", but I was playing on the British side so I can be wilfully Anglo-Saxon if I want.)

Following on from the success of his Blenheim game back in February, Matt brought us the second of his "Marlborough's Big Four" scenarios: Ramillies (1706), as already previewed on his own "Pushing Tin" blog.

Ramillies was a battle the French should never have fought. They were ensconced behind their system of fortresses in the Low Countries, where the Grand Alliance could hardly touch them, giving them secure possession of Belgium. However, Louis XIV wanted a victory to restore French prestige, so prodded his Marshal Villeroi into an imprudent advance. The two armies met at Ramillies. As at Blenheim, the French adopted a defensive position anchored on three villages behind a marshy stream. However, in this case the French right faced open ground, so most of the French horse massed there. The forces were virtually equal except for a significant Allied superiority in artillery. After initial skirmishes on the flanks, allied probing attacks in the centre and north drew French forces away to their left wing. Marlborough then shifted his weight to launch the decisive attack across the open ground against the French right. The allies broke through, rolled up the French right and routed the enemy army.

Linear warfare! French line at top facing Allied line (red unit markers, with a few orange Dutch ones on the left). Ramillies is the village at centre left, then Offus to the right of it, and Autre-Eglise furthest right. Some French dragoons in Franquenee (bottom left) detained an Allied infantry unit a while. The marshy valley of the Little Geete, dividing the opposing lines, was a challenging obstacle but not an insurmountable one.

So much for the history; on to our game. For the first time I found myself on the same side of the table as our recent recruits, Luke and Ben. While John, Dave W and Bruce were setting up the French army in defence, another new face appeared and introduced himself! Dave nobly gave way so that Dragos could join the game.

Our task was made simpler in that, due to a misunderstanding, the French did not actually occupy Ramillies itself but lined up just beyond it. Consequently, on our first turn, Ben's infantry were able to march in unopposed to seize the village, which they then held against three French counterattacks. Unlike Marlborough, we launched our horse against the French right immediately, while holding back from attacking their left or centre and letting our superior artillery play on their ranks a while.

Although our horse suffered badly, this attack led the French to shift reserves from left to right, rather than right to left as historically. Seeing their left weakened, we then advanced and got a foothold in the northernmost fortified village, Autre-Eglise. Bruce's first line of defenders there counter-attacked but his second line failed to support them. As our troops in Autre-Eglise were superior in both numbers and quality, he was ejected disastrously. Autre-Eglise was emphatically ours, as was Ramillies - sufficient for victory if we could hold them. Although there were still two or three turns to go, by then our horse had finally got the advantage (thanks to some infantry support), while the remaining unengaged French units had been battered by our guns, so our gallant Gallic foes conceded the game.

A few pics below, followed by some reflections on the game.


On the allied right, my infantry guard Foulz. Once the French reserves have departed for the opposite wing and my batteries have pummeled the garrison opposite and set the village on fire, my men will storm across the valley to take Autre-Eglise.

The crucial village of Ramillies on our left-centre. The French had fortified this but neglected to occupy it. Ben's infantry leapt straight in - masking some of his guns, but no matter. To the left, some of our Dutch horse can be seen facing their French counterparts. A swirling and sanguinary cavalry battle ensued there for most of the game. Marlborough himself directs operations from next to the guns.

Slightly posed photo of the endgame on our right. My infantry have taken Autre-Eglise, which is ablaze. My cavalry finally floundered through the marshes to back them up. Spent French infantry in the valley beyond have no prospect of retaking this strongly-held village.

Reflections

Hurrah - yet another new member! Dragos was very happy to have discovered our club, enjoyed himself, and seems set to become another regular. Meanwhile, apparently our near neighbours at the Abingdon club have heard good things about our games and have asked for a demo. Hopefully we can lay something on in October. The groundswell of the BBB bandwagon is snowballing.

Linear warfare: Matt's Marlburian mods capture this nicely, making manoeuvre much more difficult than in standard BBB. When the French found their reserves were in the wrong place, it was suitably hard for them to shift forces to where they were needed and coordinate counterattacks.

Aesthetics and practicality, form and function: Matt's beautifully painted battlemat made the terrain easy to set up and was a pleasure to play on. It was enhanced by nice touches such as his counters for Disruption (a mounted officer trying to rally the troops), Spent (a pile of casualties), Low Ammo (powder barrels or ammo wagons, and of course his illuminated fire and smoke for burning villages.

Guns not firing are guns wasted. Deploying your artillery in the right place is crucial (especially when it is basically immobile C18 artillery). I know all this. Yet I still managed to park one light battery where it was out of range and did not fire a shot all game. I blame the cowardly French for not attacking it.

Matt's Ramillies scenario is in the BBB group files here.

Update 11 April 2023: we fought this again at OWS. Brief report here.

Thursday 18 August 2022

Boer War guinea pigs at Diamond Hill

A rare visit from my mate Anton was the occasion for an even rarer event - me attending OWS on a Sunday (weekends mostly being too few and precious to spend wargaming). For several years, Anton has been gradually compiling a fine set of scenarios for the Second Boer War (1899-1902). He has done a great job of capturing the nature of the very different opposing forces and the distinctive character of the warfare. The resulting games have been excellent. (See for instance these reports of ColensoMagersfontein, Spion Kop and Modder Spruit/Ladysmith.) This time he had us guinea pigs playtesting the penultimate scenario in his collection: Diamond Hill (1900).

The situation is that the war is approaching its end; Pretoria has been taken; Louis Botha's Boers are being pressed back eastwards towards Portuguese East Africa (now Mozambique) and have established a long defensive position on a line of hills. The imperial forces are aiming to breach this line and press on eastward down the road towards Middelburg.

We were able to play this twice in the day, with some substitutions at half-time (Matt leaving to be replaced by Luke and Ben for the second game). We managed to fit in a pub lunch, a couple of post-battle drinks and then a curry, so it was a good day all round.

But what of the game itself? (I hear you ask.) Ah.

All Anton's previous scenarios had been virtually perfectly calibrated straight out of the box. For Diamond Hill we had all the familiar features: Tactical Ineptitude on the imperial side; Skirmishy but Fragile Boers with the advantages of Smokeless Powder and Camouflage (Anton's Boer War special rules) and Entrenchments, cover worth two column shifts on the combat table. All tried and tested, so we expected a balanced game that would be a reasonable recreation of the historical action. Also, we had the New Zealand contingent on table as part of the imperial force; the All Blacks beat the Springboks the previous day, so I took that as a good omen and was confident of imperial victory.

But no! In Game 1 I was on the British side, knew what to expect, and had some idea of the necessary tactics against concealed dug-in Mausers. Yet despite all our best efforts to take on individual Boer positions methodically, bringing up well-orchestrated gun lines to carefully chosen locations ... we were mown down in heaps for little reward. The last surviving unit of my command (I was Hamilton, on the British right) managed to take one objective hill briefly before being counterattacked and wiped out, leaving my artillery isolated and vulnerable and useless. The other two thirds of our army had put in a weighted attack against the Boer right, likewise took a single hill but could progress no further. We were a long way from the 3 objectives for a draw plus exiting two units off the east edge for victory.

We discussed this over a lunchtime pint. It was suggested that allowing the Boers free deployment while constraining the Brits to historical arrival areas was the problem. Anton rejigged it, we reset, Luke and Ben arrived and volunteered to try their luck as the imperials (alongside Mike, who had been on the Boer left against me in Game 1).

Game 2: different imperial deployment, different attack plan, but much the same result. Mike as Hamilton could not even get onto one hill. Ben (as General French) on the British left advanced cautiously, managed to keep his force largely intact, but did not reach an objective. Luke in the centre did take a central hill but at grievous cost. Interestingly, when we Boers reacted by trying to counterattack, that revealed just how vulnerable the Boers were once they left their trenches. Moving across the front of a British gun line, even at long range, a couple of commandos were blown away and the counterattack never happened. But again, the imperial side fell far short of even a draw.

Clearly something wasn't right, so we chewed it over further. Various tweaks were debated: should we get rid of the imperials' Tactical Ineptitude on the basis that this late in the war they had improved? Should we reduce the Boer 2-shift Entrenchments to 1-shift Rifle Pits? Change the victory target to make it easier for the Brits?

The next day I read about the battle and found that there might be a better answer. We are going back to the sources to check that the troop numbers being represented are correct, as the Boers appear to be too resilient. If Anton rewrites it with fewer Boers than we faced on Sunday, that should make it an even fight next playtest ...


People have been asking for photos of Anton's Boers, so here are a few pics of the action. If those don't excite you, scroll past and you'll find the usual few pearls of sage reflection at the end.

Boer riflemen, artillery and generals. 6mm figures by Irregular Miniatures. Painted by Irregular's painting service which unfortunately they no longer provide.

Mounted Boers. Sorry about the fuzzy photo  - camera couldn't decide which rank to focus on.

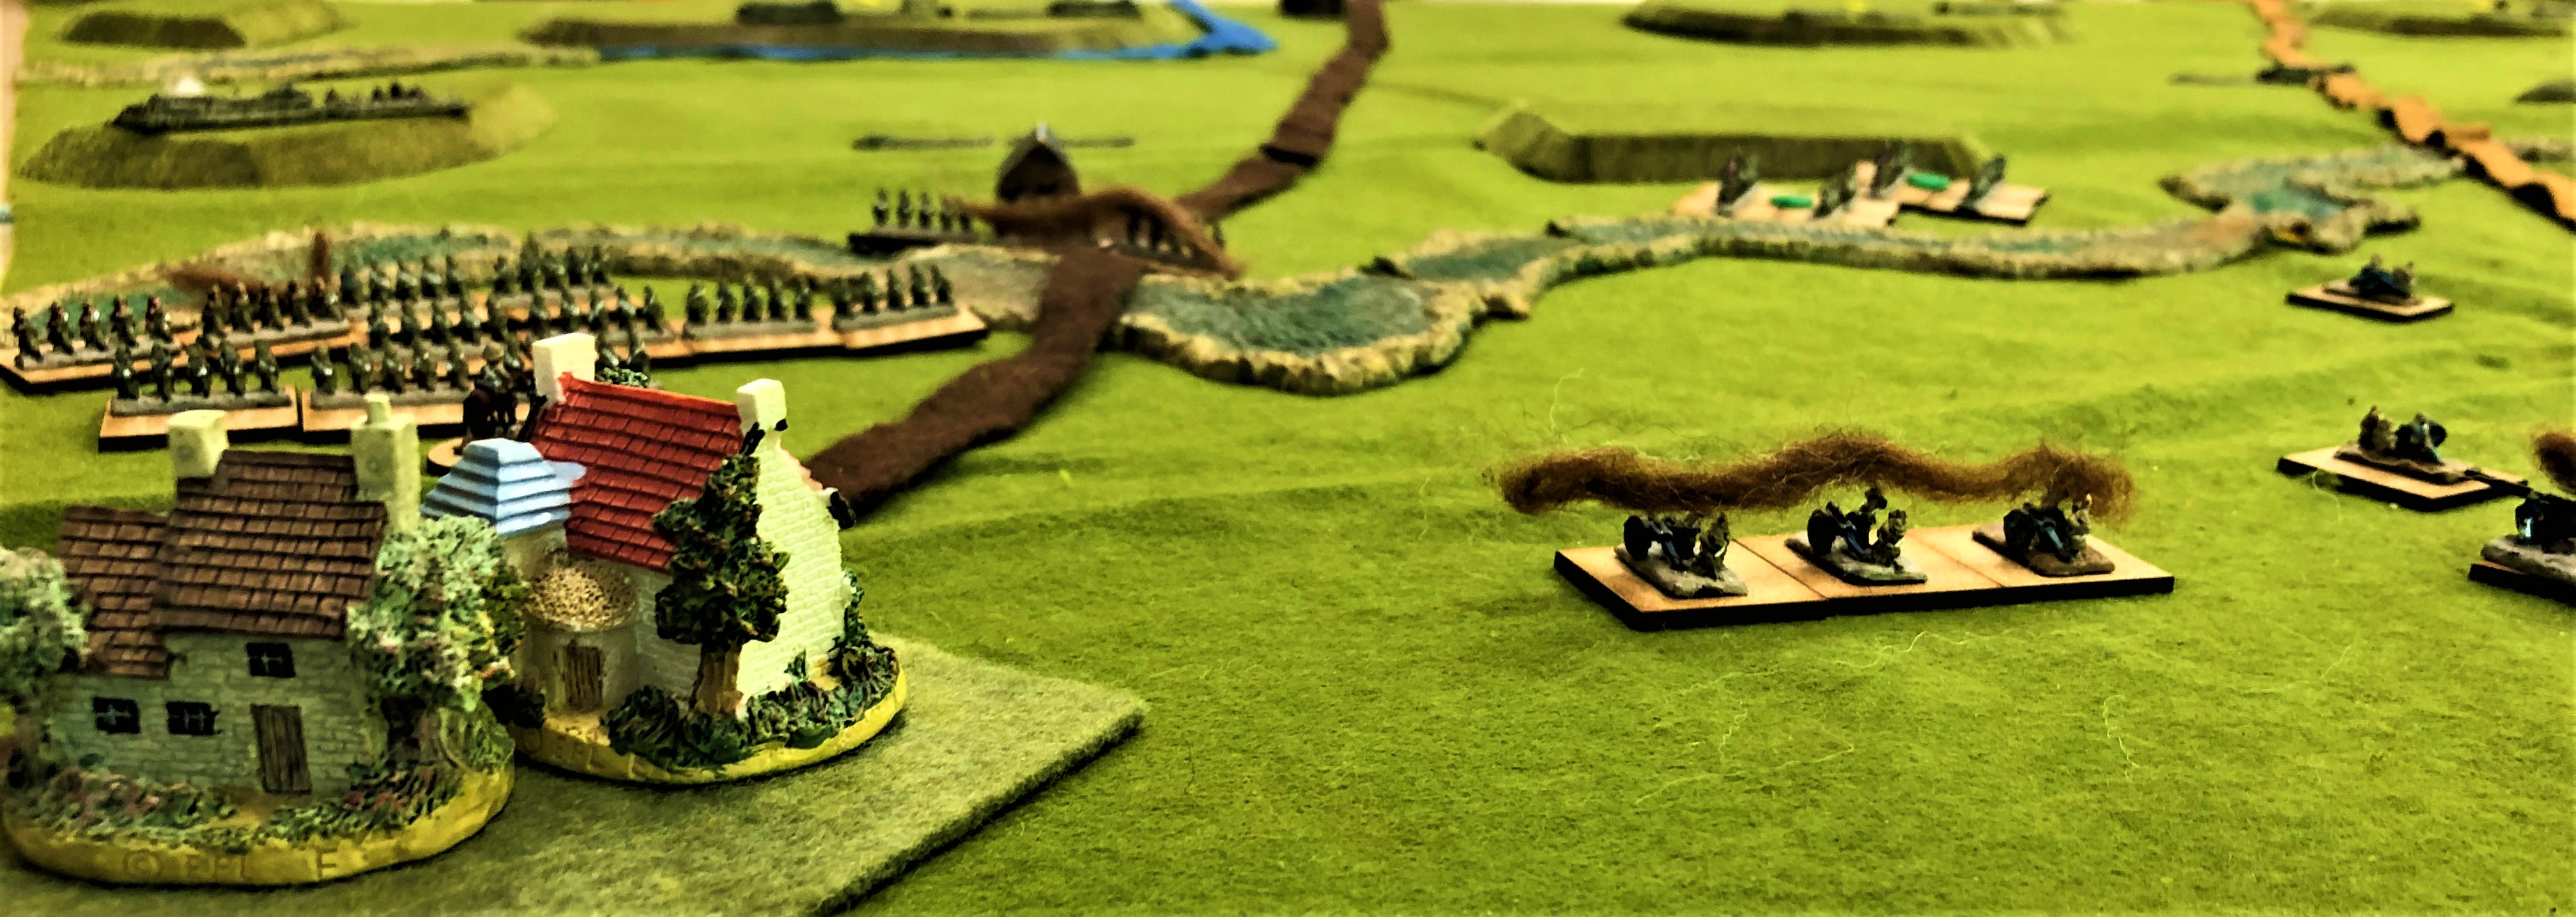
What the Boers are up against: ox-drawn naval gun and bluejackets. 
(Imperial force provided by Mark; Irregular Miniatures again.)

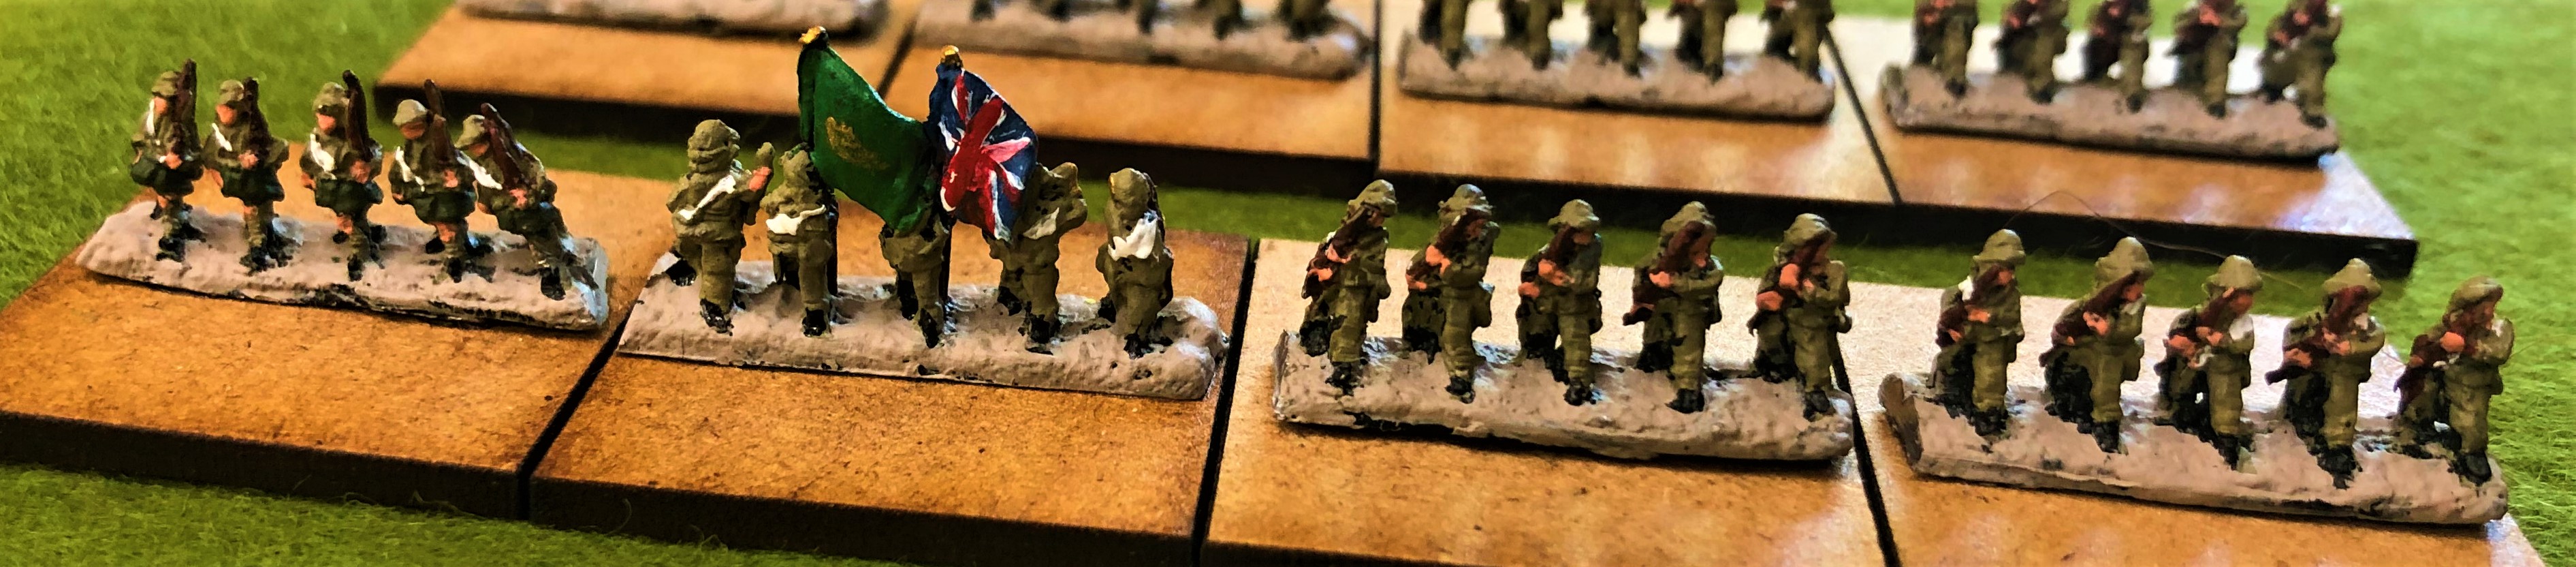
Imperial infantry. The colour party appears to be retreating - premature, or just prudent?

Imperial cavalry. I think Canadians, Australians and New Zealanders were all present at Diamond Hill.

Imperial artillery and infantry including kilted jocks.

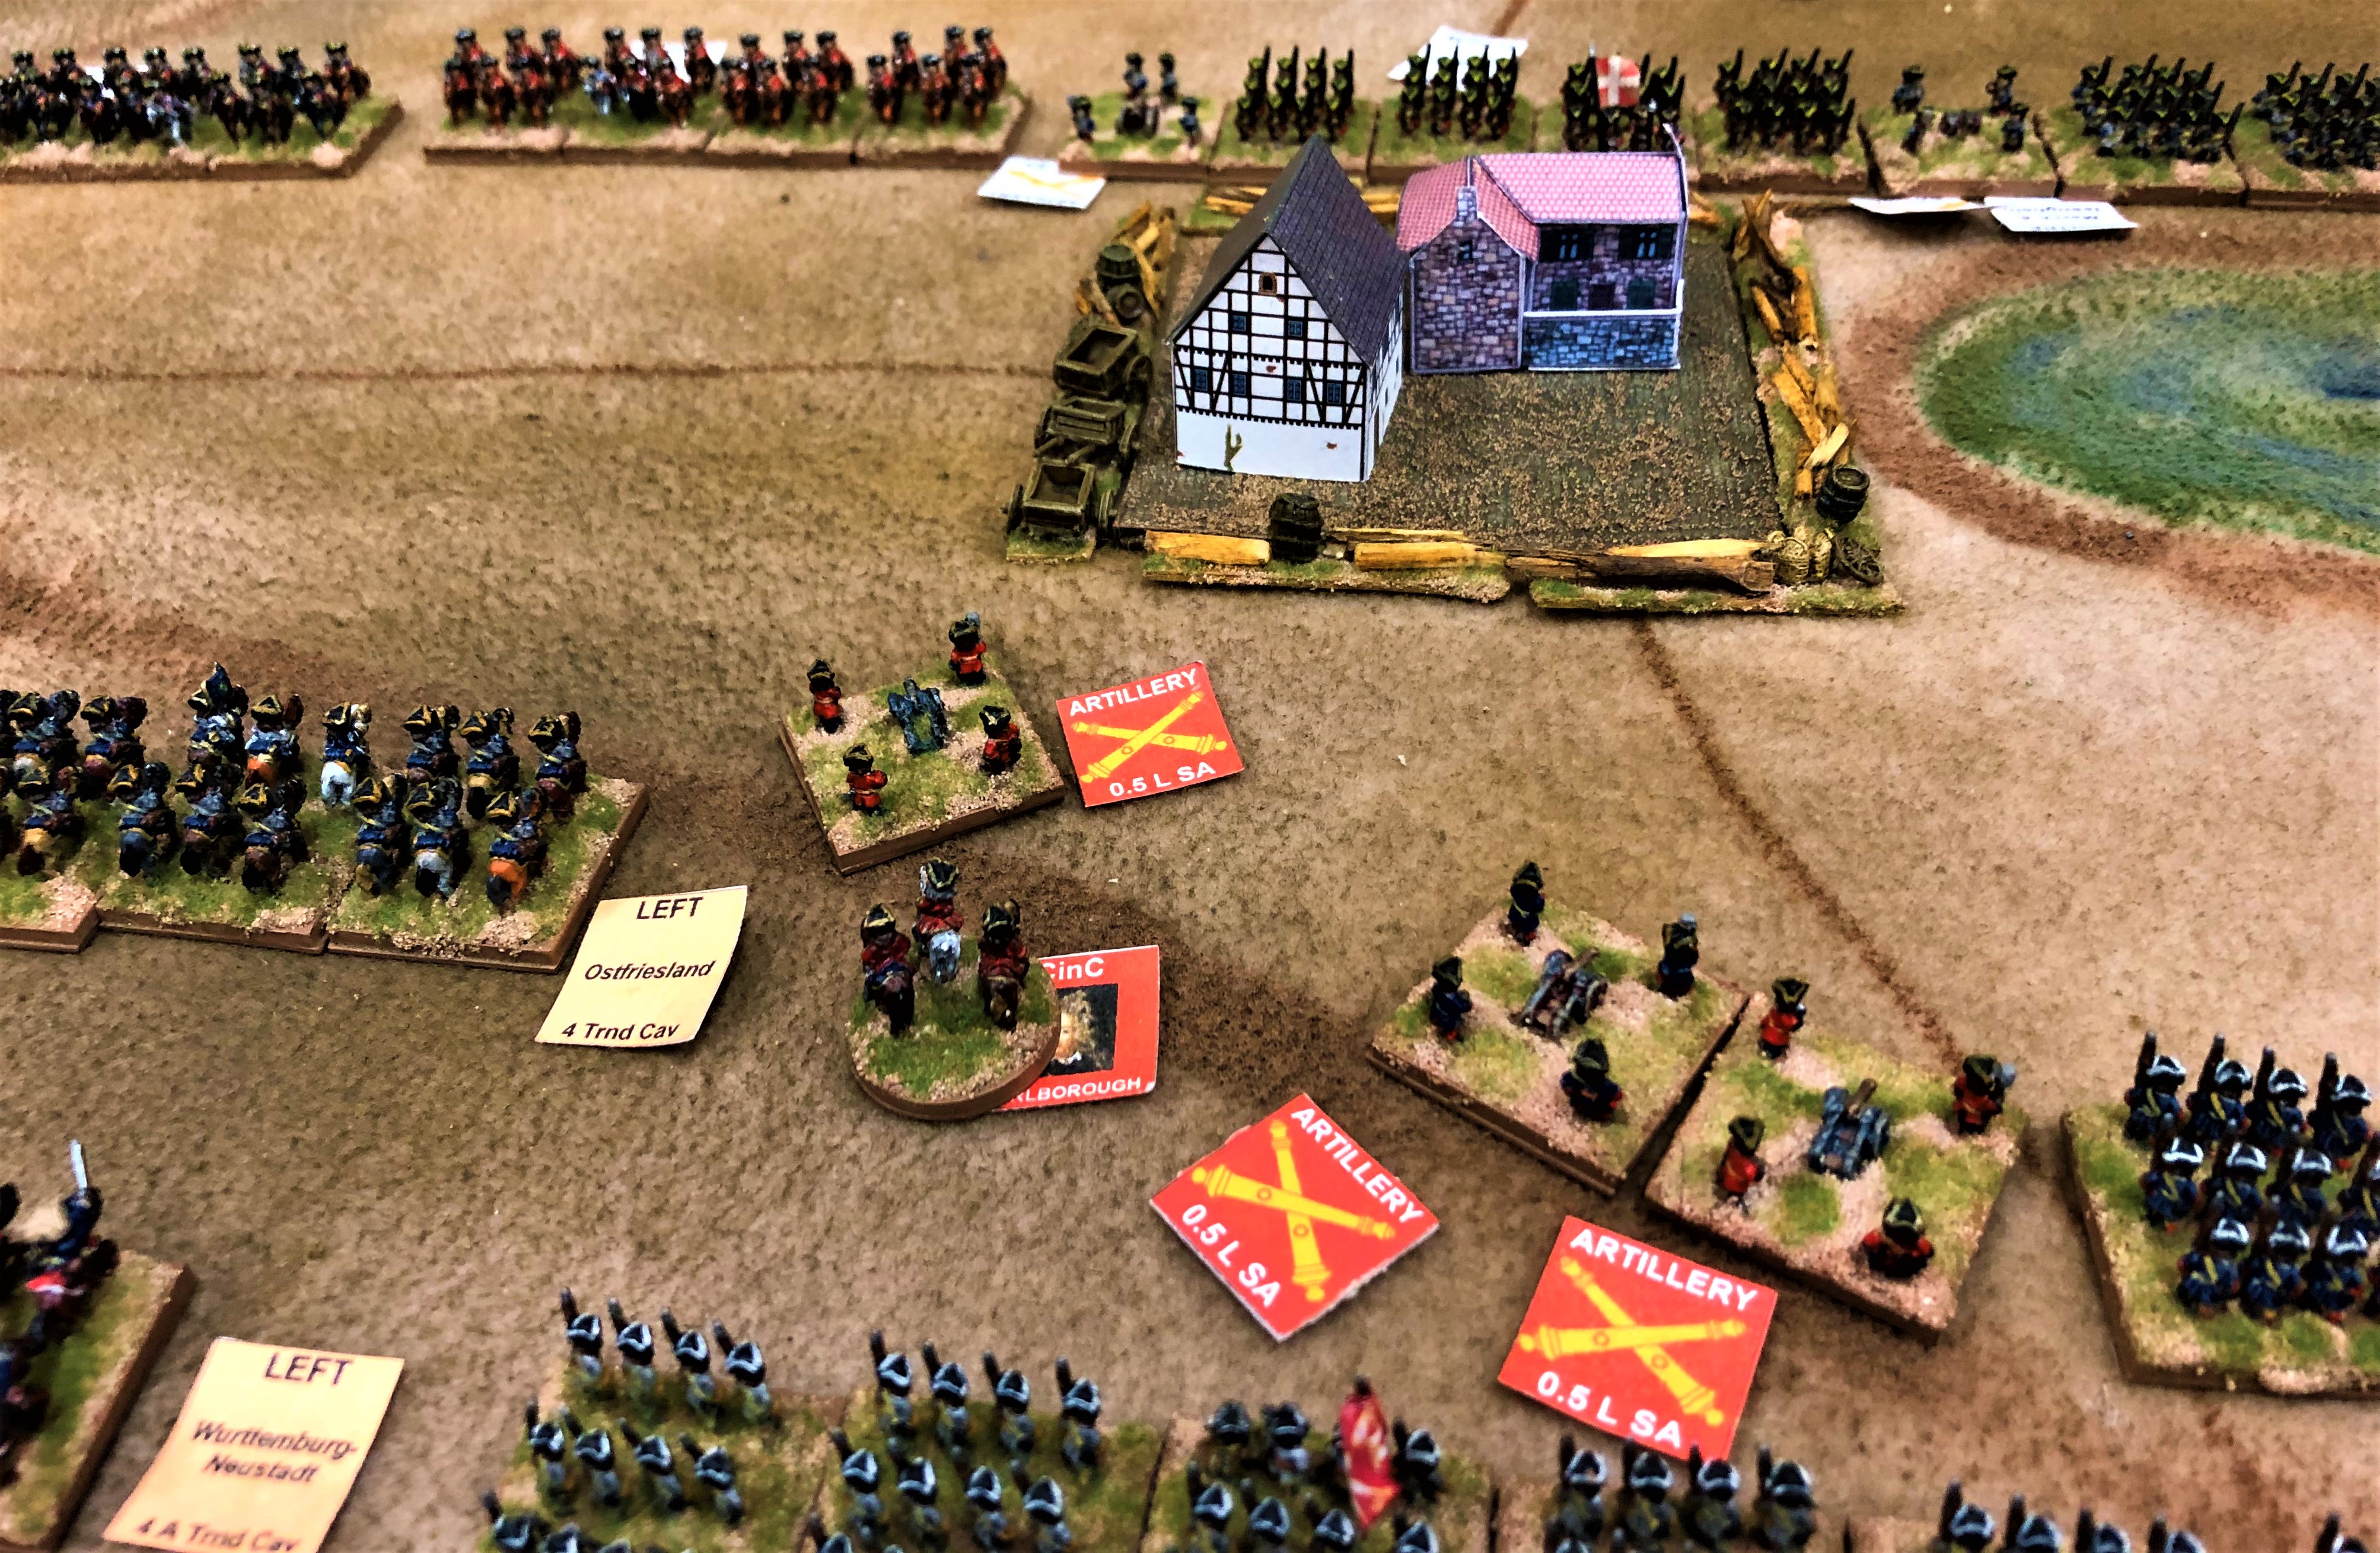
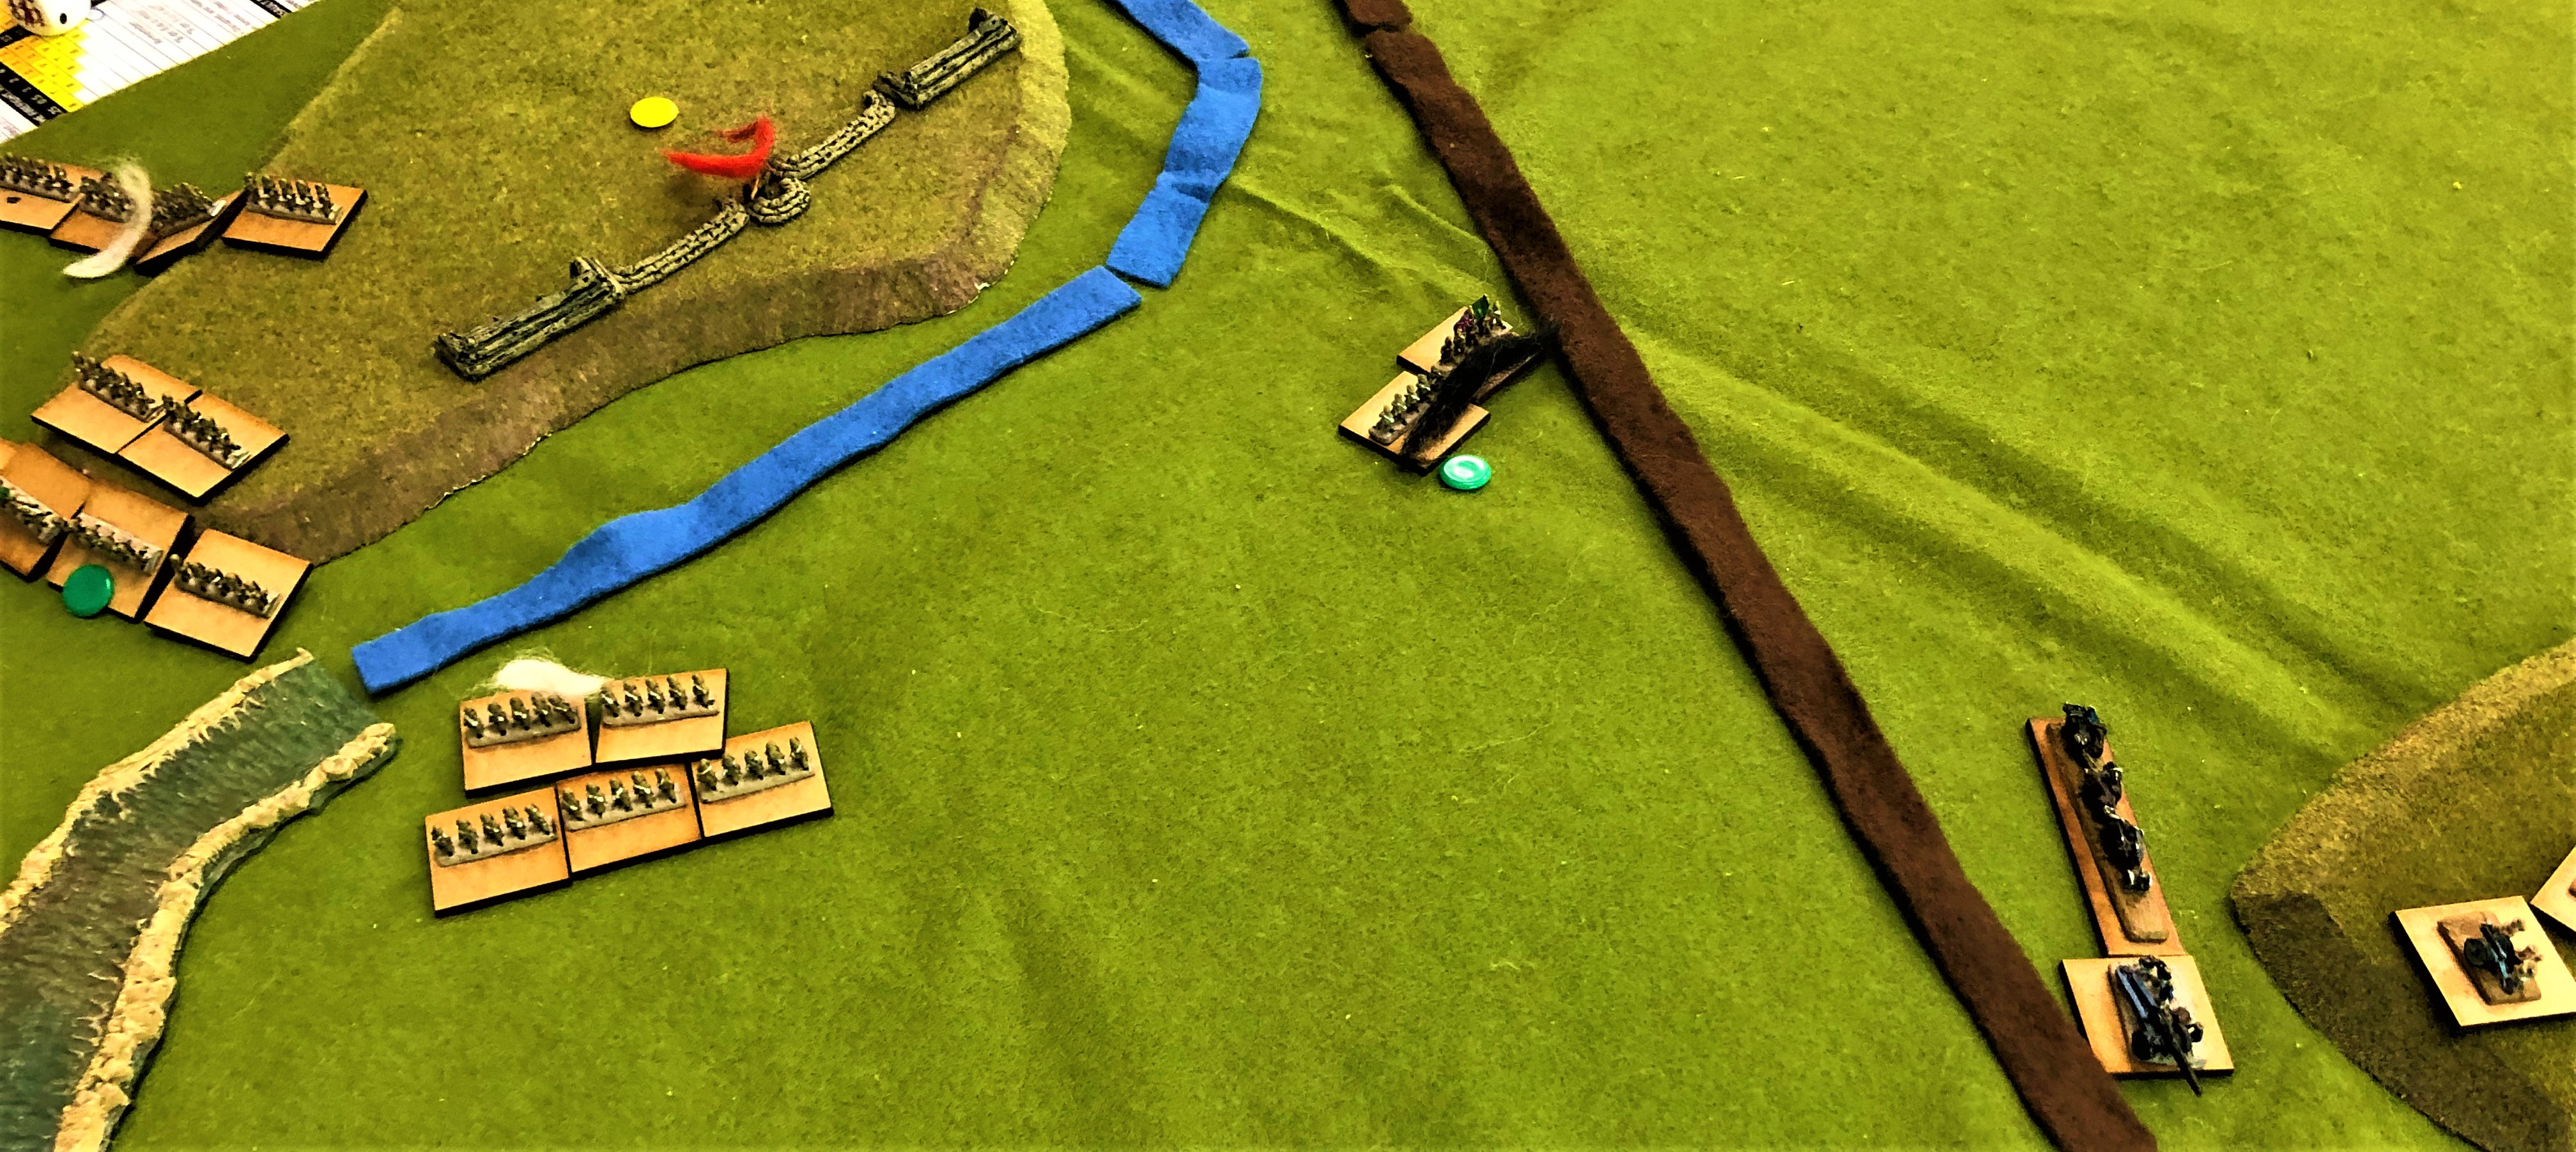
Not so much 'high veldt' as 'green felt': the Diamond Hill battlefield. Brits approach from bottom of pic. Boer entrenchments behind the river protect the hilltop objectives (yellow counters) defending the road to Middelburg. Dark strip is the railway. No Boers visible yet: Boer units start hidden and only deploy when Brits come within 12". Some entrenchments are dummies.

On the British right, Hamilton (later of Gallipoli fame) surveys the empty battlefield. It will soon be empty of Hamilton's troops as well.

French advances on the British left. For the imperials, it's all about the gun line.

Boer's-eye view of Hamilton's advance. Those Irregular Miniatures entrenchments have done good service down the years. Black fluff on British unit indicates spent from heavy casualties. Brown fluff on Boers = low on ammo. Could they by any chance be related?

Hamilton's last unit has evaporated, leaving him to face the Boer counterattack alone in front of his imperilled guns. Red counter denotes temporarily British-held objective, about to fall to the Boers again.

High water mark on the British left, where a lone Boer gun is about to be overrun now that its riflemen have melted away.

Reflections

If there's no room for manoeuvre, there can still be interesting tactical decisions. The Brits faced a continuous line of entrenched Boers, so there weren't any flanks to try to work around. Instead, it became a game of carefully phased and coordinated approach: pick one potential Boer position, move close enough to detect it without getting in range of too many others, move as much firepower up at once as possible, preferably with the guns deployed (but outside rifle range) first. Mastering that art of getting local superiority without dying too quickly was an intriguing challenge.

Likewise for the defender, there were unusual decisions to be made. The Boers are able to fight in their entrenchments as infantry but evade as cavalry. On more than one occasion in the game, the Boer players decided discretion was the better part of valour and had units evade and vacate entrenchments, either to dodge a British charge or simply to avoid being shot at by whatever massed fire the Brits had just moved up. Deciding when to scoot rather than shoot was also an intriguing challenge.

I was a bit disappointed the game turned out so one-sided, particularly for Luke and Ben's sake, as it was quite punishing having to march into the teeth of such deadly fire with so little chance of success. At least they had the consolation of finally dishing out some damage at the end, and they professed themselves happy, so that's OK. If nothing else, they - in fact, all of us - got a healthy reminder of just how much deadlier firepower had become in the half-century between this and the 1866 game they'd fought last week. 

The contrast between this Boer War scenario and last week's Kissingen 1866 battle did illustrate the virtue of a system like BBB (other brands are available!) which covers the whole of the nineteenth century and more, enabling us to play a different war every week and have very different games but without having to learn a whole new ruleset. Though you definitely have to adapt your tactics!

And on that note, we will be leaping two centuries back in time to fight Ramillies next - may have to adapt my tactics a little for that too!

===

And a PS: followed this up with a very different game the following night. My Hungarian friend and co-translator, Dr Péter Bayer, plays a lot of strategy games etc, mostly on PC, but had never tried miniature wargames. I offered to run a remote game for him and Prof Nick Murray in the US. I chose Pákozd, the first scenario in my Hungary 1848 collection, partly because it is smallish and manageable, but mainly because it is full of colourful semi-random (actual historical) events and is a riot to play. So it proved, with the usual medley of Croat Landwehr hiding in the wine cellars, parleys aborting assaults, escaped sheep disrupting proceedings, etc. In classic BBB fashion it all came down to the last few dice on the last turn for an exciting finish. Péter said he loved the layout, the rules and the game. We will do this again. [Update 30 Aug 2022: Péter has done his own very witty write-up here - well worth a read!]

PPS We will be running Pákozd as a display/participation game at the Colours wargames show in Newbury UK on 10 September 2022. Come and see us!

Hungarian right wing at start of Pákozd. National guards in colourful blue or green frock coats backed up by regular troops - former Hungarian line battalions of the Austrian army, still in their white coats.

And the Hungarian left wing: newly formed honvéd battalions and guns among the vineyards, barring the way to Budapest.


Tuesday 16 August 2022

JMH on Clausewitz 1799: "finely translated, annotated, and edited volumes"

Just over a year ago, Professor Nicholas Murray and I published translations of two more volumes of Clausewitz's histories which helped him develop his theories:

"Napoleon Absent, Coalition Ascendant: The 1799 Campaign in Italy and Switzerland, Volume 1"

"The Coalition Crumbles, Napoleon Returns: The 1799 Campaign in Italy and Switzerland, Volume 2"

These have now been very positively reviewed in the Journal of Military History, Vol.86, No.3, July 2022. JMH's reviewer, Professor Frederick C. Schneid, is kind enough to say Nick and I "continue to produce finely translated, annotated and edited volumes of Carl von Clausewitz's military histories" and "For those scholars who study this era, these volumes will be a wonderful addition to their library". He also mentions our previous volume, "Napoleon's 1796 Italian Campaign", describing it as "clear, well-presented, and valuable".

I am very grateful to Professor Schneid for his review.

Tuesday 9 August 2022

Baptism of fire - new players fight Kissingen (1866)

As if one enthusiastic recruit were not enough, Phil's recent arrival at Oxford Wargames Society has now been followed by Luke and Ben, who joined us for the first time this week. For their swearing-in ceremony, Mark laid on another little-known battle from the Austro-Prussian War of 1866: Kissingen.

At the start of the war, Austria had several allies in west and south Germany, notably Hanover, Bavaria and a composite VIII. Federal Corps of various contingents. These attempted to link up but were forestalled by Prussia's swift destruction of the Hanoverian army at Langensalza (one of my favourite 'training scenarios' for BBB). The Bavarians lost some initial skirmishes and fell back to hold the line of the River Saale. In the battle of Kissingen, the Prussians forced the line of the Saale around Kissingen, then held off a Bavarian counterattack on the heights around Winkels, preventing the Bavarians from joining up with VIII. Corps.

Some of Mark's Baccus 6mm Bavarians on the parade ground before deployment. He also has some in the soft cap that they wore in 1866 as well as the Raupenhelm. I told him he needs to get flocking - as we all know, beautifying bases makes a difference! - but of course, time spent flocking is time he can't spend writing more excellent scenarios for us.
 
Our game was a jolly romp and a good introduction for our new players, who took the Prussian side along with David B against me and Phil as the Bavarians. I had a bit-part, commanding the screen along the river. My battalion facing Luke and Ben in Kissingen itself was swiftly crushed by needlegun-armed Prussians stampeding across the bridge. My boys further north in Friedrichshall did rather better, holding up von Manteuffel (David) for several hours, much to his frustration ... until I got cocky and advanced my right flank battalion out of its nice defensive position in an objective village (Hausen) behind a river, only to find itself embarrassed, isolated and annihilated.

The serious action was in the centre and left. Flushed with success, Luke's Prussians pushed forward and found themselves in the killing zone of Phil's guns and longer-ranged rifles. His first regiment learned a hard lesson. But more followed, pressing on into Winkels itself while Ben's troops took two objectives on the heights in the south (our left flank).

As Bavarian reinforcements began arriving in force, the Prussians had a glorious chance to seize the remaining height north of Winkels. Our regiment there had been battered by Prussian fire and its guns driven off. Two Prussian regiments stormed up the hill - and the defenders rolled 12, the 3% chance they needed to halt the assault which would otherwise surely have crushed them.

This was the turning point of the game, after which swelling Bavarian numbers became inexorable. Such are the fortunes of war!

Only one photo of the actual game, sorry - I was too busy yakking:

Those are not islands in the sea - the lighting just makes Mark's cloth look blue instead of green! The little village is Winkels in the centre of the battlefield. The heights either side of it are where the main Bavarian stand took place. Prussians approach from right of pic. Led by the Lippe-Detmold battalion, they have surged onto the further height and are about to expel its Bavarian defenders. The nearer Bavarian regiment has had its artillery silenced (yellow cubes) and is about to be half blown away by massed Prussian guns. The disrupted Prussians in the centre are about to rally to storm this height, only to be thwarted by a last desperate volley from the few remaining Bavarians there.


Reflections

Another fun scenario from Mark's expert pen: a game of two halves in which both sides get to move and attack, the Prussians first surging forward, then having to repel Bavarian counterattacks.

Pay attention to the briefing! I might have done better had I brought my potentially counter-attacking reinforcements on where they were supposed to arrive, rather than two feet more distant from the enemy. It was all there on the scenario handout. Oh well - generals can be careless as well as players.

Exotic units add colour. Two bases of troops on the Prussian side represented the entire Lippe-Detmold contribution to the war, a battalion in nice green uniforms with a fetching red and yellow Lippe flag (glimpsable in the photo above). The pleasure of little aesthetic touches like that is why we game with figures rather just cardboard counters.

There's so much history to enjoy. I knew there was significant action in southern and western Germany in 1866, as covered by Mike Embree's book on those campaigns, 'Too Little, Too Late' (on my to-read list), but playing this game has given me a better sense of what went on.

Great to have new recruits joining with fresh enthusiasm, and to watch their epiphanic joy as they discover just how much fun wargaming can be. All the new men have acquitted themselves very well thus far and are absorbing the ethos of our elite unit.

Friday 5 August 2022

Victory at Mars-la-Tour!

Mars-la-Tour is rightly one of the most famous battles of the Franco-Prussian War. The main French army was trying to retreat to avoid being enveloped and trapped in its fortress at Metz. It was intercepted by a much smaller but far more aggressive force, the lead elements of the German II. Armee. The French attempt to break through failed and they fell back towards Metz. This was followed by another French defeat at Gravelotte two days later, after which the French army was truly bottled up and besieged in Metz. Nearly 200,000 men surrendered two months later.

This is one of the nine FPW scenarios in the BBB rulebook, so it is a very familiar battle to our gang, but it's been a while. We last visited it five years ago, soon after Crispin ran it as one of the showpiece games at BBB Bash Day in 2017. I said on that occasion, "Wargames really don't come more exciting than that" - but this revisit proved me wrong!

 
The battle revolves around the French army's effort to march from Gravelotte (bottom left of pic) through Mars-la-Tour (top right), while Germans keep marching on from the upper left to stop them. This pic shows the situation after a couple of turns. Our French plan was to hurl everything towards MLT as fast as we can, leaving only the Imperial Guard grenadiers to hold Rezonville (centre of pic) until reinforcements arrived. Unfortunately they were overwhelmed by aggressive Germans ...


A couple of turns later and the battle has taken a more conventional shape. Blue lines show the French front, red for the Germans. Rezonville has been retaken and the German attackers there wiped out, Vionville has been captured, and a corps is deploying around MLT (more troops out of shot right of pic). It looks bad for the outnumbered Germans, but more are about to arrive. In particular, note the red arrow top left. Another German division will debouch from there ...


... and will storm into Rezonville! The French division holding it rolled snake eyes and fell back in disorder (out of view), refusing to charge back in on the final turn. Another division right of pic, low on ammo, likewise declines. The Imperial Guard voltigeurs, left of pic, are pinned down by German artillery. Only the chasseurs a cheval will charge in from the right. Can the Germans hang on?


Meanwhile, also on the last turn, three French divisions mount a massed assault on MLT. French artillery provides fire support as they go in. The assault succeeds! The Prussians are in no shape to counterattack. An attempted Prussian counterattack against Vionville also fails, so they can no longer win. Still, if they hold Rezonville, they can claim a draw ...


... but with the final shot of the game, I roll 12. The German brigade in Rezonville evaporates, my cavalry canters in, and victory is ours!


This really was a super-exciting dramatic finish to a see-saw game. Rezonville changed hands four times. French passivity and lack of competent generals made it a race against the clock to reach and take MLT. On the final turn, three of the four objectives were contested; all three results were possible, it was still a German victory when the turn began, but the French took and held enough to snatch a win.


Reflections

This scenario format - a fixed number of turns with victory being decided on objectives held, and the possible results being Win/Draw/Lose - so often makes for exciting finishes. This one was breathtakingly so. It's definitely better than a binary Win/Lose, and I think it's better than incremental casualty-counting or army break-points too. (Per my Reflection on victory conditions.)

Replay value is something I reflected on a few weeks ago. From bitter experience, I had some idea what we on the French side needed to do to give ourselves a chance. As it happened, our plan worked. Now I'd like to play it yet again, this time as the Germans, to see how to defeat that 'optimal' French plan ...

The march of technology: the previous few weeks had seen the Prussian needlegun dominating Austrian opponents in 1866 games. Mars-la-Tour pitted the needlegun against the chassepot and showed vividly how the game changes when the technology changes - some players particularly enjoyed seeing the Prussian infantry having to take it instead of dishing it out.

The dice can tell a story. In this scenario the French command and control is heavily handicapped, so our units frequently failed to move. Often we were able to rationalise this by saying, 'oh, Bazaine is over there loading a gun instead of issuing orders', or, 'oh, they've seen that Prussian division appear on their left', or 'oh, doctrine dictates they'll settle down into a firing line rather than pressing forward'. On the German side it would be, 'I don't like the sound of this Death Ride ...'

It's such a pleasure just to turn up and play. There have been times where if I wanted a game I had to run it. These days at OWS I am spoiled: we have people keen to umpire, keen to write scenarios and run them, keen to get their terrain and armies on the table. All I have to do is arrive and be entertained. Brilliant!