Wednesday, 19 March 2025

My 2025 gamefest

I had a real treat earlier this month: a 10-day holiday in the US gaming it up with a great group of friends. Such a fantastic time, I'm going to record it briefly here, primarily for my own benefit, to look back on happily in years to come. If you enjoy it too, my gracious reader, all the better.

The trip kicked off with us visiting the Cold Wars wargames convention in Gettysburg:


Pretty busy and well attended, considering the con was planned relatively late. Some nice games on show and a chance to catch up with a few guys I'd not seen in a while.

We followed that up with a couple of hours touring some of the Gettysburg battlefield: Seminary Ridge, Little Round Top, the highwater mark. You can't beat walking the actual ground for understanding a battle.


Then it was back to SkirmishCampaigns HQ for a wonderful week+. Because we had the luxury of time, we paced ourselves sensibly. Most days we just played one high-quality game at a leisurely pace so we could appreciate it to the full. That would be followed by a civilised dinner (including Glenda's famous military history quiz one evening), then a drinks and a movie and more drinks (but not too many).

The roster of games played included:

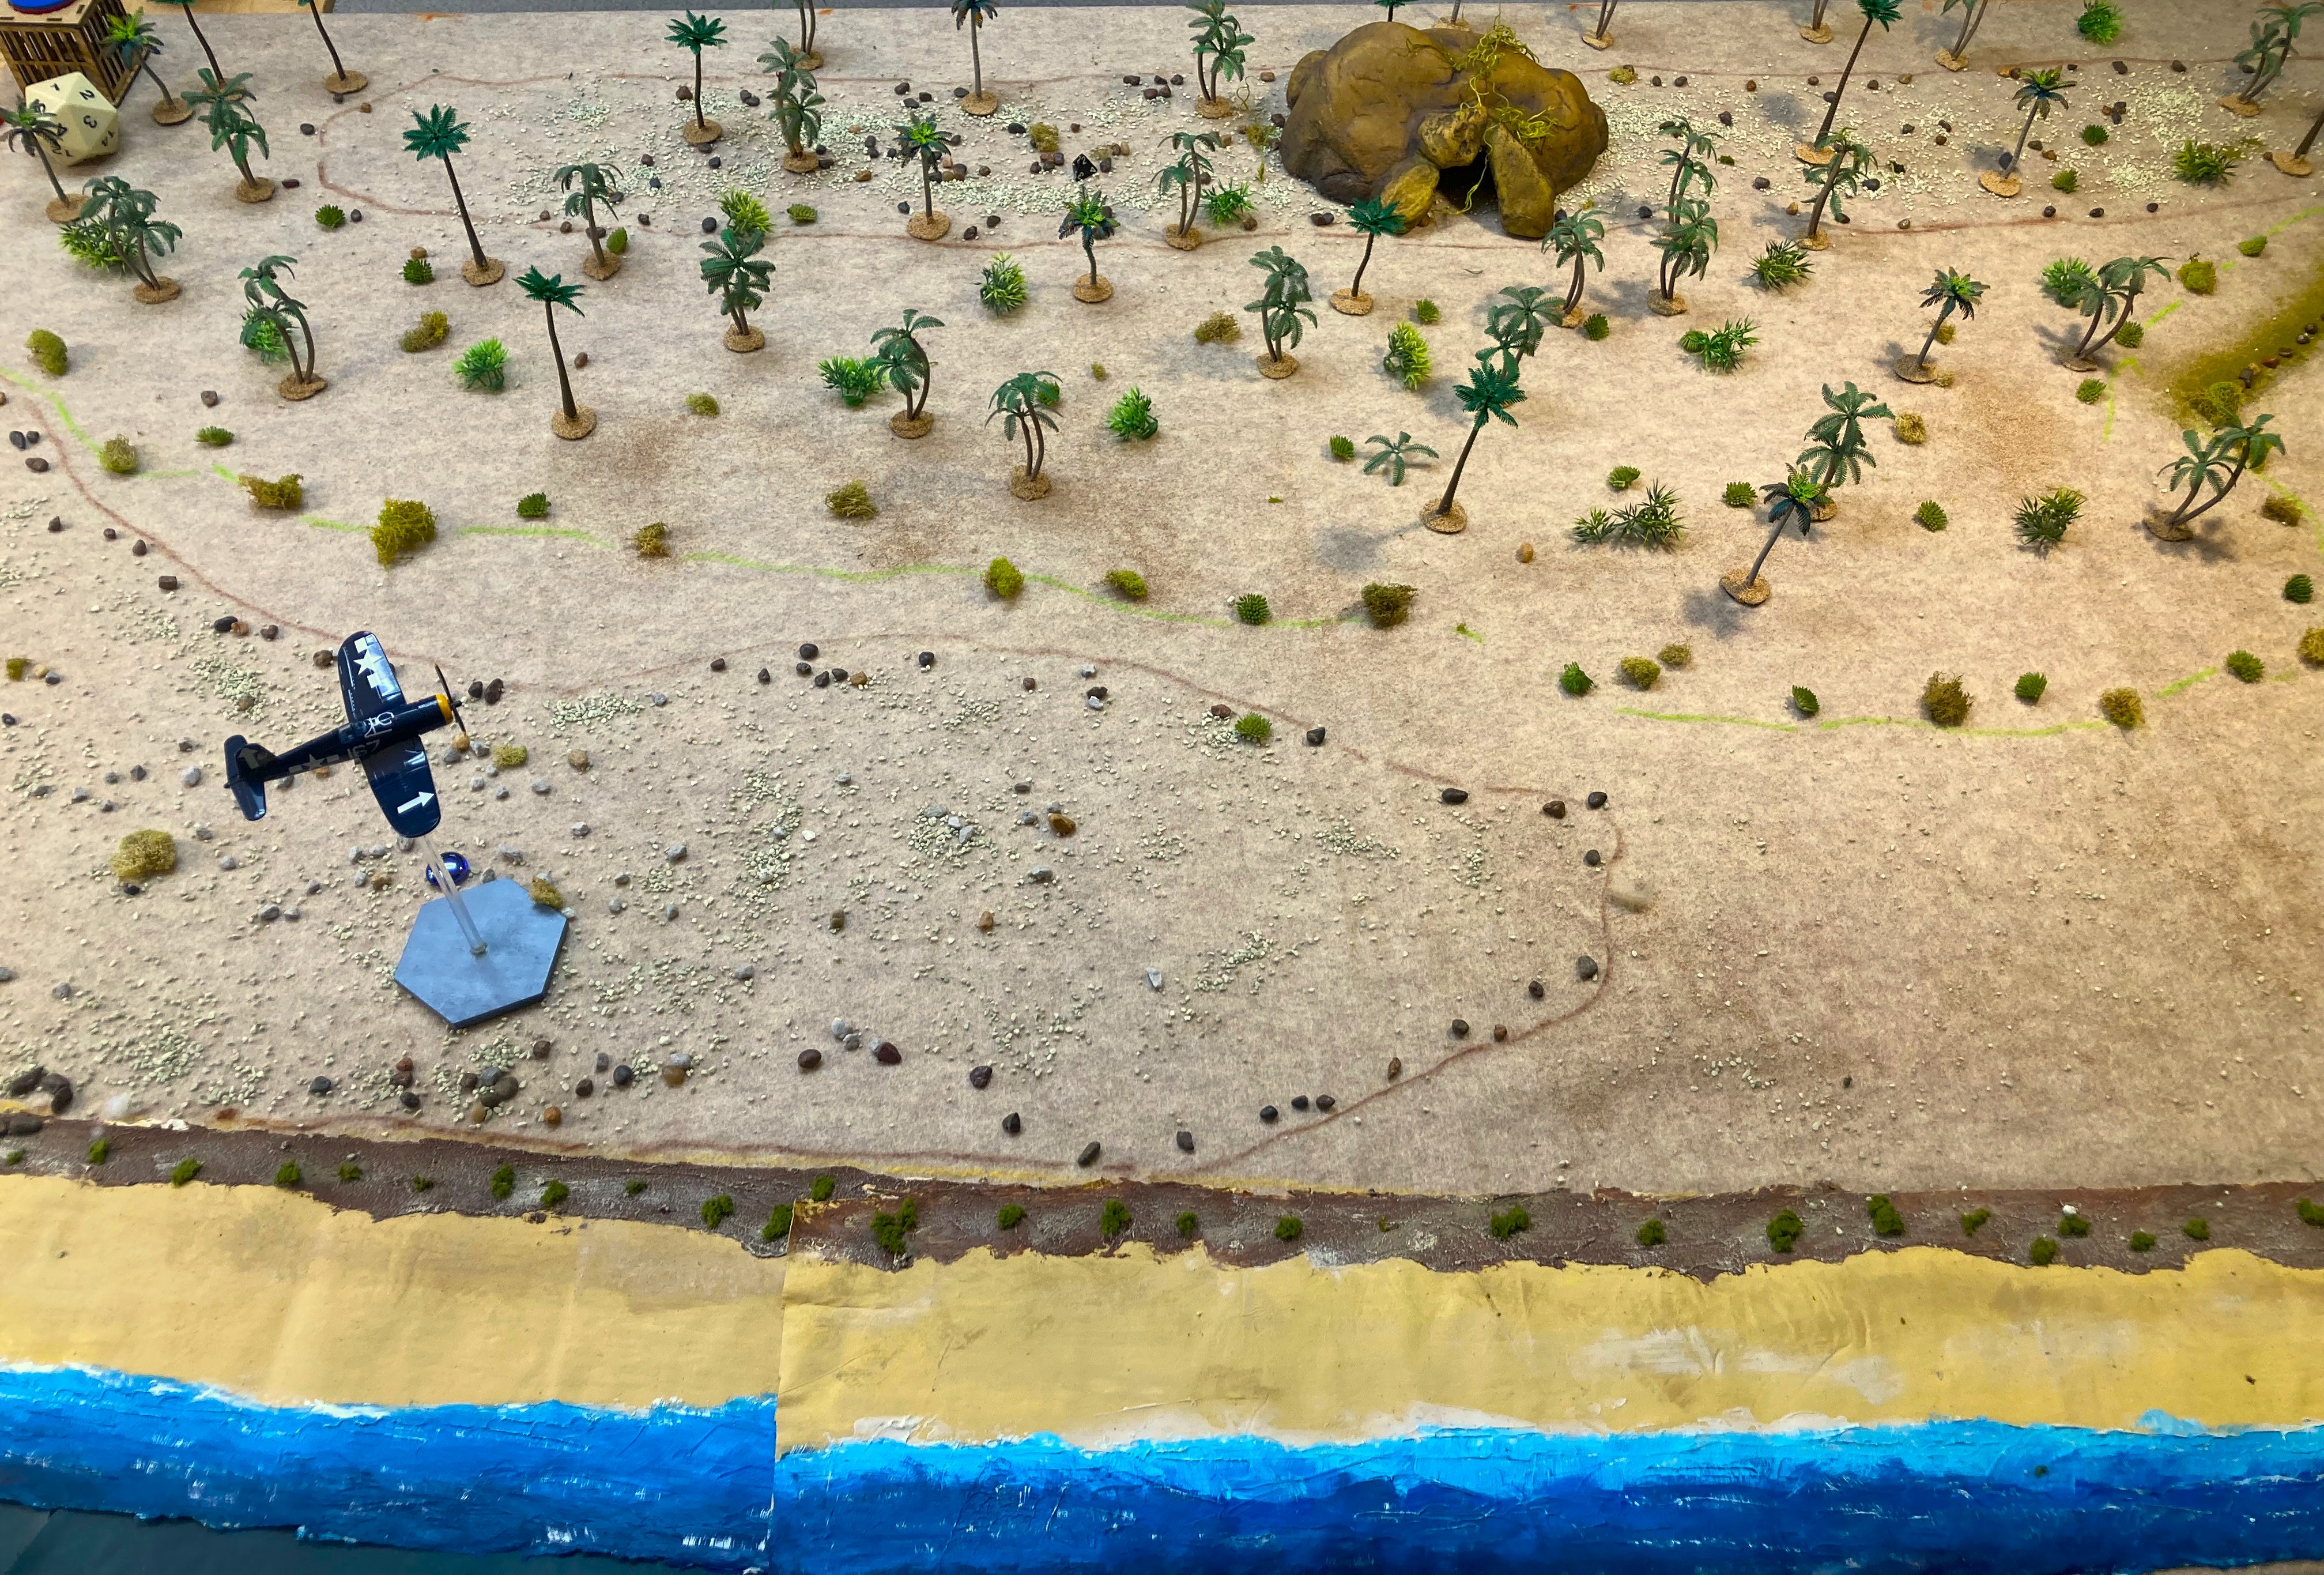
- WWII: Peleliu. Pacific scenario by Rob, using the Arc of Fire 2 rules that he and Scott have been developing (with some input from me). We fought this twice (one Jap win, one US).

- AWI: Freeman's Farm. Scenario by Scott using his mods for battalion-scale BBB.

- AWI: Lexington & Concord. Scenario by Rob (adapted from CWG) using Scott's mods. We played this twice - both games were tied!

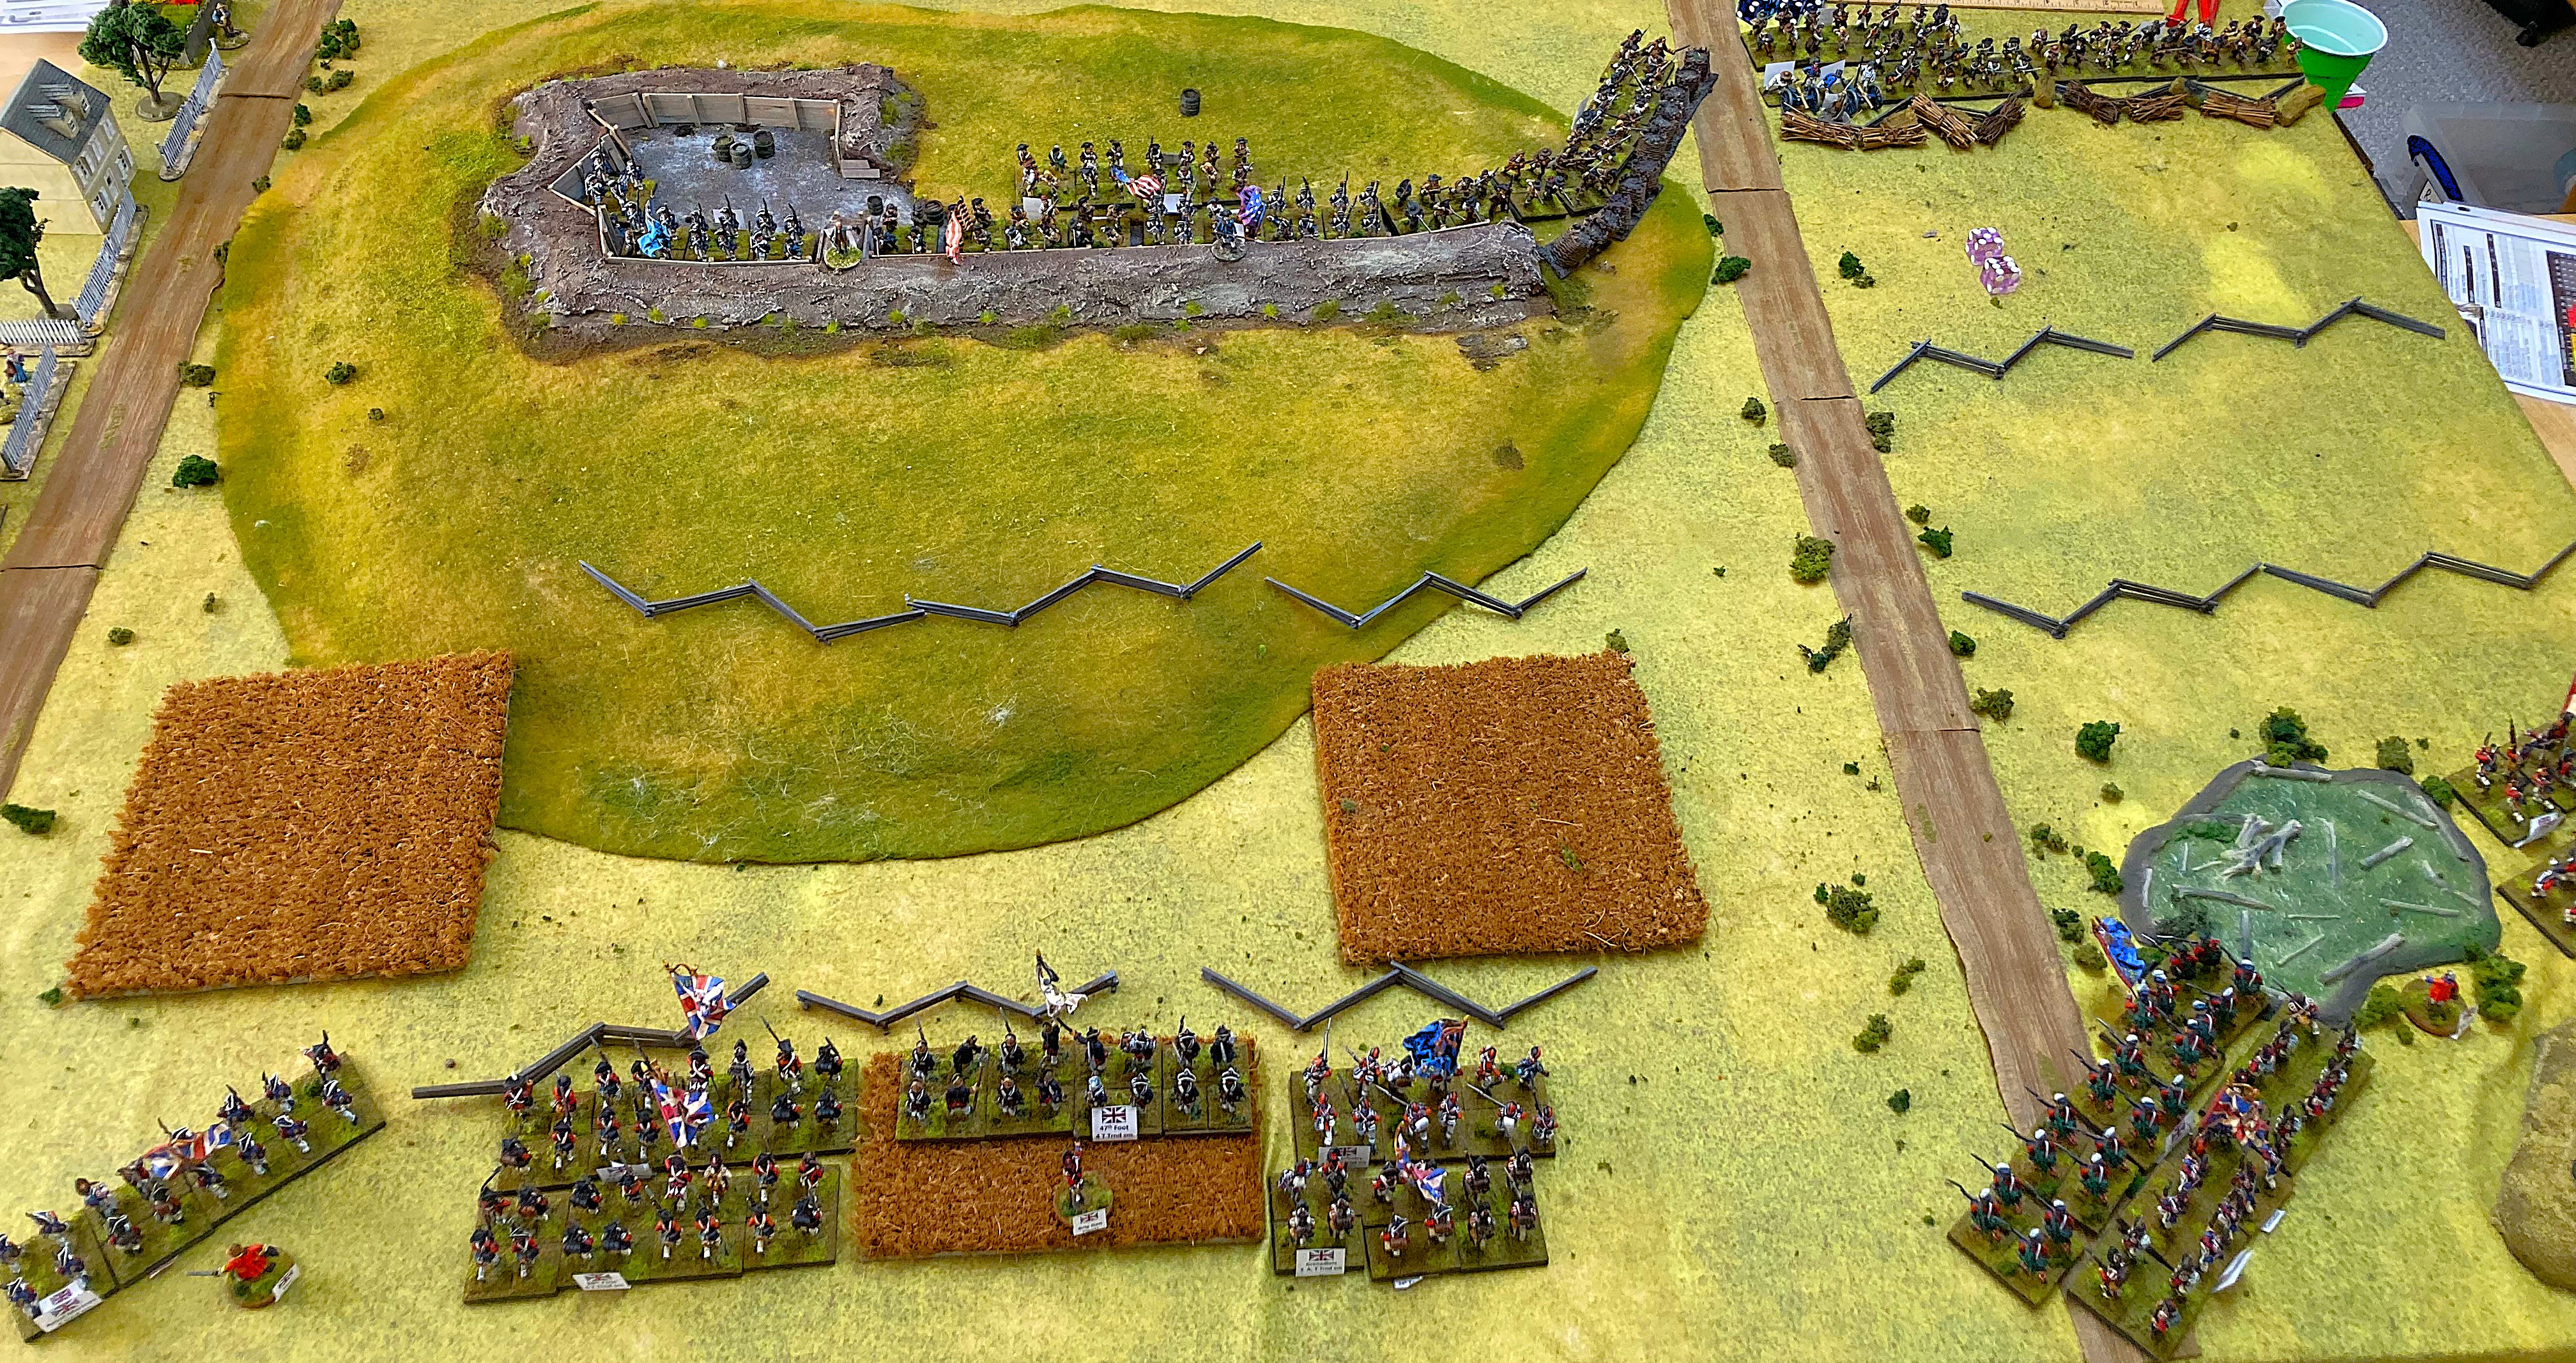
- AWI: Bunker Hill. Scenario by Rob. Fought this one three times, with a different British plan of attack each time and some tweaks along the way. One US victory, one draw, one British win.

- WWII air: "When Pigs Fly". Italians vs Brits over Egypt. Check Your Six! rules. Scenario from CB Stevens's Falcon of the Duce campaign scenario book.

- WWII: The Death of Wittmann. Scenario by Sean, written for Fireball Forward, adapted for AOF2. We played this three times with some tweaks. First time, the Brits sprang their ambush too early and got wiped out. Second time, the Germans walked clumsily into a better-timed ambush and got wiped out. Third time, Germans used sensible reconnaissance and were able to fight through for a win.

- ACW: The Seven Days. My BBB scenario. Initial Confederate attack was devastating, but Nick managed to rally the Union and hold the line.

20 or so photos of the action:

Rob's lovely layout for Peleliu.


Marines hit the beach at Peleliu. 15mm figures painted by Rob.

K Company takes on the Japanese first line of defence.

Magnificent centerpiece: the main Japanese bunker.

Luckily, the USMC has flamethrowers! (Unluckily, mine did virtually no damage all game.)

Amtraks come to grief, easy prey for 47mm.

Morgan's Rifles at Freeman's Farm.

The Freeman's Farm battlefield.

Intense fighting at Freeman's Farm. Scott's 28mm figures.

British grenadiers at Freeman's Farm.

Bunker Hill. Terrain by Rob.

American militia await the British assault. Rob's 28mm figures.

The British are coming!

My layout for the Seven Days. This represents something like 15 miles x 10. Malvern Hill top left corner; Chickahominy river running through the middle. Confederates start from the top edge, with Jackson arriving from the righthand edge.

The Death of Wittmann: successful British ambush.

Not this time! The Panzerkeil escapes off the north board edge. Troops and terrain by Sean.

The Seven Days: Union line behind Beaver Dam Creek, in front of Gaines Mill.

Tough Union line in front of Fair Oaks.

Confederates approach, undaunted. Scott's 15mm figures.

Union right is driven back (top right), so McClellan counterattacks in the center directly towards Richmond (top left).

Game end: The Union holds the line north of White Oak Creek. Artillery protects the Glendale objective.

Impossible for these few words and pictures to convey just what a brilliant trip this was. Must do it again!


Changing history at 2nd Bull Run (1862)

Matt's current work-in-progress, both physically and intellectually, is the ACW Battle of 2nd Bull Run (aka 2nd Manassas). He rolled out his half-finished battlemat for us to playtest his scenario. Nick O and I took the part of the Rebs; Matt teamed up with Mark to save the Union.

The History: Having defeated McClellan on the Peninsula in his Seven Days campaign (which we played in January - report here), Lee launched his Confederate Army of Northern Virginia north towards Washington, hoping to destroy Pope's Union Army of Virginia before McClellan's redeployed Army of the Potomac could intervene.

Lee's Left Wing led the way, commanded by Jackson. On 28 August, Jackson set upon a US column at Brawner's Farm, just west of Groveton. This attracted the attention of Pope, who thought he had a chance to destroy Jackson's force, so launched a full attack on the 29th. In his strong position on Stony Ridge, with an unfinished railroad cutting providing an earthwork to cover his front, Jackson fended off Pope until the Right Wing under Longstreet arrived on his right around noon. Pope continued to launch a series of attacks on Jackson through the afternoon, all of which were repelled; his intended main blow by Porter against Jackson's right resulted only in an inconclusive clash with one of Longstreet's divisions. So ended the 29th.

On the 30th, having overestimated his success and Confederate losses, misinterpreted Confederate tactical withdrawals, and therefore underestimated Confederate strength and determination, Pope unwisely resolved to attack again. After a morning spent in reconnaissance and redeployment, around noon he attacked Jackson's right - effectively the Confederate centre - with his own left wing. This attack was bloodily repulsed. The Union army's left was then exposed to Longstreet's ensuing counterattack. As the Union forces reeled, Jackson too went on the attack. However, he was slow to do so, giving Pope enough time to form a line across Henry House Hill and cover an eventual orderly withdrawal.

Hmm, that was a longer exposition than I intended. To describe how the game went, let's plunge straight into the 10 captioned photos that illustrate it. (Some Reflections follow.)

My cameraphone doesn't do justice to Matt's artwork. What I'm trying to show you here is the striped trousers he's painted on these 6mm "Wheat's Tigers" Lousiana zouaves!

The battlefield. The mottled paper cutouts are hills, not woods. Woods are the green outlines with trees on them. (As I said, this is a work in progress. The finished product will look like the other lovely layouts on Matt's 'Pushing Tin' blog.) The big hill on the left is Stony Ridge, with the railway cutting in front of it. Groveton is the small town in the centre. US will deploy in the top half of the photo; Confederates in the bottom half. 

I commanded the Confederate left, shown here lining the railroad cutting. You can see I have already pushed two divisions forward into the woods on the left, seeking to hit the flank of the Union line top of pic. This is because my assessment of the situation was that, rather than waiting for the Union to make suicidal attacks, we Rebs needed to attack immediately to smash the outnumbered Union forces on-table initially before their substantial reinforcements could arrive to rescue them. Unfortunately, Mark had reached the same conclusion and took advantage of the very free deployment allowed by the scenario to form a solid defensive line near the back of the table to buy time. This entailed him sacrificing the Grovetown objective temporarily, but of course (a) he didn't need it to win and (b) there would be plenty of time to retake it once he had all his army available.


Meanwhile, on our right, Nick brought up most of Longstreet's corps. Nick doesn't play BBB very often, so didn't take full advantage of the roads and our advance here wasn't as swift as it might have been.

A couple of turns later on our left. I have pushed a third division forward but my left hook has been slow to emerge from the woods. Matt has responded by extending his right somewhat (top left of pic), while sending a couple of divisions of his own, including Berdan's sharpshooters, to test my position in the cutting. At least I have managed to seize Groveton (right edge) and flank them.

On the next turn, Matt tried to storm the cutting but was repulsed. I launched a counter-assault of my own to take advantage of his temporary discomfiture, plus two more assaults (finally) with Jackson's and Ewell's divisions top left. Matt blithely dismissed all these with firing rolls of 9, 10 and 11. Was that the highwater mark of the Confederacy for this game? Read on ...


Meanwhile, Mark chose to march up his reinforcements swiftly on the Union left, obliging JEB Stuart's cavalry to scamper back and aborting Nick's intended right hook. See the blue-labelled unit top left? That furthest-forward Union division presented Nick with an opportunity to isolate and smash it before its friends could help. He duly charged - and Mark duly rolled 11, managing not only to repel Nick's charge with heavy loss but also to leave the chargers hanging, awaiting the Union left's onslaught. The Union then wiped out one of Nick's divisions.

That pretty much sums up the action on Day 1 (29 Aug), apart from a couple more Union divisions showing up late in the day to seize Sudley's Ford on our extreme left and threaten Stony Ridge, where we deployed Anderson's division when it arrived during the ensuing night. 

Now we're about halfway through Day 2, still looking at the Confederate right. Nick managed to form a thin grey line in front of Stuart Hill (objective flag on bottom edge of pic), but he was facing a fat blue one that was getting round his right flank (see the bad guys in the woods upper right). He put up a valiant fight but by now the arithmetic was already inexorable. He was steadily driven back and back until Stuart Hill fell on the last turn.

We could still deny the Union victory if we held Groveton and took Henry Hill, in their right rear. We were in with a chance of doing so. How did that go?

Here's my own thin grey line in the centre of the battlefield around Groveton: good troops, in some cover, but too few of them. The diminished 3-base unit in the woods to the left of Groveton was overrun by two Union divisions upper left; our guns were driven off by fire; then the two divisions upper right stormed Groveton itself.

This is a view from a different angle, from the top of Henry House Hill. The main battle lines are off the lefthand edge. The three units top of pic are from Jackson's and Ewell's divisions, the troops I'd sent on my initial left hook. These had finally smashed the US right-flank guard division. The Henry House Hill objective lay before them, naked save for one battery that we could surely drive off with rifle fire. Onward!

Unfortunately, on the next US move, the three nearest US units all rolled the full-move results they needed to execute a smart about-face, cross the streams or woods in their way, and form up with the battery. My gallant men tried three times to storm the hill but the odds were too great. Maybe that was our highwater mark here. It was certainly every bit as bloody, desperate, and ultimately futile as Pickett's charge.

Happily, only little lead men perished (and will be resurrected on Sunday when we present Gettysburg at the Overlord show in Abingdon). Many thanks to Matt for creating the scenario and laying on the game; congratulations to him and Mark on a sound plan well executed and a deserved victory; and medal of honor to my comrade Nick for being indomitable in the face of adversity - I could see the writing on the wall and was ready to surrender by Turn 7, but Nick gamely said we should carry on for the full 10. Bravo!


Reflections

Players and Plans Matter. This was the third time Matt had run this scenario. He said the other games had produced crushing Confederate victories. His report on his previous playtest, with different players, is here. In that one, the US commander basically followed Pope's script, deploying forward and bashing his head repeatedly against the Confederate defences until he lost. In our game, Mark made no such mistake and had a much better plan, which worked. As for how it played out on-table, the mismatch of experience and expertise between Mark (our canniest player) and Nick (who only plays occasionally) didn't help the Confederate cause.

Victory Conditions Matter. This is a tricky battle to recreate, because it is difficult to replicate Pope's misapprehensions about his supposed numerical superiority and therefore to encourage the Union side to attack as they did historically. On the one hand, you don't want to force players to repeat dumb actions; on the other, if the Union can just sit back and wait to mass superior force, is it really Second Bull Run? Maybe we need to build in some incentive for the Union to try to hurt Jackson early on, be it objectives that only count on Day 1, or some more variability in Confederate deployment (maybe Longstreet gets to turn up at X distance from the Union, rather than having to arrive from the table edge?). This needs further thought.

Dice Matter. It's too easy to blame the dice when the truth is we were beaten primarily because of a good Union plan. I'm sure they evened out over the course of the game (I enjoyed an unlikely victory in Matt's first assault when I rolled a 6 to his 1; he did exactly the same to me later). But those four big US shooting rolls on Turn 3 or so absolutely stymied any initial advantage we had and had significant ramifications. Fortunes of war.

Player Morale. I don't care about winning - it's just losing I can't stand. I could see from quite early on that it was unlikely to go well for us; from halfway, it was obviously a case of fighting to salvage a draw, rather than any chance of victory; and a couple of turns later, I felt we were just going through the motions, performing the last rites. My morale definitely dipped and I was ready to throw in the towel. But even though Nick was in an even worse situation on his wing than I was on mine, he was determined to fight on, put up a spirited defence to the last, and almost managed to hang on. Never say die!

Wednesday, 26 February 2025

A Taiping battle: 2nd Hukou (1860)

A mere eight years ago, I invested in a four-volume work in Chinese: a military history of that immense yet unknown conflict, the Taiping Rebellion. (As I recorded at the time here.) Obviously I meant to generate scenarios from it, but competing priorities, lack of time, paucity of other sources, and especially the language obstacle meant this project has lain fallow ever since - until last year, when OWS made a new friend. Jeremy speaks Chinese and has studied this war seriously. He is back in Hong Kong now, has access to good Chinese sources, and has been working on BBB scenarios for it.

I was excited to see his first one arrive on our tabletop at OWS this week. Stalwart OWS member Bob Medcraft laid it on for us. Bob's garage is full of armies of all nations and eras, so it was no great problem for him to rustle up a battle's worth of 19th-century Chinese in 15mm scale. (Actually, that's not fair - although he had enough miscellaneous Oriental troops for the core of the two armies already, he did paint up dozens of extra figures specially. Some of these were figures he and some other gamers had got Steve Barber to sculpt as private commission a while ago.)

The scenario in question was for the Second Battle of Hukou (22 December 1860). This was a tricky one for Jeremy to reconstruct as he had to interpret and reconcile conflicting sources, as well as tracking down a good map. The strategic situation is that the Taipings were trying to capture the city of Wuchang, far up the Yangtze from their capital of Nanjing. To do so, they sent four widely separated columns to converge on it. One of these, some 30,000 men under Yang Fuqing, was to capture Hukou, secure water transport there, and then reach Wuchang by river. The Qing government forces defending Hukou had about 25,000 poor infantry in a stockaded defensive line east of Hukou, backed up by 15,000 or so cavalry, plus a small garrison in the town itself and adjacent fort. The stockade line had its right resting on a river and its left against a ridge of steep hills running alongside the Yangtze.

There were five victory locations: the three stockades; Hukou itself; and the village of Sanli, halfway between them. The Taipings could earn an Objective each for Hukou and Sanli; one more for taking any two of the three stockades; and another one if they held either Hukou or Sanli and the Qings failed to evacuate at least five infantry units up the Yangtze. They needed two Objectives to earn a draw or three to win.

Here's how our game of this unusual and exotic battle went.

Qing defenders of the northernmost stockade. Each stockade counted as a Town in BBB terms, capable of holding one infantry unit, and had two artillery units in front of it in 'Rifle Pits' (1 level of cover). The first line of Qing infantry was Raw and Passive - and these were their better troops. 15mm figures from Bob's collection, I think a mix of Khurasan, Steve Barber, maybe some Eureka.


View of the whole stockade line. Hukou is the sandy-coloured felt top right, beyond the wooded ridge. (Bob mostly plays competition games where a few bits of felt is sufficient terrain, so he forgot to bring any trees or buildings.) The second line of infantry is Peng Chunyao's Hunanese contingent - these were not only Raw and Passive but Fragile as well. Behind them is a mass of regular cavalry. All the Qings started the battle Disrupted because the Taipings attacked at dawn.

Pan out some more and we see the Taiping attackers arrayed. All the Taipings were rated Aggressive and at least Trained. Three infantry units were classed as Veteran 'Guards'. The little 2-base unit and artillery on the right centre hill, flanking the stockade line, was a force of 'picked men' that included a British sailor, Augustus Lindley, whose account is one of the sources Jeremy used.

Crispin and Phil commanded the Qings. Bob took the Taiping left, I had the centre, and Dave W our right. Our plan, such as it was, was for Bob to pin the Qings frontally while I rolled up the stockades from the right and Dave pushed through towards Sanli and Hukou.

A closer look at the Qings in the stockades. Even though Jeremy created a special weapon class, 'Chinese Artillery' (CA), with lower firepower than normal Western smoothbore cannon, that artillery proved formidable.

Our attack develops on the right. I get my two blue brigades onto the hill above the stockades' flank. The picked men and a supporting brigade rout a Qing effort at a spoiling counterattack and stand atop the ridge. However, this has left them Disrupted, Low on Ammo and exposed.

Crispin and Phil take due advantage. Dave's picked men are overrun by massed cavalry. However, my thin white line repels a Qing infantry brigade.

Freshly squeezed Mandarins! The Taipings' turn to attack again. As per the plan, we stormed the first stockade, routing some Qing brigades. The blue brigade is one of mine that exploited one victory and achieved a second. However, in retrospect, that may have been a mistake, as it was left exposed to a subsequent flank attack.

A couple of turns of see-saw counter-attack and counter-counter-attack ensued. The exposed brigade has fallen back Spent out of shot beyond lower left corner. We launched more attacks to try to take advantage of the Qing counter-attackers' Disruption. As their growing collection of blue 'Spent' counters shows, we smashed some back, but that left us Disrupted (yellow counters) and vulnerable in turn. In particular, that left-hand unit in green drove back its foes, only to unmask two batteries at cannister range. That didn't go well.

On our far right, one Taiping Guards unit approaches the fort by the Yangtze protecting Hukou. No further progress was possible here. Note the impeccably manicured fingers of the Qing mandarin. Long plaited moustache just out of shot.

I think we played seven turns out of 10. My blue brigade holds a stockade but Qing counter-attackers have advanced past its left. There are too many of them, and too few of us, for us to take any more of the stockade line. Our one glimmer of hope is the white-coated unit just visible top right. This (plus three other units behind it) would have had a good chance of taking the village of Sanli (sandy felt top right) and cutting the Qing evacuation route. If we'd had time to play the last couple of turns and managed to take and hold Sanli, it would have been a draw; otherwise, a Qing victory. 

The victorious Qing commanders fly their banners proudly.

Reflections:

The virtues of 15mm. I know there are other players who use 15mm for BBB, but at OWS we almost always use 6mm or 10mm. It was a nice change to 'go large' and see individual soldiers more clearly. We had enough figures on the table for it to still look like a battle, not a skirmish. One minor disadvantage was that Bob's base frontages were larger than the standard BBB 1" (I guess 40mm), so initial deployments were slightly more cramped than the scenario envisaged, but otherwise it worked fine.

The exotic East. We all loved the fact that we were dipping our toes in the Yangtze and learning about the Taiping Rebellion. Fundamentally it's still just 19th-century horse and musket, of course. But Jeremy's addition of Chinese weapon types and his use of standard BBB attributes to rate the two very different armies' troops captured the different flavour of this war.

Terrain aesthetics. To capture it fully, we really needed pagodas in the town, Chinese buildings in the villages, and junks on the Yangtze. Not to mention some trees in the woods (couldn't see the trees for the woods? shouldn't it be the other way round?). Hopefully we'll be better equipped next time.

Complex situations make interesting scenarios. A simple assault on a stockade line wouldn't have been much fun. (See my essay on frontal assault games here.) The fact that we had a flank option, plus an evacuation route to threaten, gave both sides more choices to make, more scope for maneuver, and more interesting things to do.

Historical research. Huge kudos to Jeremy for his work in taking conflicting sources, making sense of them, tracking down necessary geographical and other details, and turning all this into a historically accurate and eminently playable scenario that brought some obscure and fascinating history to life for us players. This is what BBB is all about!


Tuesday, 11 February 2025

Battle of the Pyrenees (1813) - an operational-level game

This was the latest in Mark's set of Peninsular War battles. It's a challenging one to bring to the tabletop, as the Battle of the Pyrenees was less a battle and more a week-long offensive, involving over 100,000 men and encompassing multiple engagements fought across 1,000 square miles or so of very mountainous country. After Vitoria, the French remnants had retreated behind the Pyrenees. Wellington's army formed a screen in the mountains to cover him while he besieged the fortresses of Pamplona and San Sebastian. Soult mustered fresh forces to bring his own army back up to some 80,000 men and launched an attack through the Maya and Roncesvalles passes to relieve Pamplona. The Allies gave ground, suffering some reverses on the way, but finally repulsed Soult at Sorauren.

Mark said his operational-level scenario was initially inspired by the approach I took to the Austro-Prussian War border battles in the Bloody Big European Battles! scenario book - a single scenario covering four different actions (Nachod, Trautenau, Skalitz and Soor) over two days on a 25-mile front - but that it actually owes more to my more recent treatment of Lee's "Seven Days" in 1862.

To enable BBB's elastic scale to stretch that far, Mark limited LOS to 3", dispensed with canister, decreed that there was difficult terrain everywhere, allowed for some strategic movement in two 'Night Intervals', and limited the number of units that could be committed to a single assault. To make it even harder for the French to relieve Pamplona, he included rules for possible fog (stalling movement in the mountains) and possible supply problems (rendering whole French corps low on ammo).

This scenario also had particular appeal for me because it features "the inexperienced General Pringle [who] found himself unexpectedly in command" in the Maya Pass. I had to look him up. Apparently William Henry Pringle was also MP for St Germans in Cornwall at the time and the House of Commons subsequently formally thanked him for his services in this and other battles. Naturally I asked to command the Allied left in our game. Here are eight annotated pics to show how that went. Even if you don't care, you could still scroll to the end to find what thoughts were provoked by the game.

Spanish troops besiege Pamplona. Do they look so large, and the fortress so small, because of the dramatic foreshortening effect of looking down from the Pyrenees? No, it is because they are 6mm Baccus Napoleonic figures from Mark's collection, while the fortress is TTW01 European Fortified Town from Baccus's new(ish) Teeny Tiny Terrain range.

Most of General Pringle's command, set up to defend the Maya Pass and the village of Elizondo beyond it (white objective counters). No, it doesn't have a tarmac dual carriageway. The dark grey strips are Level 1 contours, while the green polystyrene hills are Level 2 (the valley in the middle, with the blue stream and light grey road running through it, is Level 0). This looks like a decent position, with flanking units atop steep slopes protecting the central blocking brigade. The orange and green counters note that these are top-quality British units - Veteran, Aggressive, with Skirmishers and the Devastating Volleys attribute.

Lots of lumpy Pyrenees! Looking south from the French end of the table. Pamplona is just out of shot, top right. Three roads provide the French with three axes of advance towards it (plus the option of a wide flanking maneuver via the top left corner). The chaps with the pink counters, lower left, are French National Guards (Raw, Passive, Fragile - a bit rubbish). Every other unit in view is Allied. You can see how widely dispersed they are, and also how small they are - mostly just two bases strong. White counters are victory locations. Most of these are time-sensitive. The French have until Turn 4 to seize the two passes (counters on roads) and until Turn 6 (as written) to capture the three villages and a hill in a rough row beyond the passes. There are another two in the top right quarter, and one for getting close to Pamplona.

Turn 1: D'Erlon's French advance towards Campbell's Portuguese in Aldudes, astride the central axis. Admire the French National Guard in their bicornes on the hill on the left. The rocks, lichen, logs etc are to remind us that the mountains are Difficult Terrain.

Reille charges up the Maya Pass. Even with its 3:1 odds, that big 6-base (6,000-man) French division has less than 50% chance of beating these tough Brits in cover on their steep, rocky mountainside ...


... but a bizarre sequence of dice sees the French win on a 6:1 roll that lets them hurtle into and smash the second British brigade as well with a second 6:1 roll. My isolated guns look embarrassed and the road to Elizondo is open.

Things got hectic after that and I didn't take any more photos until Turn 7. On my side of the table, with that hole blown in my line at the start, all I could do was sacrifice yet more units to play for time until Wellington could turn up with reinforcements. I lost Elizondo. Dave, commanding our right against Phil, did better, counterattacking aggressively and preventing the French taking the Roncesvalles Pass in time, though they did capture Aldudes.


Hot fighting on our right. Hard to tell who's who, but Dave has managed to establish a reasonably solid line to hang onto objectives through that crucial Turn 6. (Albeit we were helped by not one but two turns of fog hampering the French advance.)

Panorama of most of the battlefield on Turn 7, with red lines added to show what's going on. Remnants of Pringle's original force are left of the line at top left. Wellington has turned up on our left flank with 6th & 7th Divisions (below line at bottom of pic) to cover the western axis. Dave, reinforced by Picton, is holding the line upper right.

At this point, the scenario as written was effectively over, as it seemed clear that it would be a draw. We discussed tweaks to the victory conditions and played on for another couple of turns, at which point we again called it a draw under the revised conditions.


Reflections

Stinky dice! I know that we roll a lot of dice in BBB, that the luck should even out, and that starting the battle by having a third of my force wiped out immediately by two rolls of one on my British red dice against sixes on Crispin's blue dice may have coloured my view of the matter. Still I will repeat my complaint from after our Salamanca games that players should all use the same dice pool.

Super-asymmetric = super-interesting. As noted above, this game pitted two very different armies against each other, with very different challenges. The Allied force - small but high-quality units - was fighting a delaying action against an enemy army of much larger divisions that was having to overcome time and terrain as well as armed opposition. Asymmetric games are always fun.

It's not linear warfare! Maybe 'perpendicular warfare'? The terrain presented different tactical problems from the usual. It also made those operational-level decisions about which axis to commit reserves along much more momentous. It gave shape and character to the game.

It's tricky but it works. These operational-level games (multi-day battles across large areas) are radically different from a regular pitched-battle scenario. They are therefore harder to design, particularly when it comes to setting victory conditions, and they generally need some special rules. That said, we've done enough of them now to have a fair idea of what works and to have established some basic principles accordingly. Consequently, although in this first playtest we found we needed to apply some tweaks mid-game, it was impressive that Mark's draft was so close to the mark already.

Ways to skin cats. This was a playtest among experienced and creative players. It generated productive discussion about how to adjust the victory conditions and various special rules to capture the character of the battle and create a good game. People threw ideas into the mix - for instance, there are many different ways you could write a fog rule. This was an evening well spent in helping Mark to refine his scenario to be as clean, elegant and entertaining as possible.

The personal connection. OK, I don't know just how distant a relative General Pringle must have been, but even just sharing the name added an extra element to the game.

Pretty terrain items. The fortress is a nice addition to Mark's growing collection of special terrain items. Even though it sat in a corner of the table and didn't see any action, it was important as the reason for the battle, and enhanced the game as a distinctive and aesthetically pleasing piece. All part of another High Quality Gaming Experience (TM).


Thursday, 6 February 2025

Review of Nigel Smith's "The Honvéd War"

[First published 6 February 2025; updated 27 February 2025.]


Regular readers of this blog will know that the Hungarian War of Independence is one of my particular enthusiasms. Decent English-language sources on the military history of this substantial war are few and far between. I am therefore very pleased to report on an important addition to this underserved bookshelf: The Honvéd War: Armies of the Hungarian War of Independence 1848-49, by Nigel James Smith, which was published by Helion in 2024.

Thank you, Santa!

(Let me preface this book review with a disclaimer. Nigel and I are both Helion authors; I gave Nigel some minor assistance with the preparation of his book and he kindly acknowledges me in it. Furthermore, I have met him once and I owe him a drink. That said, I was already in his debt because of his previous visit to 1848 in his work published by Pickelhaube Press in 2006, The Magyar War, which I had found very useful and full of information that was difficult to obtain from anywhere else.)

Anyway, to business:

For £29.95 you get over 200 pages of nicely produced book on glossy paper that enables a gallery section in beautiful colour, as well as dozens of rare black-and-white illustrations scattered throughout the text.

Of those 200 pages:

- 20 are devoted to the history of the war;

- 60 pp to the organisation, weapons and tactics of the three armies involved;

- 9 pp to ten of the most important generals;

- 73 pp to uniforms and flags (including 14 colour plates);

- 29 pp to historical orders of battle.

The history section is nicely written and does a good job of explaining the course of this complicated war. Perhaps my favourite part is where Smith describes how "Jellačić, in his capacity as [Kaiser Ferdinand's] Croatian Viceroy, on behalf of King Ferdinand of Croatia pronounced a declaration of war against King Ferdinand V of Hungary. Astute readers will have noted that this Kaiser and both these Kings were one and the same man." It might have benefited from a couple more maps or, at least, having the major battles marked on the one map on p12. However, the campaign history is not the main focus of this work, so this is a minor complaint. (In fact, for readers who already have the complementary campaign histories published by Helion, it minimises redundant overlap.) One tiny quibble: it was not Windischgrätz but his subordinate, Jellačić, who defeated Perczel at the battle of Mór.

Perhaps inevitably, the text displays some inconsistencies in the spelling of eastern European place names, etc. In particular, Smith uses an idiosyncratic spelling, "Széklars", for the Transylvanian people known in Hungarian as Székelyek or conventionally in English as "Szeklers". However, these are cosmetic problems rather than being likely to cause any real confusion.

The sections on organisation, weapons and tactics are comprehensive, thorough, and full of detail. This ranges from corps structure and offensive artillery doctrine down to small unit tactics. There is a lot of dense information here but it is conveyed in a clear and readable manner that helps us to understand the character of each army and how it operated. E.g., of the Russian army, Smith says, "obedience was literally beaten into the rank and file".

In the earlier version of this review, I expressed some mild regret that, for all its comprehensive coverage, The Honvéd War didn't provide information on a couple of obscure Imperial units I'd struggled to identify during my own researches: Cordonisten and National-Uhlanen. It is a tribute to Nigel's research skills - and therefore further assurance of the quality of this book - that he has since tracked down and sent me detailed information on the two Cordonisten battalions, including their combat history during 1848-1849, their uniforms, and even their commanders' names. Much obliged!

Smith's brief biographies of the main commanders are clear and informative and give us pen portraits of some colourful characters such as the "Hyena of Brescia", "Papa Bem", etc. (Though I might question his statement that Richard Debaufre Guyon subsequently "served the Ottoman Army with distinction against the Russian Army in Asia Minor": as Zarif Pasha's chief of staff during the Crimean War, he devised a plan that might have worked for the honvéd but was too sophisticated for the Ottoman army of the Caucasus, which was consequently destroyed in the battle of Kurudere.)

A third of the book is given over to uniforms and flags. This is truly exhaustive and has all you could possibly need on this topic. As well as everything you'd expect concerning types of headgear, the colours of tunics and buttons, or the hues of regimental facings, we learn about such things as linen recognition strips tied to Austrian shakos to tell friend from foe, or Polish konfederatki caps being worn both with and without peaks. The colour plates are a good mix of old prints or paintings and original new artwork. I particularly like the Imperial grenadier in his splendid M1836 bearskin.

The 'Orders of Battle' section provides detailed snapshots of the composition and structure of the major formations at several pivotal junctures in the course of the war. Smith's footnotes demonstrate that he has not simply reproduced these from other sources but has examined them critically to check their accuracy.

My few criticisms above do not materially detract from the work and are offered mainly to show that this is a thorough and unbiased review by a reasonably qualified reviewer. The fact that they are all so minor also proves that this is a very good, well-researched book by a skilled and knowledgeable author. It will be invaluable to any wargamer or military modeller seeking to portray this fascinating conflict. Essential reading if you want your tabletop armies for 1848 to be properly organised and look authentic. Excellent value and highly recommended!


PS - I cannot avoid some self-promotion here. Anyone who has read this far is surely sufficiently interested in this war that I should mention my own related publications (in case you don't already know about them). These include three translated histories and one wargames campaign book:

Hungary 1848: The Winter Campaign

Hungary 1849: The Summer Campaign

The Hungarian War of Independence 1848-1849: an illustrated military history (forthcoming 2025)

Bloody Big HUNGARY '48 Battles!


Saturday, 18 January 2025

Victory snatched away at Albuera (1811)

While I am focusing on ACW, Mark is forging ahead with his collection of Napoleonic scenarios for the Peninsular War. The latest to take to his table is Albuera. This is a relatively well-known battle that seems popular to refight, judging from a quick web surf. May as well add one more blog post to the crowd!

Background in brief: while Wellington was confronting Masséna along the centre of the Portuguese border, further south his subordinate Beresford was besieging Badajoz. Soult marched to relieve the fortress. Beresford moved to occupy a blocking position on the ridge behind Albuera. Rather than simple frontal assault, Soult chose to leave part of his force to pin Beresford by demonstrating against the Allied front, while most of the French army moved around the Allied right flank. When the Allies changed front in response, Colborne's brigade was famously left exposed just as a sudden storm limited visibility and damped their muskets, allowing French cavalry to charge and shatter the brigade. Despite this setback, the Allies eventually firmed up their line, then advanced to counterattack and drive the French back. Thwarted, Soult gave up and withdrew.

Here's how it went for us. (9-photo AAR, then some Reflections.)

Initial Allied set-up, looking east from behind the Allied line. Mark used a 2.5D system for the hilly ground: dark lines are contours defining the slopes of the ridges between the streams ("Level 1"); polystyrene hills are the highest points ("Level 2"). Albuera village is top centre, with the Albuera river in front of it. White labels indicate that some Allied formations are fixed in place until Turn 2 or Turn 4, so long as the French maintain a pinning force in front of them. Doesn't that Allied right flank look open?

And here's the French force threatening it. The scenario gives the French a choice of deployment areas: either along this road on the Allies' right front, or in the SW corner of the table (beyond bottom right of pic) - thus further from the Allies, but behind their flank and across the stream obstacles. White counters indicate victory locations: two hills and a bridge in this pic. In addition, Albuera itself was an objective, as were the two roads leading NW or W towards Badajoz. (And British infantry - see the Reflections.)

Latour-Maubourg's formidable cavalry leading the French advance. Mark rated most of these as Shock (the purple counters, worth +2 in Assault) and the rest as Aggressive (+1) on the basis of their performance in the battle. These columns are advancing through Spanish woods that are really just pastures with shade - widely spaced olive trees etc, with cattle grazing among them.

As the French commander, I chose to disrupt that tidy column and shift most of our infantry to the outflanking move: Girard's division, Werlé's brigade, and the grenadier reserve, seen here. That left Godinot to do the pinning and Gazan to attack the angle of the Allied position. (Figures are Baccus 6mm from Mark's collection.)

My columns moved swiftly forward and deployed for battle. Zayas's Spanish turned to face us.

So much for outflanking and catching the Allies on the hop. By Turn 3 they had formed a pretty solid-looking line.

I tried working round further left to find some advantage. Meanwhile, Mark had launched a converging attack on the angle of the Spanish line. This made a dent but exposed him to Allied counterattack. On his right, large Allied units had become unpinned and were threatening to overwhelm our pinning force.

Time for me to act, then! I launched coordinated assaults. On my extreme left, I did manage to break a Spanish unit and establish myself on one of the Badajoz roads. We were less fortunate elsewhere, though. On my right, I committed my grenadiers in support of a charge by Mark's cavalry. My own cavalry failed to join in, while Crispin rolled 11 and 12 for his firing and blew Mark's precious dragoons and lancers away. That left my grenadiers embarassed and outnumbered 3:1, so they were destroyed in their own assault. The photo shows the aftermath, on the final turn: our line has become very thin, we are just trying to hold on our left, while launching two desperate counterattacks on our right to fend off the Allies from one of the hilltop objectives.

Close-up of those counterattacks. My infantry managed to keep the Spanish infantry at bay, but Mark's last cavalry brigade was vaporised by Portuguese musketry (of course). I had a couple of batteries out of pic lower right to cover the hill, but these were unable to stop any of Crispin's allied units upper right, all three of which made full movement rolls on the last turn and captured the hill.

Until that point, we had held 3 objectives - enough for victory (in fact, our high point was 4 until we lost the bridge again) - but when the Allies retook this hill, they denied us and we had to settle for a bloody (in both senses) draw.


Reflections

Nice to fight a classic battle! In a 2018 post, I mused on the merits of different ways of studying classic battles. One of those, obviously, is the 'learning by doing' of a wargame. Mark's scenario certainly explains Albuera well.

Choices, choices. It was nice to have a choice of deployment areas, hence several possible plans of attack. This not only makes the one game interesting, it opens up replay value for future games.

Precious units. The scenario had one unusual objective: we French could earn an Objective by making any British infantry unit Spent or destroyed (representing the near-scandal caused by the destruction of Colborne's brigade). This made our Allied opponents, Crispin and Phil, rather cautious about committing their most potent troops. We felt this worked well.

Rubbish units. The Spanish cavalry continued their suitably dreadful form. When I first approached them, they Evaded. Being Fragile, they spent the next several turns failing to rally from the resulting Disruption, before finally rolling so low that they quit the field without having struck a blow or even caught a whiff of powder. Hilarious.

British too ponderous? There was some post-game debate about whether the British on the left should have a General on-table to help them move faster (Phil having been frustrated by their inaction at times). I felt it was OK, my view being that the British army doesn't really transcend linear warfare and become a truly modern manoeuvrable force until Salamanca in 1812. But better-informed readers may leap in and put me right here.


Wednesday, 8 January 2025

The Seven Days Battles (ACW) - all in one evening

My current project is to create and play BBB scenarios for all the biggest battles of the American Civil War. In several cases, I am exploiting the BBB ruleset's elastic scale and making a single scenario cover battles so large in time and space that most conventional rulesets would split them down into several different smaller actions: Chancellorsville, Spotsylvania, Cold Harbor, Petersburg ...

Perhaps the most extreme example is the Seven Days Battles. In an area of some 30 x 15 km, between 26 June and 1 July 1862 (ignoring a preliminary skirmish on 25 June), Robert E. Lee's Confederate Army of Northern Virginia fought four substantial battles against McLellan's Army of the Potomac: Beaver Dam Creek (Mechanicsville); Gaines's Mill; Glendale; and Malvern Hill.

Of course, I could just write conventional scenarios for each of these. No doubt eventually I or another BBB enthusiast will. But I think these are less interesting individually than as episodes of the larger whole, and anyway, I'm sure they've been done that way many times before. I therefore wrote a scenario for the whole Seven Days. Ambitious! But feasible - as we proved this week.

The historical background is the Peninsula Campaign, McLellan's attempt to capture Richmond by advancing NW up the Virginia Peninsula, taking advantage of Union naval superiority. After a couple of months of slow advance involving a few actions of moderate size, the main result of the otherwise inconclusive battle of Fair Oaks (aka Seven Pines) was that the Confederate C-in-C, Johnston, was wounded and replaced by Lee. Within a month, Lee planned and prepared his attack. Leaving a small force under Magruder covering his own right, he massed most of his forces against McLellan's right wing, both attacking it frontally and outflanking it from the north. Over the next few days, the Union army was driven back, forced to switch its line of communications, and eventually gave up and escaped by sea. However, Lee's repeated attempts to envelop and crush it had failed, ending in an especially costly repulse at Malvern Hill.

Our scenario compresses all this into a 6'x3' table and 9 or 10 game turns (originally 12, but that was too many), punctuated by two nominal 'Night Intervals' that are really strategic pauses and resets, given that each turn represents about half a day. You'd think that might work out kinda funky, but in fact it seemed to go pretty much as per the history without feeling silly or 'gamey'. Let me explain with the help of eight photos, followed by some Reflections.

Send a gunboat! This represents USS Mahaska and USS Galena on the James River. Malvern Hill just visible top right of pic. Model from Crispin's collection.

OK, let's get you oriented with a view of (almost) the whole battlefield, looking north. Confederates are on the brighter green bases, left and top of pic. The force top right is Jackson's, poised to fall on the Union right flank and rear. Their ultimate target is the Union line of communications, the rail exit guarded by Union cavalry, centre right edge. Top left is Longstreet, about to assault Beaver Dam Creek. Centre left, Magruder has a thin screen protecting the Confederate LOC rail exit.

The balloon facing Fair Oaks is actually a US balloon, but represents the "Magruder Effect". Historically, Magruder conducted a brilliant deception by generating lots of fake activity for the Union to observe, making himself look much stronger than he was. In game terms, this meant on Turns 1-4 any Union unit trying to move within 9" of Magruder was penalised with a -2 on its movement roll.

Most of the Union forces are in the line, either waiting to fend off the Confederate assaults in the north or to launch their own frontal attack against Magruder in the south. However, the force lower right - IV Corps (Keyes) - is about to execute a swift route march around the Confederate right, into the bottom left corner of the pic, to threaten Magruder's flank and rear.

A closer look at Jackson's force about to cross the Totopotomoy Creek and attack the Union right around Beaver Dam Creek and Gaines's Mill. Figures are Baccus 6mm from Crispin's collection. Roads and rivers by Rob's Scenics.

Now we leap ahead to Turn 5. The game allows Strategic Redeployment during the two Night Intervals. This is also when the Union can choose to switch its LOC exit from the railroad to the James River. That's what has happened here. Despite inflicting historically significant casualties on the Confederates at Beaver Dam Creek and Gaines's Mill, the Union forces have suffered badly themselves, as witness the black puffs on several Union divisions that are now Spent and have been left to fight rearguard actions around Savage's Station (where that happened historically). The Union has formed a new line behind White Oak Creek, in front of Glendale (the blue counter and building centre of left edge) while still attacking Magruder (top of pic). Yet again the Confederates will try to combine frontal assault with envelopment of the Union right (again, rather historical).

Close-up of Jackson's Rebs about to overrun a Union rear guard division.

Lee about to do likewise at Savage's Station and Seven Pines.

Turn 7 and the Confederate assault against the Union line in front of Glendale is in full swing. Top left, a Union division spontaneously fell back before it was hit - a bad movement roll that was actually perhaps the smart move, pre-empting the Confederate envelopment.

Game end: the Confederates have broken through, the retreating Union army is in disarray, the pursing Rebs are rampant and (out of shot, below right of pic) wrapping round the Union right, while JEB Stuart's cavalry menace the James River LOC.


Reflections

Now that's what I call grand tactical. Or maybe 'operational'. I was really happy with how this ambitious scenario worked out. The game moved quickly all across the table (OK, it was only a 6'x3' table), with intense action throughout, and the lines pivoting through more than 90 degrees. We didn't quite get to Malvern Hill, but otherwise, all the historical sub-battles pretty much happened along the way - each only lasting a turn or two. And it did leave the Union players as shell-shocked as McLellan and the Confederates suitably historically jubilant. Operational-scale maneuver but with a tactical tabletop feel. Lovely!

Multi-day actions multiply the fun. Said it before, say it again: games with Night Interval 'resets' so often make the best games as they generate more decisions and more interesting situations. I discussed this at more length in one of my Reflections on Wargaming essays, Changing situations mid-game.

One man's 'grand' is another woman's 'busy'. To me, the opening pic looks grand: a layout like an aerial view of historical terrain, the two armies with battlelines drawn, and 6mm giving that great mass effect. My clubmate Linda wandered over for a chat. She always plays ancient/renaissance tournament games with armies that preferred flat open plains, hence minimal terrain. She said our table looked 'busy' and maybe too confusing for her - but admitted she'd like to join our BBB games for a change ...

Special rules can make a game special. This game has two. One is a provision for units to lose bases in the Night Interval if they are 'Out of Supply' (unable to trace a clean route to their LOC). It didn't come into play directly during the game, but did influence players' maneuvers and the Union decision to switch LOC. The other is the Magruder Effect, which worked very well to protect the weak Confederate right in a plausible way. And it was a good excuse to put a balloon on the table.

Victory Conditions. These have mutated through the development of this scenario (which I first drafted in 2016). I think we'll settle on essentially a typical BBB formula - three objective locations along the battleline (Gaines's Mill, Fair Oaks, Glendale) plus LOC objectives - but with a twist: rather than all being calculated at game end, the Union will earn objectives by holding them until a given game turn. That should give the right incentives, give the Union some big decisions to make about when to fall back, plus make for an interesting decision for the Union about if/when to switch LOC. And BBB games should be all about making interesting decisions.