While I am focusing on ACW, Mark is forging ahead with his collection of Napoleonic scenarios for the Peninsular War. The latest to take to his table is Albuera. This is a relatively well-known battle that seems popular to refight, judging from a quick web surf. May as well add one more blog post to the crowd!
Background in brief: while Wellington was confronting Masséna along the centre of the Portuguese border, further south his subordinate Beresford was besieging Badajoz. Soult marched to relieve the fortress. Beresford moved to occupy a blocking position on the ridge behind Albuera. Rather than simple frontal assault, Soult chose to leave part of his force to pin Beresford by demonstrating against the Allied front, while most of the French army moved around the Allied right flank. When the Allies changed front in response, Colborne's brigade was famously left exposed just as a sudden storm limited visibility and damped their muskets, allowing French cavalry to charge and shatter the brigade. Despite this setback, the Allies eventually firmed up their line, then advanced to counterattack and drive the French back. Thwarted, Soult gave up and withdrew.
Here's how it went for us. (9-photo AAR, then some Reflections.)
Initial Allied set-up, looking east from behind the Allied line. Mark used a 2.5D system for the hilly ground: dark lines are contours defining the slopes of the ridges between the streams ("Level 1"); polystyrene hills are the highest points ("Level 2"). Albuera village is top centre, with the Albuera river in front of it. White labels indicate that some Allied formations are fixed in place until Turn 2 or Turn 4, so long as the French maintain a pinning force in front of them. Doesn't that Allied right flank look open?
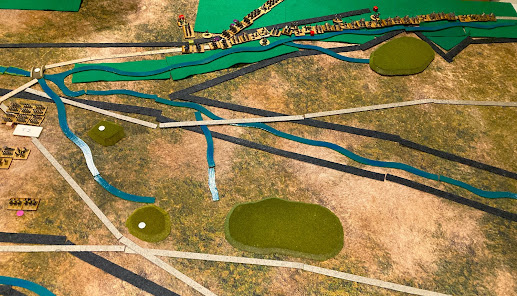
And here's the French force threatening it. The scenario gives the French a choice of deployment areas: either along this road on the Allies' right front, or in the SW corner of the table (beyond bottom right of pic) - thus further from the Allies, but behind their flank and across the stream obstacles. White counters indicate victory locations: two hills and a bridge in this pic. In addition, Albuera itself was an objective, as were the two roads leading NW or W towards Badajoz. (And British infantry - see the Reflections.)
Latour-Maubourg's formidable cavalry leading the French advance. Mark rated most of these as Shock (the purple counters, worth +2 in Assault) and the rest as Aggressive (+1) on the basis of their performance in the battle. These columns are advancing through Spanish woods that are really just pastures with shade - widely spaced olive trees etc, with cattle grazing among them.
As the French commander, I chose to disrupt that tidy column and shift most of our infantry to the outflanking move: Girard's division, Werlé's brigade, and the grenadier reserve, seen here. That left Godinot to do the pinning and Gazan to attack the angle of the Allied position. (Figures are
Baccus 6mm from Mark's collection.)
My columns moved swiftly forward and deployed for battle. Zayas's Spanish turned to face us.
So much for outflanking and catching the Allies on the hop. By Turn 3 they had formed a pretty solid-looking line.
I tried working round further left to find some advantage. Meanwhile, Mark had launched a converging attack on the angle of the Spanish line. This made a dent but exposed him to Allied counterattack. On his right, large Allied units had become unpinned and were threatening to overwhelm our pinning force.
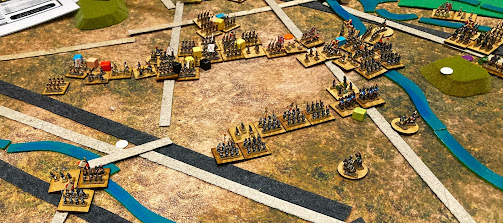
Time for me to act, then! I launched coordinated assaults. On my extreme left, I did manage to break a Spanish unit and establish myself on one of the Badajoz roads. We were less fortunate elsewhere, though. On my right, I committed my grenadiers in support of a charge by Mark's cavalry. My own cavalry failed to join in, while Crispin rolled 11 and 12 for his firing and blew Mark's precious dragoons and lancers away. That left my grenadiers embarassed and outnumbered 3:1, so they were destroyed in their own assault. The photo shows the aftermath, on the final turn: our line has become very thin, we are just trying to hold on our left, while launching two desperate counterattacks on our right to fend off the Allies from one of the hilltop objectives.
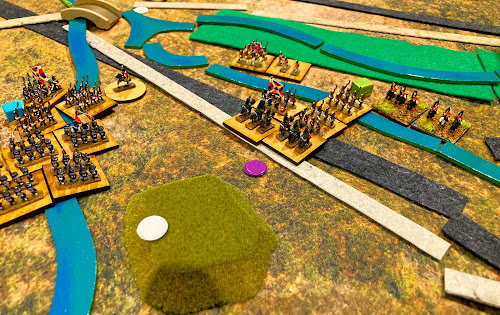
Close-up of those counterattacks. My infantry managed to keep the Spanish infantry at bay, but Mark's last cavalry brigade was vaporised by Portuguese musketry (of course). I had a couple of batteries out of pic lower right to cover the hill, but these were unable to stop any of Crispin's allied units upper right, all three of which made full movement rolls on the last turn and captured the hill.
Until that point, we had held 3 objectives - enough for victory (in fact, our high point was 4 until we lost the bridge again) - but when the Allies retook this hill, they denied us and we had to settle for a bloody (in both senses) draw.
Reflections
Nice to fight a classic battle! In a 2018 post, I mused on the merits of different ways of
studying classic battles. One of those, obviously, is the 'learning by doing' of a wargame. Mark's scenario certainly explains Albuera well.
Choices, choices. It was nice to have a choice of deployment areas, hence several possible plans of attack. This not only makes the one game interesting, it opens up replay value for future games.
Precious units. The scenario had one unusual objective: we French could earn an Objective by making any British infantry unit Spent or destroyed (representing the near-scandal caused by the destruction of Colborne's brigade). This made our Allied opponents, Crispin and Phil, rather cautious about committing their most potent troops. We felt this worked well.
Rubbish units. The Spanish cavalry continued their suitably dreadful form. When I first approached them, they Evaded. Being Fragile, they spent the next several turns failing to rally from the resulting Disruption, before finally rolling so low that they quit the field without having struck a blow or even caught a whiff of powder. Hilarious.
British too ponderous? There was some post-game debate about whether the British on the left should have a General on-table to help them move faster (Phil having been frustrated by their inaction at times). I felt it was OK, my view being that the British army doesn't really transcend linear warfare and become a truly modern manoeuvrable force until Salamanca in 1812. But better-informed readers may leap in and put me right here.


That looks like a good scenario. I'd leave the British being ponderous myself. Always a problem with dice or card based activation systems, some players will get frustrated by a series of low rolls, other types of players will think it is hilarious.
ReplyDeleteIndeed. And one playtest is never enough, given the vagaries of dice and players. I'm sure this will be played again before Mark shares it with the world.
DeleteSecond the British being ponderous, especially at Albuera, where Beresford wasn't quite up to the mark.
ReplyDeleteThanks for the endorsement. I think that was our consensus too.
DeleteA fine game and concur on the 'learning by doing' front. Great post game thoughts too:).
ReplyDeleteCheers, Steve!
Delete