A friend of mine writes school textbooks. A few years ago he did one in war and society for the UK history curriculum. I reviewed the chapter on 1750-1914 for him. I thought I was doing him a favour but in fact I caused him a problem. I found two bones of contention in it.
One was the claim that war did not change significantly between 1750 and 1850. Napoleon and Clausewitz might disagree with that.
The other debatable claim was this (I paraphrase): 'the foolish WW1 generals had not learned the lesson of the previous 50 years that, because modern weapons had become so lethal, the defence was king'. I pointed out that (a) the attacker gets to shoot too and (b) the lesson from virtually every war of the previous 50 years was that the attacker wins. The Crimea; Italy in 1859; Denmark in 1864; the ACW; the Austro-Prussian War; the Franco-Prussian War; the Russo-Japanese War and the Balkan Wars, with the latter two being proto-WW1 warfare with WW1 weapons: the attacker wins, the attacker wins, the attacker wins. The difficulty for Paul was that the debatable claim was not his, but he was required to make it because it was actually in the curriculum ...
Which brings us to this week's wargame: Lule Burgas (1912), the fourth in our ongoing campaign from the "Bloody Big Balkan Battles!" scenario book. This was the largest European battle between 1870 and 1914. The attacker won.
The historical situation was that, just four days earlier, the Bulgarians had defeated the Ottomans at Kirkkilise. The battered Ottoman army established a new defensive line at Lule Burgas, but its right flank was open. Ottoman reserves were rushed up to fill the gap and clashed with the Bulgarian 3rd Army, while the Bulgarian 1st Army took Lule Burgas. After a three-day battle, the Ottoman defense caved in and retreated to the fortified lines at Chataldja.
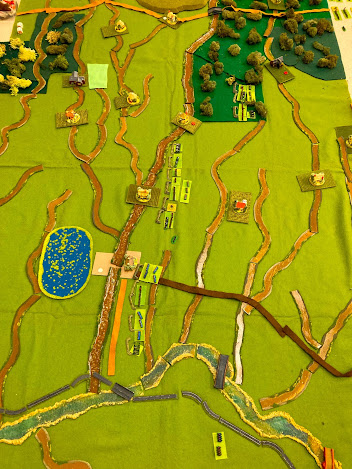
The scenario revolves around four objectives: Lule Burgas itself on the Turkish left; Karagac in the centre; Bunarhisar on the right; and Congara in the rear. Both sides need to hold two of these to draw or three to win. The five annotated photos that follow reveal how the game went.
Reflections:
Blenheim in the Balkans. The battle had a nice shape to it: initial fencing along the front, a turning movement on the Turkish left, then essentially a big fight on each flank that made the Turks thin out their centre and make it vulnerable to the victory blow. Kudos to Will for having the vision four turns earlier to get his Balkanska brigade into march column and race it across the battlefield to where it was needed.
Other plans are possible. As is usually the way, I can see other options for both sides. The Turks could deploy differently with more attention to their left flank and to fields of fire. The Bulgarians could try what seemed an obvious approach at first glance: weight their attack heavily to the left, avoiding most of the dug-in Turks and going for the three village objectives rather than the tougher town. Certainly worth replaying to see how it goes with different plans and different players.
Limiting LOS. I noted in the Kirkkilise report how that similarly large-scale scenario might benefit from some line of sight limit. The scenario special rule here did the job.
Quality tells! All the Bulgarians were rated Aggressive. Most of the Turks were Fragile. On Day 1, while they were mowing down advancing Bulgars, the Turks had the best of it. Once the Bulgarians developed their own firing lines and set up their artillery and started dishing some out, Turkish units evaporated rapidly. And, of course, the quality difference swung it in the final assault.
Nice terrain. Rob Owens's rivers had their second serious outing (their first having been at Kirkkilise). Definitely an improvement on the usual blue felt. Now to attend to the roads, and then the woods ...
What a good game! I embarked on this one with some trepidation. Assaulting against an entrenched enemy with equal numbers of troops and modern weapons? It didn't look too promising. But the space for manoeuvre on both flanks actually enabled a mobile game, and it was a bold dash in the centre that decided it at the end. The shift in fortunes and the epic climax meant the game really told a story.
Thank you to Nick, Will, Dave and John for being engaged and enthusiastic and tackling the challenge in good spirits, and to Konstantinos for a fine scenario.


Lovely AAR. I remember our playtests were also fun. Having visited the battlefield I can attest that the many low hills do create conditions for defeat in detail.
ReplyDeleteCheers, Konstantinos. Thanks again for a fun game. On to Yiannitsa! (But probably not until August or September.)
Delete