Wednesday, 11 June 2025

How do I get started with "Bloody Big BATTLES!" (BBB)?

The Bloody Big BATTLES! ruleset (BBB) for wargaming nineteenth-century battles (including Napoleonics) is over 10 years old now and continues to grow in popularity. A good thing to have done a decade ago would have been to create a set of introductory material for new players, but I didn't, so ... the purpose of this long overdue post is to make it as easy as possible for new or would-be players to get into BBB. (Also, to share the love for gaming this richly varied and fascinating period, whose battles produce such great historical games.)


This post covers:

-  Online resources

- Which armies to collect

- Which figure scale to choose

- How to build your armies

- How to collect/create terrain

- How to learn the rules

- How to find other players

- Creating your own scenarios


Online resources

1. BBB's publisher is SkirmishCampaigns. See the SC website here for various useful information such as where to buy BBB and its scenario books.

2. For collected reviews of BBB, see here:

3. For many additional free scenarios and other resources online, or to ask questions about the rules or discuss 19th-century warfare in general, join the community of over 1,000 fellow BBB enthusiasts here: bloodybigbattles@groups.io | Home

4. There is a very active BBB Facebook page with over 1,000 members here:


Which armies should I collect?

Well, that's really up to you, isn't it! But apart from the sheer romance and emotional, aesthetic or patriotic appeal of your favourite army or conflict, there are some other factors you might want to consider.


1. Deployability. Those yellow-jacketed Bolivian cuirassiers look gorgeous, of course, but they only ever fought one battle. Is it worth building a Bolivian army specially for that? You'll probably get most use and therefore most value out of armies that fought a number of battles, perhaps even several wars, in basically the same uniform.

A popular triad to start with is therefore the French, Austrian and Prussian armies that all fought each other (and some others) between 1848 and 1870. From there it's easy to add Italians, Danes, Brits, Russians, Hungarians, etc as allies or enemies.

Or you could choose one of the published BBB scenario books and build armies for that: Balkan Wars, Wars in India, Napoleon's biggest battles, etc. That guarantees you a good number of scenarios, and all the scenarios have plenty of replay value, so that's a lot of potential games.

Alternatively, just go for the blue and the grey: American Civil War armies, which can fight dozens of battles against each other.


2. Size. If you are keen to get armies on the table soon, pick one of the small scenarios I'll recommend later in this post and build specifically for that.


3. What have your mates got? If your regular opponents are interested in BBB as well, check with them what armies they already have so you can collect armies to fight them, rather than duplicating. Or consult them about which war to do together and choose an army each.


4. Availability. What figure ranges are available in your preferred scale? Maybe there's a fantastically complete range of beautifully sculpted figures that will just be a joy to paint and a feast for the eye, and maybe that's more important to you than the fact that this army never actually fought much?

But this will be a minor factor for many BBB players, as BBB suits smaller scales particularly well, and in the smaller scales it is easy to use figures from other ranges as proxies if dedicated figures are lacking.

Which brings us to:


Which figure scale to choose?

Fighting big historical battles on a 6'x4' table is what BBB does best. Larger scale figures look great individually, but frankly can look a bit odd when just three or four of them on BBB's 1" bases are supposed to represent a division or even a corps. Smaller scales give a more convincing and realistic mass battle effect. Each scale has other pros and cons too. Let's look at them in detail.

28mm: There are a few players who fight BBB scenarios in 28mm. To do so, though, they scale everything up by 50% (9'x6' table, larger bases, longer ranges and movement distances). A nice solution if you have the space.

15mm: More practical than 28mm, and BBB-sized units look OK. If you already have 15mm armies, you can use them, no problem.

10mm: The Goldilocks scale? I'm committed to 6mm, but if I were to start again, I think I'd go with 10mm. Small enough for mass effect, but still large enough to recognise individual regiments and uniform details. Easier than the smaller scales for aging wargamers' eyes, too, which is increasingly a consideration these days.

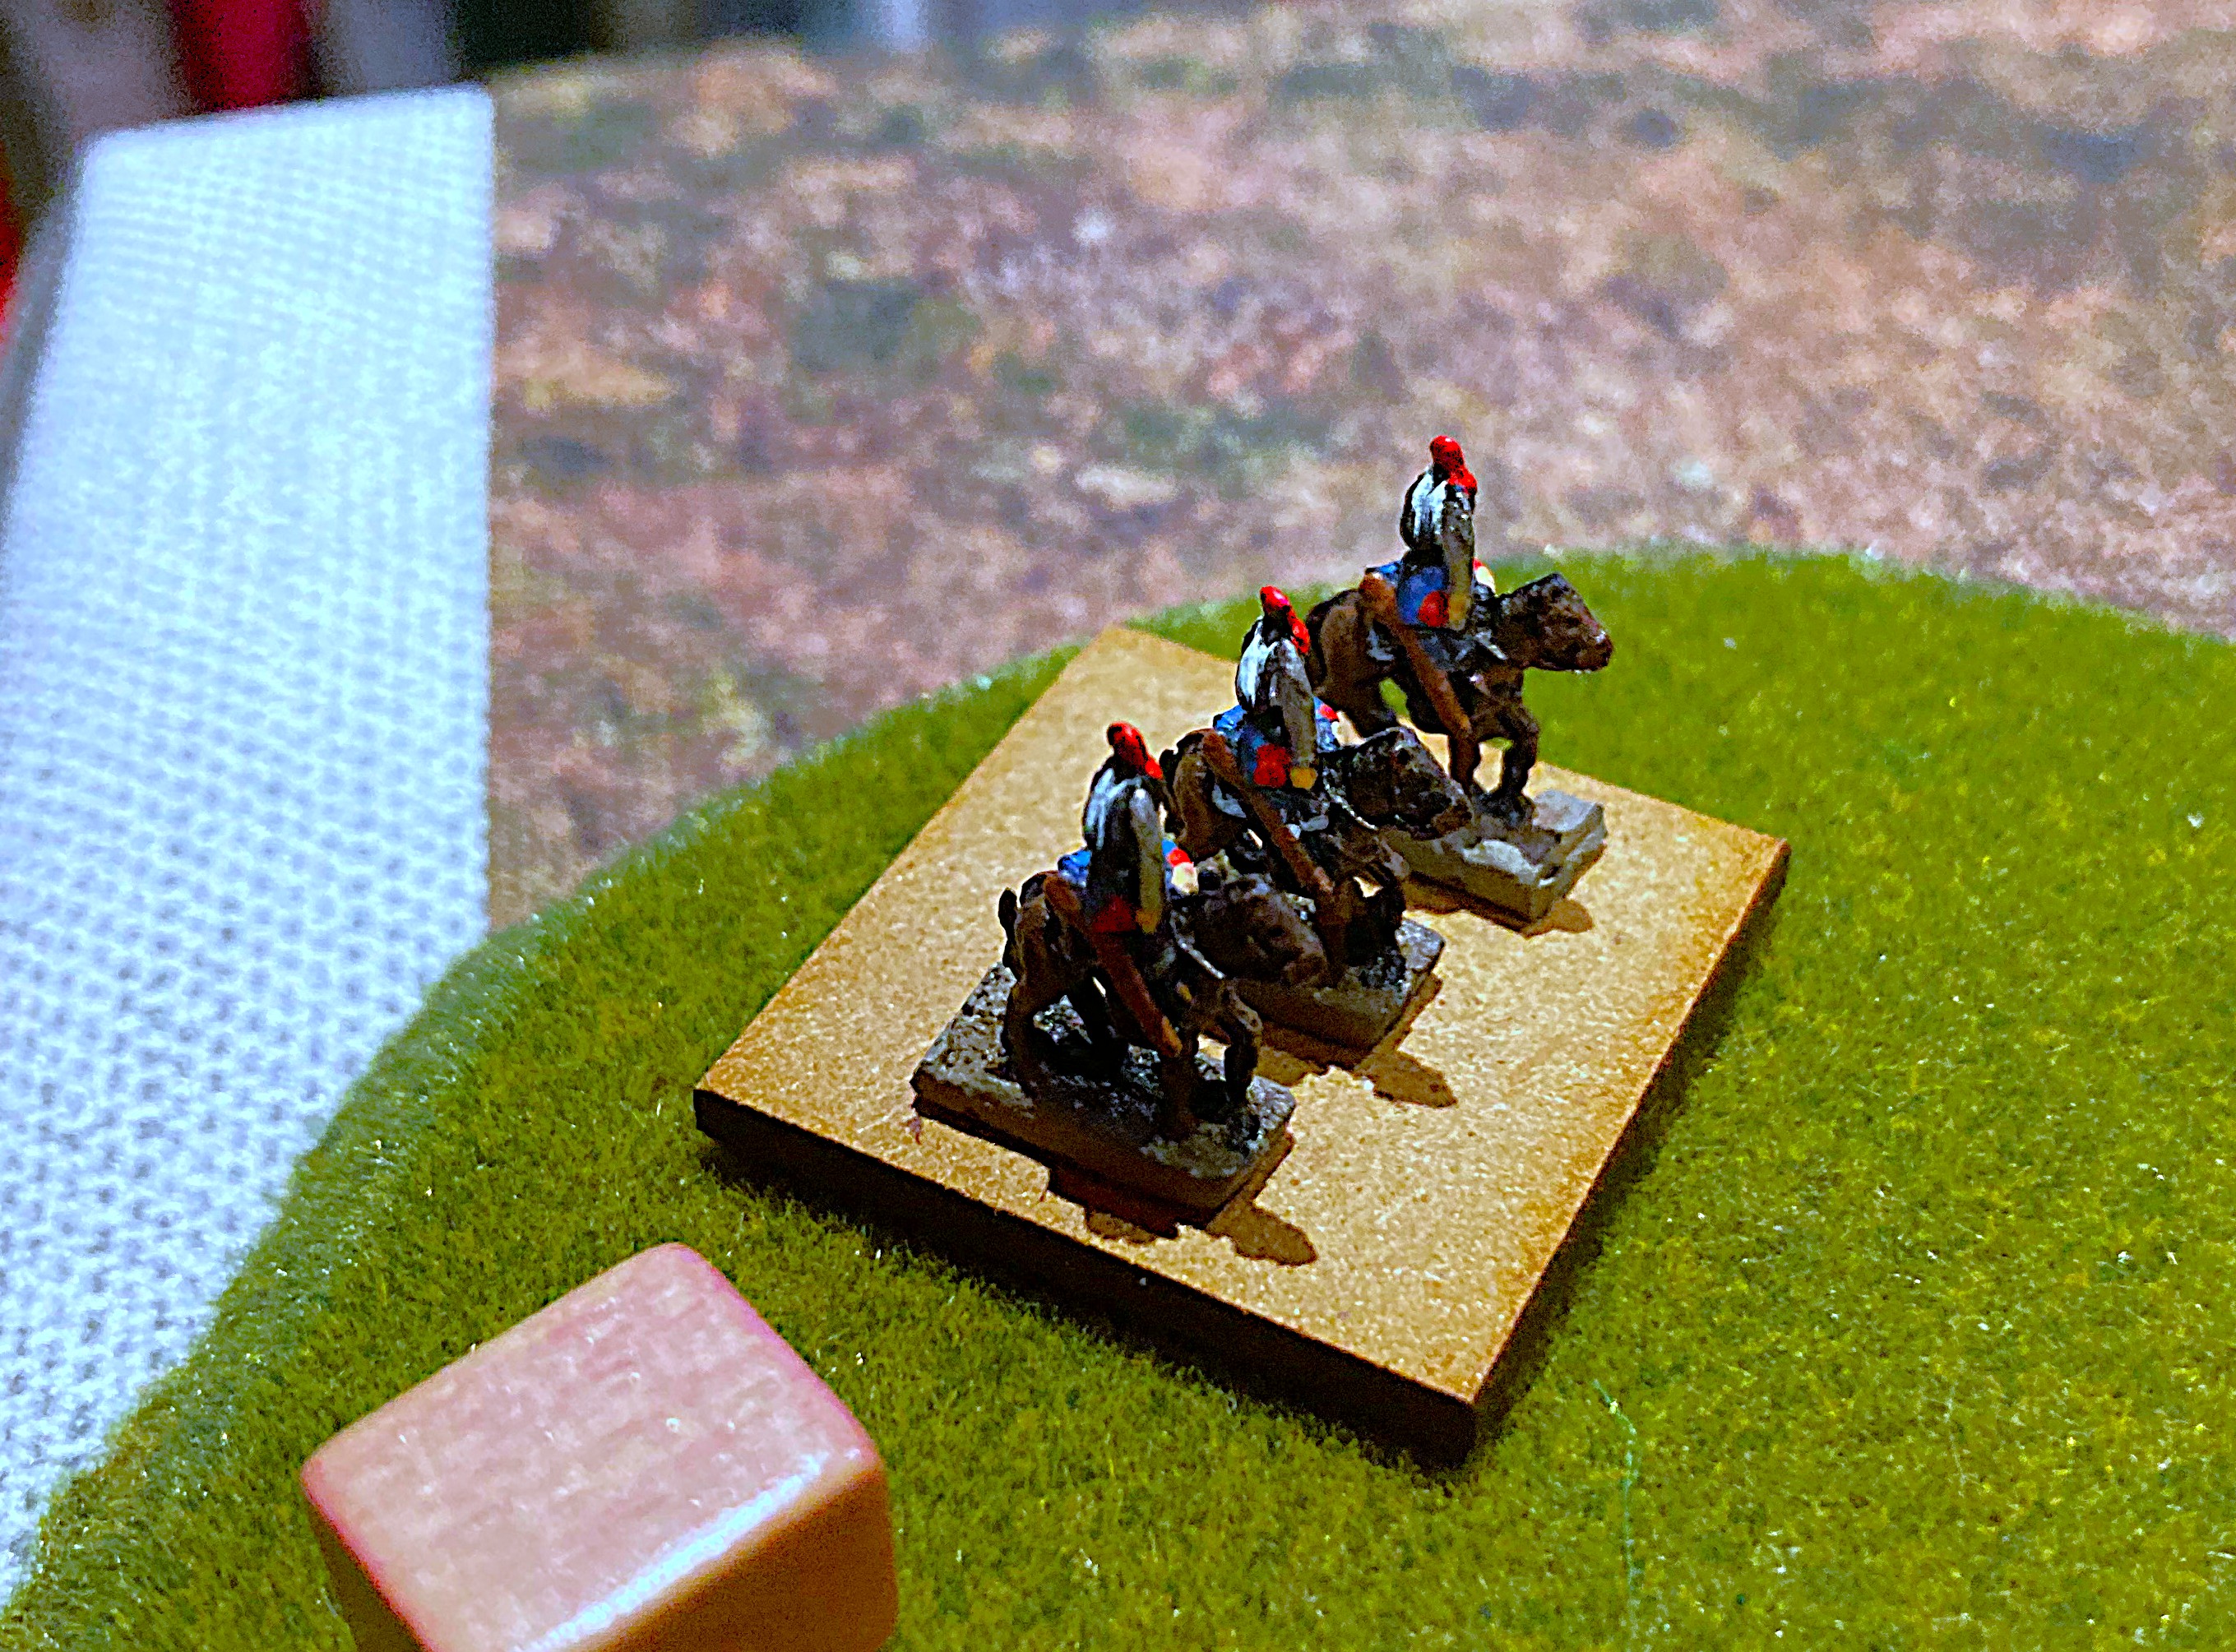
6mm: My preferred scale for a long time, for multiple reasons. Apart from mass effect, 6mm's advantages over larger scales include: it is relatively cheap; takes up less storage space; is more portable; is quicker to paint; is easier to find acceptable proxy figures. That's why I've got loads.

3mm or 2mm: All the advantages I just cited for 6mm apply even more so to 3mm or 2mm. However, at those tiny scales it becomes impossible to see much apart from a couple of basic uniform colours. Even the flags are hard to paint and hard to make out. Instead of uniform details, the trick is to use different layouts of figure blocks (assorted combos of lines, columns, skirmishers and officers) to help identify different units or types of unit. If you're eager to field an army quickly, this is one good way to do it.


How to build your armies

Build to purpose! Look at the scenarios available for your chosen army and they will tell you how many troops you need. For the conflicts covered in the BBB rulebook and BBEB supplement, there are spreadsheets in the io group files that show exactly how many bases of each type are required for the individual scenarios and the total needed for a particular war:

FPW scenario size and bases required

BBEB scenario size and bases required

Make the 'Flag' and 'Skirmisher' bases distinctive so that you can identify them easily from normal gaming distance. This makes it easy to tell different types of unit apart instantly.

One useful tip: I base about half of my ordinary infantry bases in pairs, 2"x1". This makes it easier and quicker to move units, as well as producing tidier lines.


How to collect or create terrain?

BBB is intended for recreating historical battles. Historical battles need historical terrain. Historical terrain tends to be a lot more complicated than the average wargame table, so you're probably going to need to invest in some. Still, there are a few different options available.


Felt collage. Felt is cheap and versatile and comes in all the colours you could want. It's easy to cut up different greens for woods and marshes, brown or grey for roads, blue for rivers, brown or grey for towns and villages, perhaps two or three shades of green/brown for different contour levels. That's not a bad way to get started quickly. You can upgrade from there. (I have - mostly.)


Custom battlemats. I don't mean ones you buy. I mean ones you make. For a couple of alternative approaches, check out the work of my regular gaming buddies Matt and Crispin.

Matt's work can be seen on his 'Pushing Tin' website. Specifically, look at his description of how he made his Gettysburg battlefield.

Crispin's is a quicker and more functional approach. He uses heavy-duty green paper catering tablecloth like this from Venuscello that you can buy in 25m rolls. He cuts out hills from MDF and spraypaints them green to match. (As he's got about 30+ mats now, he's got enough hills that he can usually manage with the existing collection.) He applies roads, rivers, villages etc with different coloured chalks. For areas of marsh, woods, etc, he resorts to the spraycan again. You can see plenty of his work in various game reports on this BBBBlog. A typical example is his Cold Harbor battlefield here.

Yet a third way is what I used for some of my Hungary 1848 and Crimean War battlefields: getting a battlemat printed by a commercial vendor. Back in 2017 I used Pixart, as explained here, but nowadays I believe there are companies specialising in wargame battlemats who will offer this service.


Let's talk about hills. Hills are the real pain, especially once you get among some Balkans or Alps or Pyrenees. Let me just refer you to the entire essay I wrote about these a decade ago.


Making terrain. I think the best advice I can give you here is to visit the comprehensive set of terrain tips that the good people at Little Wars TV provide to help players of their Altar of Freedom ACW rules.


Buying terrain. For several years, I had a rule that I always had to buy some terrain whenever I went to a wargames show. That did significantly improve my collection. Nowadays, I think I'd simply say "buy with purpose": decide what game(s) you want to play, work out what terrain you need to get started, and buy it. One piece of advice concerning buildings in particular: buy ones a scale down from your figures (i.e., 3mm buildings for 6mm figures, etc). Remember, terrain is a good investment - your woods, hills or roads can serve convincingly on far more battlefields than any one army you might build.


These are just a few pointers that barely scratch the surface of what there is to say about terrain. It is important, as the ground shapes the battle, so you want to get it right and have it look good. It's worth some time, money and effort to achieve that.


How to learn the rules

There are a few particular scenarios I always recommend to new players as 'training scenarios' for learning the rules before you get stuck into Gettysburg or Solferino. They are all reasonably small and quick to set up; don't involve too many troops or take too long; not all the troops are committed initially, so players have a chance to get to grips with the rules without being overwhelmed; the armies are asymmetrical, which both helps to bring out some of the features of the rules and makes for fun games; and they are entertaining little tactical puzzles in their own right. These favourites include:

Montebello (1859) - Austrians vs French in the Second Italian War of Independence;

First Bull Run (1861) - first big battle of the American Civil War;

Langensalza (1866) - Prussians trap the Hanoverian army during the Austro-Prussian War;

Loigny/Poupry (1870) - Republican French vs Germans in the Franco-Prussian War;

Velestino (1897) - Ottomans attacking Greeks in the Greco-Turkish War.

Apart from Loigny/Poupry (which is in the BBB rulebook and is the biggest game on this list), all these scenarios can be found in the io group via the hyperlinks. Note that you will need to join the group to gain access to the scenarios. 


How to find other players

Join the BBB io group or Facebook page and ask there. You might find players near you.

Join your local club and persuade your friends there to play.

Come to a BBB Bash Day convention.

Online! Alan Millicheap has translated a number of scenarios to Tabletop Simulator. Ask on the BBB io group or Facebook page to find a willing opponent.


Creating your own scenarios

Not as hard as you might think. Essentially, if you get the troops and terrain right, you'll be pretty close.

Try to set the troop, time and ground scales so the battle fits onto 6'x4' and lasts 8-12 turns, with 10-20 infantry or cavalry units a side.

If the battle had some unusual feature that needs a special rule, look at existing scenarios to see if there's a similar situation with a special rule you can adapt. 

Often the trickiest part of scenario design is to set the victory conditions. The standard BBB formula is a tried and tested one: designate perhaps 6 or 7 locations on the battlefield as Objectives and decide how many side A needs to hold at game end to draw or to win. Good locations to choose include key defensive terrain along one or both sides' battle lines, or perhaps along a second defensive line; also, locations whose capture would represent an attacker threatening flanks or lines of communication or retreat. Using the historical outcome as the 'par score' for a draw is a good rule of thumb.

And, of course, ask for advice on the BBB io group or FB page. Lots of helpful people there!


That's it for now

Lots more that I could say but I hope this is enough to get you started. Sorry it isn't perfect, but as it's 10 years late already, I figured publish and be damned. Questions always welcome, especially from new or would-be players, so if there's anything I haven't covered that you'd like to know about, get in touch.

Happy gaming!

***

This is one in a series of essays, "Reflections on Wargaming", exploring various questions about the hobby. The full list can be found here.


Baggage to Catalonia: the battle of Valls (1809)

Mark treated us to another of his Brit-free Peninsular War battles: Valls (1809).

In synopsis: the French had invaded Spain in 1808. A corps under St Cyr had captured Barcelona in December, defeating the Spanish Army of Catalonia at Molins de Rei. The AoC was then put under the command of a Swiss general, Theodor von Reding. In early 1809 he deployed it as a 60-mile screen, enabling St Cyr to defeat part of it in detail and threaten its supply base at Tarragona. Reding was forced to concentrate what he could and undertake a risky march through Valls to cover Tarragona. He encountered a French division under Souham guarding the river Francoli, forced a crossing, and managed to get much of his baggage across it on the road to Valls. However, St Cyr arrived with Pino's Italian division to reinforce Souham. Reding therefore thought better of it and fell back across the Francoli again to defend the heights behind the river. After a long siesta, during which both sides reorganised, St Cyr duly assaulted and routed the Spanish army. Reding was mortally wounded in a last desperate cavalry charge.

Of course, others have wargamed this battle before us (e.g., see here and here), but seem to focus only on the second half of it, the simple French assault. Mark's scenario embraced the whole thing, with a 'Siesta Interval' punctuating it. This approach has the twin advantages of featuring a baggage train (always amusing) and making it one of those multi-phase battles that tend to be among the most interesting to wargame. (See my "Reflections" essay on "Changing Situations Mid-Game".)

Here are two photos to set the scene before the battle report:


Reding leads his first division onto the battlefield, a 2-base unit of white-coated guards at the head of the column, the three wagons of the baggage train bringing up the rear. Baccus 6mm figures from Mark's collection.


The whole battlefield. Spanish arrive from bottom left. (Including Castro's division, bottom right of pic. Mark had put them there in their box, which fooled me into thinking that's where they would turn up. That slightly coloured our plan, probably for the worse. Oh well, should have read the scenario brief better.) The bridge the wagons must use is the one with Souham's little vanguard regiment above it, facing Reding's advance guard. All the other French arrive through Valls.


I took quite a lot of photos this time. In case you don't want to look through all the other 14, the brief summary of the game is this:

- Dave and I as the Spanish decided to use our initial numerical superiority to stretch the French. The bulk of Dave's division focused on trying to get the wagons across the only viable bridge they could use; my division pushed up on his right; small flanking forces pushed round each end of the French line to threaten Valls and pin or distract French units.

- The flanking forces did their job and came within an ace of capturing Valls;

- Dave's repeated attempts at crossing the river briefly got one wagon across, but ultimately failed with heavy casualties;

- My division got across the river but then got battered after Dave had been repulsed;

- This meant that for part 2, after the siesta, we had very few troops left to face the overwhelming Franco-Italian onslaught;

- Nevertheless, we made a valiant stand and Crispin was only able to eject us from the crest and claim victory on the final turn.

Now you can look at the rest of the pics or skip to the Reflections at the end.


Between our first and second bloody repulses. Just visible at left edge is the blue 'Spent' marker inflicted by French musketry on one of Dave's units as it tried to storm across a bridge. In the centre, a Spanish regiment has crossed but is still in march column. My tiny cavalry unit is doing its best to pin the French column advancing from top right, but part of that column will fend off the cavalry and the rest will smash our column back behind the river.


On our extreme left, the Spanish guards executed a flank march through the village of Picamoxons (top of pic). The French cavalry (bottom right) prudently evade. Unfortunately, Dave's Spanish cavalry (left edge) decided to stop for a rest rather than press the advantage through La Plana.


More bloody river crossings ... a second Spanish unit is mauled failing to cross the lefthand bridge. Two French regiments storm across the main bridge to attack the wagon train but are driven back by a Spanish counterattack. I think that remaining French regiment south of the river got wiped out next turn.


Last turn before the siesta. Time was about to run out for getting wagons across. Dave managed to push one across the bridge, supported by an infantry regiment, but the infantry were wiped out by French fire and the wagons assaulted by French infantry. No victory points so far for Spain. (We could have earned one VP for each wagon north of the river by siesta time.)


And on the extreme right - oh, so close! After distracting the French left and easily evading the infantry that turned to face it, my cavalry regiment was close enough to capture Valls and had two moves to do it. Unfortunately, it failed its movement roll on the penultimate pre-siesta turn; then those faintheart French dragoons from the opposite flank got the full move they needed to ZOC us and thwart us. No Spanish VP for taking Valls either! Thus we reached the siesta on zero VPs.


To rub salt into the wound, Crispin outflanked and wiped out one of my regiments that had crossed the river on our right as well. On the opposite flank, I got some of my Catalan miquelet militia killed for no particular good purpose too.


Consequently, once we had redeployed during the siesta to defend the heights south of the river, this is all we had left - 18 bases in total: three infantry regiments in the front line, with a few guns; two spent units kept safely in the rear (though, inevitably, we would soon commit them forward). Out of shot to the right is my cavalry regiment that had almost captured Valls.


And here is most of what faced us (two cavalry units and another infantry regiment are out of shot to the right): more than twice our number and rather better quality. The infantry in white are Pino's Italians.


The full picture post-siesta. To win, the French need to exceed Spanish VPs. That would have been harder if we'd scored any in Part 1. As it stands, there are 4 VPs at stake: 1 VP for holding four of the five righthand bridges; another VP for holding all five; 1 VP for being last to have sole possession of the first level of the heights bottom left; and 1 VP for the crest. Thus, effectively, the French must clear us off one of the contour levels, and they have 4 turns to do it. (There were 6 turns pre-siesta.)


Turn 7: all but one of Crispin's units managed a full move. Neither of our batteries managed to prevent a unit crossing a bridge. How depressing. Maybe we should have committed everything to defending the bridges - except that there were more bridges than we had units left. On the bright side, surely our luck could only improve?


That black cube on the right shows it improved slightly: our battery there is temporarily low on ammo having wiped out the French shock cavalry. But our lefthand battery has been silenced by French artillery fire, just in time to be stormed by French infantry. It died and our guards were driven back up onto the crest. Meanwhile, massed French/Italian infantry form up to assault our other regiments.


Desperate times, desperate measures. Bring up the Spent rubbish! Determined to sell their little lead lives dearly, our conscripts on the left charge and wipe out a French regiment. On the right, the Spent and Fragile miquelets fill a gap in our line.


They think it's all over - it is now. Three small Spanish regiments, already variously Spent (blue cube), Low on Ammo (black), Fragile (pink) and/or Disrupted (yellow) are enveloped and assaulted by no fewer than nine French and Italian regiments, including Aggressive cavalry (green cube). Our heroes finally succumb to a hail of die roll modifiers.


All that's left of the Spanish army: my 1-base cavalry unit, hanging on in the corner of the table long enough to count as contesting the Level 1 hill (hurray - we retain a VP!) before cantering off to take the bad news to Madrid.


Reflections

Ifs, Buts and Maybes. Although our Spanish army was comprehensively crushed, in game terms it was still a close-run thing. There were several opportunities for us to claim one or two VPs pre-siesta. Had the dice been kinder there, or on Turn 7 when the French swarmed across the bridges, a draw or even a win could have been on the cards. At the same time, we can point at things we Spanish players should have done differently, while Crispin's performance as French C-in-C was hard to fault. Overall, a great scenario full of possibilities.

Wagon Trains are Fun. The standard BBB formula of designating half a dozen or so fixed locations as Objectives works very well. But including a baggage train as a mobile Objective adds another dimension that makes the tactical decisions even richer. And it's something different, and variety adds fun.

The Record's Stuck! (Or for younger readers who don't understand vinyl: the CD's glitching; or, for even younger readers: the MP3 is on permanent loop ...) Some of the same lessons come up time and again from our games. Asymmetry makes for good games; changing situations midway makes for good games; if both sides are obliged to maneuver and have room to do so, that makes for good games ... this was a good game.


Monday, 9 June 2025

Army History journal on Clausewitz 1799 Vol 1: "engaging and interactive"

Professor Murray has just alerted me to another recent review of one of our Clausewitz translations, "Napoleon Absent, Coalition Ascendant: The 1799 Campaign in Italy and Switzerland, Volume 1". The generous reviewer this time is LTC Tom Vance, writing in Army History journal. I thank LTC Vance for his thorough and fair review. The full review can be found in JSTOR. Favourable comments include:

"With 509 footnotes accompanying Clausewitz’s original 39 notes, Murray and Pringle have created an engaging book within this translation."

"Clausewitz’s text and Murray and Pringle’s commentary and analysis are so seamless that it is easy to forget whose voice you are reading"

and a nicely backhanded finish:

"their book requires studying, not just reading. However, the effort is worth it. Their commentary is easy to follow, and the cross-referencing creates an engaging and interactive experience [...]. When you are finished, however, you feel like you have earned several professional military education credits."

Go on - buy the book, enjoy an engaging experience and earn yourself some PME credits!

A couple of previous reviews of the 1799 works are reported here and here.


Tuesday, 3 June 2025

Spain's biggest Peninsular War battle: Ocaña (1809)

Another week, another wargame, another finely crafted, lovingly edited blog post ... our battlefield this time is Ocaña (1809), which I believe features the largest Spanish army of the entire Peninsular War.

After his victory at Talavera, Wellington withdrew into Portugal. Nevertheless, even without his support, the Spanish junta decided to launch three Spanish armies to converge on Madrid. The largest of these was that approaching from the south under Juan Carlos de Aréizaga. Unfortunately, he dithered and gave the French time to concentrate against him. Aréizaga decided to defend the line of the gorge in front of Ocaña, but left his right hanging in the air. The French were outnumbered 3:2 but had a much better quality army. King Joseph and his chief of staff, Marshal Soult, attacked by pinning the Spanish frontally while launching a strong left hook against the open Spanish right. The Spanish line was rolled up and Aréizaga's army disintegrated.

Our game didn't quite follow the script. See how it went in the dozen pictures below (almost all taken from the Spanish point of view, as I was commanding the Spanish right). Some reflections follow at the end.

Dave W commanded the Spanish left, tasked with holding Ocaña (the town with two white Objective counters on it). The buildings at San Francisco (top left) and San Isidore (centre right) are also Objectives. So are the two road exits off the bottom edge of the pic - the Spanish lines of retreat.

The dark grey strips in front of Ocaña mark the very steep slopes of the gorge; the brown strips are where it gets shallower and gentler. Hard to tell, but the light stripe running along the centre of the gorge is a stream; the other light strips are roads. The 'wood' lower right is actually very open, no obstacle to movement or fire, just blocks LOS.

Units with one flag are Trained; those with none are Raw militia. (Only the French get 2-flag Veteran units.) Pink cubes denote Fragile; red show that artillery units are of Reduced strength. The best troops on our side are in Zayas's division, the two leftmost brigades in this pic, unfortunately fixed in place until Turn 3.


And here we see my right wing, hanging in the air as described above. A lot of troops but a lot of rubbish. My Fragile cavalry covering the flank are hugely inferior to the French cavalry (top right) who are rated Shock or Aggressive. At least we have a hill Objective, 'El Navajo', to fall back on and defend.


Crispin, commanding the French right, immediately stole a march and had a brigade leap into Ocaña, undeterred by feeble Spanish fire. (The yellow cube shows the French suffered some Disruption, but not enough to stop them.) He also deployed a grand battery on the hill facing Ocaña (top of pic) to hinder any counterattack by Dave.


Mark, acting as Marshal Soult, points his deadly baton at my isolated 1st Division under General Lacy, which my cavalry (now bottom right) promptly deserted as soon as the French horse approached. Four French brigades march on, top left. Actually, one of these comprised Polish troops and another Germans. For some reason, these two units failed to cooperate all game ...


Dave's first attempt at responding to the French incursion into Ocaña is rebuffed with heavy casualties - the formerly large Spanish unit just to the right of the town is now much smaller, Disrupted and Spent (blue counter). The grand battery briefly ran short of ammo.


Matters develop briskly on the Spanish right, with huge swings of fortune. The French cavalry works its way around the flank to get behind the Spanish line (top right). However, the first French infantry assault against Lacy's troops suffers an unexpected and bloody repulse (a 6:1 die roll), which dislocates the French attack and leaves the French cavalry fighting a separate battle for the rest of the game.


Another swing of fortune, this time on our left. Having taken heavy punishment last turn, Dave dishes some out: a Spent French brigade is driven back from Ocaña (top right). Can the now isolated French unit in the town hang on?


Looking inward from the extreme right end of the Spanish line, where Lacy is poised to fall on an exposed French flank, now that the French cavalry is focusing on our defensive position on the El Navajo hill (next pic).


And here's a French cavalryman's-eye view. The French are in some disarray, having finally caught up with the Spanish cavalry and driven them back but (embarrassingly) failed to destroy them. (Green cube = Aggressive; purple counter = Shock.) El Navajo is strongly garrisoned but about to be assailed from two directions: cavalry from its right, infantry against its front.


Patient stuff around Ocaña. Dave is trying to organise his forces for a massed assault; Crispin is frantically trying to persuade King Joseph's royal guard to reinforce his foothold in the town. The 1-base cavalry unit made it briefly and can be seen in the middle of Ocaña, about to be mown down by musketry from its flank.


The French combined assault on El Navajo has been thwarted: the Frenchcavalry were repelled with loss; the French infantry actually made it to the top and effectively destroyed a Spanish infantry unit, but a Spanish counterattack drove them off again.

Meanwhile, bottom right, I'd cautiously pulled back a brigade to guard the road exits, but now felt emboldened to push it forward again.


This emboldened Mark in turn to launch all his cavalry against said brigade. One cavalry unit duly charged - but the other rolled snake-eyes and stalled! (We joked that they were bidding for promotion to Joseph's similarly disinclined royal guard.) Result: the heavily outnumbered cavalry unit was wiped out. However, when the infantry tried to rally from the resulting Disruption, being Fragile they failed so badly they lost a base, became Spent, and fell back 12" to guard the escape route again. (At which Mark cheered up somewhat and declared that his charge was vindicated.)


Game end on the right: Soult (top right) surveys the sorry remnants of his force (one inf unit top right, one cav unit foreground) and the seemingly impregnable bastion of El Navajo.


Game end on the left: a Spanish charge expels the Josefino royal guard, but cannot dislodge the stubborn French who have held Ocaña since Turn 1. This left the French holding the three Objectives they needed to earn a draw. Hurrah!


Reflections

Quality vs Quantity. No harm in saying this once again: asymmetric contests like this, between two very different forces, always produce a good game.

Swings of Fortune. In a BBB game, we roll a lot of dice, and using 2D6 makes the results tend towards the average. But in this game, both sides seemed to get more than the usual proportion of extreme dice - either very high or very low. This produced some unexpected results and radical changes of fortune, forcing us commanders to adapt our plans agilely and on the hoof - not to mention generating whoops of delight or moans of dismay as applicable. The dice definitely added to the fun.

Combined Arms and Concentration of Force. Post-game, Mark rued the fact that his cavalry had ended up separated from his infantry and fighting their own battle. This wasn't primarily his fault - 9 times out of 10, he could have expected to smash Lacy's division and keep coordinated - but it's true that the resulting division of effort hurt his attack and helped me to defeat French units in detail.

The Difference between 0 and 2. The town of Ocaña was worth 2 Objectives. The difference between holding and losing it, in a game where the French needed 3 Objectives to draw or 4 to win, was therefore huge - enough to turn victory into defeat. I suggested Mark split the town into two halves next time.

Forgetting Scenario Special Rules. To prevent the Spanish from forming ahistorical grand batteries, Mark had a scenario special rule obliging Spanish artillery units to stay buddied up with their own infantry units at all times. I duly forgot it and broke the rule repeatedly during the game; the rule author did not notice or remind me. With scenario special rules, there is a delicate balance to be struck: one or two adds flavour; more than that and they either start adding complication and getting in the way or (as here) just get forgotten. Maybe this one was a rule too many - I never had two artillery units together anyway.

Looking Forward to the Book. This was another of Mark's set of scenarios intended for an eventual Peninsular War scenario book. They've all been very good games. Roll on publication - hopefully early 2026, maybe even by the end of this year?