Wednesday, 26 February 2025

A Taiping battle: 2nd Hukou (1860)

A mere eight years ago, I invested in a four-volume work in Chinese: a military history of that immense yet unknown conflict, the Taiping Rebellion. (As I recorded at the time here.) Obviously I meant to generate scenarios from it, but competing priorities, lack of time, paucity of other sources, and especially the language obstacle meant this project has lain fallow ever since - until last year, when OWS made a new friend. Jeremy speaks Chinese and has studied this war seriously. He is back in Hong Kong now, has access to good Chinese sources, and has been working on BBB scenarios for it.

I was excited to see his first one arrive on our tabletop at OWS this week. Stalwart OWS member Bob Medcraft laid it on for us. Bob's garage is full of armies of all nations and eras, so it was no great problem for him to rustle up a battle's worth of 19th-century Chinese in 15mm scale. (Actually, that's not fair - although he had enough miscellaneous Oriental troops for the core of the two armies already, he did paint up dozens of extra figures specially. Some of these were figures he and some other gamers had got Steve Barber to sculpt as private commission a while ago.)

The scenario in question was for the Second Battle of Hukou (22 December 1860). This was a tricky one for Jeremy to reconstruct as he had to interpret and reconcile conflicting sources, as well as tracking down a good map. The strategic situation is that the Taipings were trying to capture the city of Wuchang, far up the Yangtze from their capital of Nanjing. To do so, they sent four widely separated columns to converge on it. One of these, some 30,000 men under Yang Fuqing, was to capture Hukou, secure water transport there, and then reach Wuchang by river. The Qing government forces defending Hukou had about 25,000 poor infantry in a stockaded defensive line east of Hukou, backed up by 15,000 or so cavalry, plus a small garrison in the town itself and adjacent fort. The stockade line had its right resting on a river and its left against a ridge of steep hills running alongside the Yangtze.

There were five victory locations: the three stockades; Hukou itself; and the village of Sanli, halfway between them. The Taipings could earn an Objective each for Hukou and Sanli; one more for taking any two of the three stockades; and another one if they held either Hukou or Sanli and the Qings failed to evacuate at least five infantry units up the Yangtze. They needed two Objectives to earn a draw or three to win.

Here's how our game of this unusual and exotic battle went.

Qing defenders of the northernmost stockade. Each stockade counted as a Town in BBB terms, capable of holding one infantry unit, and had two artillery units in front of it in 'Rifle Pits' (1 level of cover). The first line of Qing infantry was Raw and Passive - and these were their better troops. 15mm figures from Bob's collection, I think a mix of Khurasan, Steve Barber, maybe some Eureka.


View of the whole stockade line. Hukou is the sandy-coloured felt top right, beyond the wooded ridge. (Bob mostly plays competition games where a few bits of felt is sufficient terrain, so he forgot to bring any trees or buildings.) The second line of infantry is Peng Chunyao's Hunanese contingent - these were not only Raw and Passive but Fragile as well. Behind them is a mass of regular cavalry. All the Qings started the battle Disrupted because the Taipings attacked at dawn.

Pan out some more and we see the Taiping attackers arrayed. All the Taipings were rated Aggressive and at least Trained. Three infantry units were classed as Veteran 'Guards'. The little 2-base unit and artillery on the right centre hill, flanking the stockade line, was a force of 'picked men' that included a British sailor, Augustus Lindley, whose account is one of the sources Jeremy used.

Crispin and Phil commanded the Qings. Bob took the Taiping left, I had the centre, and Dave W our right. Our plan, such as it was, was for Bob to pin the Qings frontally while I rolled up the stockades from the right and Dave pushed through towards Sanli and Hukou.

A closer look at the Qings in the stockades. Even though Jeremy created a special weapon class, 'Chinese Artillery' (CA), with lower firepower than normal Western smoothbore cannon, that artillery proved formidable.

Our attack develops on the right. I get my two blue brigades onto the hill above the stockades' flank. The picked men and a supporting brigade rout a Qing effort at a spoiling counterattack and stand atop the ridge. However, this has left them Disrupted, Low on Ammo and exposed.

Crispin and Phil take due advantage. Dave's picked men are overrun by massed cavalry. However, my thin white line repels a Qing infantry brigade.

Freshly squeezed Mandarins! The Taipings' turn to attack again. As per the plan, we stormed the first stockade, routing some Qing brigades. The blue brigade is one of mine that exploited one victory and achieved a second. However, in retrospect, that may have been a mistake, as it was left exposed to a subsequent flank attack.

A couple of turns of see-saw counter-attack and counter-counter-attack ensued. The exposed brigade has fallen back Spent out of shot beyond lower left corner. We launched more attacks to try to take advantage of the Qing counter-attackers' Disruption. As their growing collection of blue 'Spent' counters shows, we smashed some back, but that left us Disrupted (yellow counters) and vulnerable in turn. In particular, that left-hand unit in green drove back its foes, only to unmask two batteries at cannister range. That didn't go well.

On our far right, one Taiping Guards unit approaches the fort by the Yangtze protecting Hukou. No further progress was possible here. Note the impeccably manicured fingers of the Qing mandarin. Long plaited moustache just out of shot.

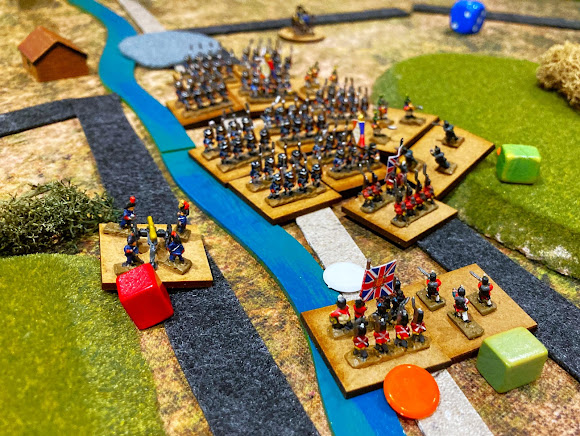
I think we played seven turns out of 10. My blue brigade holds a stockade but Qing counter-attackers have advanced past its left. There are too many of them, and too few of us, for us to take any more of the stockade line. Our one glimmer of hope is the white-coated unit just visible top right. This (plus three other units behind it) would have had a good chance of taking the village of Sanli (sandy felt top right) and cutting the Qing evacuation route. If we'd had time to play the last couple of turns and managed to take and hold Sanli, it would have been a draw; otherwise, a Qing victory. 

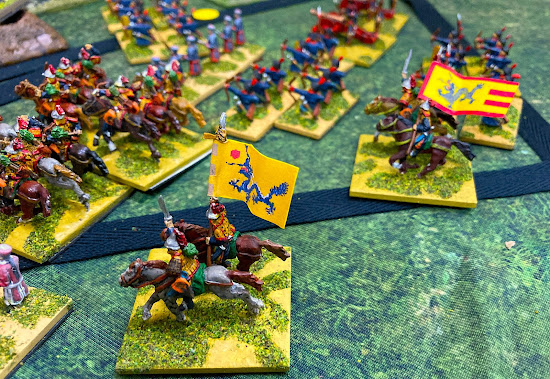
The victorious Qing commanders fly their banners proudly.

Reflections:

The virtues of 15mm. I know there are other players who use 15mm for BBB, but at OWS we almost always use 6mm or 10mm. It was a nice change to 'go large' and see individual soldiers more clearly. We had enough figures on the table for it to still look like a battle, not a skirmish. One minor disadvantage was that Bob's base frontages were larger than the standard BBB 1" (I guess 40mm), so initial deployments were slightly more cramped than the scenario envisaged, but otherwise it worked fine.

The exotic East. We all loved the fact that we were dipping our toes in the Yangtze and learning about the Taiping Rebellion. Fundamentally it's still just 19th-century horse and musket, of course. But Jeremy's addition of Chinese weapon types and his use of standard BBB attributes to rate the two very different armies' troops captured the different flavour of this war.

Terrain aesthetics. To capture it fully, we really needed pagodas in the town, Chinese buildings in the villages, and junks on the Yangtze. Not to mention some trees in the woods (couldn't see the trees for the woods? shouldn't it be the other way round?). Hopefully we'll be better equipped next time.

Complex situations make interesting scenarios. A simple assault on a stockade line wouldn't have been much fun. (See my essay on frontal assault games here.) The fact that we had a flank option, plus an evacuation route to threaten, gave both sides more choices to make, more scope for maneuver, and more interesting things to do.

Historical research. Huge kudos to Jeremy for his work in taking conflicting sources, making sense of them, tracking down necessary geographical and other details, and turning all this into a historically accurate and eminently playable scenario that brought some obscure and fascinating history to life for us players. This is what BBB is all about!


Tuesday, 11 February 2025

Battle of the Pyrenees (1813) - an operational-level game

This was the latest in Mark's set of Peninsular War battles. It's a challenging one to bring to the tabletop, as the Battle of the Pyrenees was less a battle and more a week-long offensive, involving over 100,000 men and encompassing multiple engagements fought across 1,000 square miles or so of very mountainous country. After Vitoria, the French remnants had retreated behind the Pyrenees. Wellington's army formed a screen in the mountains to cover him while he besieged the fortresses of Pamplona and San Sebastian. Soult mustered fresh forces to bring his own army back up to some 80,000 men and launched an attack through the Maya and Roncesvalles passes to relieve Pamplona. The Allies gave ground, suffering some reverses on the way, but finally repulsed Soult at Sorauren.

Mark said his operational-level scenario was initially inspired by the approach I took to the Austro-Prussian War border battles in the Bloody Big European Battles! scenario book - a single scenario covering four different actions (Nachod, Trautenau, Skalitz and Soor) over two days on a 25-mile front - but that it actually owes more to my more recent treatment of Lee's "Seven Days" in 1862.

To enable BBB's elastic scale to stretch that far, Mark limited LOS to 3", dispensed with canister, decreed that there was difficult terrain everywhere, allowed for some strategic movement in two 'Night Intervals', and limited the number of units that could be committed to a single assault. To make it even harder for the French to relieve Pamplona, he included rules for possible fog (stalling movement in the mountains) and possible supply problems (rendering whole French corps low on ammo).

This scenario also had particular appeal for me because it features "the inexperienced General Pringle [who] found himself unexpectedly in command" in the Maya Pass. I had to look him up. Apparently William Henry Pringle was also MP for St Germans in Cornwall at the time and the House of Commons subsequently formally thanked him for his services in this and other battles. Naturally I asked to command the Allied left in our game. Here are eight annotated pics to show how that went. Even if you don't care, you could still scroll to the end to find what thoughts were provoked by the game.

Spanish troops besiege Pamplona. Do they look so large, and the fortress so small, because of the dramatic foreshortening effect of looking down from the Pyrenees? No, it is because they are 6mm Baccus Napoleonic figures from Mark's collection, while the fortress is TTW01 European Fortified Town from Baccus's new(ish) Teeny Tiny Terrain range.

Most of General Pringle's command, set up to defend the Maya Pass and the village of Elizondo beyond it (white objective counters). No, it doesn't have a tarmac dual carriageway. The dark grey strips are Level 1 contours, while the green polystyrene hills are Level 2 (the valley in the middle, with the blue stream and light grey road running through it, is Level 0). This looks like a decent position, with flanking units atop steep slopes protecting the central blocking brigade. The orange and green counters note that these are top-quality British units - Veteran, Aggressive, with Skirmishers and the Devastating Volleys attribute.

Lots of lumpy Pyrenees! Looking south from the French end of the table. Pamplona is just out of shot, top right. Three roads provide the French with three axes of advance towards it (plus the option of a wide flanking maneuver via the top left corner). The chaps with the pink counters, lower left, are French National Guards (Raw, Passive, Fragile - a bit rubbish). Every other unit in view is Allied. You can see how widely dispersed they are, and also how small they are - mostly just two bases strong. White counters are victory locations. Most of these are time-sensitive. The French have until Turn 4 to seize the two passes (counters on roads) and until Turn 6 (as written) to capture the three villages and a hill in a rough row beyond the passes. There are another two in the top right quarter, and one for getting close to Pamplona.

Turn 1: D'Erlon's French advance towards Campbell's Portuguese in Aldudes, astride the central axis. Admire the French National Guard in their bicornes on the hill on the left. The rocks, lichen, logs etc are to remind us that the mountains are Difficult Terrain.

Reille charges up the Maya Pass. Even with its 3:1 odds, that big 6-base (6,000-man) French division has less than 50% chance of beating these tough Brits in cover on their steep, rocky mountainside ...


... but a bizarre sequence of dice sees the French win on a 6:1 roll that lets them hurtle into and smash the second British brigade as well with a second 6:1 roll. My isolated guns look embarrassed and the road to Elizondo is open.

Things got hectic after that and I didn't take any more photos until Turn 7. On my side of the table, with that hole blown in my line at the start, all I could do was sacrifice yet more units to play for time until Wellington could turn up with reinforcements. I lost Elizondo. Dave, commanding our right against Phil, did better, counterattacking aggressively and preventing the French taking the Roncesvalles Pass in time, though they did capture Aldudes.


Hot fighting on our right. Hard to tell who's who, but Dave has managed to establish a reasonably solid line to hang onto objectives through that crucial Turn 6. (Albeit we were helped by not one but two turns of fog hampering the French advance.)

Panorama of most of the battlefield on Turn 7, with red lines added to show what's going on. Remnants of Pringle's original force are left of the line at top left. Wellington has turned up on our left flank with 6th & 7th Divisions (below line at bottom of pic) to cover the western axis. Dave, reinforced by Picton, is holding the line upper right.

At this point, the scenario as written was effectively over, as it seemed clear that it would be a draw. We discussed tweaks to the victory conditions and played on for another couple of turns, at which point we again called it a draw under the revised conditions.


Reflections

Stinky dice! I know that we roll a lot of dice in BBB, that the luck should even out, and that starting the battle by having a third of my force wiped out immediately by two rolls of one on my British red dice against sixes on Crispin's blue dice may have coloured my view of the matter. Still I will repeat my complaint from after our Salamanca games that players should all use the same dice pool.

Super-asymmetric = super-interesting. As noted above, this game pitted two very different armies against each other, with very different challenges. The Allied force - small but high-quality units - was fighting a delaying action against an enemy army of much larger divisions that was having to overcome time and terrain as well as armed opposition. Asymmetric games are always fun.

It's not linear warfare! Maybe 'perpendicular warfare'? The terrain presented different tactical problems from the usual. It also made those operational-level decisions about which axis to commit reserves along much more momentous. It gave shape and character to the game.

It's tricky but it works. These operational-level games (multi-day battles across large areas) are radically different from a regular pitched-battle scenario. They are therefore harder to design, particularly when it comes to setting victory conditions, and they generally need some special rules. That said, we've done enough of them now to have a fair idea of what works and to have established some basic principles accordingly. Consequently, although in this first playtest we found we needed to apply some tweaks mid-game, it was impressive that Mark's draft was so close to the mark already.

Ways to skin cats. This was a playtest among experienced and creative players. It generated productive discussion about how to adjust the victory conditions and various special rules to capture the character of the battle and create a good game. People threw ideas into the mix - for instance, there are many different ways you could write a fog rule. This was an evening well spent in helping Mark to refine his scenario to be as clean, elegant and entertaining as possible.

The personal connection. OK, I don't know just how distant a relative General Pringle must have been, but even just sharing the name added an extra element to the game.

Pretty terrain items. The fortress is a nice addition to Mark's growing collection of special terrain items. Even though it sat in a corner of the table and didn't see any action, it was important as the reason for the battle, and enhanced the game as a distinctive and aesthetically pleasing piece. All part of another High Quality Gaming Experience (TM).


Thursday, 6 February 2025

Review of Nigel Smith's "The Honvéd War"

[First published 6 February 2025; updated 27 February 2025.]


Regular readers of this blog will know that the Hungarian War of Independence is one of my particular enthusiasms. Decent English-language sources on the military history of this substantial war are few and far between. I am therefore very pleased to report on an important addition to this underserved bookshelf: The Honvéd War: Armies of the Hungarian War of Independence 1848-49, by Nigel James Smith, which was published by Helion in 2024.

Thank you, Santa!

(Let me preface this book review with a disclaimer. Nigel and I are both Helion authors; I gave Nigel some minor assistance with the preparation of his book and he kindly acknowledges me in it. Furthermore, I have met him once and I owe him a drink. That said, I was already in his debt because of his previous visit to 1848 in his work published by Pickelhaube Press in 2006, The Magyar War, which I had found very useful and full of information that was difficult to obtain from anywhere else.)

Anyway, to business:

For £29.95 you get over 200 pages of nicely produced book on glossy paper that enables a gallery section in beautiful colour, as well as dozens of rare black-and-white illustrations scattered throughout the text.

Of those 200 pages:

- 20 are devoted to the history of the war;

- 60 pp to the organisation, weapons and tactics of the three armies involved;

- 9 pp to ten of the most important generals;

- 73 pp to uniforms and flags (including 14 colour plates);

- 29 pp to historical orders of battle.

The history section is nicely written and does a good job of explaining the course of this complicated war. Perhaps my favourite part is where Smith describes how "Jellačić, in his capacity as [Kaiser Ferdinand's] Croatian Viceroy, on behalf of King Ferdinand of Croatia pronounced a declaration of war against King Ferdinand V of Hungary. Astute readers will have noted that this Kaiser and both these Kings were one and the same man." It might have benefited from a couple more maps or, at least, having the major battles marked on the one map on p12. However, the campaign history is not the main focus of this work, so this is a minor complaint. (In fact, for readers who already have the complementary campaign histories published by Helion, it minimises redundant overlap.) One tiny quibble: it was not Windischgrätz but his subordinate, Jellačić, who defeated Perczel at the battle of Mór.

Perhaps inevitably, the text displays some inconsistencies in the spelling of eastern European place names, etc. In particular, Smith uses an idiosyncratic spelling, "Széklars", for the Transylvanian people known in Hungarian as Székelyek or conventionally in English as "Szeklers". However, these are cosmetic problems rather than being likely to cause any real confusion.

The sections on organisation, weapons and tactics are comprehensive, thorough, and full of detail. This ranges from corps structure and offensive artillery doctrine down to small unit tactics. There is a lot of dense information here but it is conveyed in a clear and readable manner that helps us to understand the character of each army and how it operated. E.g., of the Russian army, Smith says, "obedience was literally beaten into the rank and file".

In the earlier version of this review, I expressed some mild regret that, for all its comprehensive coverage, The Honvéd War didn't provide information on a couple of obscure Imperial units I'd struggled to identify during my own researches: Cordonisten and National-Uhlanen. It is a tribute to Nigel's research skills - and therefore further assurance of the quality of this book - that he has since tracked down and sent me detailed information on the two Cordonisten battalions, including their combat history during 1848-1849, their uniforms, and even their commanders' names. Much obliged!

Smith's brief biographies of the main commanders are clear and informative and give us pen portraits of some colourful characters such as the "Hyena of Brescia", "Papa Bem", etc. (Though I might question his statement that Richard Debaufre Guyon subsequently "served the Ottoman Army with distinction against the Russian Army in Asia Minor": as Zarif Pasha's chief of staff during the Crimean War, he devised a plan that might have worked for the honvéd but was too sophisticated for the Ottoman army of the Caucasus, which was consequently destroyed in the battle of Kurudere.)

A third of the book is given over to uniforms and flags. This is truly exhaustive and has all you could possibly need on this topic. As well as everything you'd expect concerning types of headgear, the colours of tunics and buttons, or the hues of regimental facings, we learn about such things as linen recognition strips tied to Austrian shakos to tell friend from foe, or Polish konfederatki caps being worn both with and without peaks. The colour plates are a good mix of old prints or paintings and original new artwork. I particularly like the Imperial grenadier in his splendid M1836 bearskin.

The 'Orders of Battle' section provides detailed snapshots of the composition and structure of the major formations at several pivotal junctures in the course of the war. Smith's footnotes demonstrate that he has not simply reproduced these from other sources but has examined them critically to check their accuracy.

My few criticisms above do not materially detract from the work and are offered mainly to show that this is a thorough and unbiased review by a reasonably qualified reviewer. The fact that they are all so minor also proves that this is a very good, well-researched book by a skilled and knowledgeable author. It will be invaluable to any wargamer or military modeller seeking to portray this fascinating conflict. Essential reading if you want your tabletop armies for 1848 to be properly organised and look authentic. Excellent value and highly recommended!


PS - I cannot avoid some self-promotion here. Anyone who has read this far is surely sufficiently interested in this war that I should mention my own related publications (in case you don't already know about them). These include three translated histories and one wargames campaign book:

Hungary 1848: The Winter Campaign

Hungary 1849: The Summer Campaign

The Hungarian War of Independence 1848-1849: an illustrated military history (forthcoming 2025)

Bloody Big HUNGARY '48 Battles!